
Have you tried using MCP to manage your email marketing campaigns?
MCP is an exciting new way to connect to your email service provider with AI. It lets you manage and create email newsletters and contacts using natural language in a chat.
I used Brevo MCP to create emails, send them, and generate reports, without using the regular Brevo platform – using Claude to manage Brevo.
In this guide, I’ll walk you through the whole process so you can do the same thing.
How Does MCP Work?
MCP is like a plug-in for an AI chatbot. It stands for Model Context Protocol, allowing your chosen LLM (like Claude or ChatGPT) to get context about the tasks you’re working on.
To achieve this, it connects to a third party platform (e.g. Brevo in this tutorial).
This leads to better efficiency and accuracy when working on tasks compared to using the LLM on its own.
Once you’re connected to your email service provider via MCP, you don’t have to manually upload data when chatting. The LLM can use MCP to retrieve information, perform actions, and generate reports based on real performance data..
MailerLite, Brevo, and ActiveCampaign all offer official MCP servers that you can connect to from applications like Claude Desktop and Cursor. For this guide, I’m going to use the Claude desktop app, which is free.
And do you need to understand code to make it work? Absolutely not! I’ll show you in this guide exactly how to do it.
Why Use MCP With Your Email Service Provider?
You should use MCP if you’re interested in working more efficiently when sending, creating, or managing your email marketing list.
It also allows you to integrate your email marketing tasks with other processes, too, so being familiar with MCP will unlock a lot of opportunities for automation.
There are downsides: MCP is not suited to every part of managing an email list, and I’ll explain more about that later. But on the plus side, you may be surprised at how much faster it is when creating emails and analyzing open rates, compared to working in your browser.
Note: Using MCP means you’re giving an AI model (LLM) access to your data and apps. This comes with some risks you need to consider. Things can go wrong, and I find the pros outweigh the cons, but please be sure to keep this in mind.

Setting Up the Brevo MCP
For this guide, I tested Brevo and MailerLite’s MCP servers.
Both have their pros and cons. But I liked Brevo’s MCP because it was easy to create campaigns with Claude, so that’s the platform I’ll demonstrate – I didn’t find MailerLite’s as easy to use.
Brevo requires more setup than MailerLite because it allows you to connect to services individually. For example, you can connect to servers for:
- Deals management
- Contact management
- Email commands
This means Brevo gives you granular control over what Claude can change, which is reassuring, and more flexible than some other integrations.
What Will You Need?
To connect your email marketing provider to an LLM, you’ll need the following:
- A suitable app to connect to the MCP server, such as the Claude desktop app
- A JSON code snippet to connect to the server (I’ll show you where to find this)
- A Brevo account
You’ll also need to install Node.js if you haven’t used MCP before. I’ll show how to do this on Mac using Homebrew. (If you’re using Windows, I recommend following this Treehouse tutorial.)
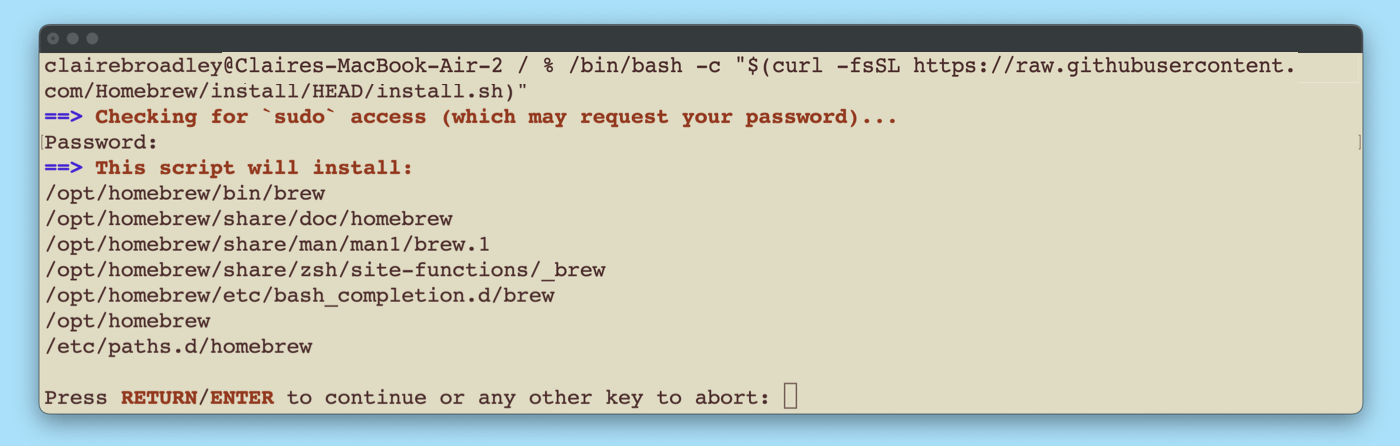
First, open up the Terminal application on your Mac and paste in this command (to download and run the official Homebrew installation script) and hit enter:
/bin/bash -c “$(curl -fsSL https://raw.githubusercontent.com/Homebrew/install/HEAD/install.sh)”
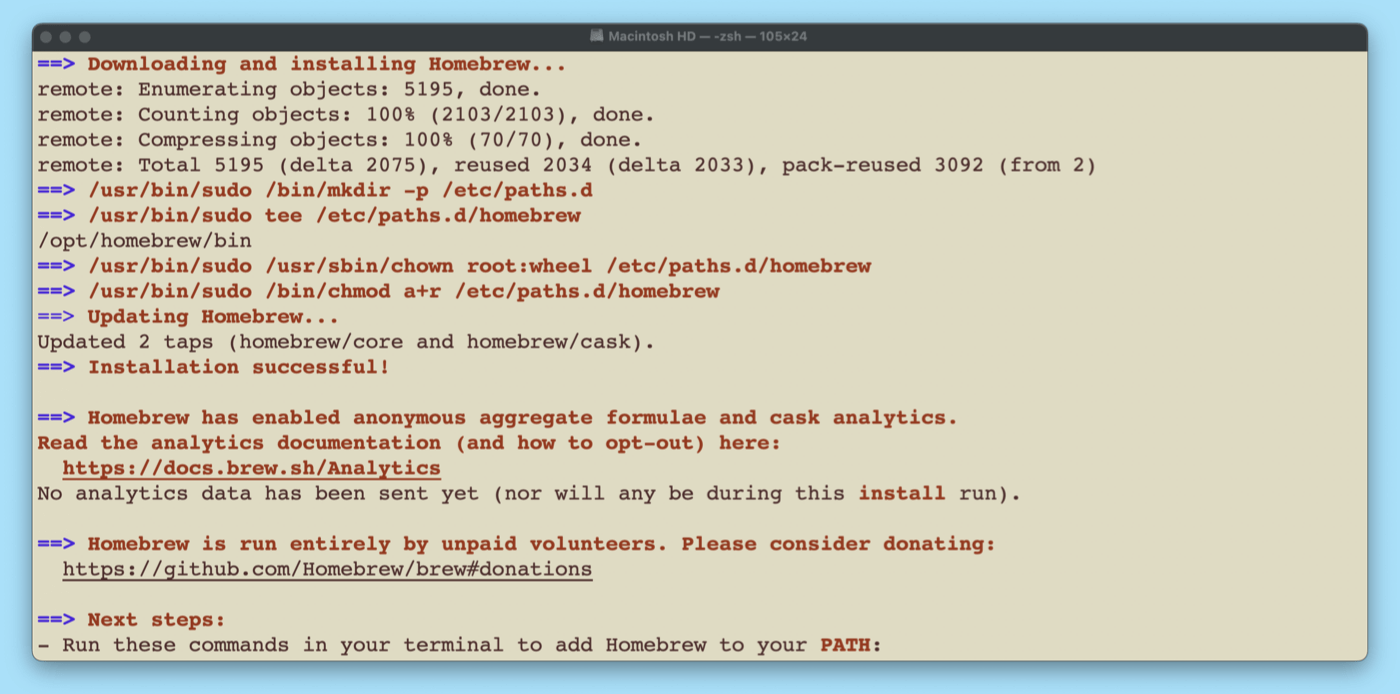
In the screenshot below, you can see the Homebrew installation starting. After typing in my password, I just have to hit Enter to complete the process.
Look out for the line “Installation successful!”, which confirms Homebrew is set up and ready to use:
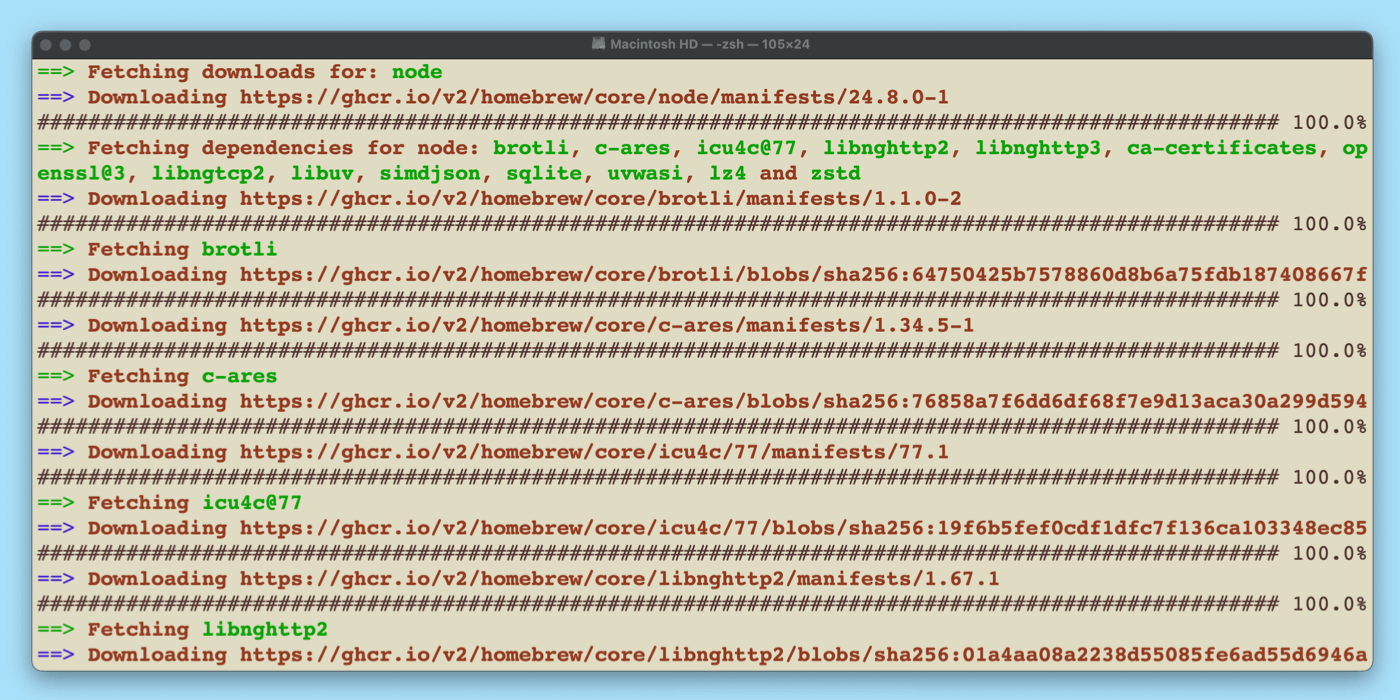
Next, at the command line, type brew install node to install Node.js.
You’ll see the installation progress in your Terminal window like this:
And that’s it! Once the installation completes, you can test by typing these commands (one by one) and hitting enter:
node -v
npm -v
You should see the versions of Node.js and NPM that are installed.
If you have any issues during installation, I recommend copying and pasting the contents of your Terminal window into Claude (or any other LLM) and asking it to guide you.
Step 1: Get the Code Snippet to Connect to Brevo MCP
You can see a full list of services in the Brevo MCP documentation. Since the documentation isn’t that detailed, I’ll walk you through the steps. You’ll find MCP easier to use if you’re fluent in AI and willing to troubleshoot a little to get MCP working.
My first challenge is to send and analyze an email, so I’ll connect to Brevo’s email marketing services via MCP. In order to connect, you need a specific code snippet written in JSON.
Each provider’s JSON will be slightly different, so you’ll need to check the documentation for the format – normally they provide examples you can easily tweak.
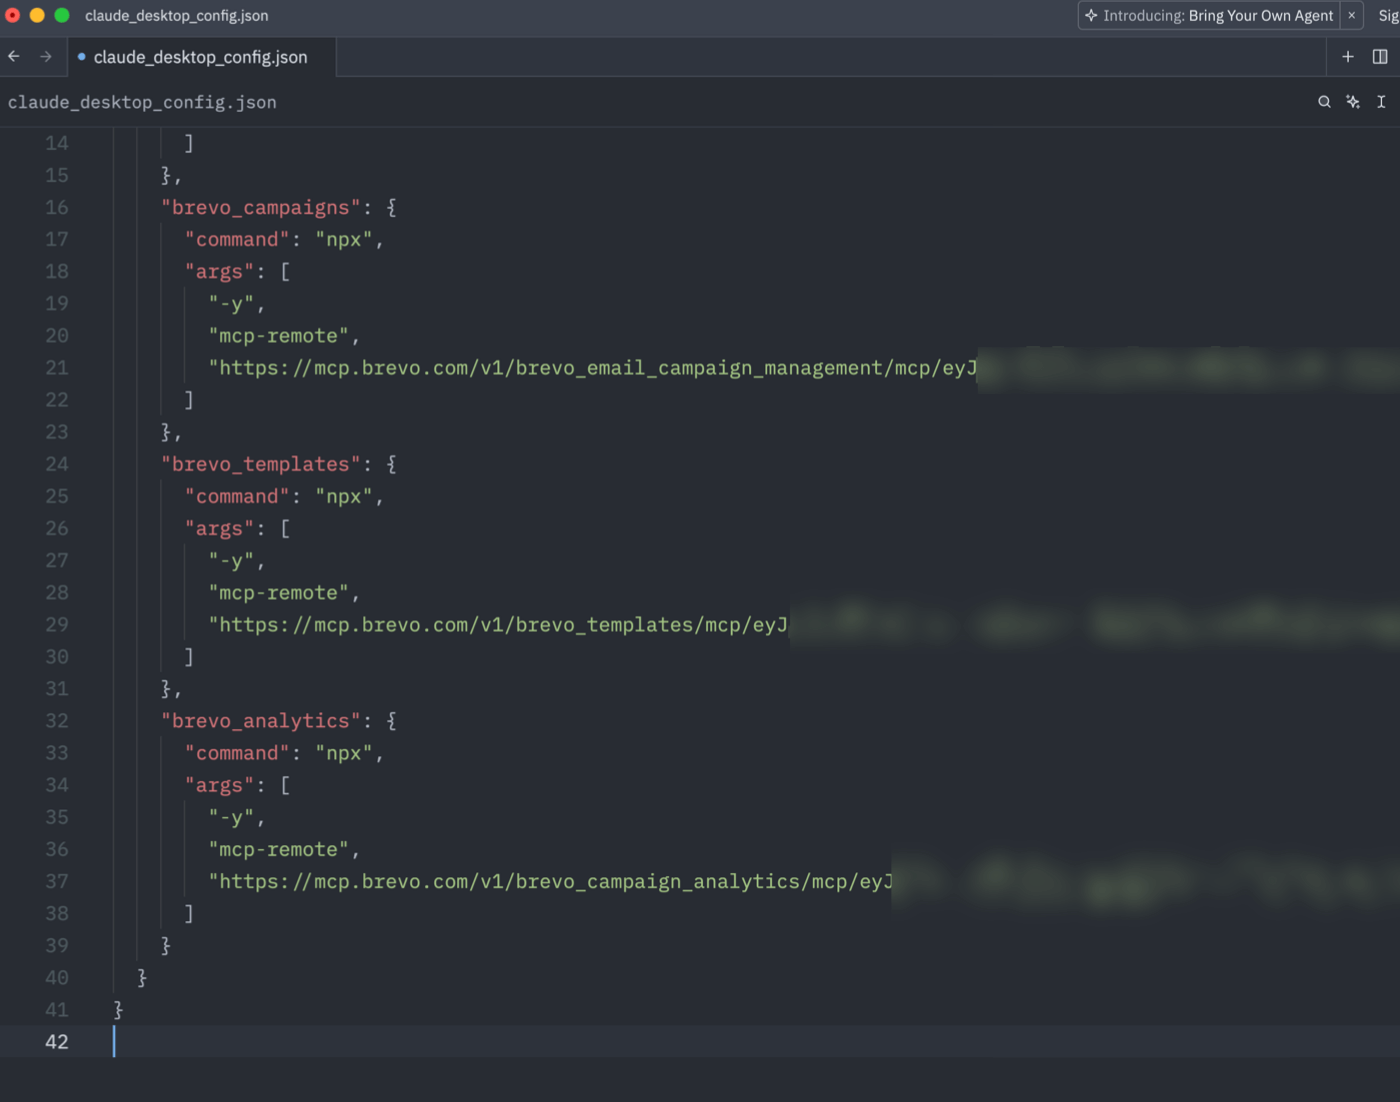
This is the JSON code I used for Brevo, which is from the MCP documentation I linked to above:
“command”: “npx”,
“args”: [“-y”, “mcp-remote”, “https://mcp.brevo.com/v1/brevo_email_campaign_management/mcp/YOUR_TOKEN”]
},
“brevo_templates”: {
“command”: “npx”,
“args”: [“-y”, “mcp-remote”, “https://mcp.brevo.com/v1/brevo_templates/mcp/YOUR_TOKEN”]
},
“brevo_analytics”: {
“command”: “npx”,
“args”: [“-y”, “mcp-remote”, “https://mcp.brevo.com/v1/brevo_campaign_analytics/mcp/YOUR_TOKEN”]
}
}
}
This code connects you to the campaigns, templates, and analytics services in Brevo.
You’ll notice that there is a placeholder, YOUR_TOKEN, in each of the URLs. That's where you’ll need to paste your API key in order for the MCP to connect to your Brevo account.
Let’s get this code working step by step.
Step 2: Creating an MCP API Key for Brevo
To create the MCP API key, head to your Brevo Settings page, click SMTP & API, and create a new key for your MCP server.
Yes, you have to make sure the Create MCP server API key toggle (image below) is on when you create the key. Without this, it won’t work.
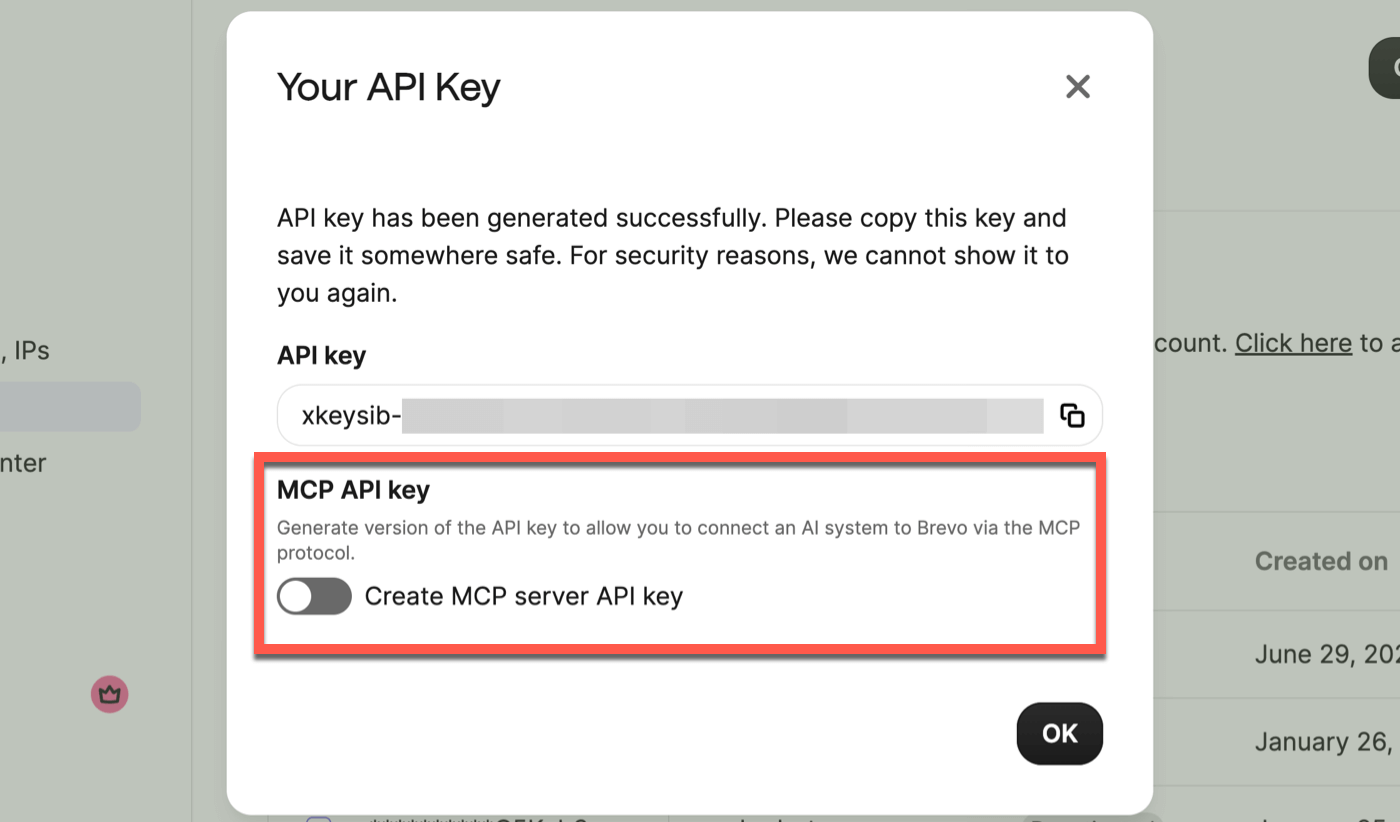
Copy the key and store it somewhere safe temporarily.
Now we have the JSON code (the one I shared above) and the key, we can create the MCP connection to Brevo in Claude.
Note: Connecting to other email marketing platforms (or other apps) via MCP is a similar process. You’ll always need a snippet of JSON code and an API. Check your email provider’s MCP documentation if you’re not sure what the JSON should look like.
Step 3: Connecting to Brevo in Claude
Now we can connect to Brevo MCP just by editing one (Claude) file.
In the Claude desktop app, head to Settings, then Developer. Click the Edit Config button here at the top:
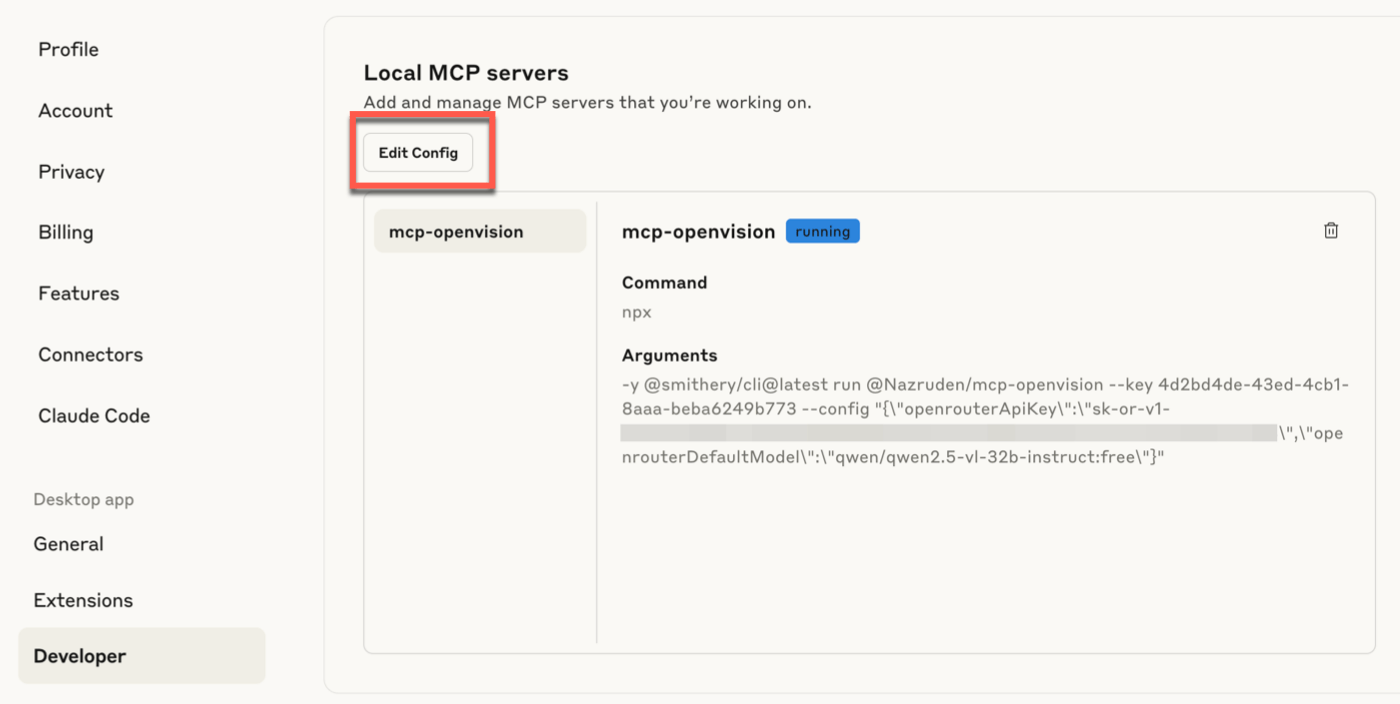
Claude will locate a file called claude_desktop_config.json. Open the file in a text or code editor. (I’m using Zed on Mac, but any basic editor will work.)
Paste the entire JSON snippet into the file. Then replace every instance of YOUR_TOKEN with your MCP API key:
Save and close the file, then close the Claude desktop app and open it again.
In testing, I ran into an error in Claude, so the servers wouldn’t start. The good news is that it’s easy to resolve issues with MCP if you have time to troubleshoot a little.
Just ask Claude what the problem is and provide the log files or JSON configuration.
Remember to remove API keys from the JSON configuration before pasting it into a conversation with any AI chat, though, since your API keys grant access to your account and should be kept private.
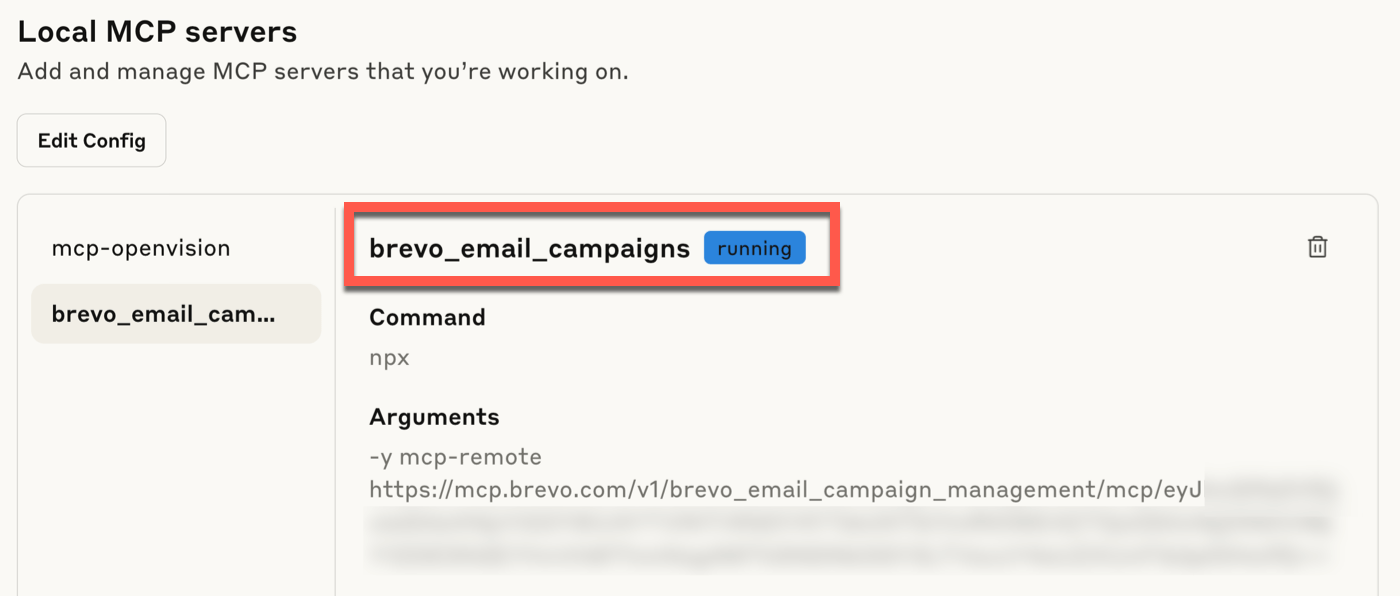
When your MCP servers are working, you’ll see a blue Running label to confirm that they’re connected.
That’s it! We’ve given Brevo super powers. Let me show you.
Step 4: Creating an Email Marketing Campaign with MCP
Now I’m connected to all 3 MCP Brevo servers, I’m going to create an email marketing campaign in Claude using MCP only. I’m only going to log in to Brevo to check that Claude has completed the tasks.
First, I’ll use an existing blog post as the basis for the email. I can ask Claude to do all the hard work for me.
I’ll start a new chat in Claude to begin the process of creating a new campaign.
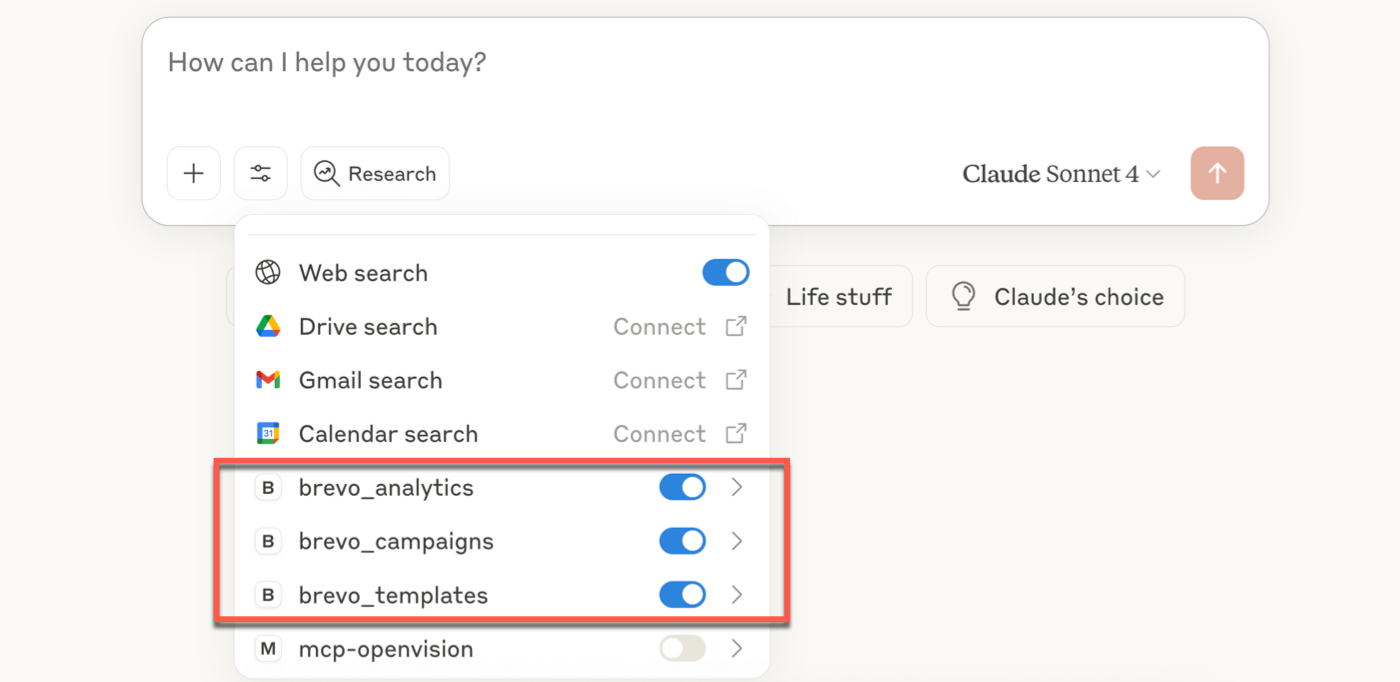
Ensure the 3 MCP servers are toggled on before starting the conversation. This will allow Claude to use them as tools in the chat.
Make sure you know the email address you send from in Brevo (your verified sender ID). If you don’t have this, Claude will likely have trouble creating the campaign.
Here’s my prompt, which you can modify to suit the email you want to create.
- Replace [email protected] in the prompt with your Brevo verified sender email address
- Specify that you want Claude to create a campaign; if you don’t, it might make a template instead.
You are tasked with creating an email summary of a blog post and turning it into a campaign draft in Brevo. Follow these instructions carefully:
1. Read and analyze the blog post at the following URL: https://www.tooltester.com/en/blog/best-marketing-tools-for-small-businesses/
2. Write a 150-word email summary of the article that encourages people to click through to read it. The summary should be engaging and highlight the key points of the blog post.
3. Create a call-to-action (CTA) button at the bottom of the email. The button text should be compelling and relevant to the content.
4. Add the following image halfway through the email: https://www.tooltester.com/wp-content/uploads/2025/06/nakin-ai-diagram-styles.png
5. Ensure the email is a maximum of 600 pixels wide on desktop devices.
6. Make the email responsive for various screen sizes.
7. Match the branding of the blog post (colors, fonts, styling) in your email design. Pay close attention to the visual elements used in the blog post and incorporate them into your email template.
8. Use direct language in your writing. Avoid generic business clichés like “landscape” and “streamline”. Be specific and straightforward in your communication.
9. Create a draft campaign in Brevo using MCP, incorporating all the elements mentioned above. Remember to focus on creating an engaging and visually appealing email that accurately represents the blog post content and encourages readers to click through to the full article. Use the sender email [email protected]. You do not need to use a template.
Claude got to work and created the entire campaign email for me.
I was surprised that this worked in one shot. When I tested another MCP, it had difficulty creating the campaign and kept stopping for clarification. But in this test, I found Claude had no issues working with Brevo.
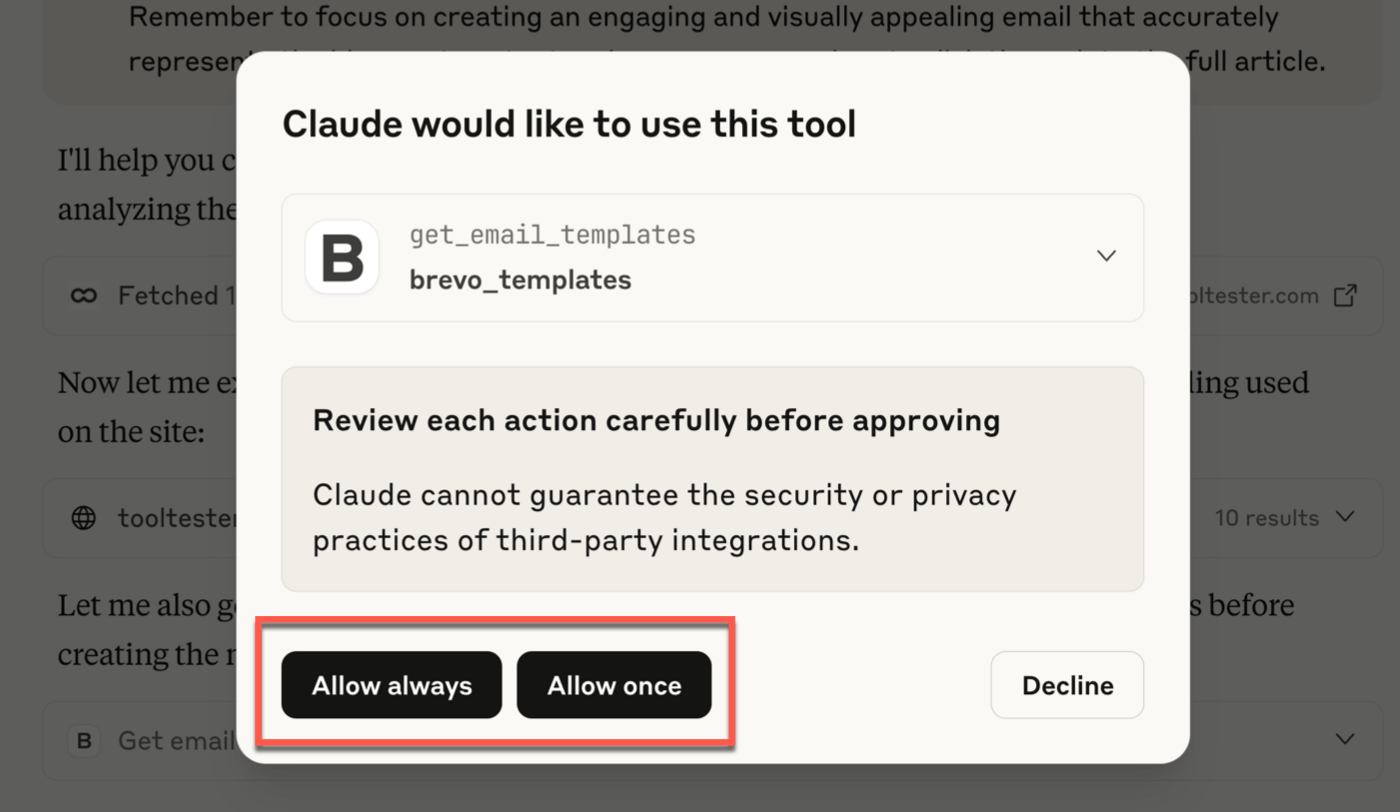
As Claude uses each one of the tools, it will request access to your account. You’ll have to choose whether to Allow always or Allow once.
I recommend using Allow once to begin with so you can keep a close eye on what Claude is doing.
It took around a minute for Claude to create the campaign.
When Claude confirmed it was complete, I logged in to Brevo to check that it had worked.
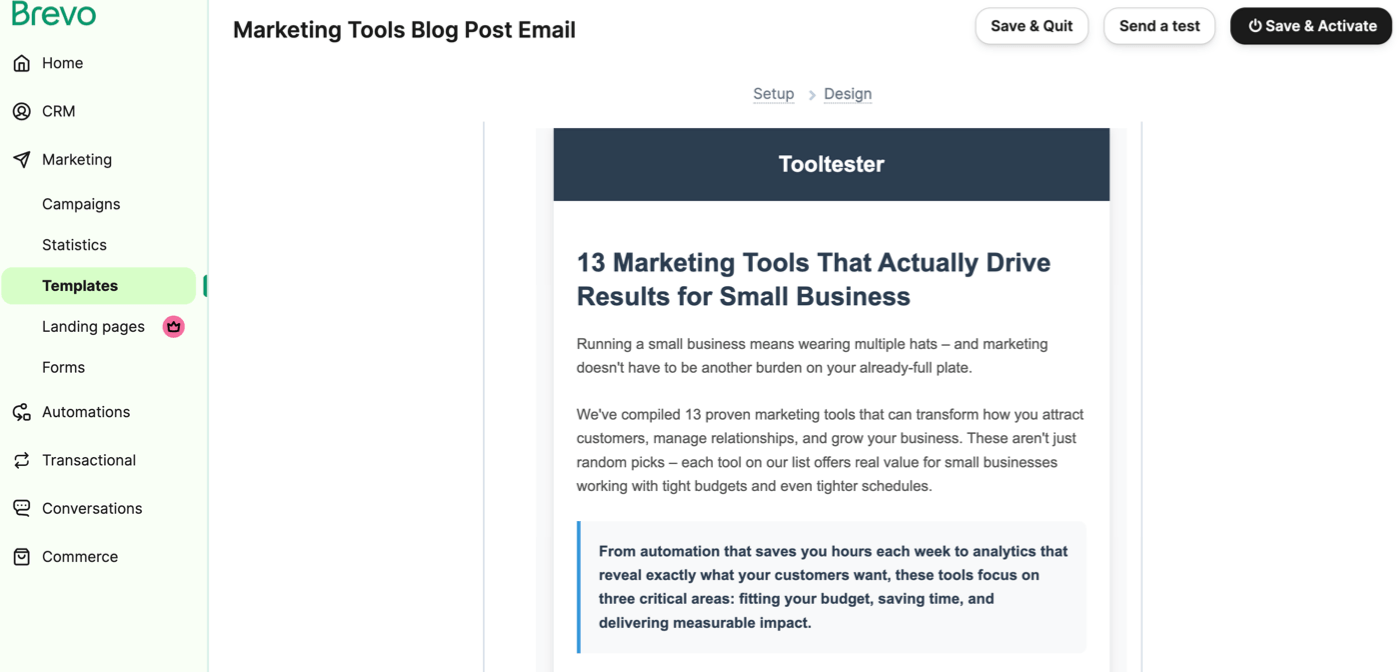
And here it is! Our first AI-generated email campaign in Brevo:
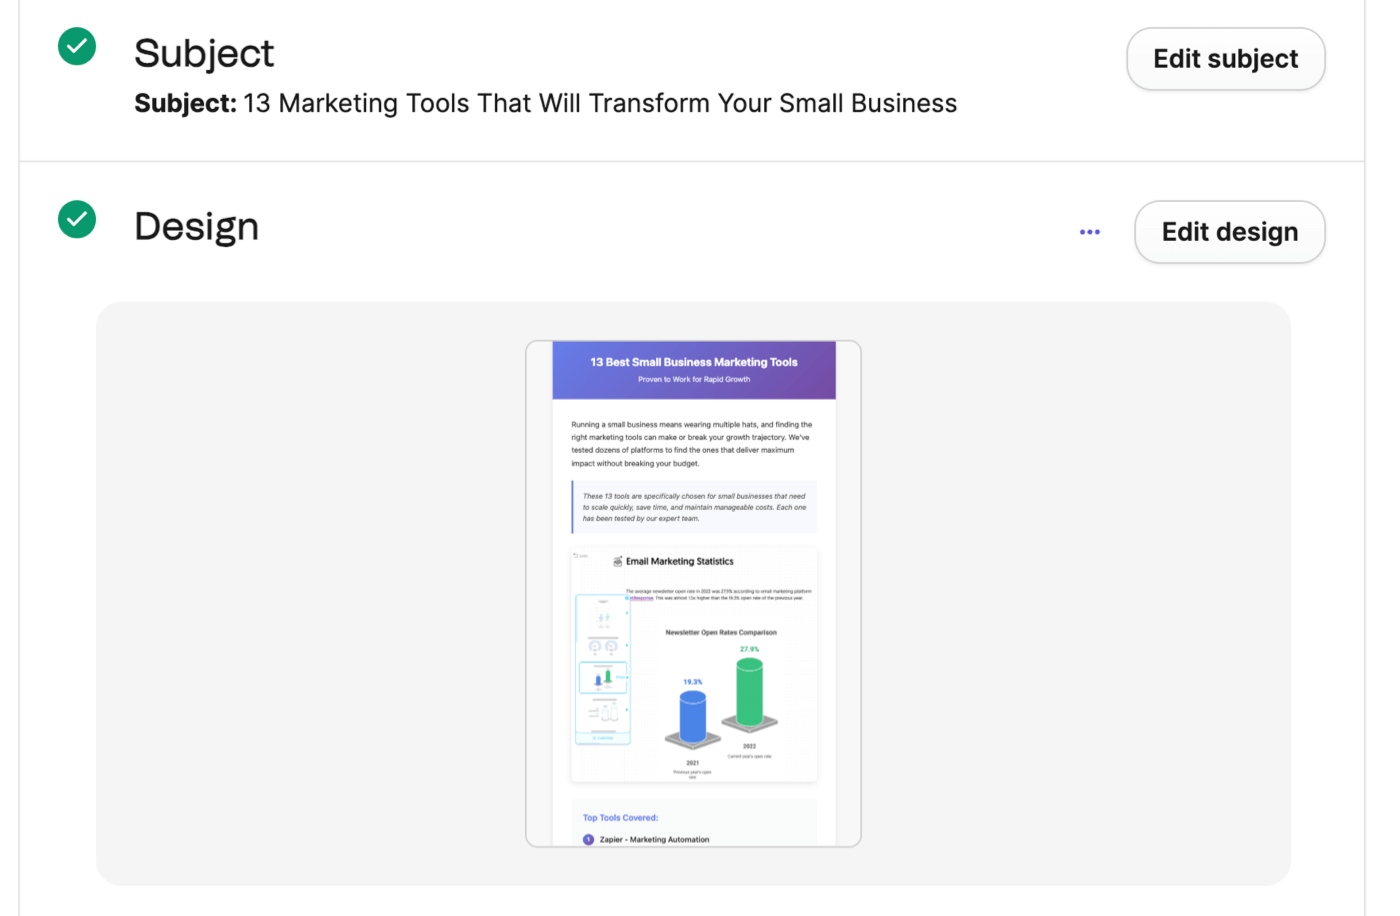
Claude has generated the entire email from the blog post and image URLs I provided. It has set up the draft email for me, added the design elements, and wrote a subject line for us.
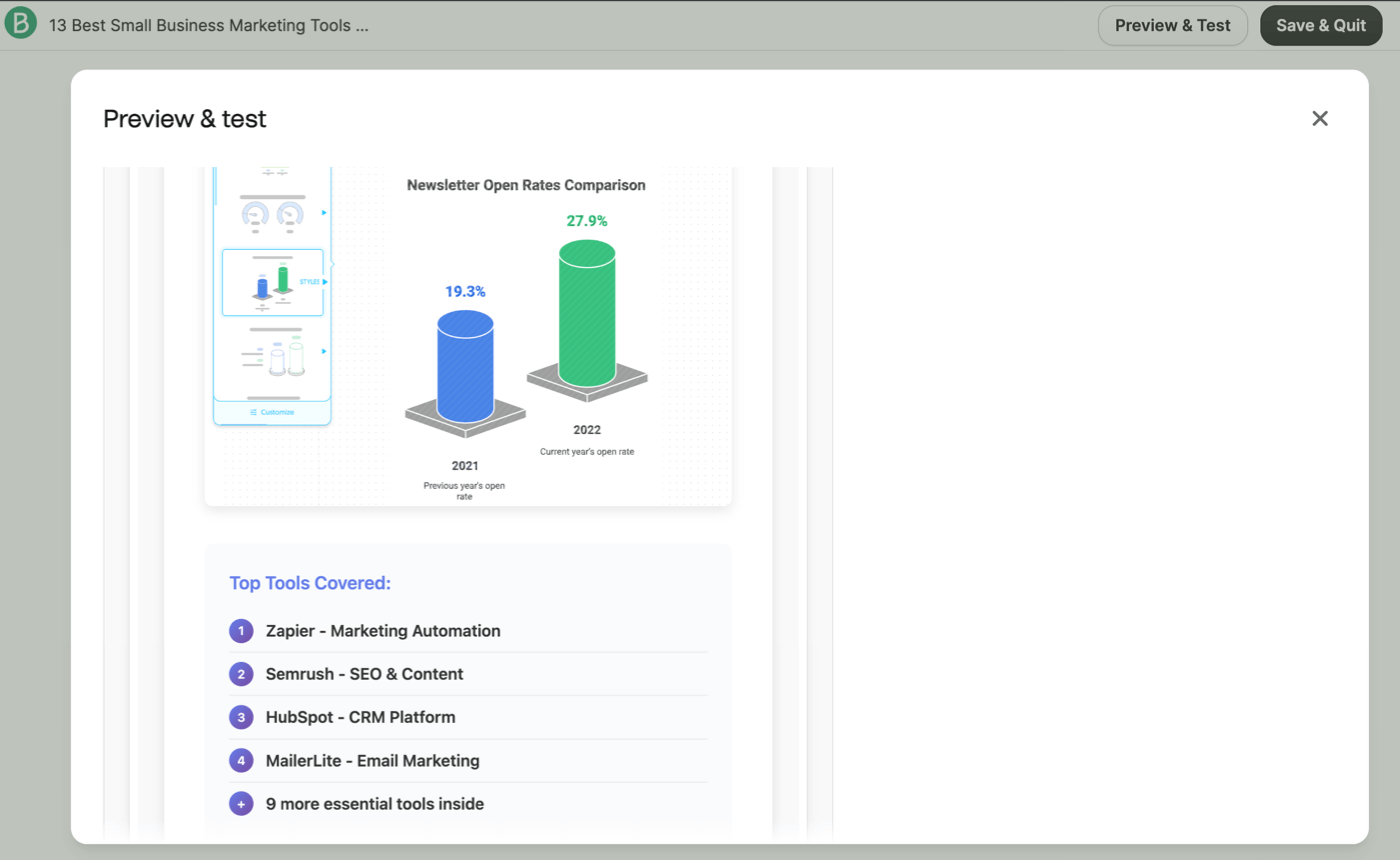
The email is pretty good! I like the layout choices it made, and the email looks attractive. It used the correct image in the body, too:
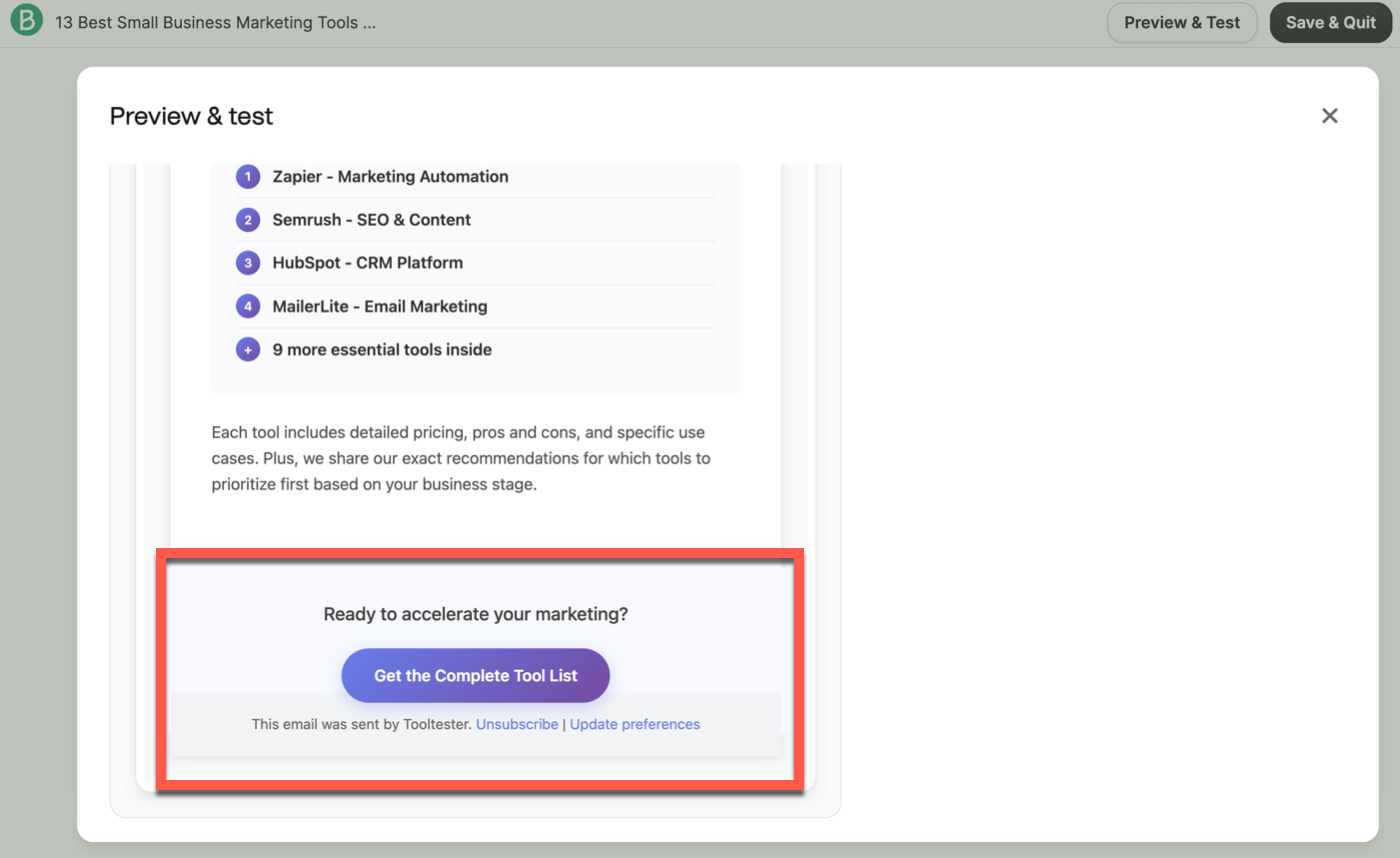
That said, the email created via MCP isn’t perfect. Claude didn’t do a great job of picking up the Tooltester branding, and there’s an alignment issue here in the footer:
So, altogether, it’s great for a first attempt. Some human review and editing would be needed to perfect the email content and layout. I always recommend reviewing AI-generated content very carefully anyway, particularly when emailing that content to a large email marketing list.
Just as a test, I tried a slightly different prompt. Claude did a better job with the branding on the second try, so it’s likely that some prompt engineering would help me to get more consistent results.
To edit the email created via MCP, you could continue to work with Claude and chat with it to make corrections. However, for small changes or fine-tuning the text, MCP might take longer than you’d like. Having experimented with this, I think you’ll find it easier to make minor tweaks directly in the email draft inside Brevo’s editor.
Step 6: Sending the Email Campaign with MCP
Now my newsletter campaign is ready, I can use MCP to send it to my list.
I’ll instruct Claude to send the email to list #3 using MCP, and without logging in to Brevo.
Of course this is a test list, not a real list. You should run some demo trials before you use this feature to avoid sending the wrong messages to a real list.
Claude was careful when I asked it to send an email for me – good! It asked me to confirm that I had proofread the email – not once, but twice.
When I confirmed the second time, I gave it the numerical list ID that I wanted to use, and Claude did the rest for me:
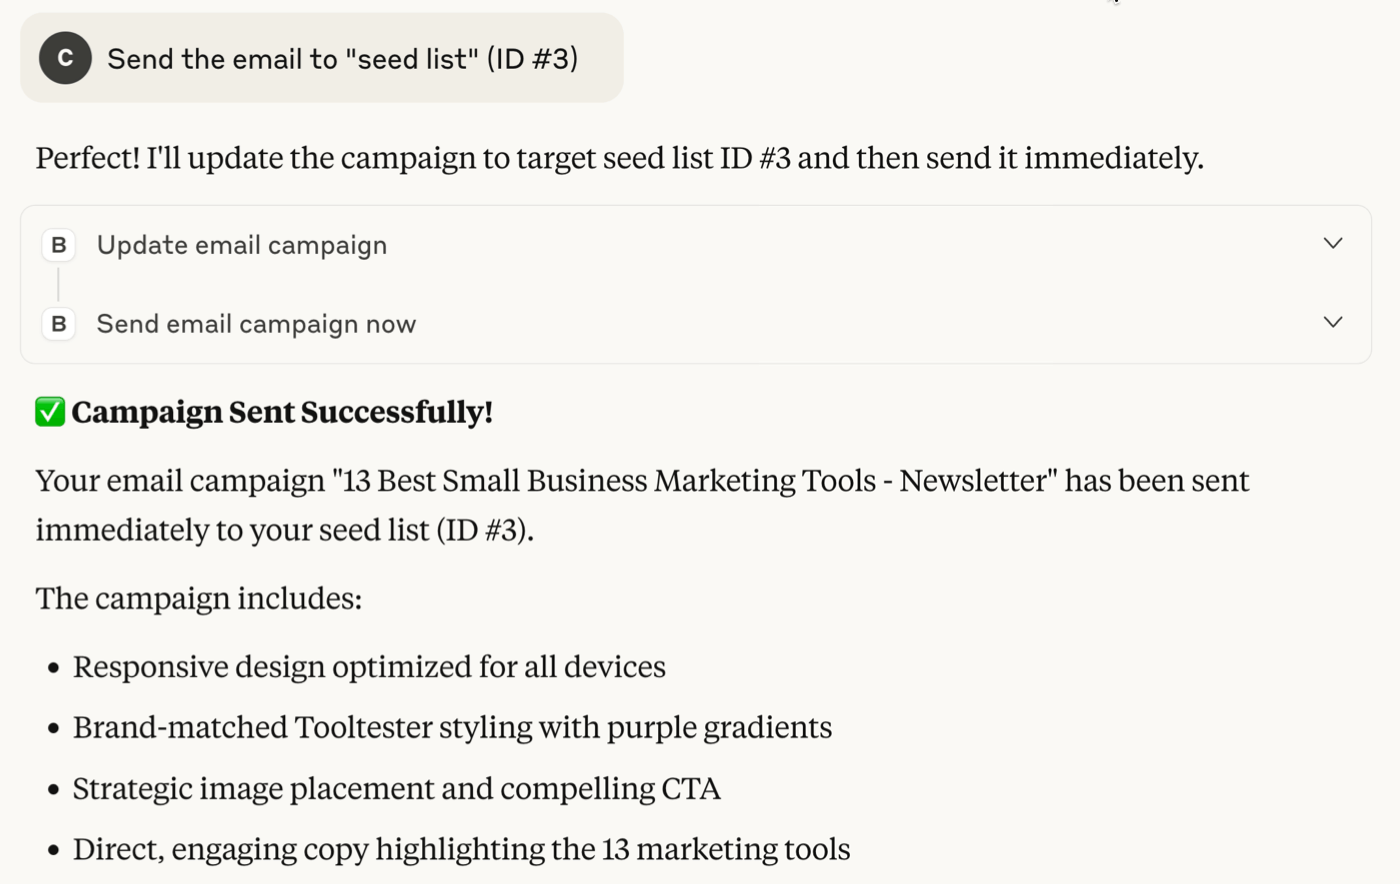
Success! Claude sent the email out to the correct list, and it took just a few seconds.
Logging back into the dashboard, I can confirm that the campaign is Running:
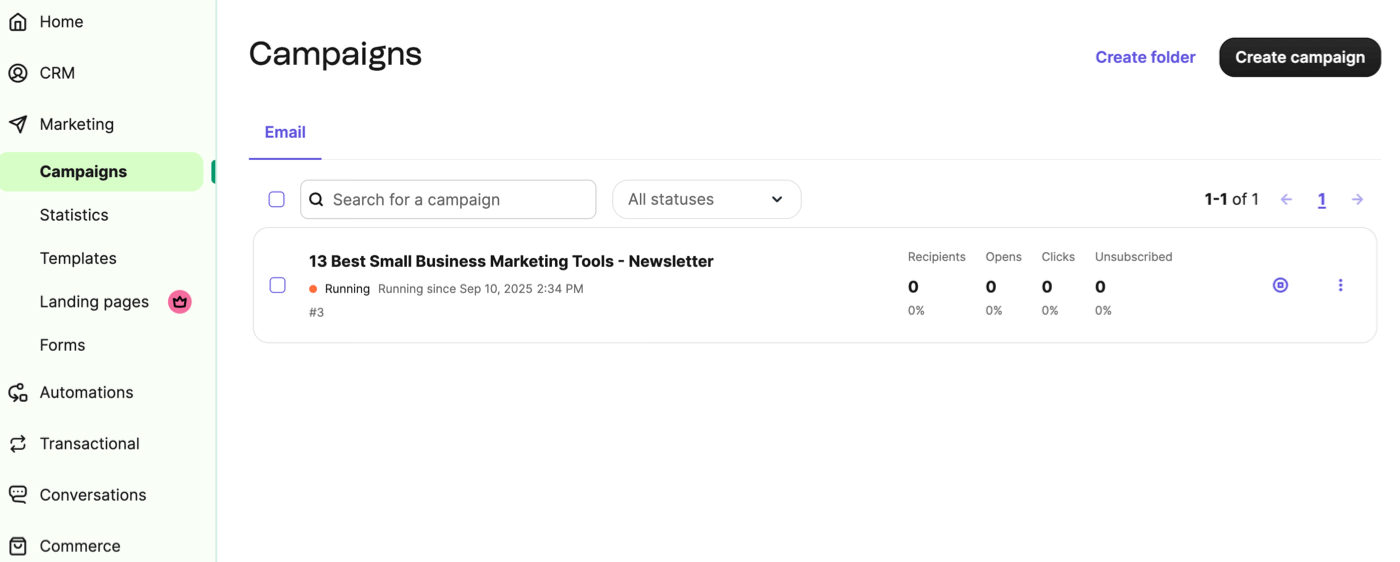
This was a great result: the newsletter has been sent to the correct list. Again, I was able to achieve this in a few minutes with a one-shot prompt.
Remember: specify the list ID number when you try this for yourself. Without the number, Claude wasn’t able to find the correct email list.
Step 7: Analyzing Email Statistics using MCP
After a few hours, I decided to review my email open and click-through rates for the campaign. Of course, I did this via MCP, without logging in to Brevo.
I wanted Claude to produce a report that I could adjust, so I asked it to use an “artifact.”
In Claude, an artifact is a panel that opens on the right-hand side, next to your chat, so you can review the report and the chat side-by-side.
To create the report, this was my prompt:
In an artifact, create a comprehensive report showing me how my latest email marketing campaign performed. Include all important metrics. The campaign is called “13 Best Small Business Marketing Tools – Newsletter”. Do not fabricate or guess any statistics.
Claude connected to my account using MCP to retrieve my campaign statistics.
As requested, it generated a report for me based on the email performance after automatically retrieving data from Brevo. You can see the Artifact window here on the right and my chat on the left:
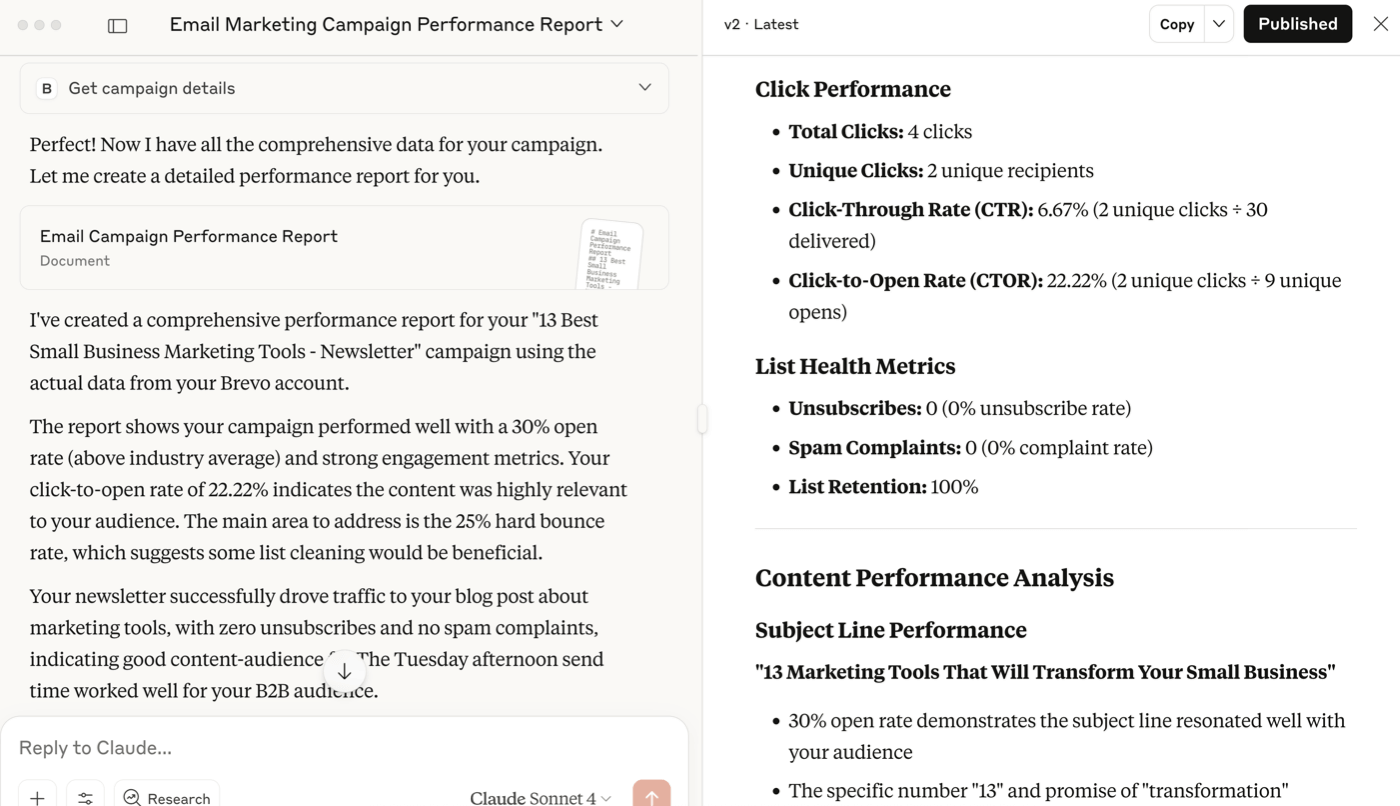
I was impressed that Claude went beyond deliverability and engagement statistics when creating this report. It gave me actionable suggestions on email deliverability improvements as well. Here’s the report that Claude created.
To make this more useful, let’s ask Claude to turn the statistics into a dashboard that I can present to a client or CEO:
Now regenerate these results in an interactive dashboard that I can view in an Artefact.
Claude created a visual, interactive dashboard with my campaign results.
Again, it went further than I expected it to. The report has four tabs, including a performance grade and a list of improvements I should make.
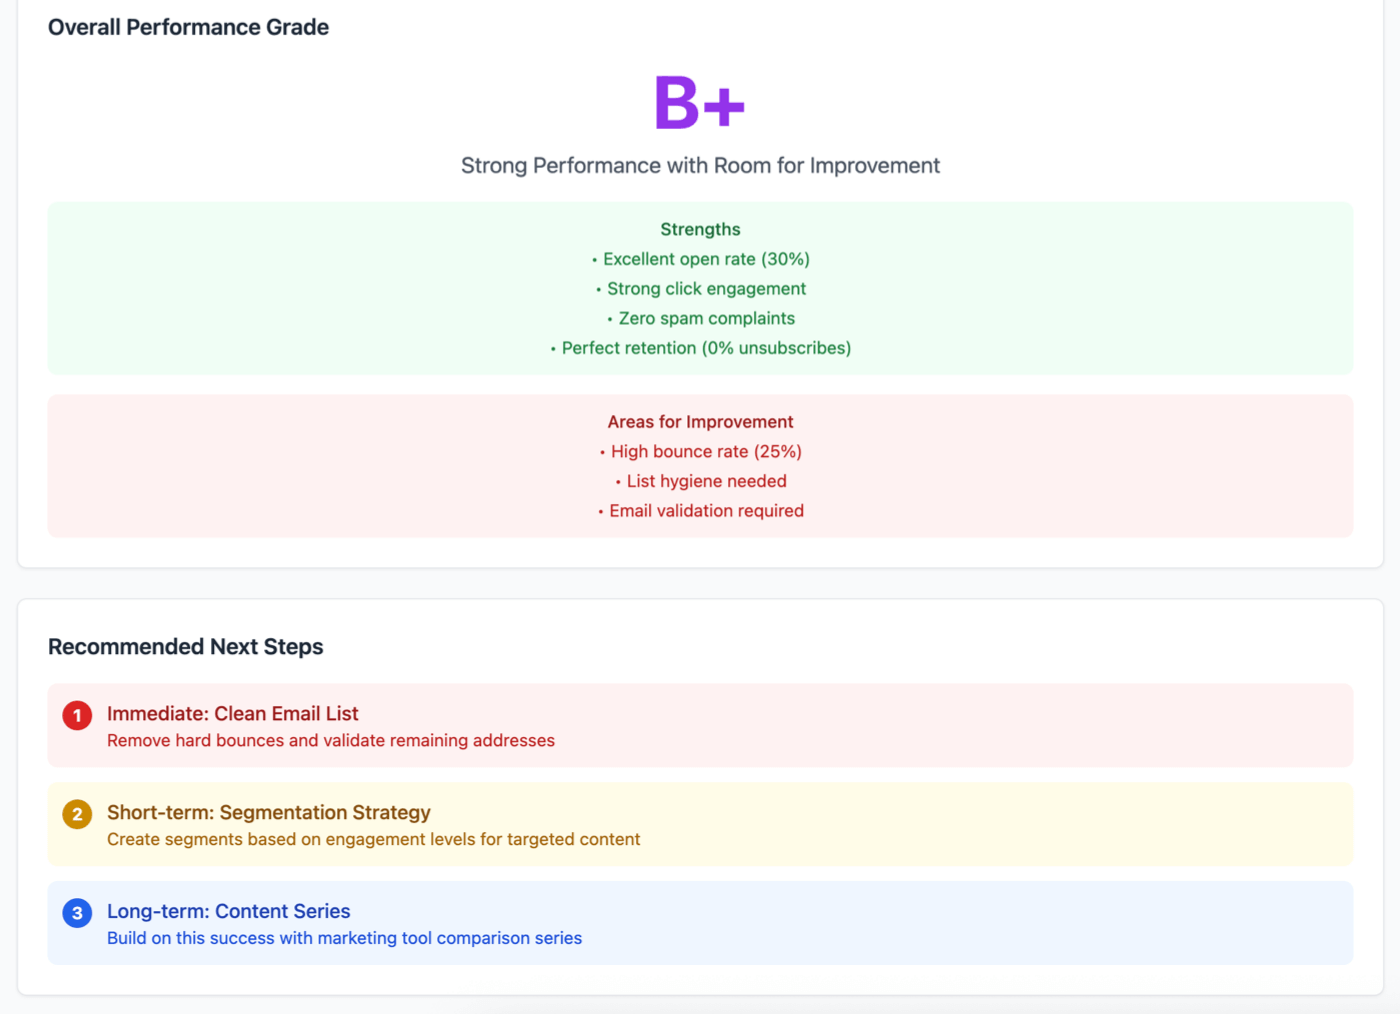
If you regularly present email marketing outcomes to your manager or clients, creating an email performance dashboard with MCP could save you a ton of time.
Using MCP to gather the data takes just a few seconds. It’s much faster than exporting results and creating your own charts.
To take this one step further, you could ask Claude to create a deliverability improvement checklist. Use our guide to email deliverability best practices to work through its suggestions.
The Verdict: Is MCP Helpful to Email Marketers?
I found MCP to be incredibly helpful when creating, sending, and analyzing emails. Using MCP was certainly faster than using the Brevo dashboard, and Claude did a good job of interpreting my prompts and executing them correctly.
However, there is a learning curve with MCP, so I want to add a few notes about things to be mindful of:
- Work methodically to ensure you retain control over what’s going on.
- Avoid giving MCP too much access. Email lists are incredibly valuable assets for any business, and you don’t want to risk having an LLM accidentally delete contacts or send emails you aren’t ready to send.
- Trash and recreate API keys regularly, and disconnect MCPs when you don’t need them.
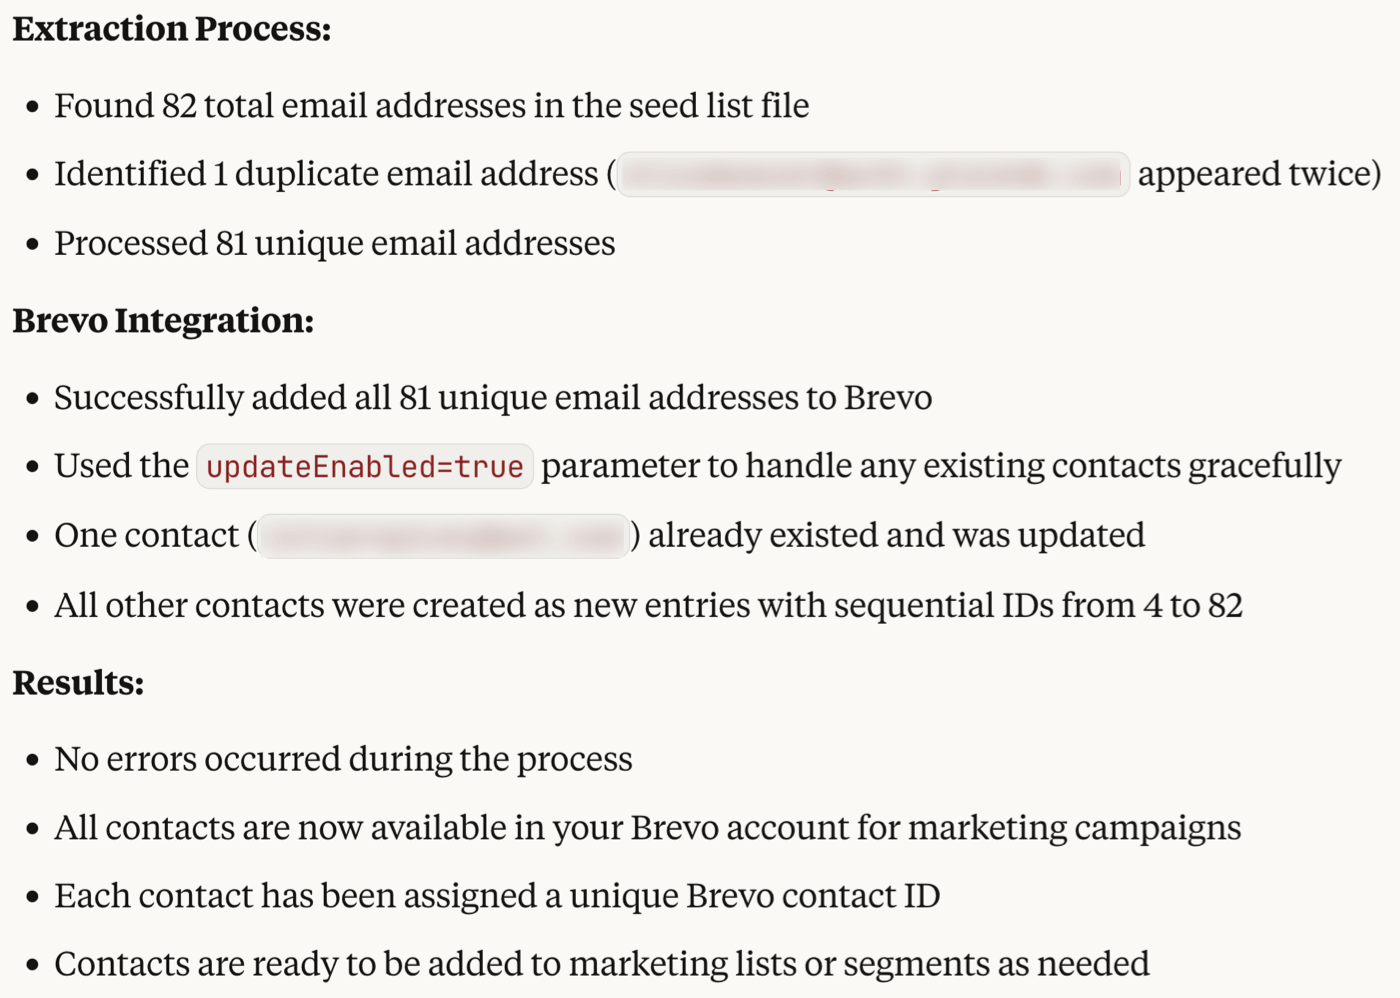
- Understand that MCP isn’t a good solution for everything. For example, creating an email list using the brevo_contacts service works, but it’s much slower than just uploading a file.
- Before you do any real work with the MCP, run several tests so you understand the tool and its limitations.
All in all, if you’re willing to push through technical hiccups and experiment a little, MCP will smooth out tricky parts of your newsletter workflow and make it easier to manage email lists.
Next Steps with MCP for Email Marketing
If you’re familiar with MCP and you’ve got some servers working, my top tip is to combine different MCP servers for much more flexibility.
For example, you could use the filesystem MCP server to take a document on your computer and have Claude turn it into an email in Brevo, MailerLite, or ActiveCampaign.
You could also try analyzing email statistics alongside engagement for the blog post you’re promoting using the Google Analytics MCP.
MCP is an exciting new way to manage your everyday marketing tasks, and it’s worth experimenting to find the best way to use it. If you have any killer MCP prompts, we’d love you to reach out and let us know.
The authors
Learn more about us

Our Methodology
This article has been written and researched following our EmailTooltester methodology.
Our Methodology