EmailTooltester is supported by readers like yourself. We may earn a commission when you purchase through our links. Of course, this won't increase the cost for you.
If you're considering Omnisend as your go-to email marketing platform, congratulations—you’re making a great choice! Omnisend is one of our top choices for ecommerce email marketing and is packed with features designed to boost your revenue.
In this quickstart Omnisend tutorial, we will show you how to:
- Connect your ecommerce store to Omnisend
- Import those valuable customer contacts
- Set up your first welcome automation series (and bonus automation)
- And finally, send your first email campaign
By the end of this tutorial, we hope you'll feel confident in exploring Omnisend's powerful features and ready to kick off your ecommerce email marketing journey.
If you’d prefer to learn by watching, follow our Omnisend tutorial video:
Why Choose Omnisend?
Omnisend is an advanced email marketing tool designed specifically for ecommerce businesses. These often rely heavily on paid ads, but an efficient email marketing strategy can be just as powerful and far more cost-effective.
With Omnisend, you can take advantage of features such as email and SMS automation, which can significantly enhance your marketing efforts. Omnisend offers so many different features that will boost your ecommerce game, so let’s round them up so that we can get started on the tutorial:
Key Benefits of Omnisend:
- You can automate emails for abandoned carts, welcome sequences, product discounts, cross-selling, shipping confirmations, and so much more.
- It lets you easily segment your audience to send highly targeted and personalized emails.
- Omnisend seamlessly integrates with major ecommerce platforms like Shopify, WooCommerce, BigCommerce, and Wix.
- The interface is extremely user-friendly, from the initial setup to more advanced automation.
- You can track the performance of your campaigns with detailed and visual reports.
Step 1: Integrating Your Shopify Store with Omnisend
Integrating your ecommerce store with Omnisend is the first step to unlocking its powerful features.
Here’s a step-by-step guide to connect your Shopify store with email marketing platform, Omnisend:
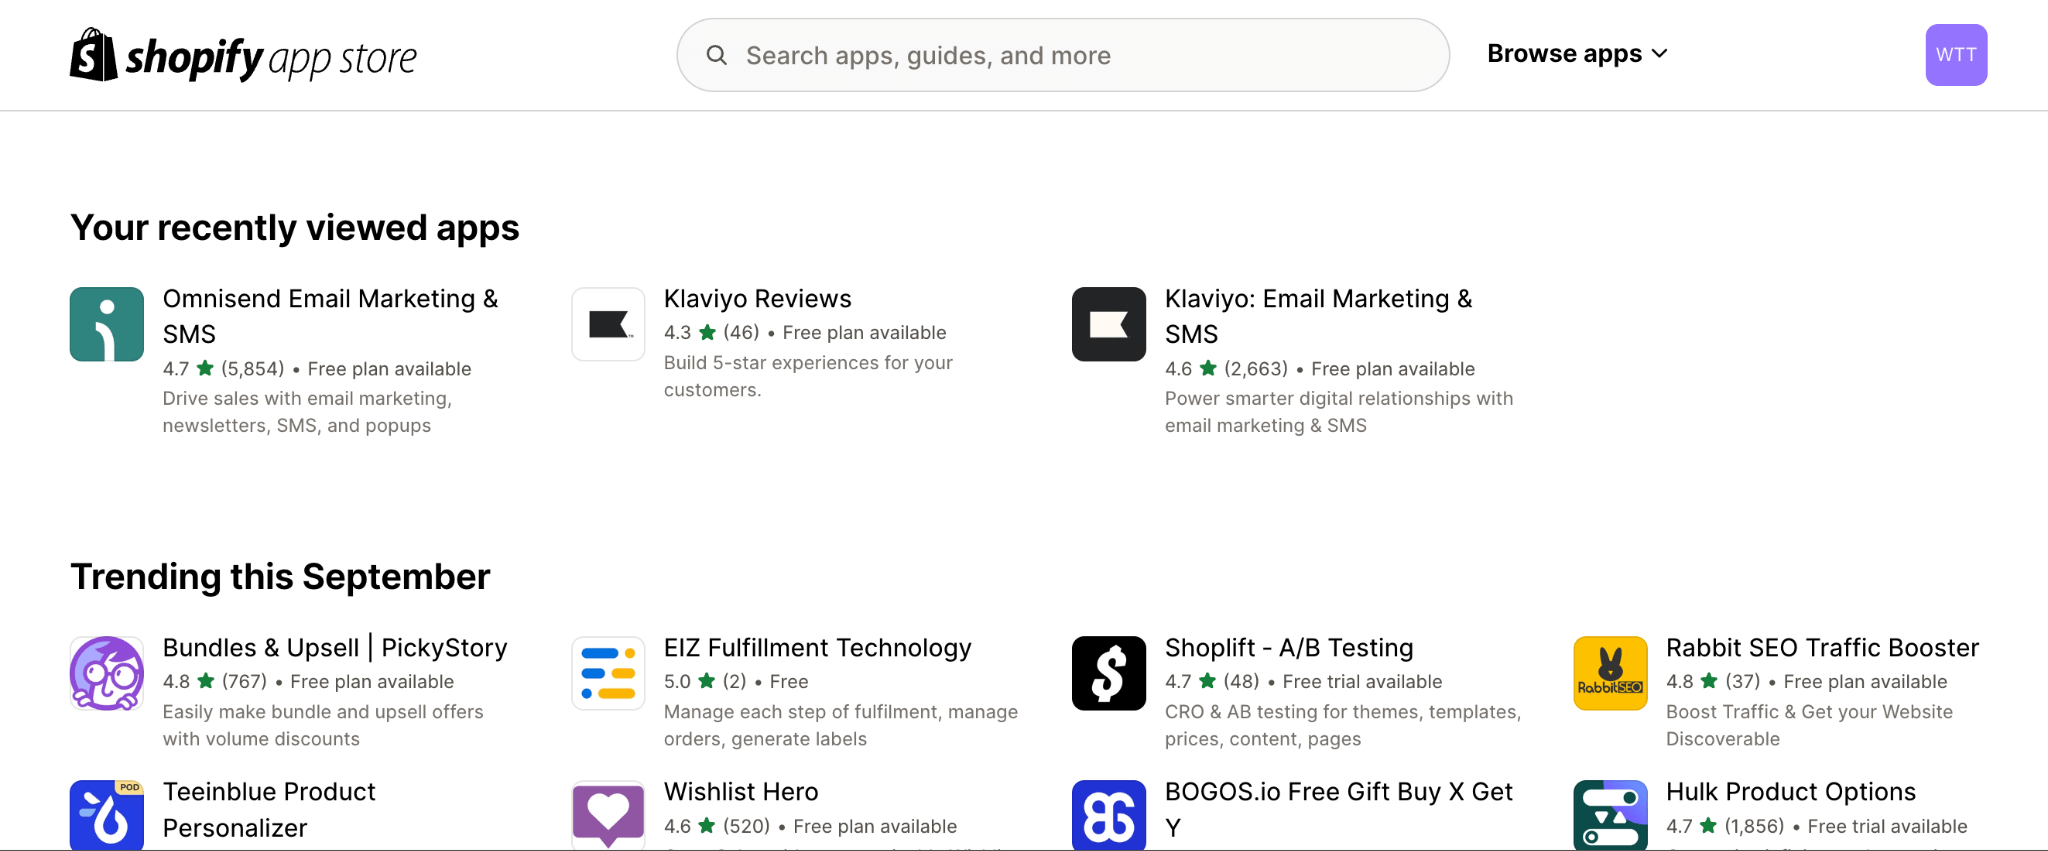
- Start by visiting the Shopify App Store, search for Omnisend, and install the app. You’ll need to grant the necessary permissions for Omnisend to access your store data, enabling seamless data transfer between the platforms.
- Log into your Omnisend account. If you’re new to Omnisend, you can easily create an account, with options to start on a free plan that includes many core features. Once signed in, click on the “Connect your store” button to begin the integration process.
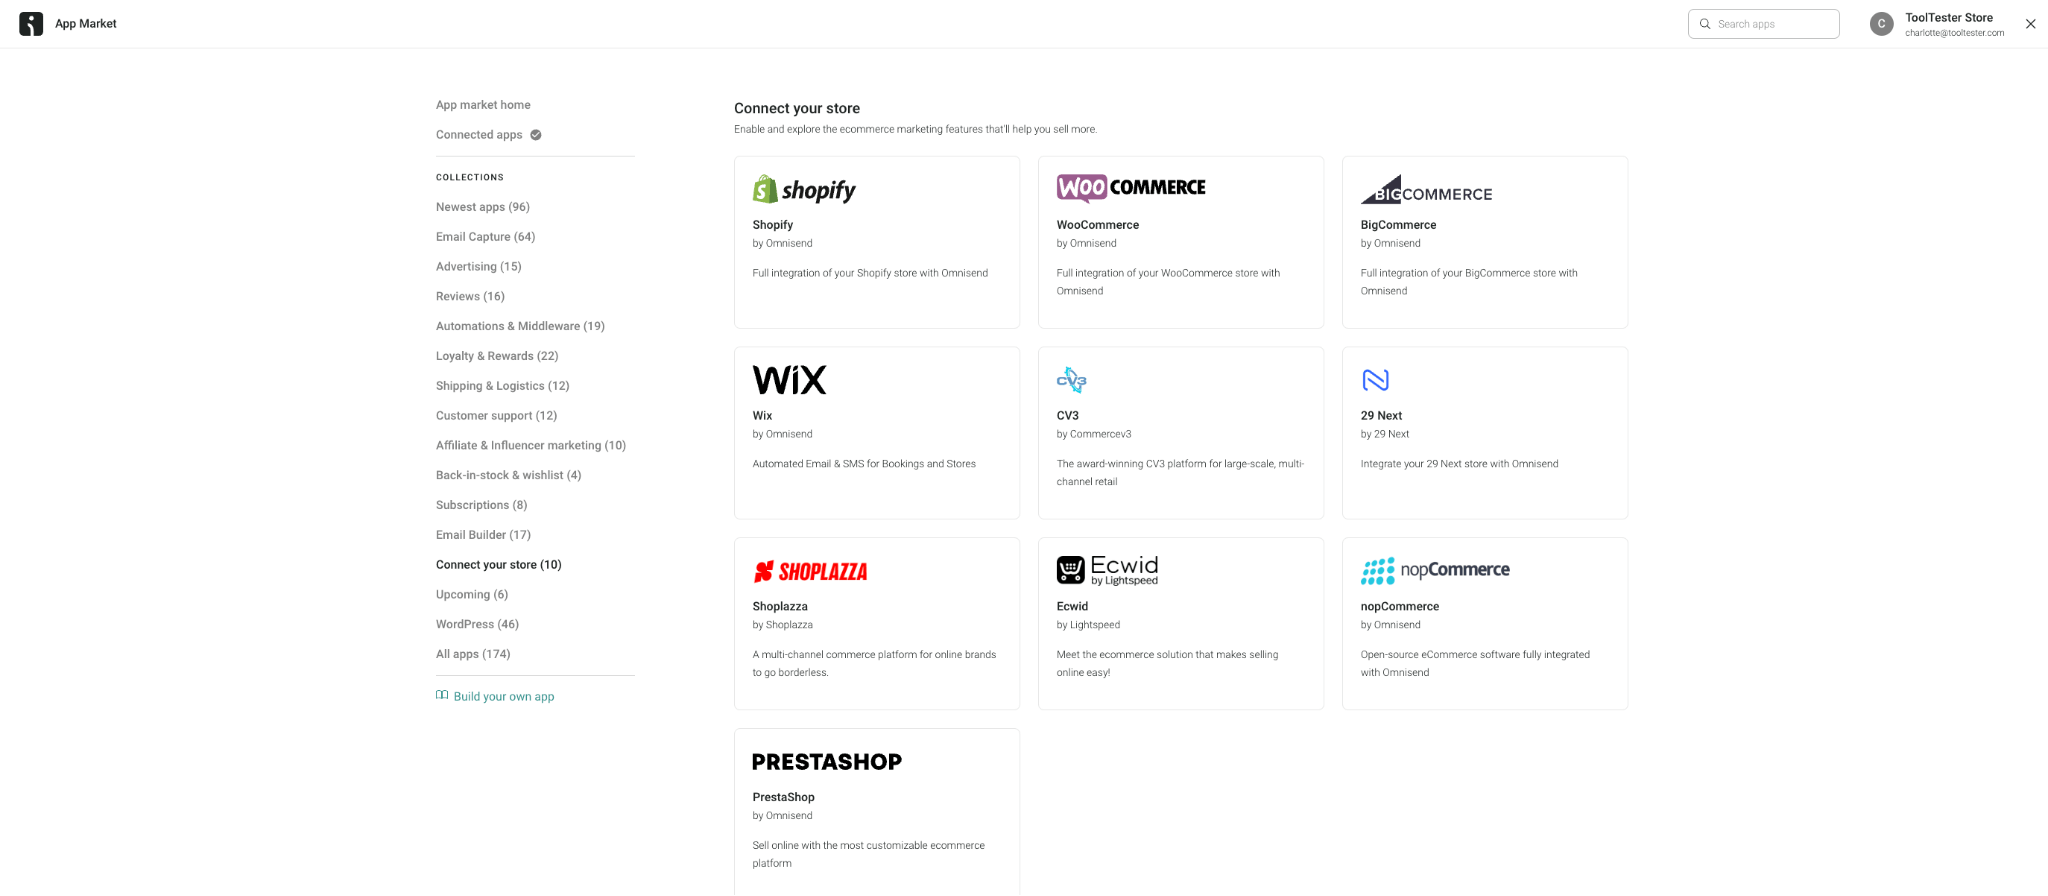
- If you're using a different ecommerce platform or a custom solution, you'll need to connect your store via API. Omnisend provides detailed documentation and 24/7 support to assist with the setup.
Step 2: Importing Customer Data into Omnisend
Once your store is connected, Omnisend will automatically import your customer data, including email addresses, names, and purchase history. This synchronization may take a few hours, but for a full data transfer, allow up to 24 hours.
Migrating from Another Email Service Provider:
If you’re switching from another email service provider, here’s how to transfer your contacts to Omnisend:
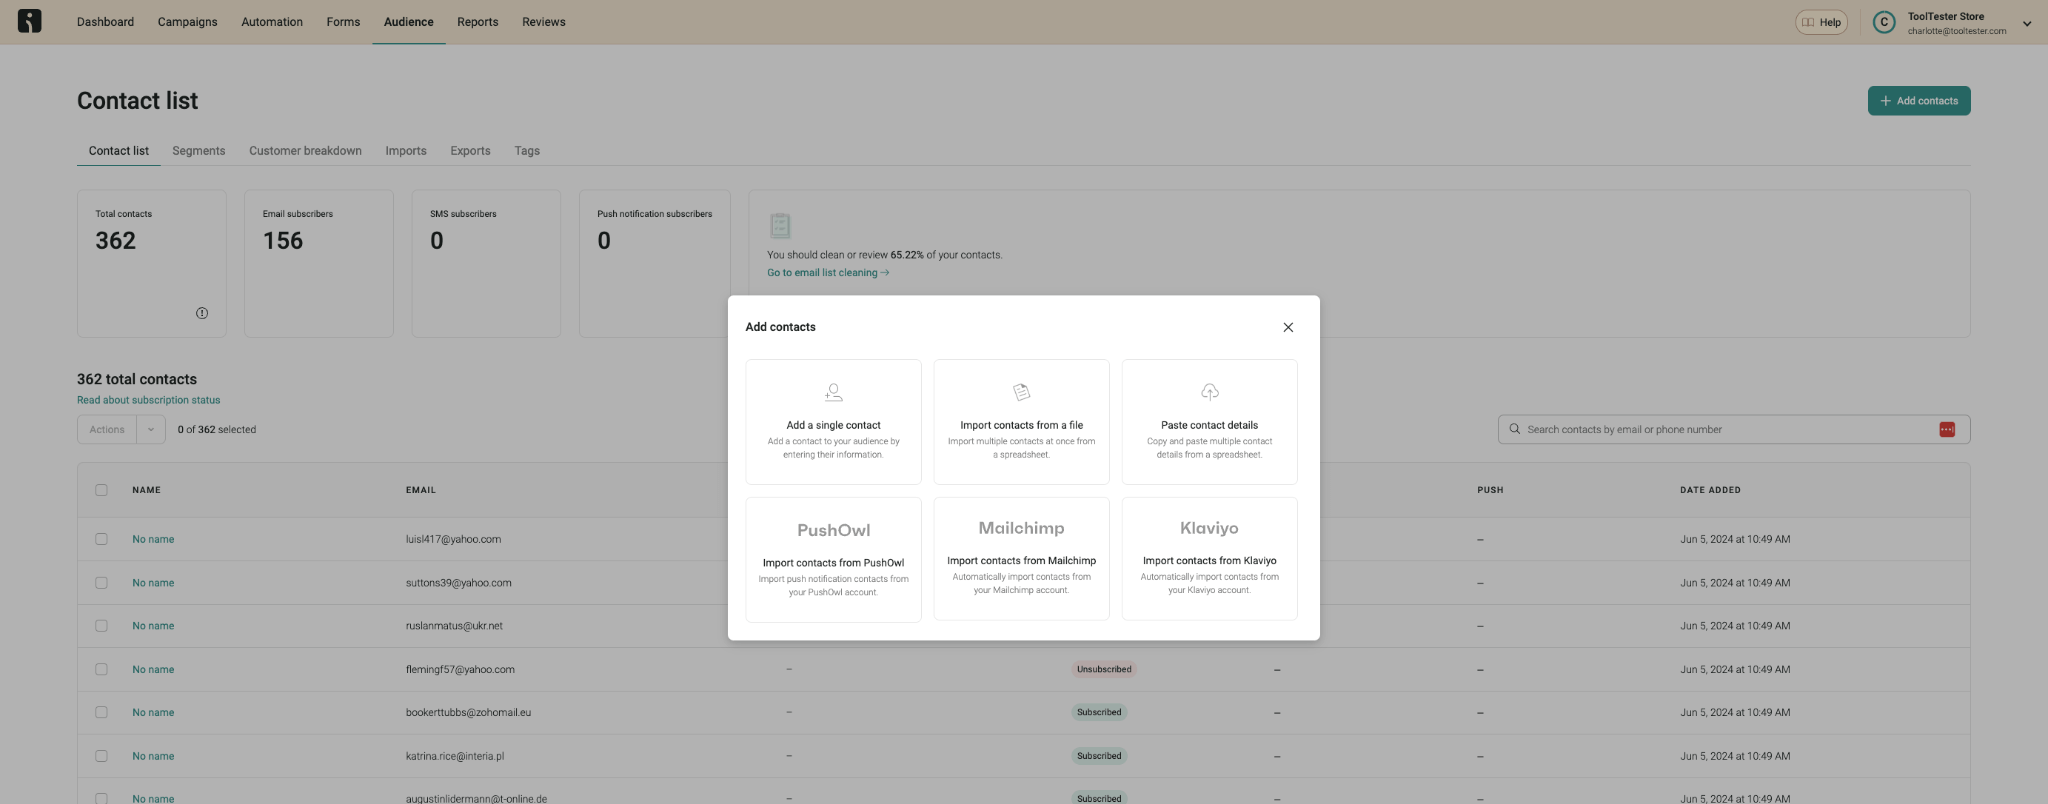
- Head over to the “Audience” Tab: This is where all your contacts will be managed.
- Click on “Add Contacts”: You can choose from several import methods, including direct imports from platforms like Mailchimp or Klaviyo. Omnisend also supports manual CSV uploads if you prefer to export your contacts from the previous provider first.
- After importing, we recommend segmenting your contacts based on their behavior and engagement with your brand. This will allow you to tailor your communications more effectively.
Step 3: Adding a Signup Form to Your Website
Before diving into the exciting world of automation, it's essential to grow your email list by adding a signup form to your website. Lucky for you, Omnisend’s form builder is one of our favorites.
A well-designed signup form not only collects customer data but also serves as an entry point for your automated marketing campaigns.
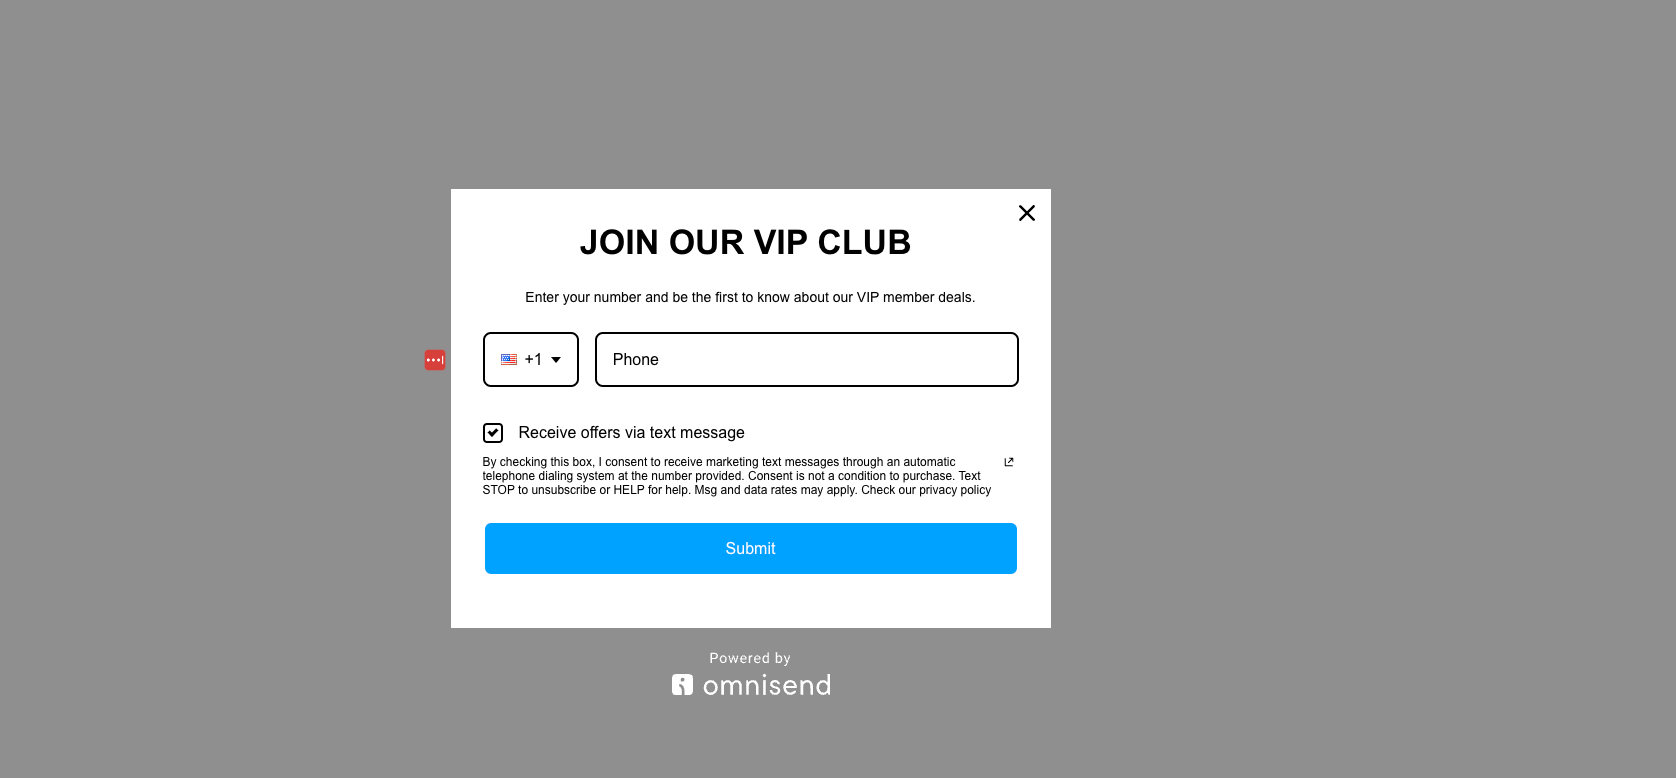
The example below shows a simple yet effective way to collect customer data while offering some exclusive discounts and VIP treatment:
Setting Up a Form in Omnisend:
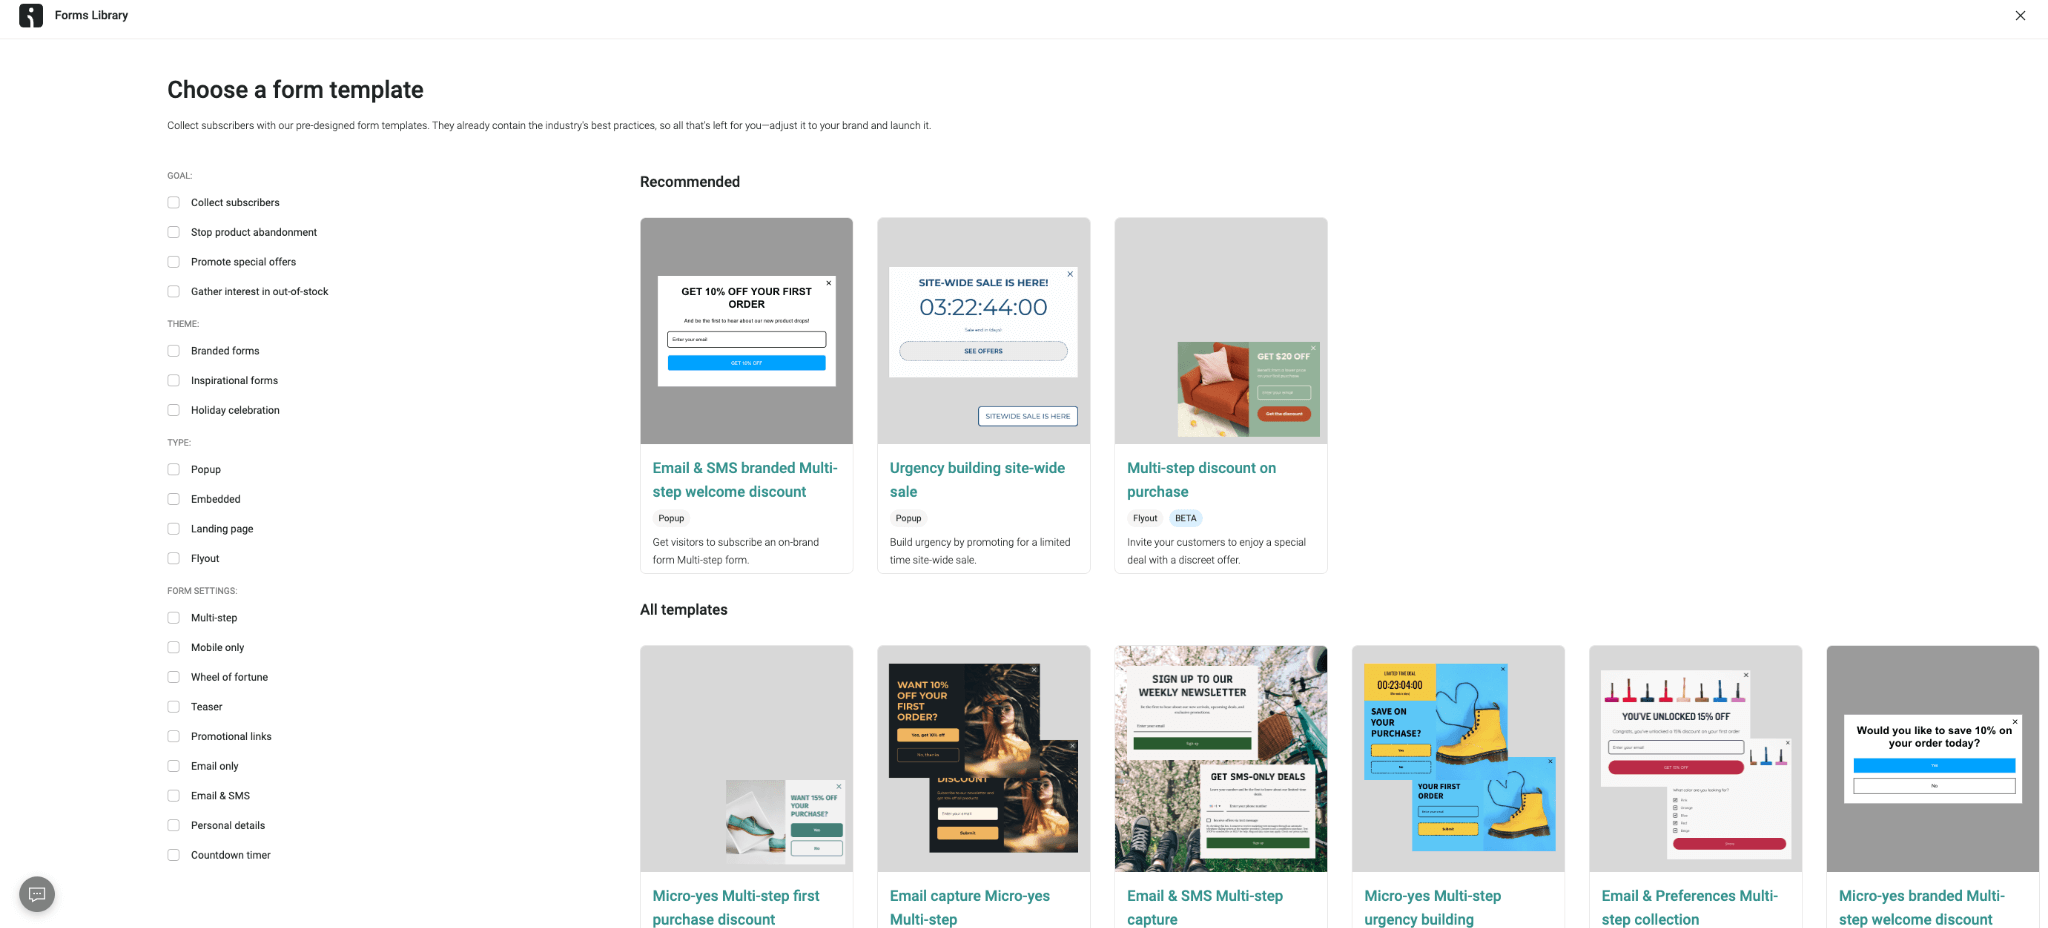
- Go to the Forms section in Omnisend and click on “Create Form.” You’ll find various templates, such as embedded forms, pop-ups, and landing pages. Choose the one that best suits your website’s design and user experience goals.
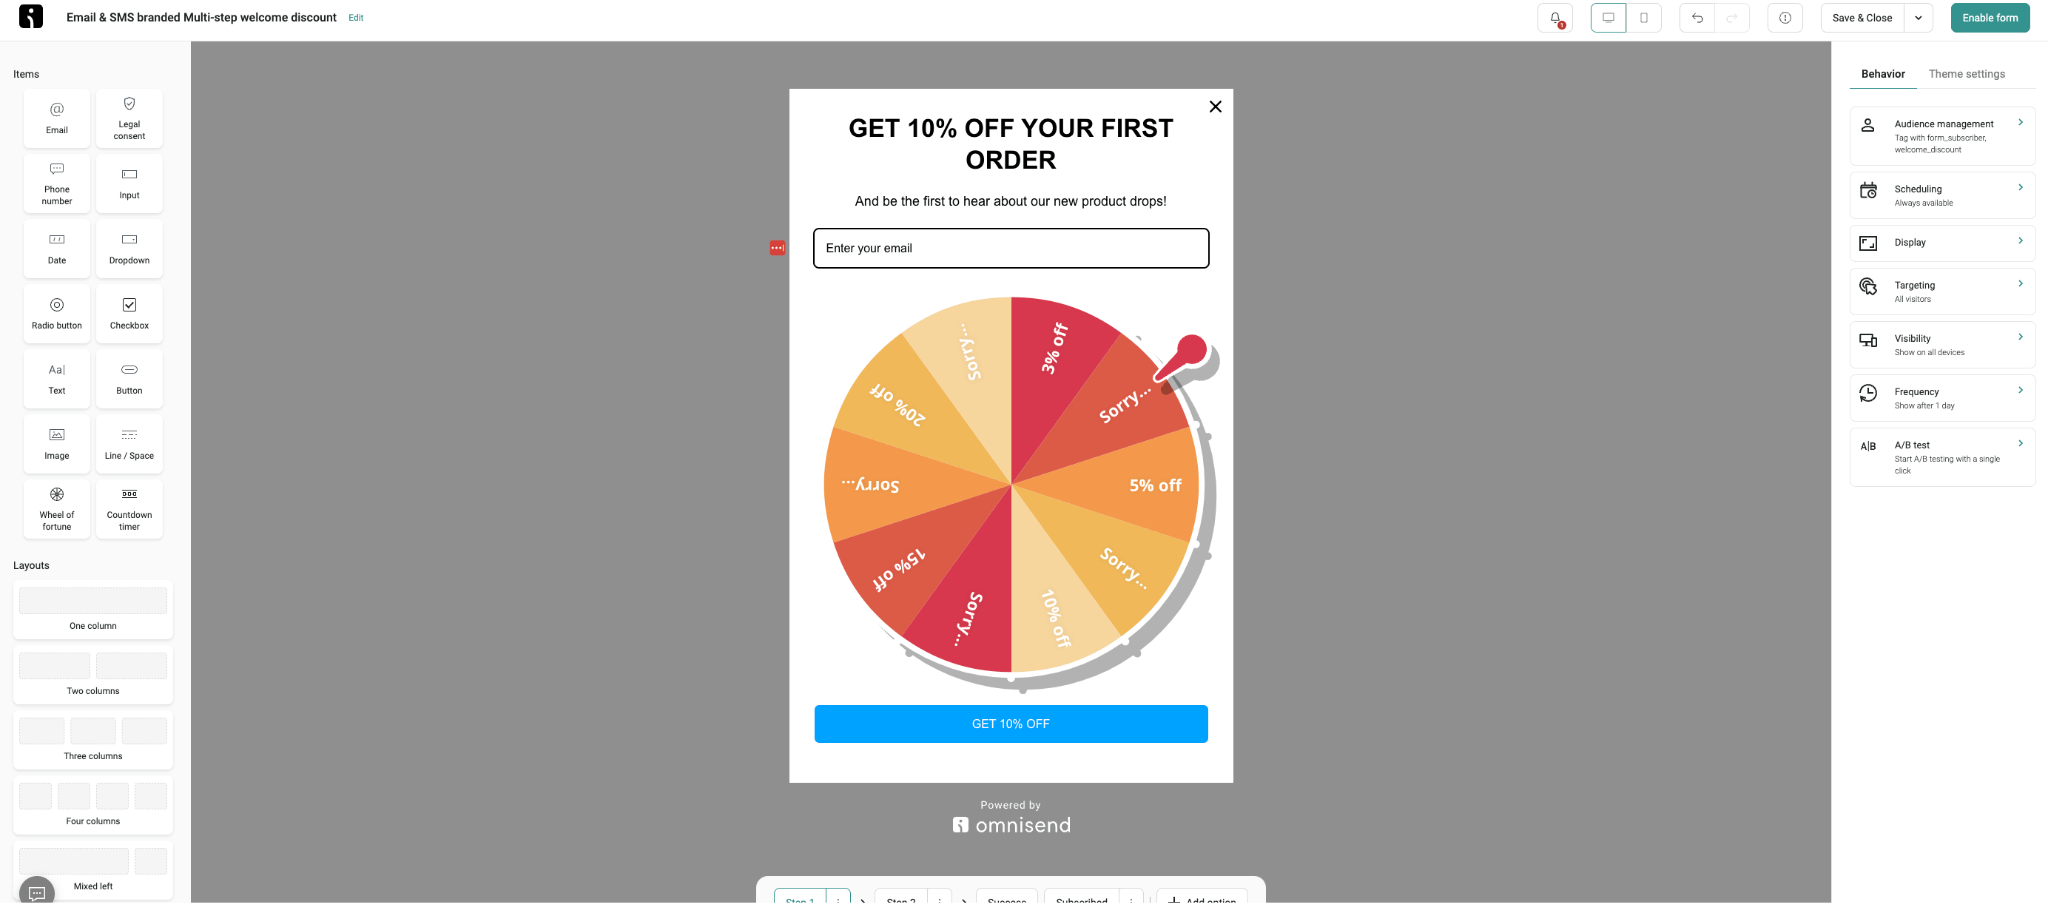
2. Use Omnisend’s drag-and-drop form builder to add elements like email fields, phone number inputs, and checkboxes for GDPR compliance. You can also customize the design to match your brand’s aesthetics.
3. Increase signup rates by offering incentives like discounts, VIP access, or entry into a giveaway. Consider adding engaging elements like gamification (e.g., a “Wheel of Fortune”) to make the signup process fun and interactive.
4. Manage who sees the form by setting audience rules and assigning tags to contacts who submit the form. For example, you can display a different form to first-time visitors than to returning customers.
5. Once your form is ready, obtain the embed code and add it to your website’s HTML file or directly into your Shopify theme. Omnisend also provides integration guides for various platforms, making it easy to implement.
Step 4: Setting Up Automated Workflows
Automated workflows are the root of an effective email marketing strategy, allowing you to collect leads, grow email lists, and engage customers without constant manual work.
Setting Up a Welcome Workflow in Omnisend:
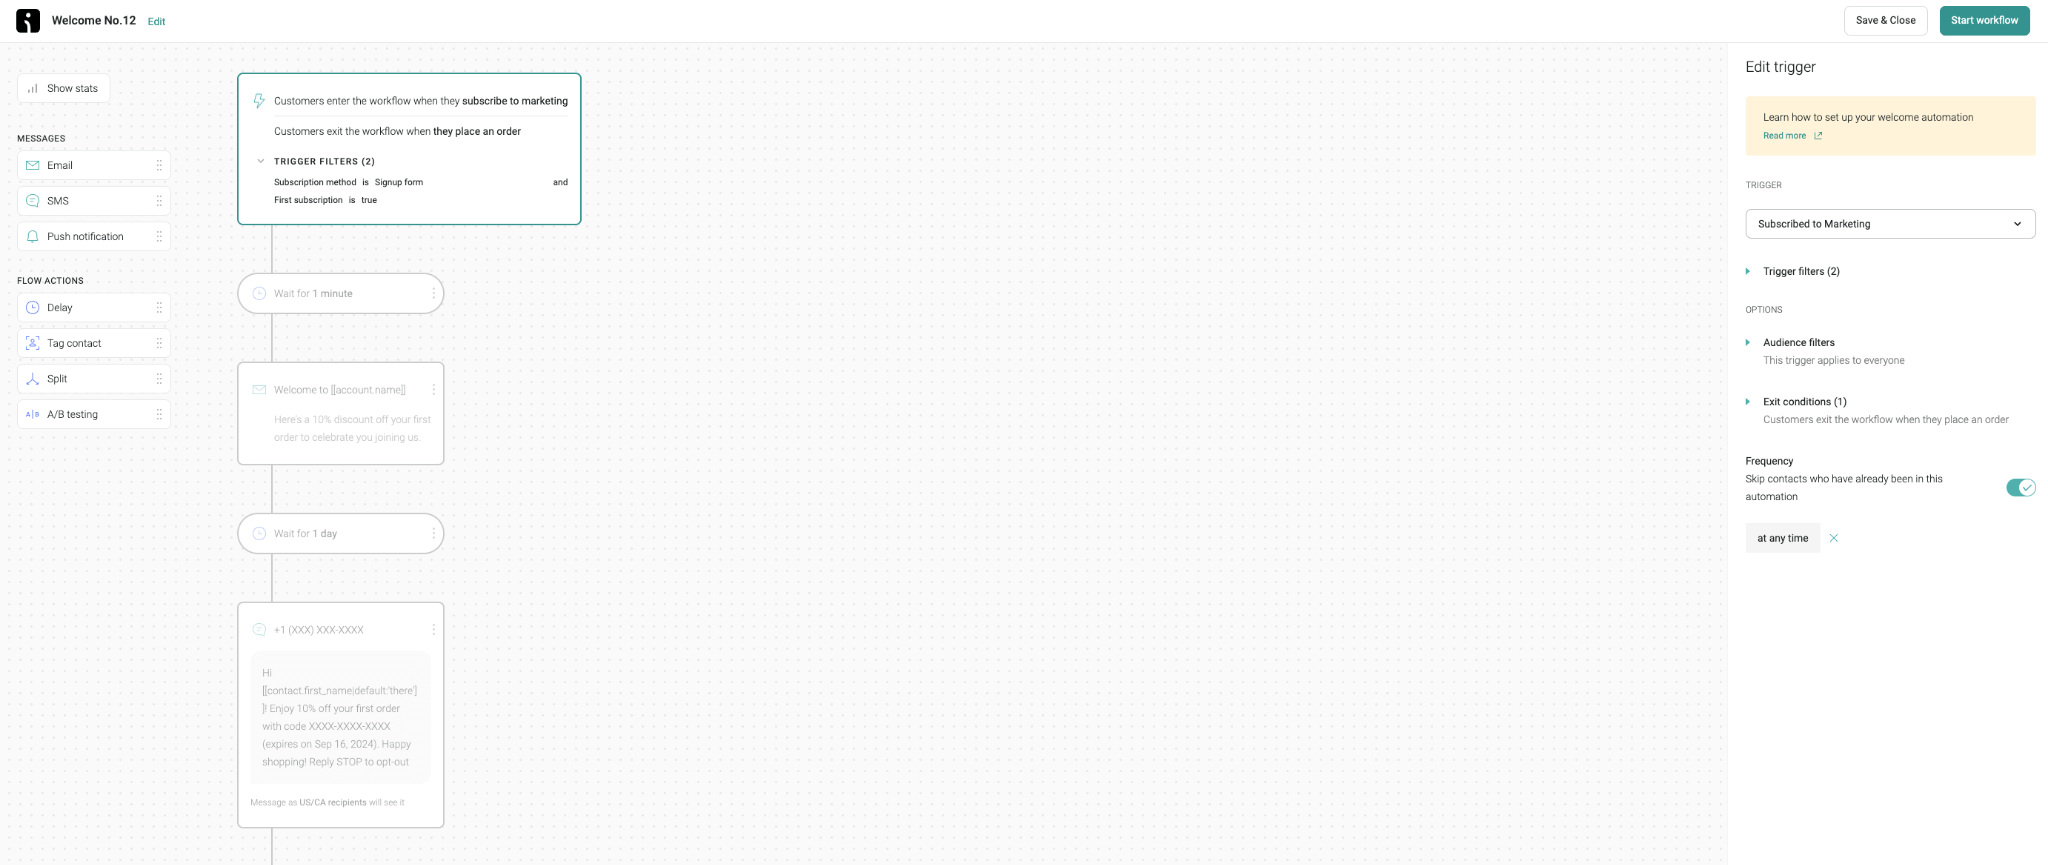
1. Head to the Automations tab and click on “Create Workflow.” Omnisend offers a good selection of pre-built templates to choose from, including a welcome series, abandoned cart reminders, and post-purchase follow-ups.
2. To get your ecommerce email marketing strategy flowing, let’s start by selecting a welcome series template.
Combine both email and SMS in your workflow to create a multi-channel experience. Customize the timing between each step to ensure your messages are delivered at the right moments.
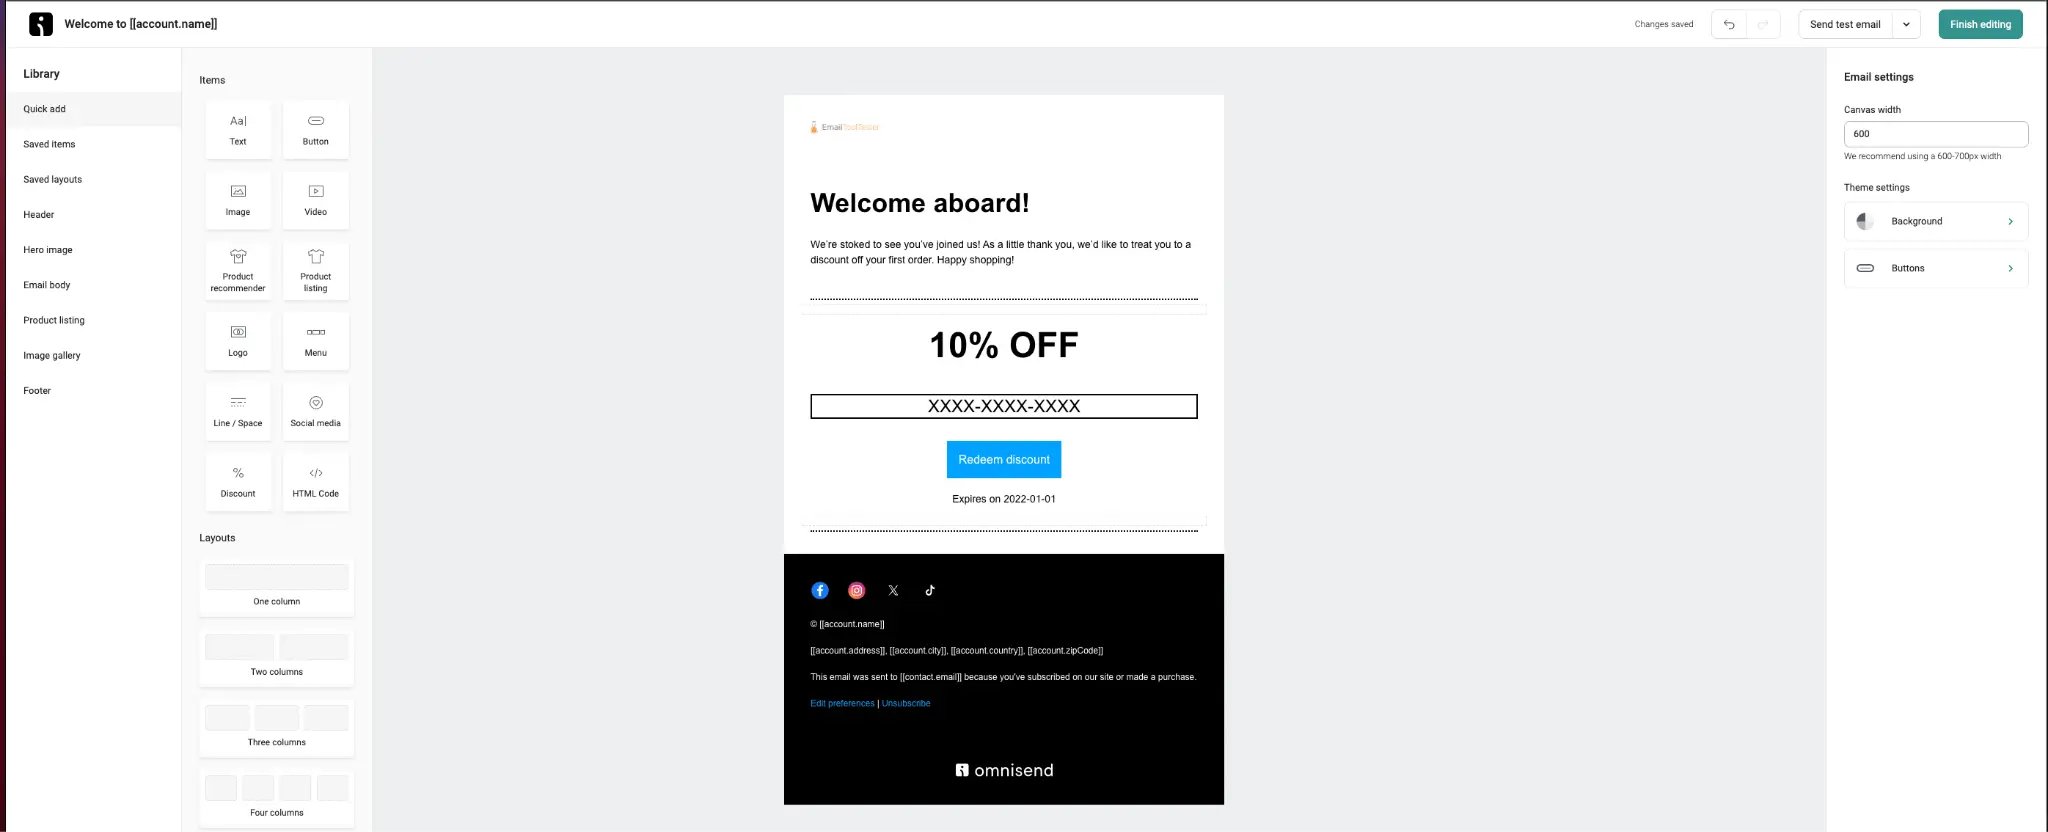
3. You can then head over to Omnisend’s email editor to add personalized elements such as the customer’s name, recommended products based on their browsing history, and custom discount codes.
4. Before going live, always be sure to send test emails to check how everything looks across different devices and email clients.
5. Then, once you are satisfied with how everything looks, you can go ahead and enable the workflow. Then be sure to monitor its performance using Omnisend’s advanced reporting tools.
Step 5: Sending an Email Campaign in Omnisend
In addition to automated workflows, regular email campaigns are crucial for maintaining ongoing engagement with your audience. These can range from weekly newsletters to promotional offers.
How to Create an Email Campaign in Omnisend:
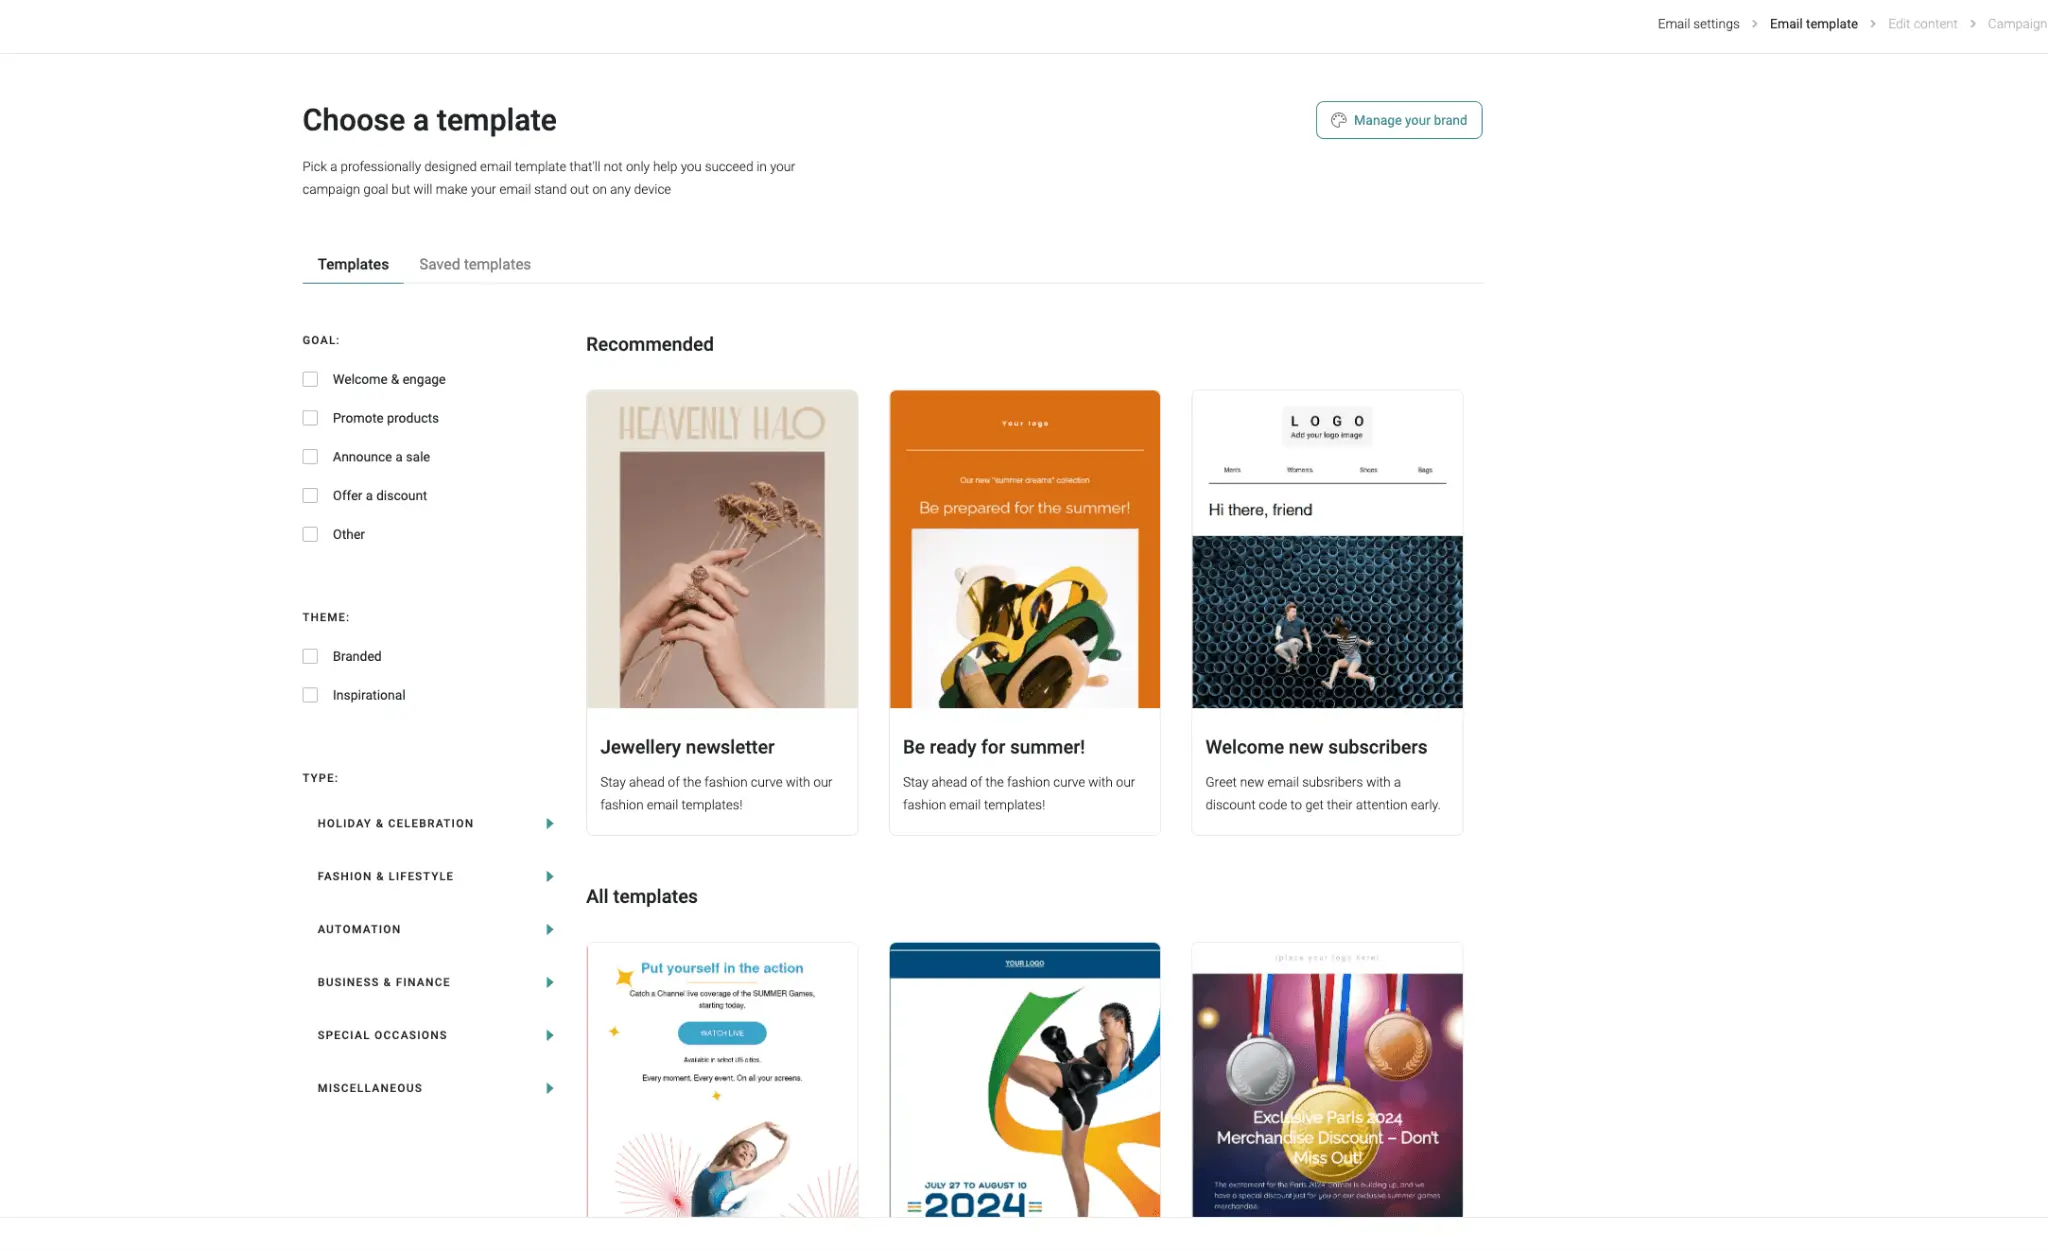
1. Head directly to the Campaigns section and click on “Create Campaign.” Choose your campaign type, then select a template that fits the type of content you want to share. Omnisend offers hundreds of templates.
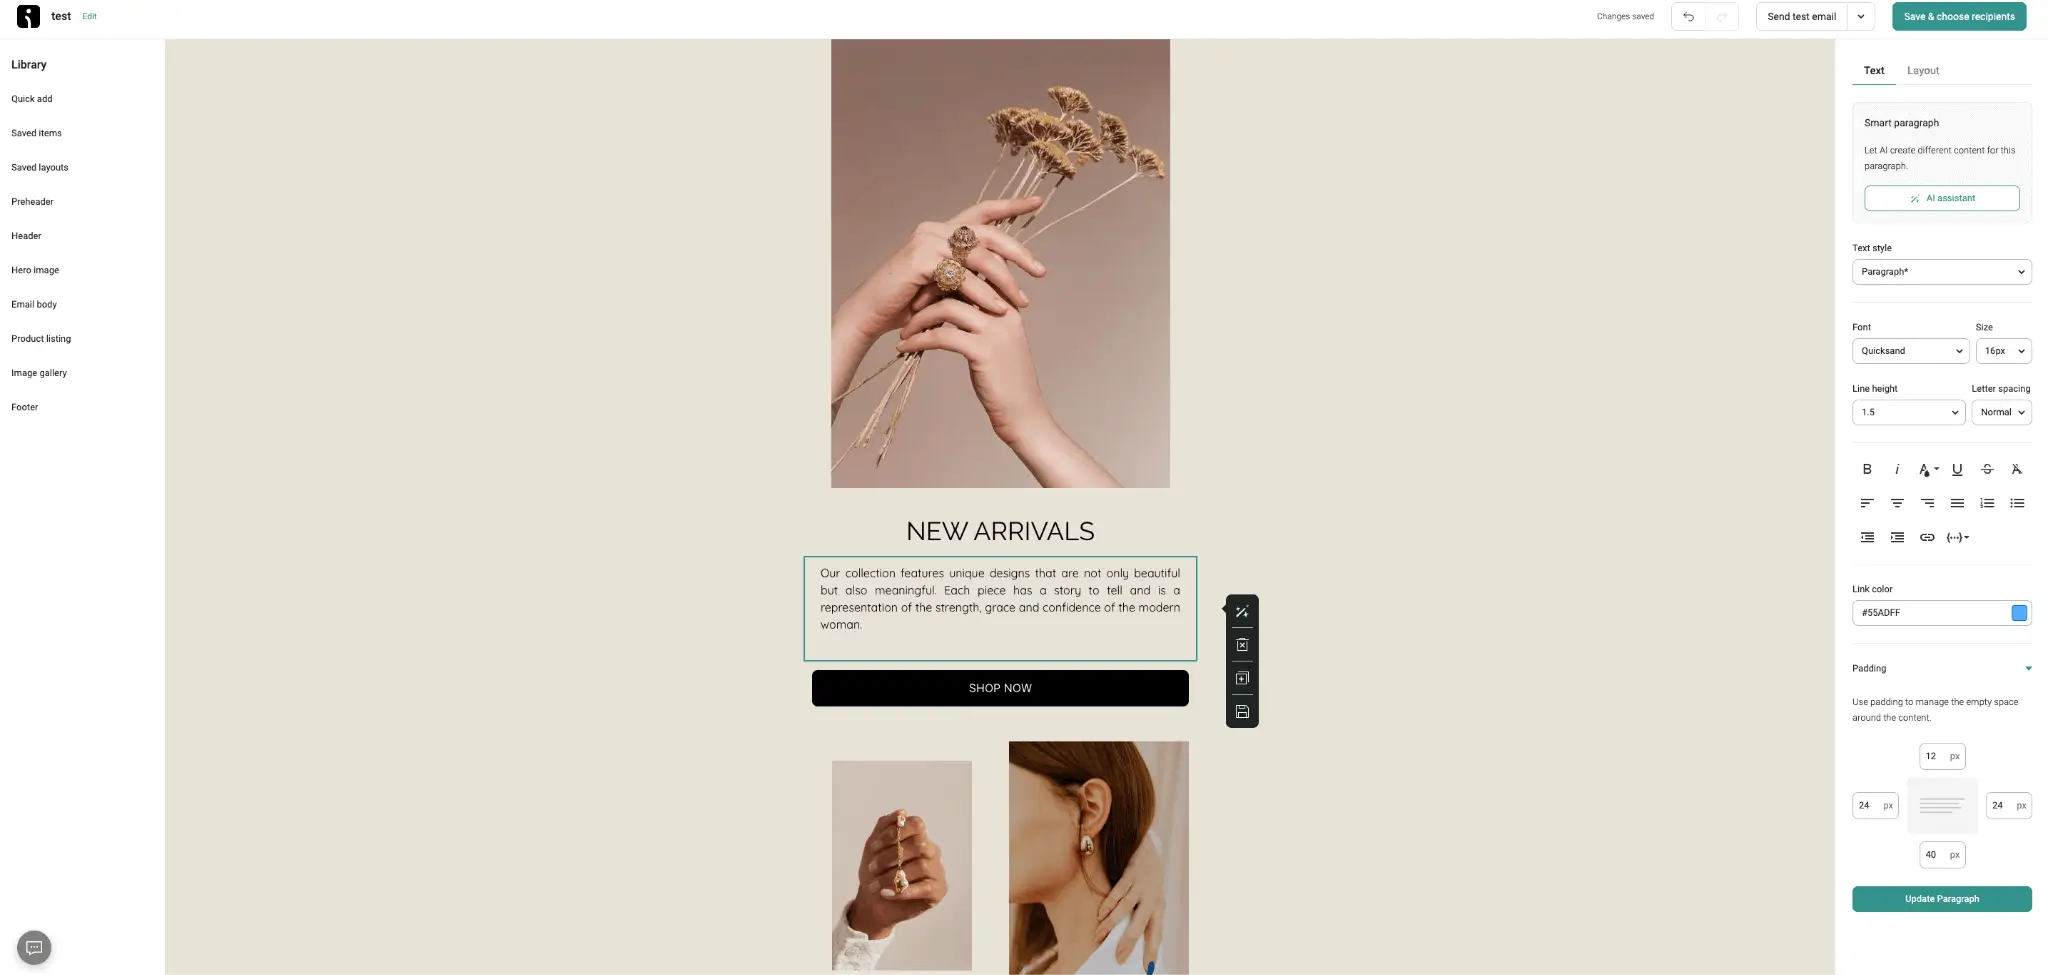
2. Use the drag-and-drop email editor to add text, images, product recommendations, and other dynamic content blocks that suit your fancy.
Omnisend’s email editor is super easy to use and allows you to create visually appealing emails to win over those customers in minutes.
3. When your email campaign is ready, it’s time to decide whether to send your campaign to all subscribers or specific segments.
Segmentation can be based on demographics, past purchases, or behavior, helping you deliver more relevant messages to your audience (and avoiding unsubscribes!).
4. Before you send your email campaign, double-check your campaign settings, including the subject line, sender name, and preheader.
Then, it's time to decide whether to send the campaign immediately or schedule it for a later time when your audience is most likely to engage. We recommend sending at a time that best suits your audience.
Step 6: Exploring the Potential of Omnisend Reviews
Omnisend Reviews is a handy feature that allows Shopify businesses to collect, manage, and display customer reviews directly on their product pages and within email campaigns.
These product reviews can significantly encourage sales through their ability to build trust with potential customers, showcasing authentic feedback from previous buyers.
How to Set Up Omnisend Reviews:
1. Head over to the Omnisend Reviews section which you'll find in your top menu.
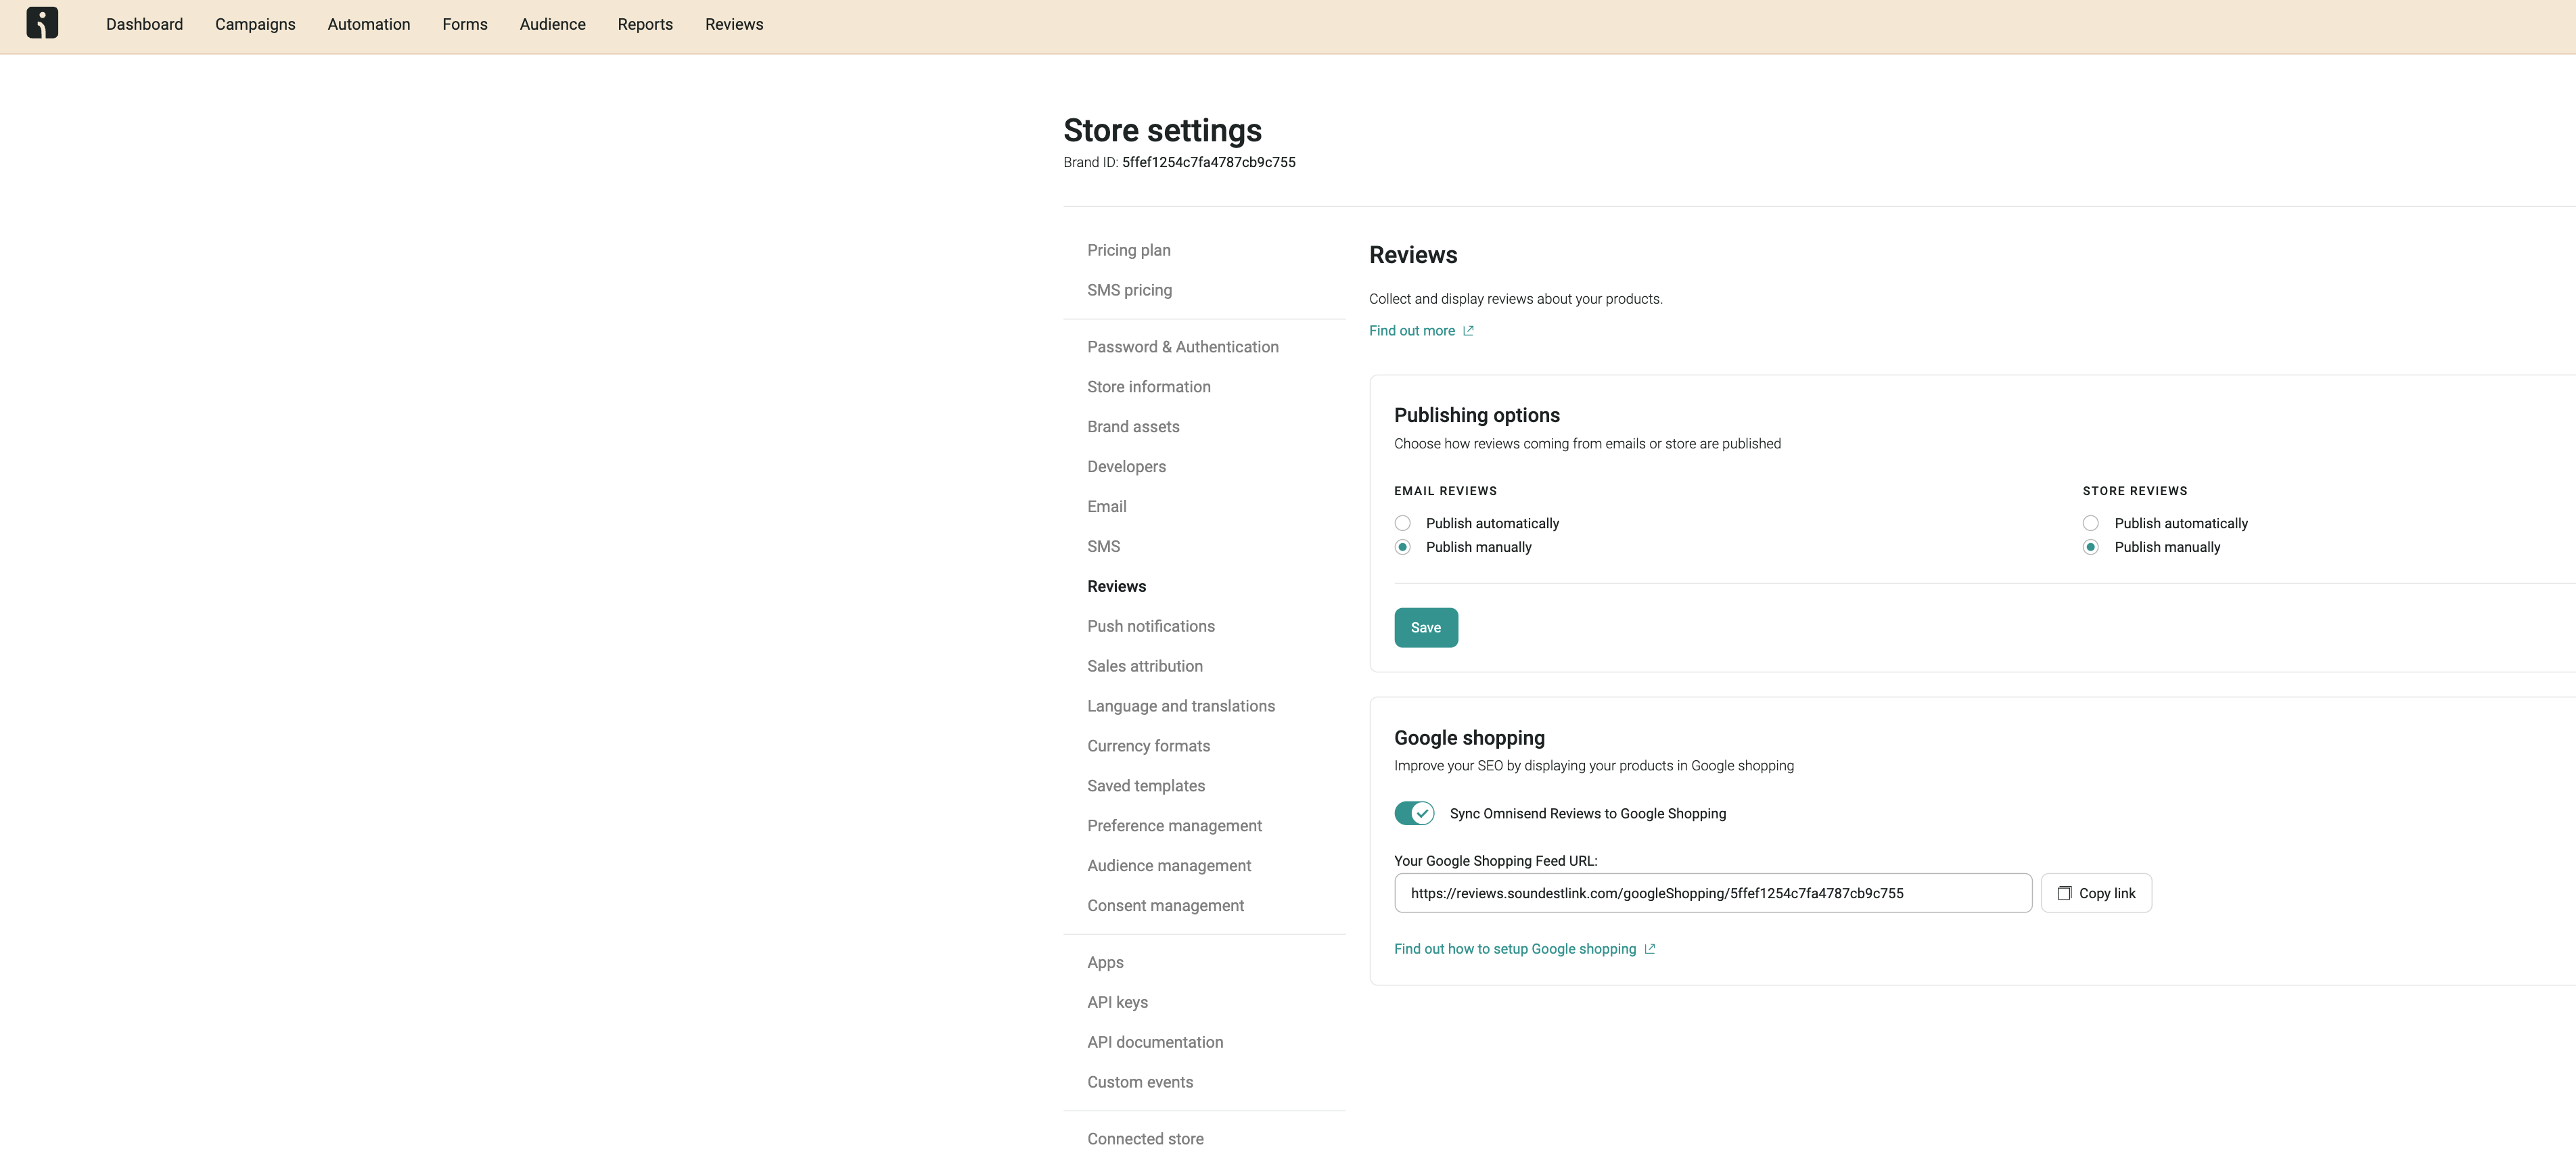
Then click on settings, here you can decide whether you’d like to check the reviews before they are published, or to publish automatically.
You can also sync your Omnisend reviews with your Google Shopping to make sure you maximize the presence of your positive customer reviews.
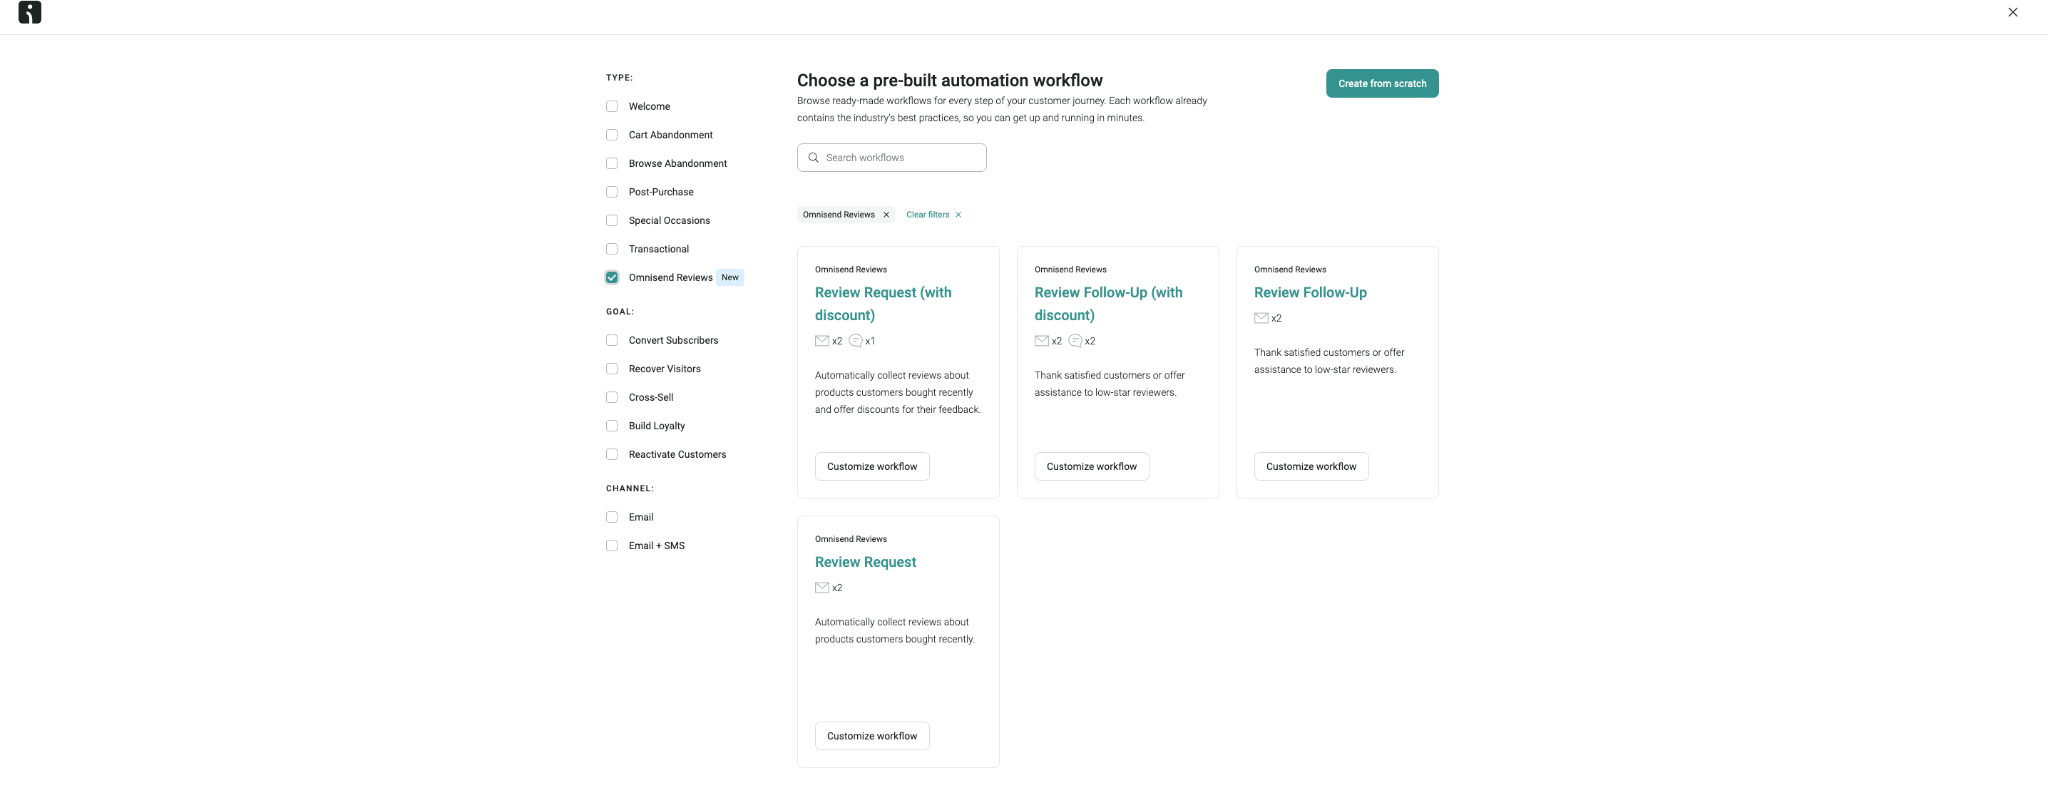
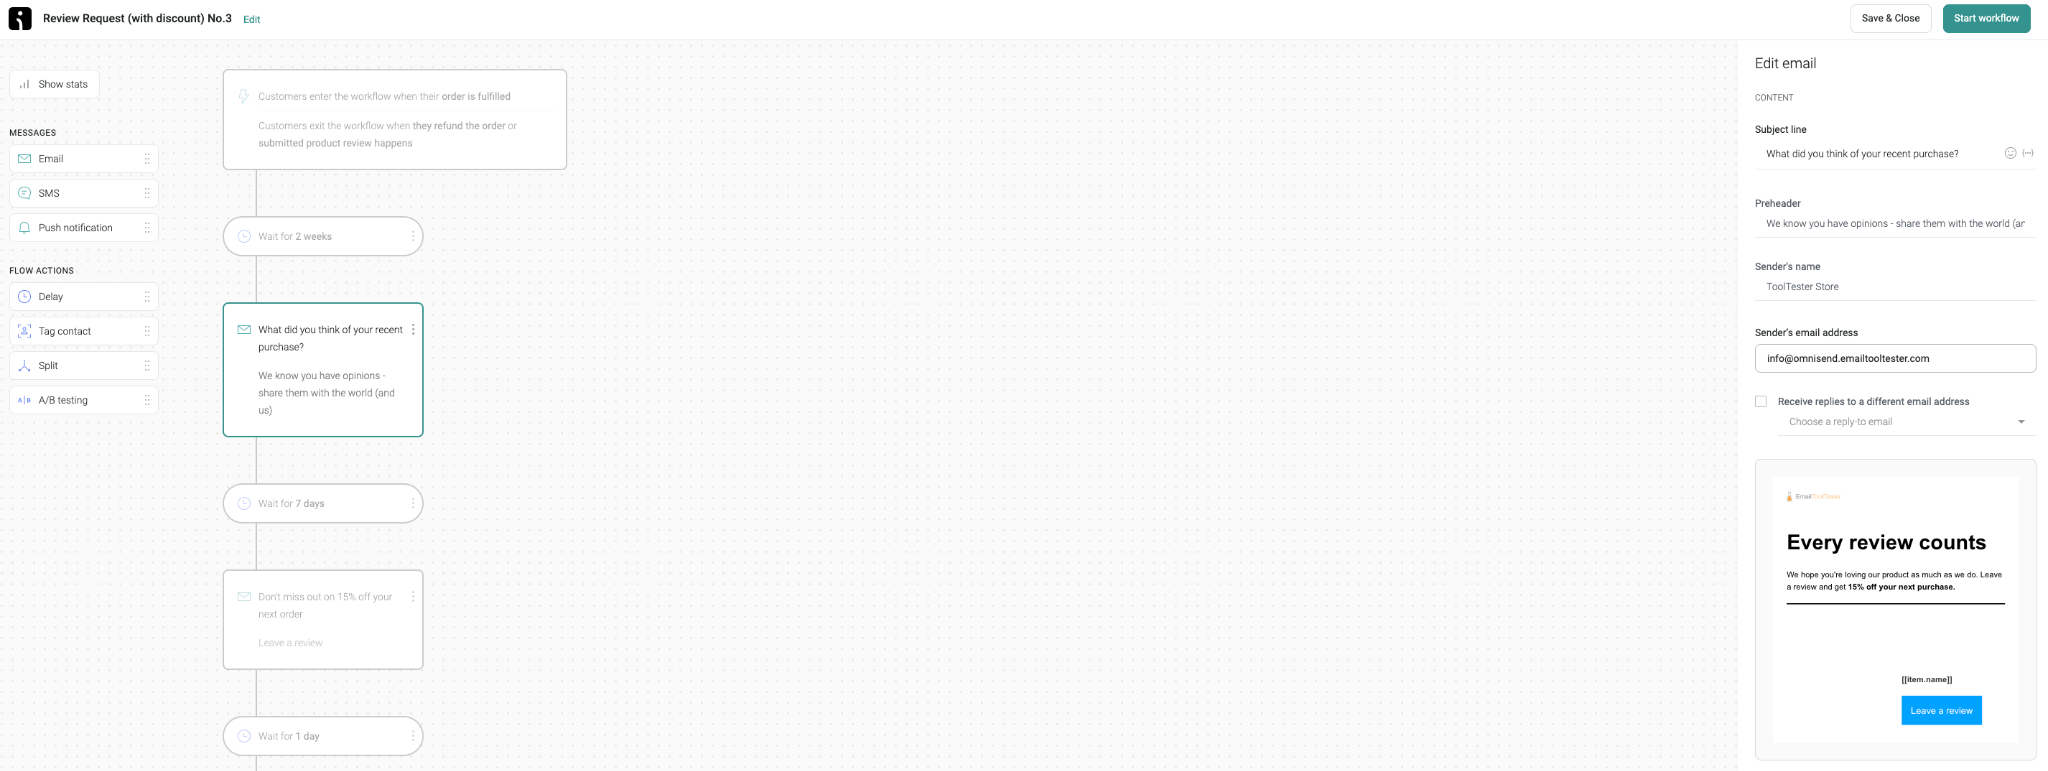
2. To start collecting reviews, you can create an automated workflow to send review request emails to customers after they’ve received their orders.
3. Within the workflow editor, you can determine the trigger timing (e.g., 7 days after purchase) to ensure customers have had time to experience the product.
We then recommend having a play around with the email content to encourage customers to leave a review, possibly offering an incentive such as a discount on their next purchase.
4. Customize the display settings to showcase reviews on your product pages. You can choose from various layout options to match your website’s design. Ensure the reviews are prominently displayed to maximize their impact on potential customers.
Good news! You also have the option to upload reviews from any previous ecommerce platforms. Luckily any good reviews you’ve already collected won’t go to waste.
Final thoughts: Omnisend Tutorial
By following our Omnisend tutorial, you’ll be well on your way to discovering Omnisend’s potential and giving your ecommerce email marketing strategy the boost it deserves.
Whether you’re an email marketing pro or just starting out in the world of email marketing, Omnisend’s easy-to-use platform and powerful features are here to help you connect with your audience and grow your online presence.
Plus, Omnisend’s integration with platforms like Shopify, WooCommerce, and BigCommerce means you can get everything set up with ease and without technical headaches!
As you get more and more comfortable with the platform, you’ll love exploring advanced features like audience segmentation, and SMS marketing. And as always, we recommend referring back and taking advantage of Omnisend’s advanced reporting to see how your email marketing strategy can be improved. Good luck!
> Check our Omnisend pricing guide
We keep our content up to date
13 Sept 2024 - Updated banner
Our Methodology
This article has been written and researched following our EmailTooltester methodology.
Our Methodology