EmailTooltester is supported by readers like you. When you purchase through our links, we may earn a commission that helps keep our reviews independent and free.
Interested in signing up or switching to Constant Contact? Nice choice! Constant Contact has been a key player in the email marketing game for almost 30 years. It’s targeted at small businesses and is well known for its niche feature set, including unique event marketing features that you won’t see with any other email marketing service.
In this Constant Contact tutorial, we'll walk you through the process step-by-step, ensuring that you have all the information you need to get started and make the most out of this email marketing platform.
Who is this Constant Contact Tutorial for?
This Constant Contact tutorial is perfect if:
- You're new to email marketing and need a beginner-friendly guide to get started with Constant Contact.
- You’d like to get a quick idea about how easy Constant Contact is to set up, especially compared to other platforms like ActiveCampaign, GetResponse, or MailerLite
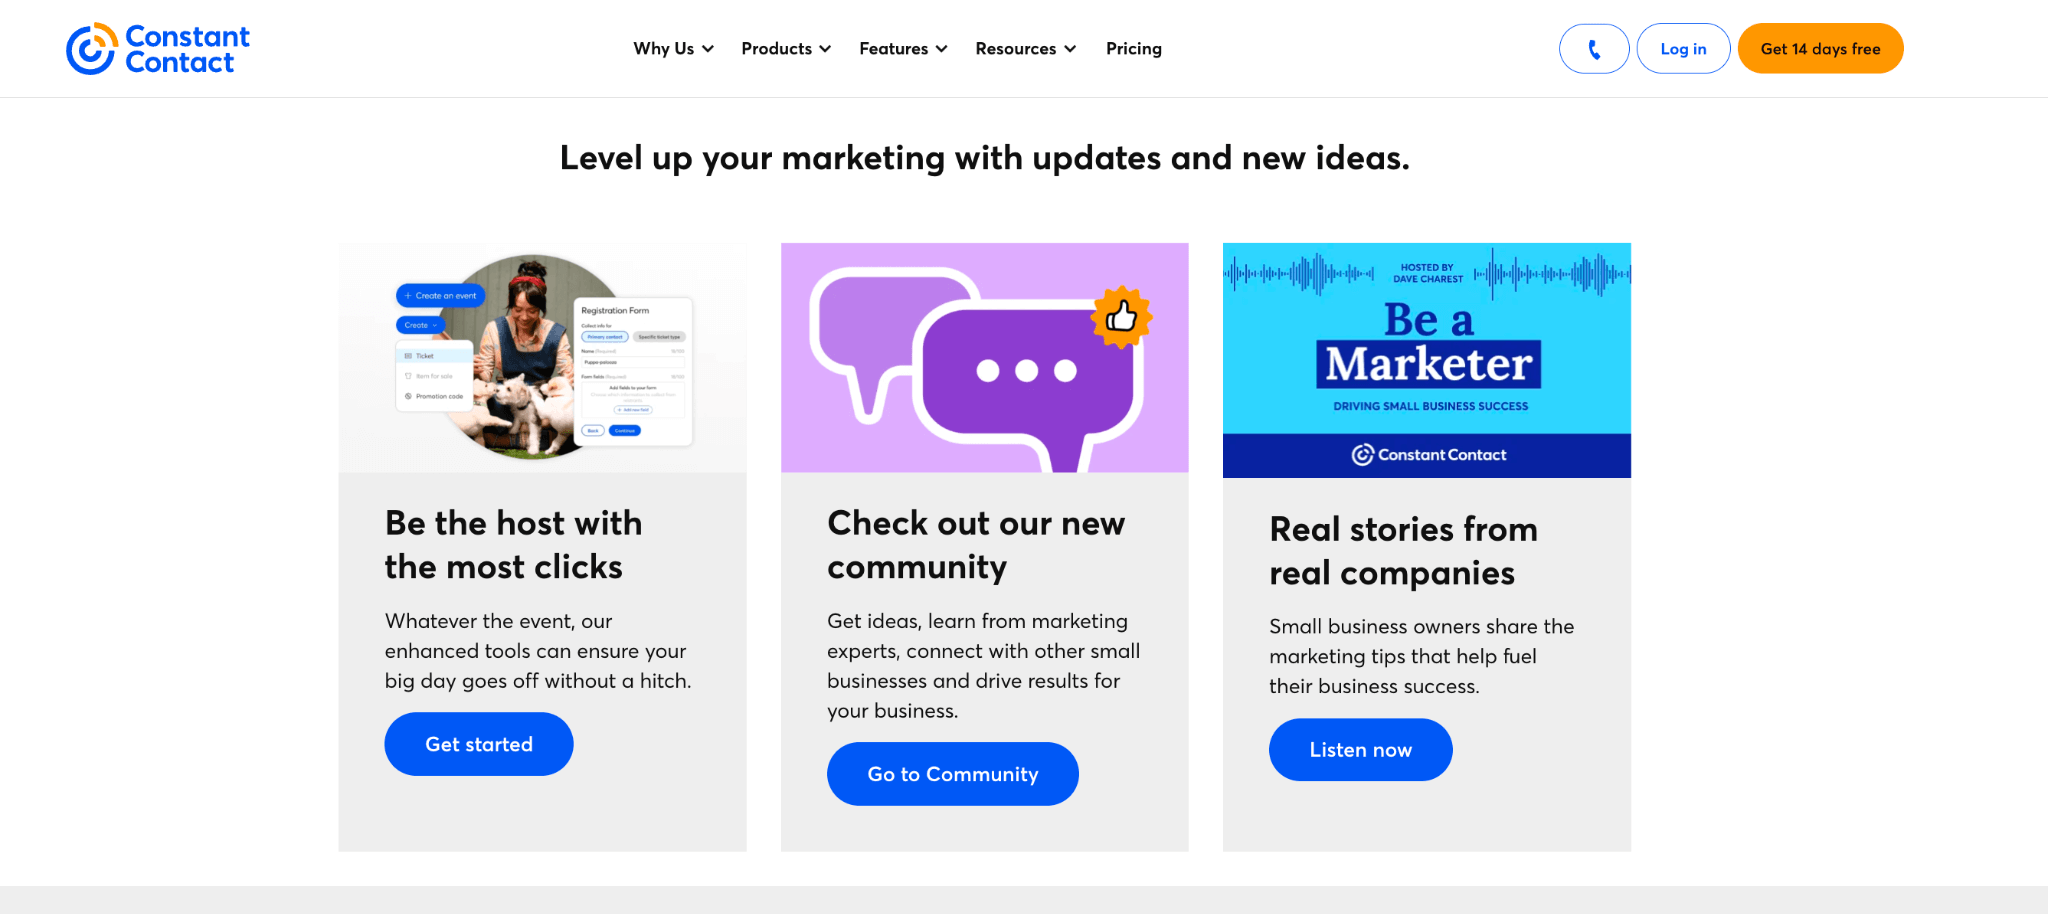
While Constant Contact is designed to be user-friendly, it also offers a pretty niche feature set such as the ability to sell digital products, manage events, schedule your social media posts, and even create your own logo. (We won't cover these advanced features in this tutorial, however, if you're interested in finding out about them, you can explore Constant Contact's knowledge base for more in-depth guidance).
Now, let's dive into the steps to get you started with Constant Contact:
Step 1: Creating your Constant Contact Account
Visit the Constant Contact website and click on the “Sign Up for Free” or “Get Started” button. This will get the account creation process going.
All you need to do here is fill in your email address and password and simply choose whether or not you’d like to receive emails about their products and services.
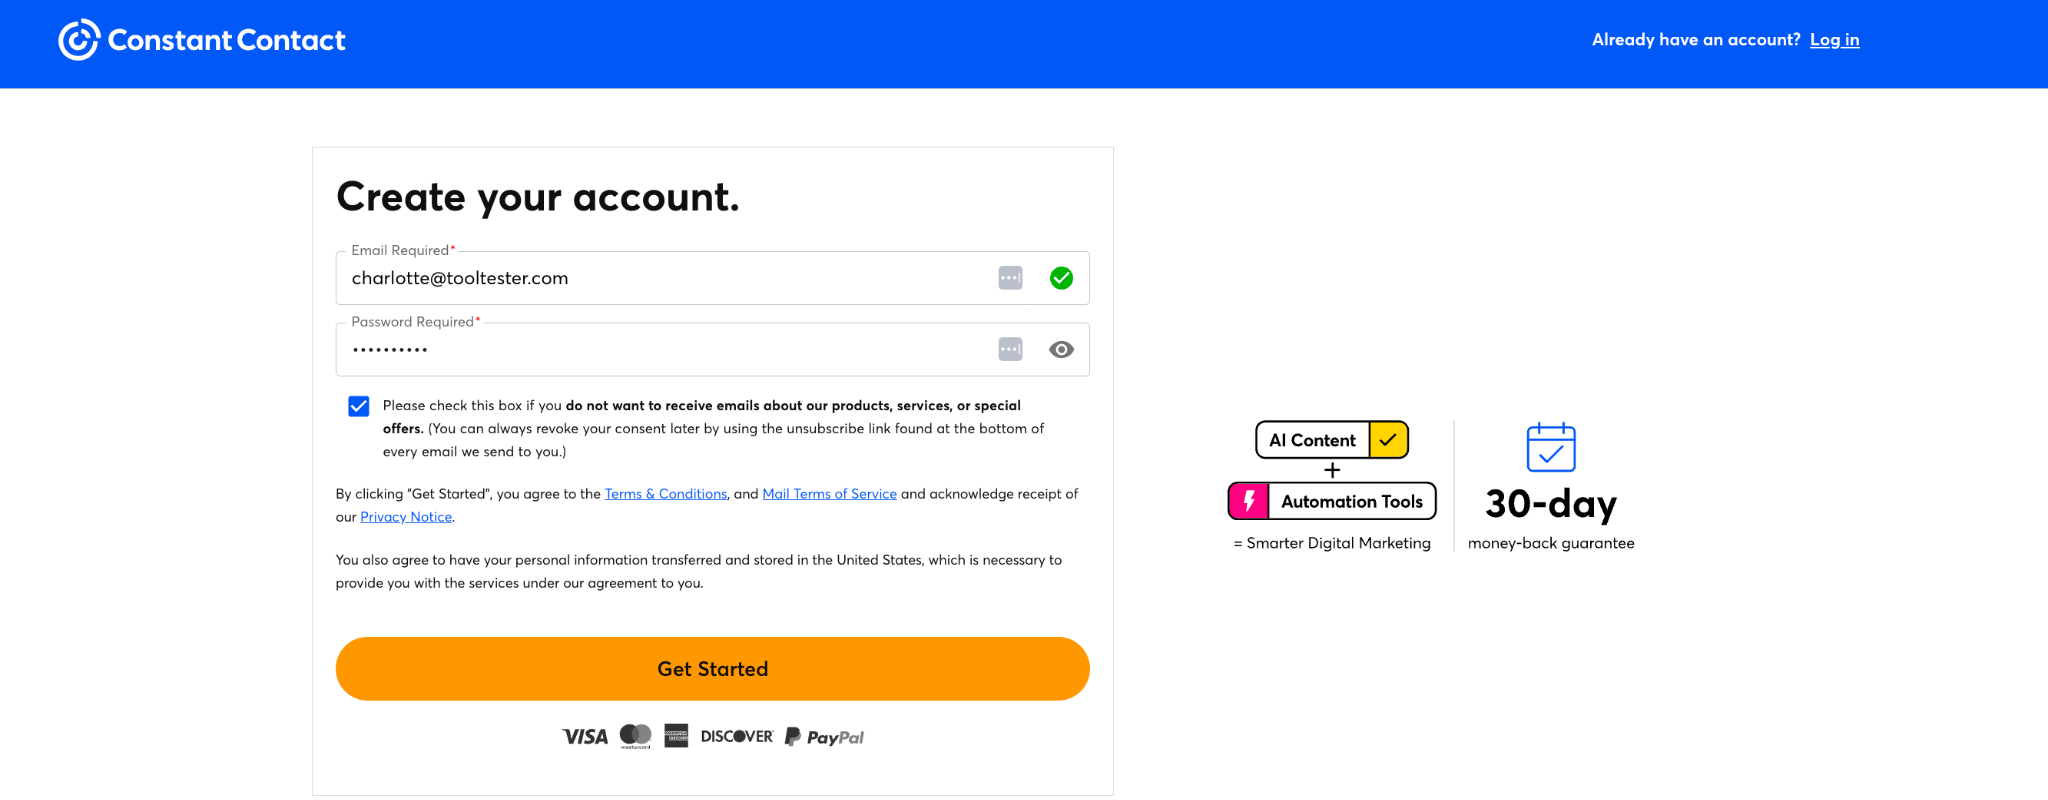
Unfortunately, Constant Contact only offers a 60-day free trial, rather than a completely free plan. Therefore, you are required to pick your plan and provide payment details at this initial stage.
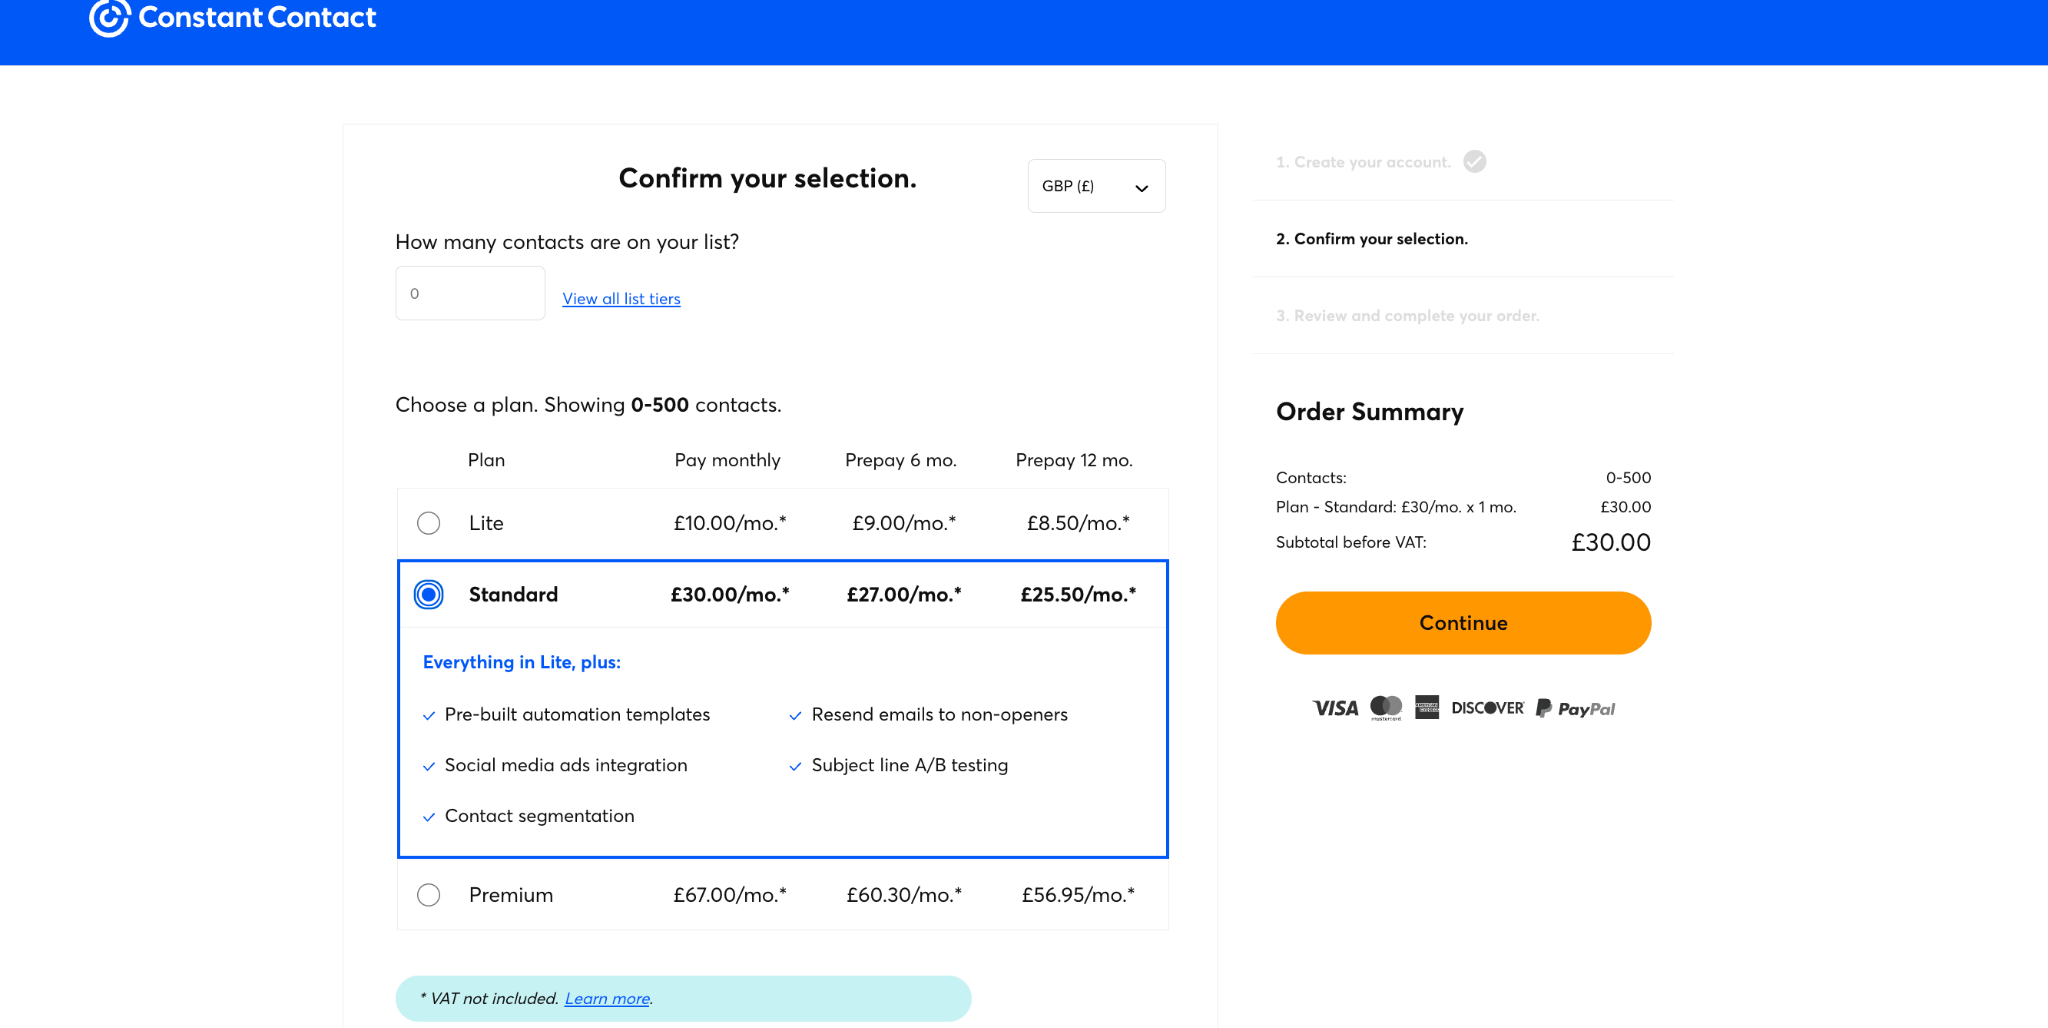
Once you've chosen your desired plan, and completed the sign-up process or “your order”, you'll be directed to your Constant Contact account dashboard.
Step 2: Customize Your Constant Contact Settings
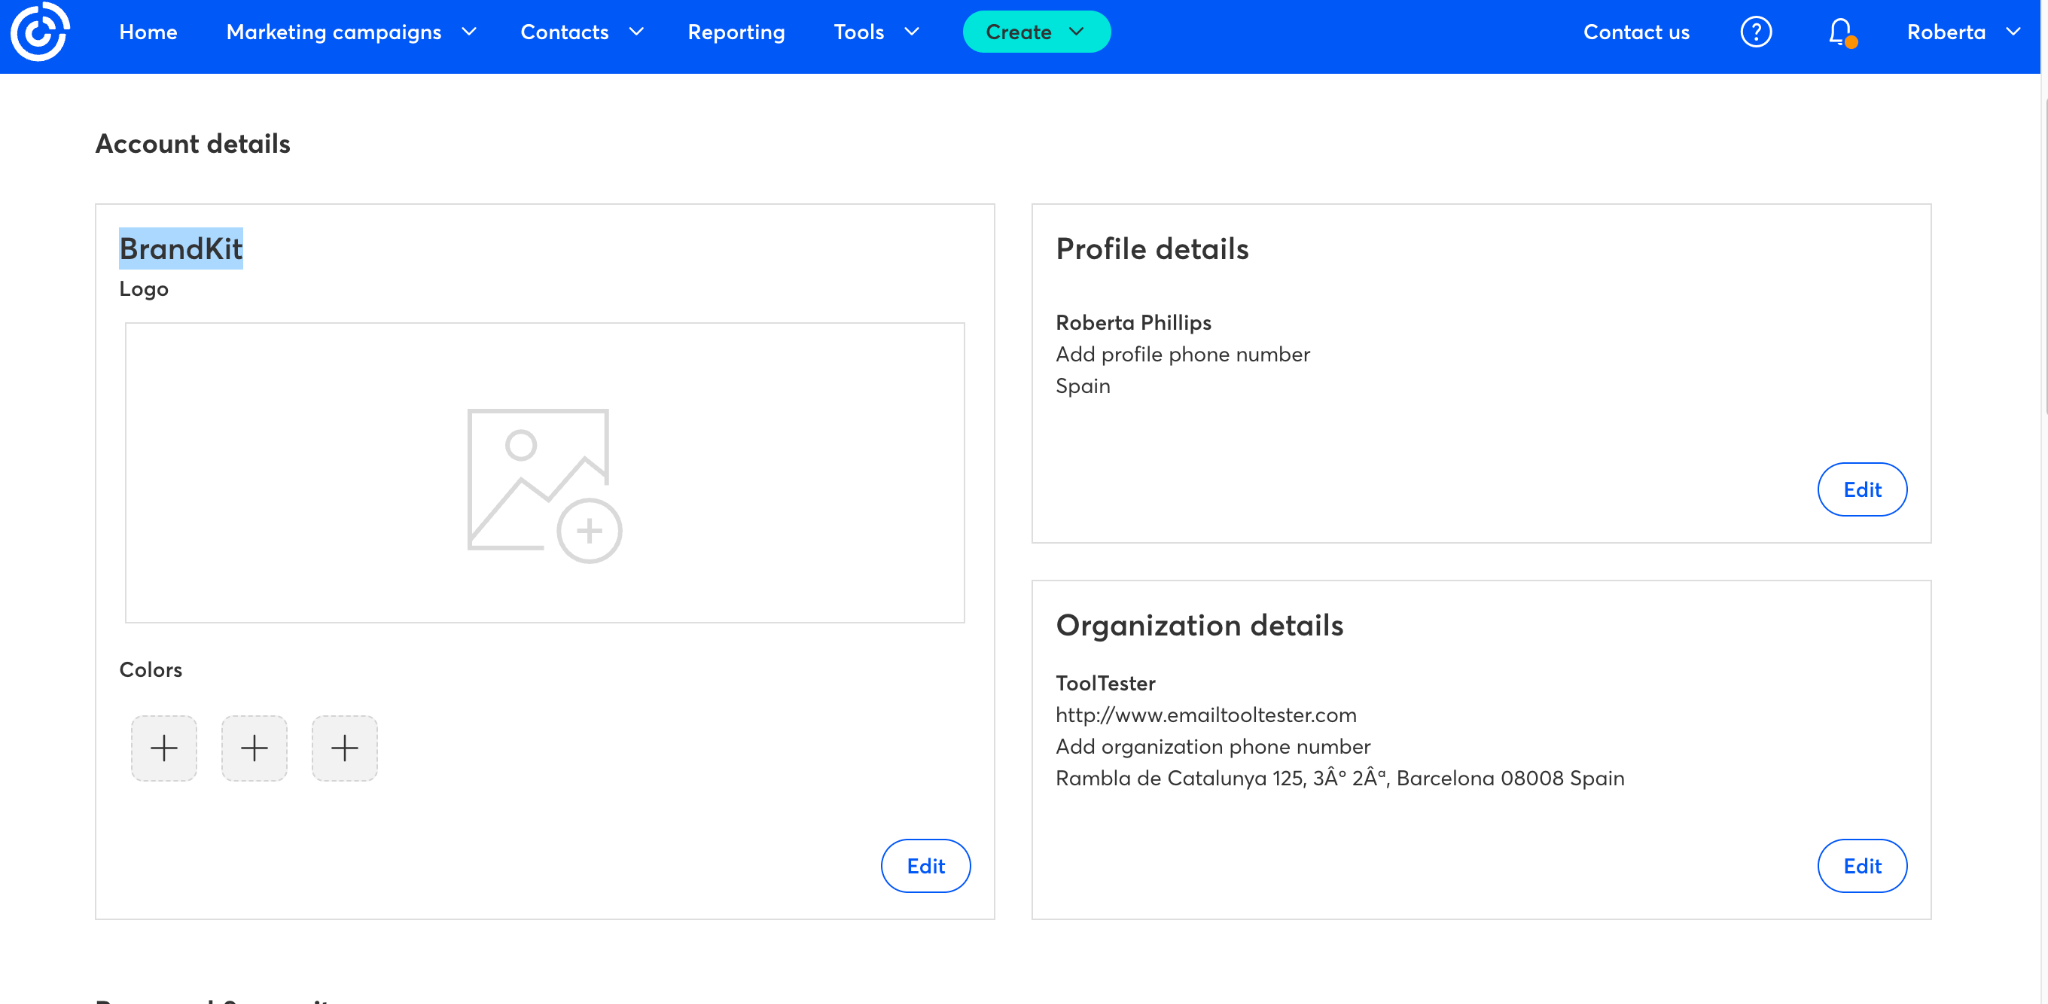
In your Constant Contact dashboard, click on your account name in the top right-hand corner and select “Account Settings”. Here you will be able to add your contact details, organization details, and email signature. Another nice touch from the Constant Contact team is the ability to add your “brand kit” which is your logo and your brand colors. This is pretty handy when you start to design your emails.
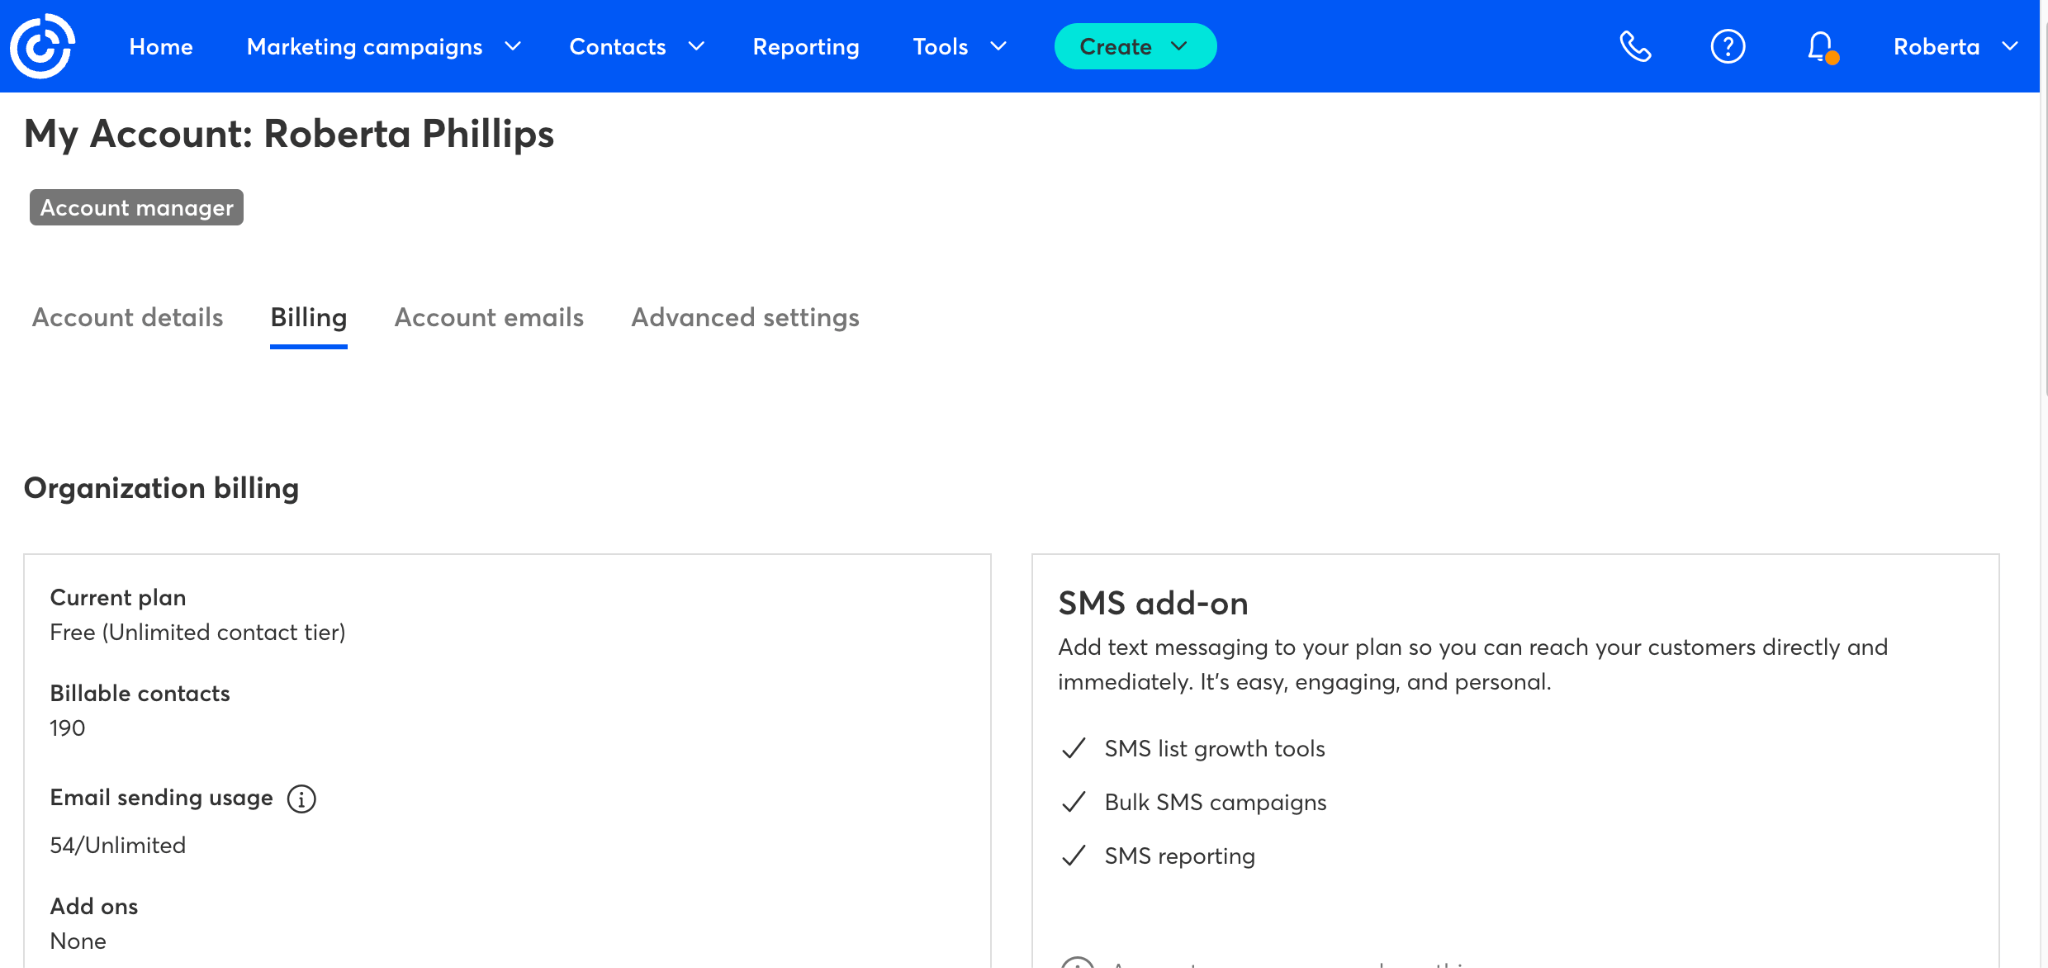
Next up, you have the billing information. Here you can change your plan, add payment information, and manage any add-ons such as SMS.
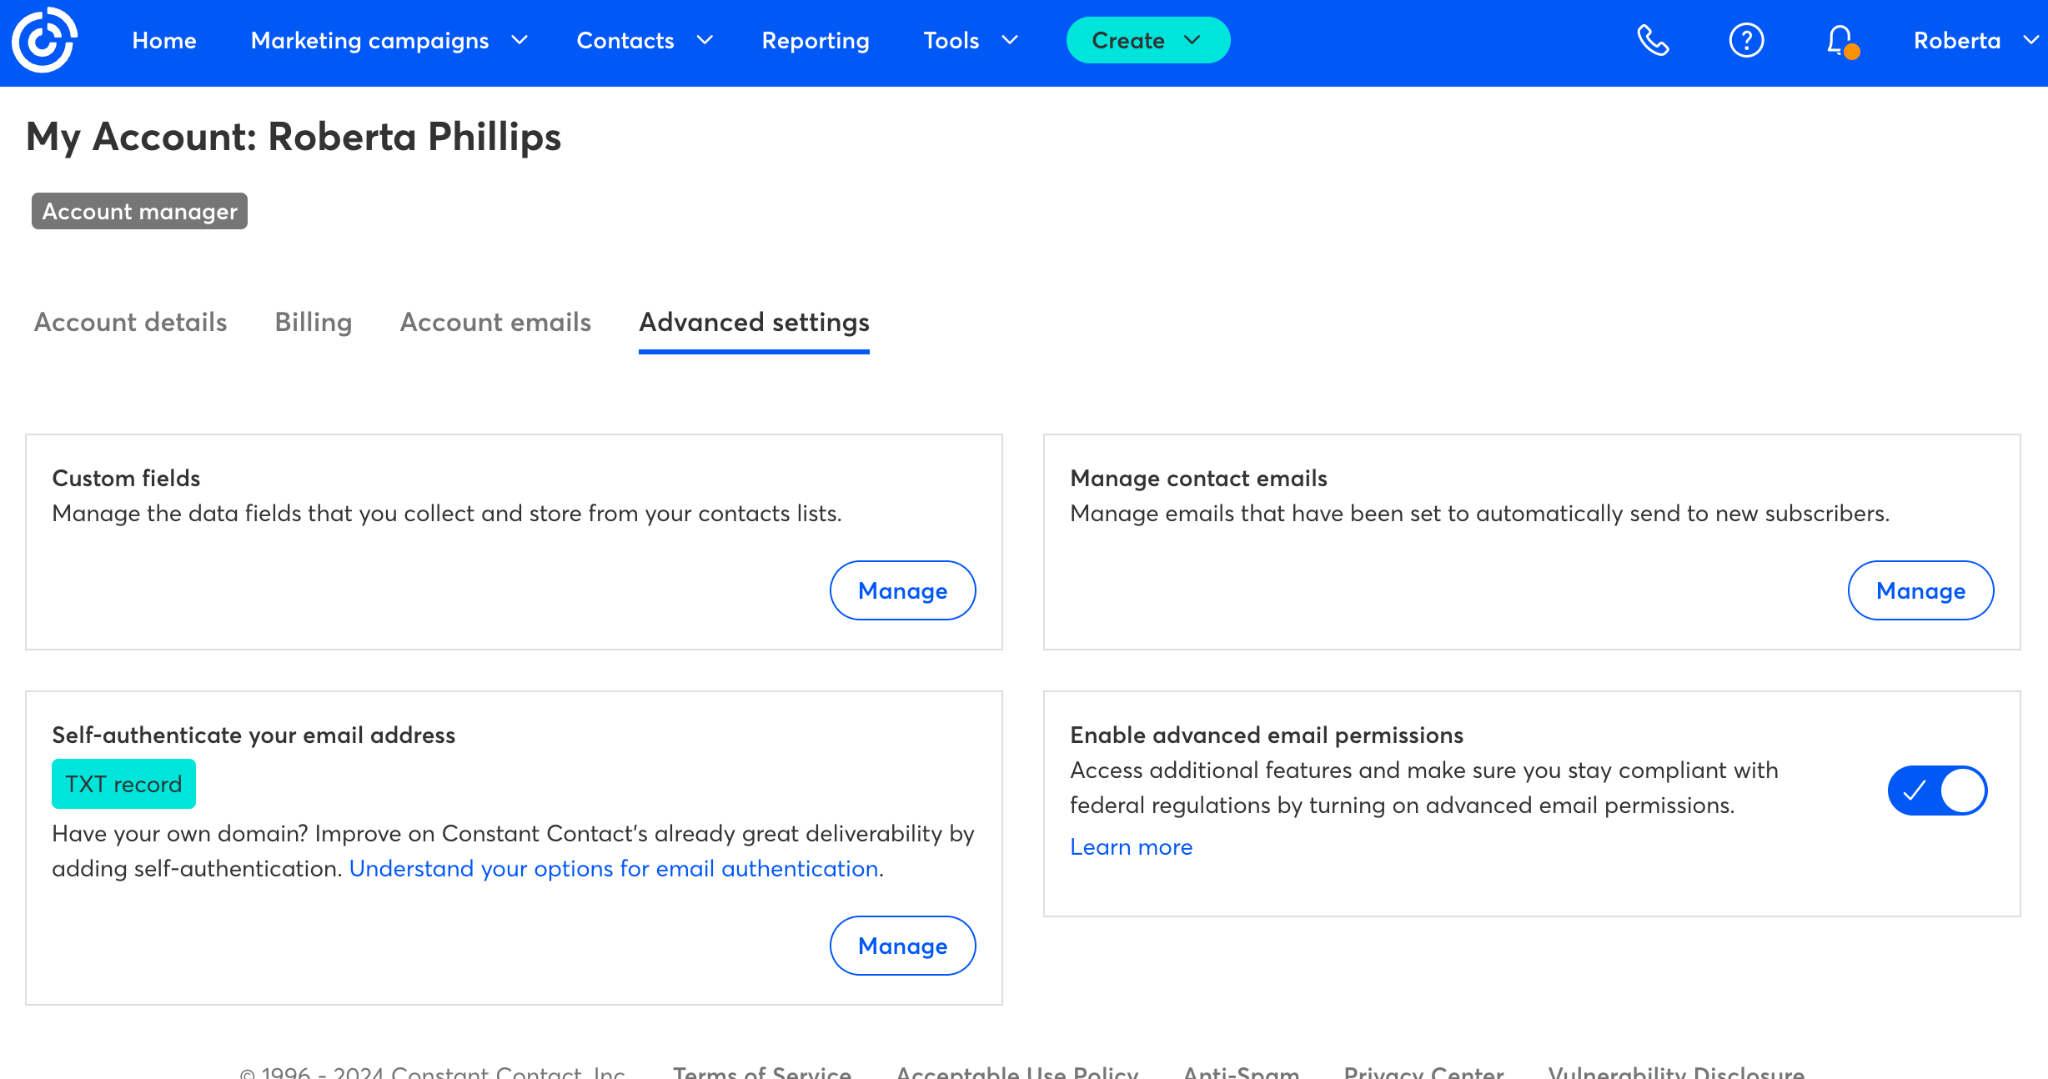
The final part of your account settings setup is your advanced settings, where you can configure your email deliverability settings, authentication, and other important options to enhance the performance of your email campaigns.
Step 3: Create your First Contact List with Constant Contact
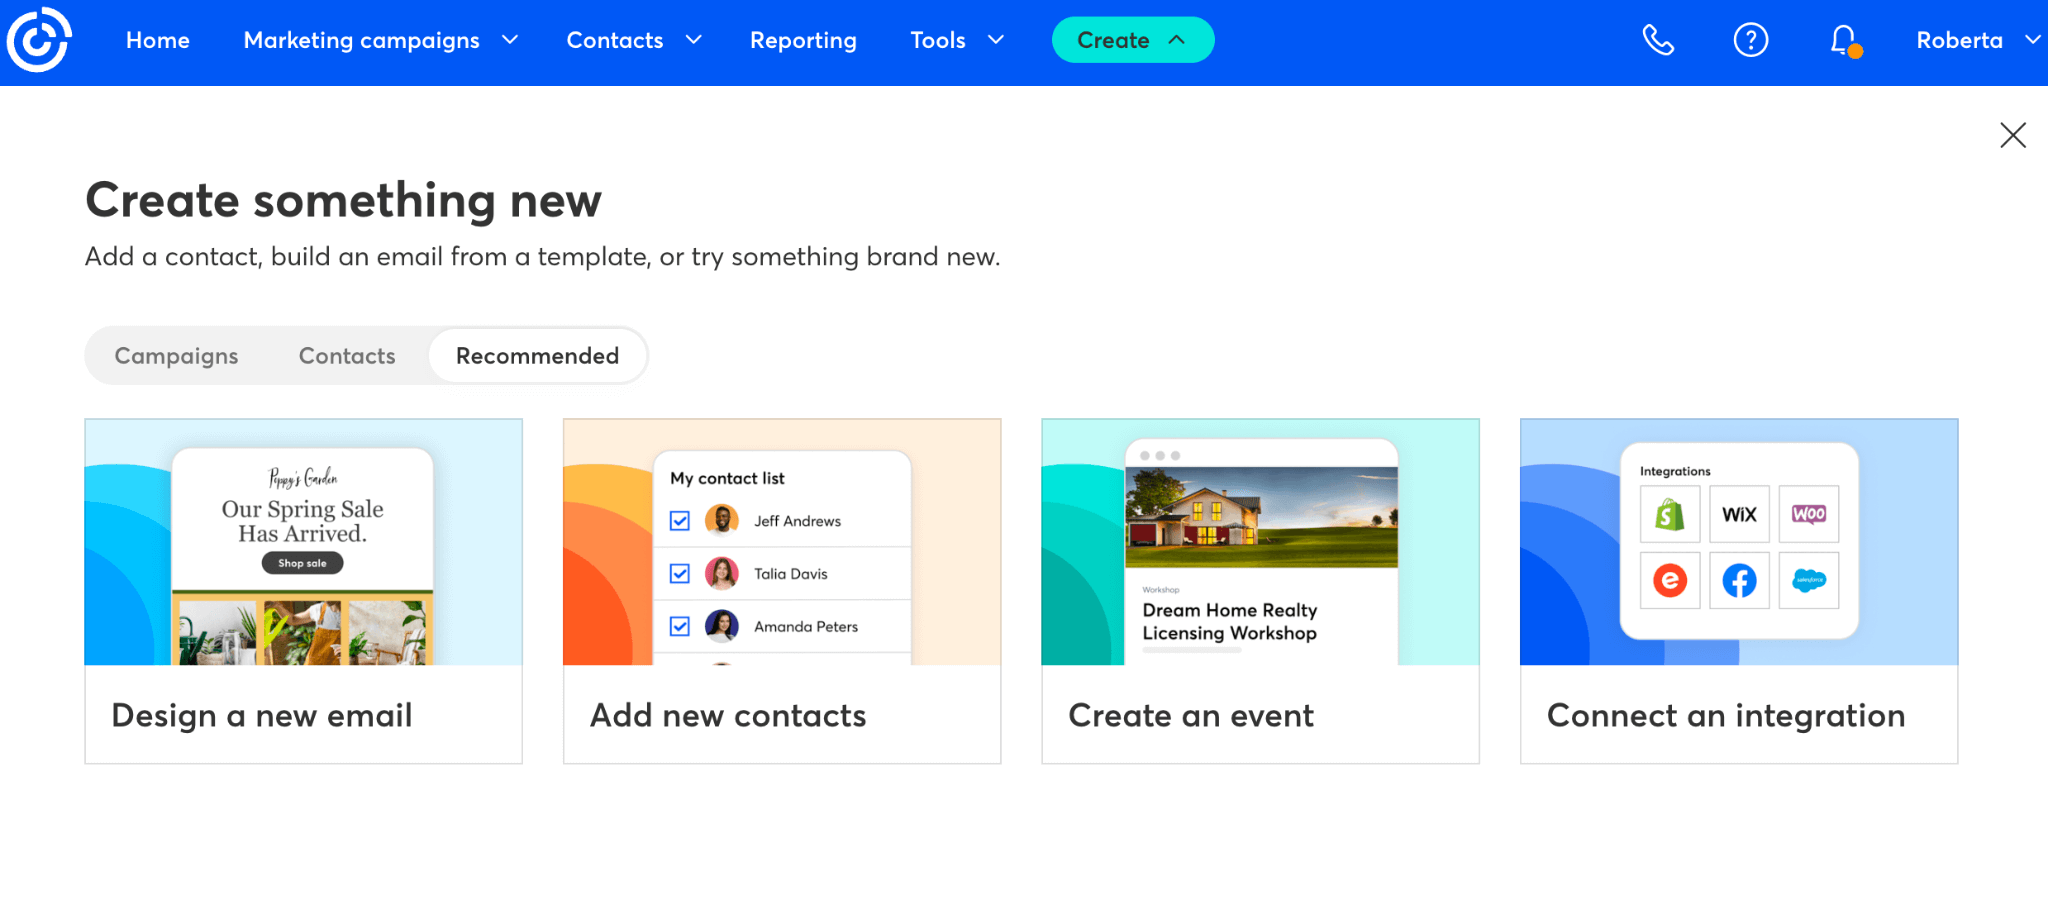
You can see in the top menu there is a CTA button that says “Create”. From here you have the option to add your contacts, build an email campaign, create an event, and even add an integration. Let's start by creating your first contact list…
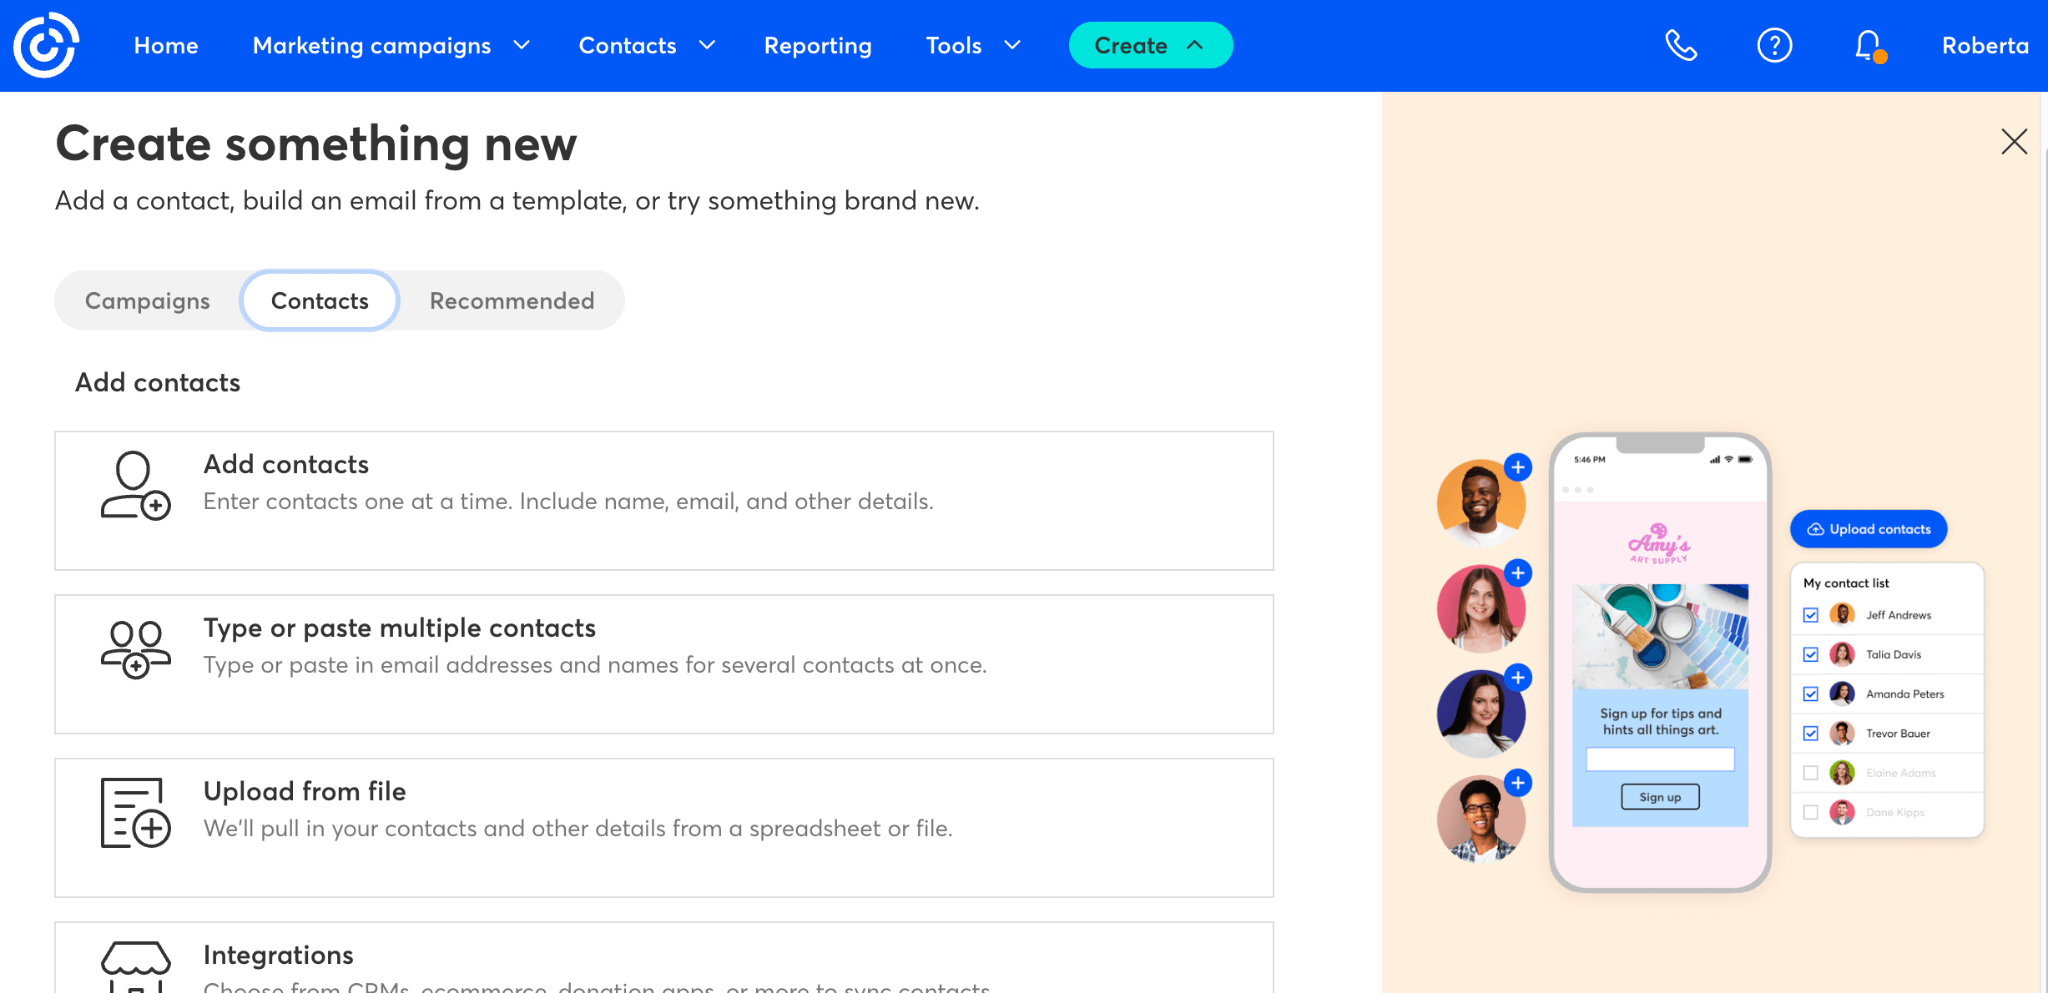
- In this same Create tab, click on the “Contacts” section. Depending on how many contacts you have, you can choose to add contacts one by one, type or paste multiple contacts at a time, upload from a file, or lastly, import contacts from your third-party integrations.
- For this Constant Contact tutorial, we will choose the “Upload from file” option which is made up of three simple steps.
- First things first, ensure that your data is correctly formatted within your spreadsheet or file and includes the necessary fields that you’d like, such as the name of your user and their email address.
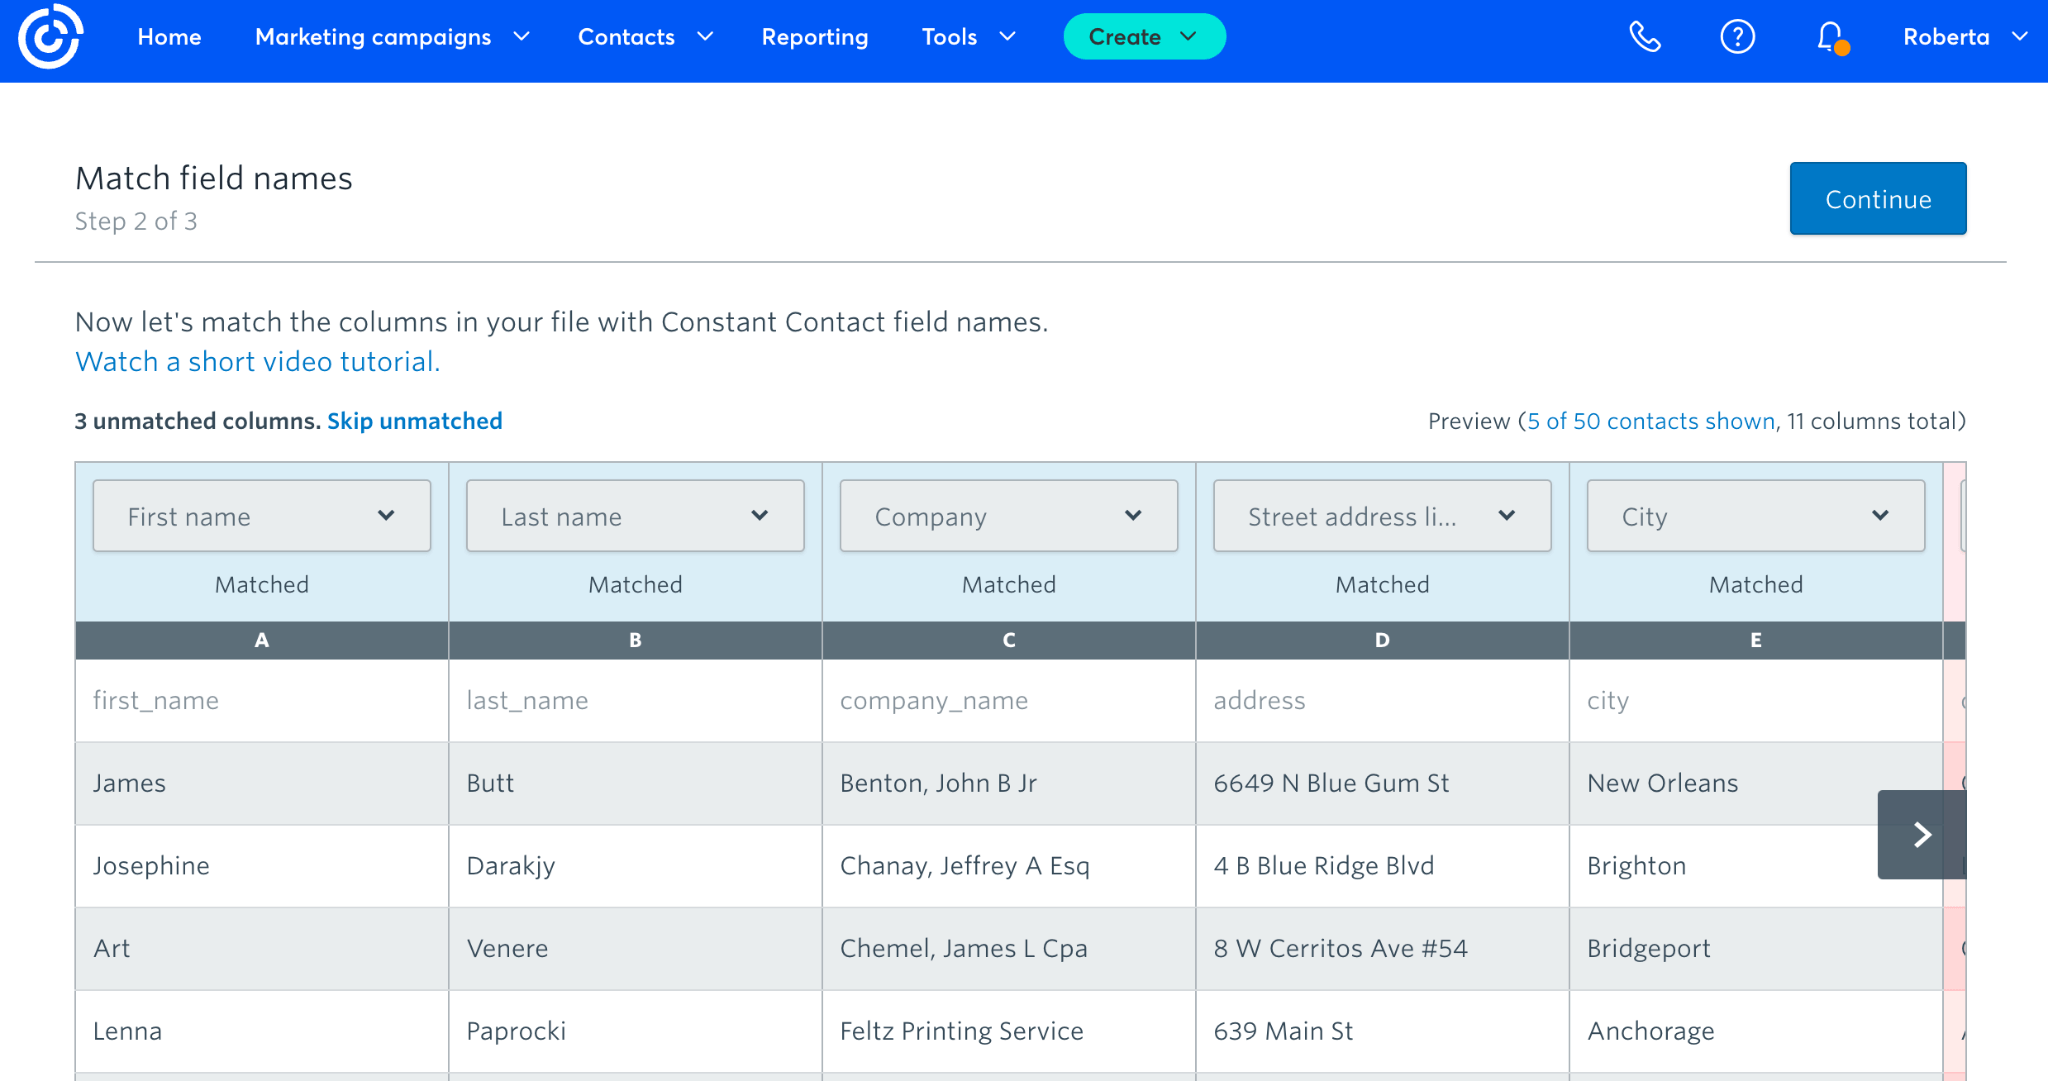
Next, you’ll need to map your fields to match the data in your CSV file. This ensures that the information is correctly imported. This is particularly important when you come to segment and organize your contacts, or even personalize your emails, e.g. with *first name* or *company* fields.
The third and final step is to verify that you have consent to upload these contacts and then finally, choose a list to add them to. You can either create your list beforehand or simply “Add a new list” here. Keep your list names as self-explanatory as possible to avoid any confusion. Otherwise, contact lists can get pretty messy!
You can also add tags to contacts at this stage to help with segmentation and organization. There you have it, your first email list has successfully been created!
Step 4: Creating Your First Email Campaign with Constant Contact
Now onto the more exciting part of your Constant Contact journey, creating your first email campaign!
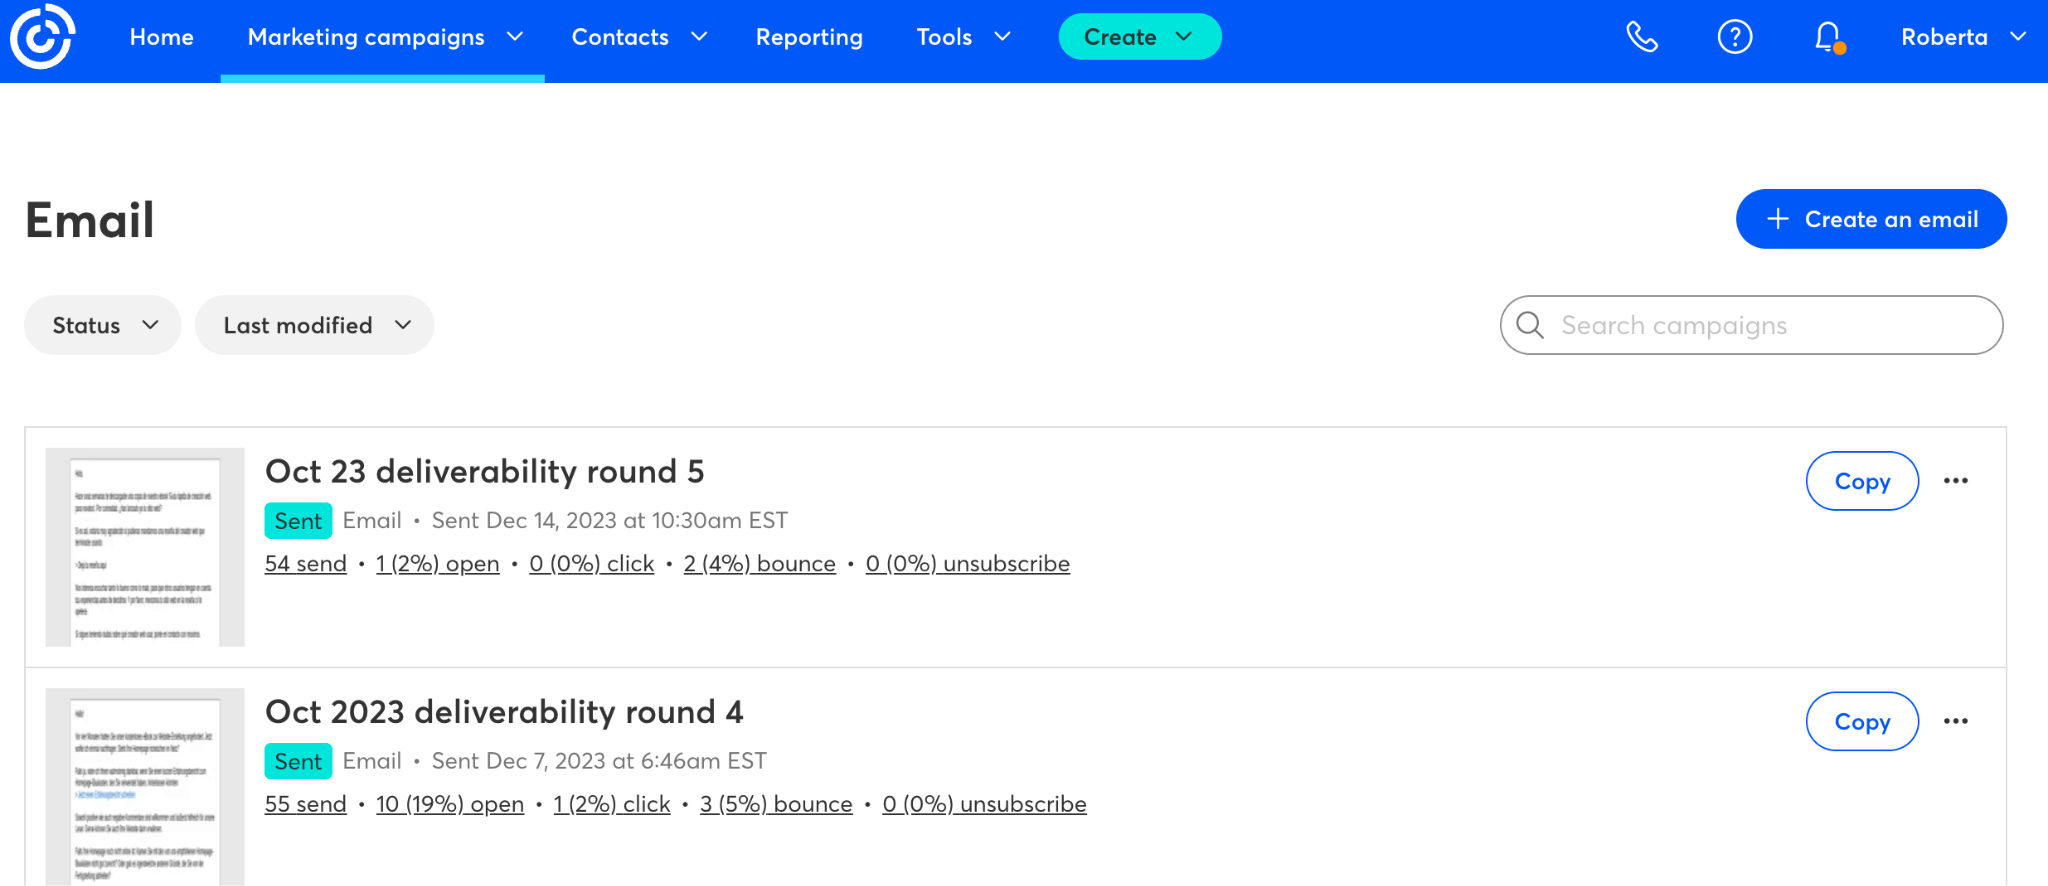
Click on the “Marketing Campaigns” tab in your top Constant Contact menu and select “Email” (you can also head to the “Create” CTA that we visited earlier, the choice is yours!)
Once you are in the Marketing Campaigns tab, click “+ Create an email”
Choose how you want to create your email. You can choose one of the following methods:
- Start from scratch
- Use your own HTML
- Import PDF to email
- Basic note
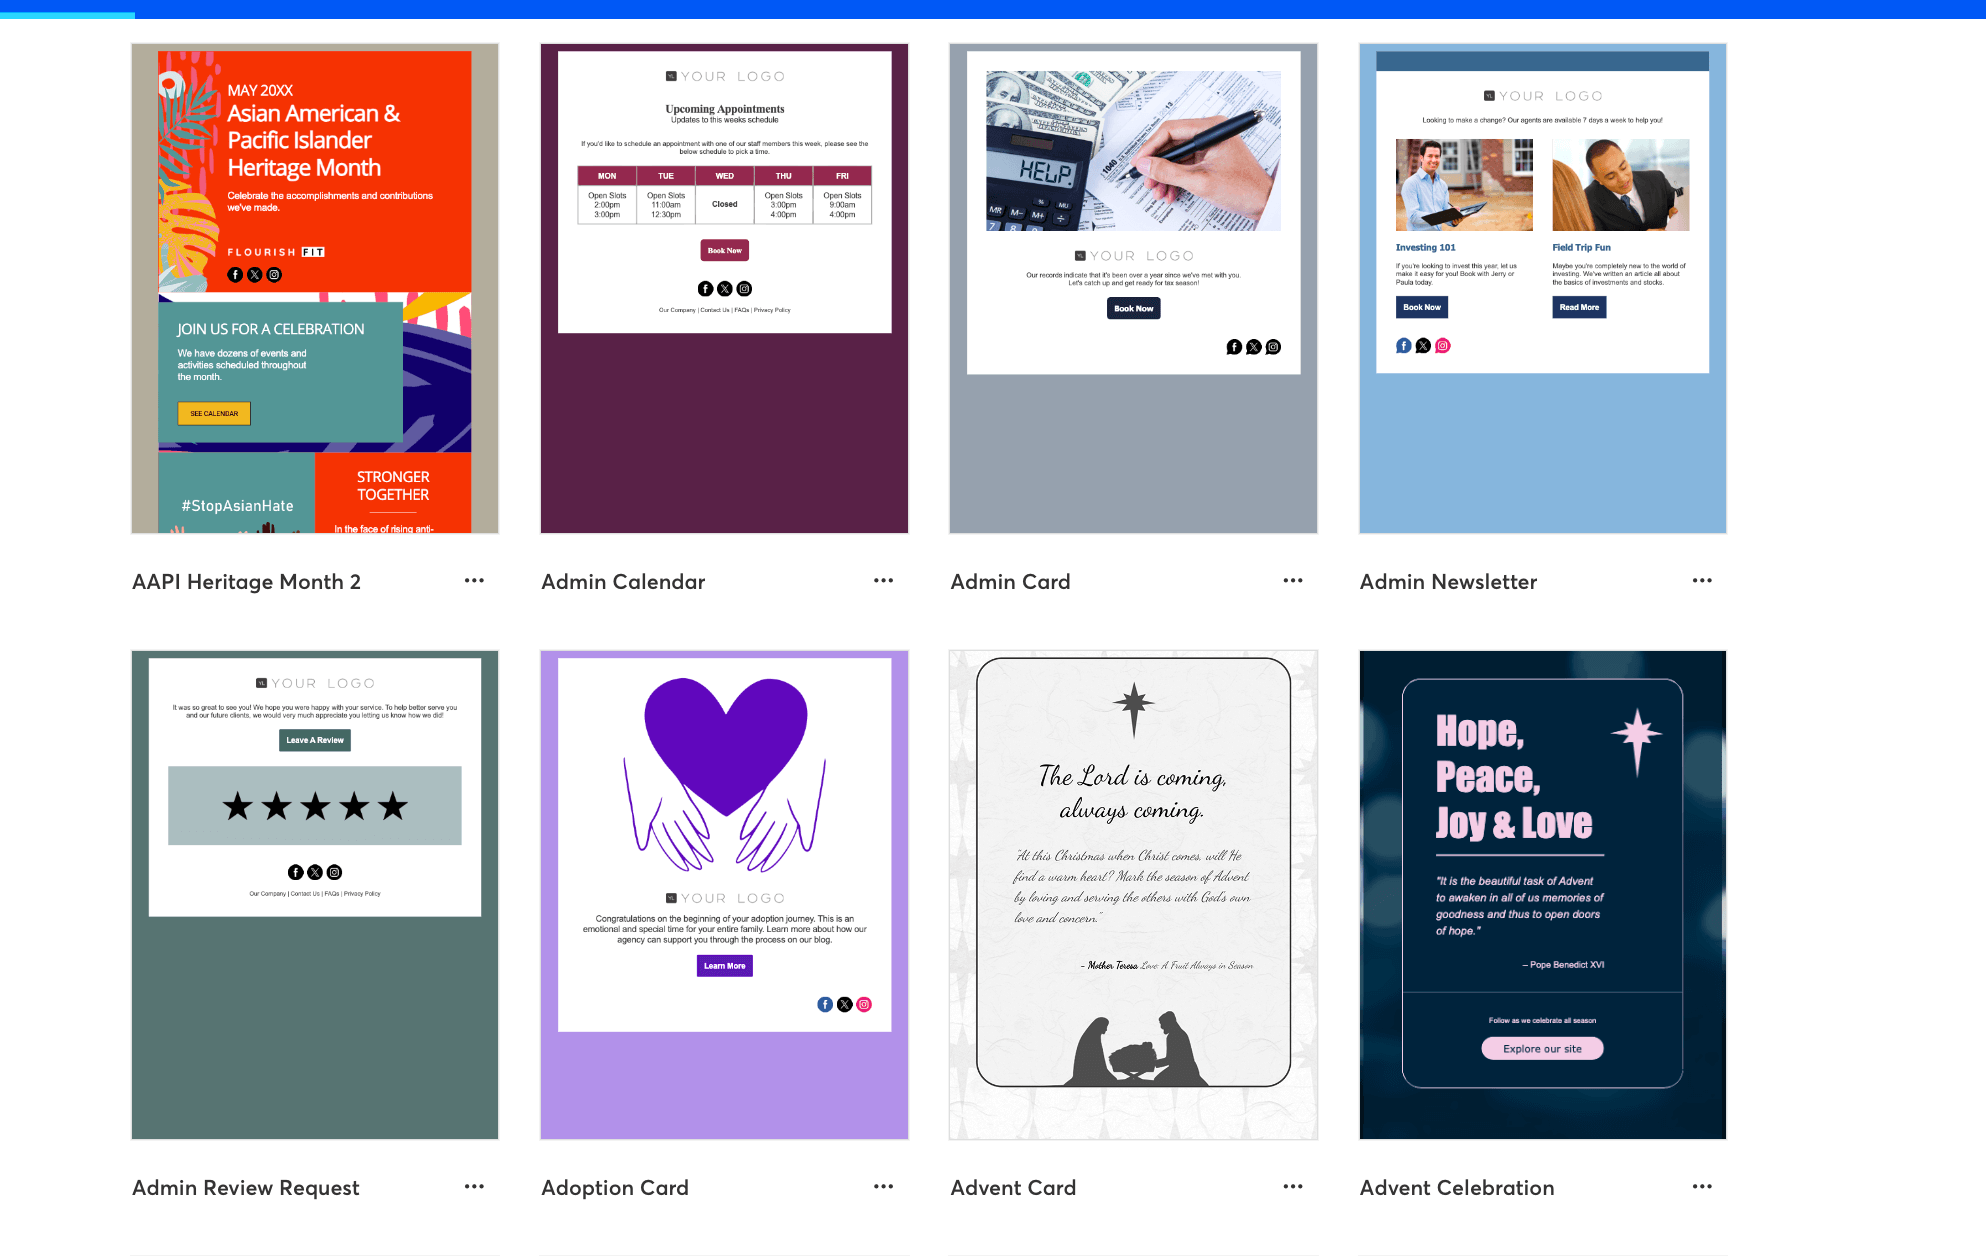
Alternatively, you can choose from a pretty impressive selection of Constant Contact email templates. They have hundreds of fully customizable templates to choose from for what seems like every occasion. And – you can even search for the template that you’d like to use which is a pretty handy feature that a lot of email providers are missing.
Once you’ve chosen a template, you will be directed to their user-friendly email editor. This is your time to get creative with your email and personalize to your heart’s content.
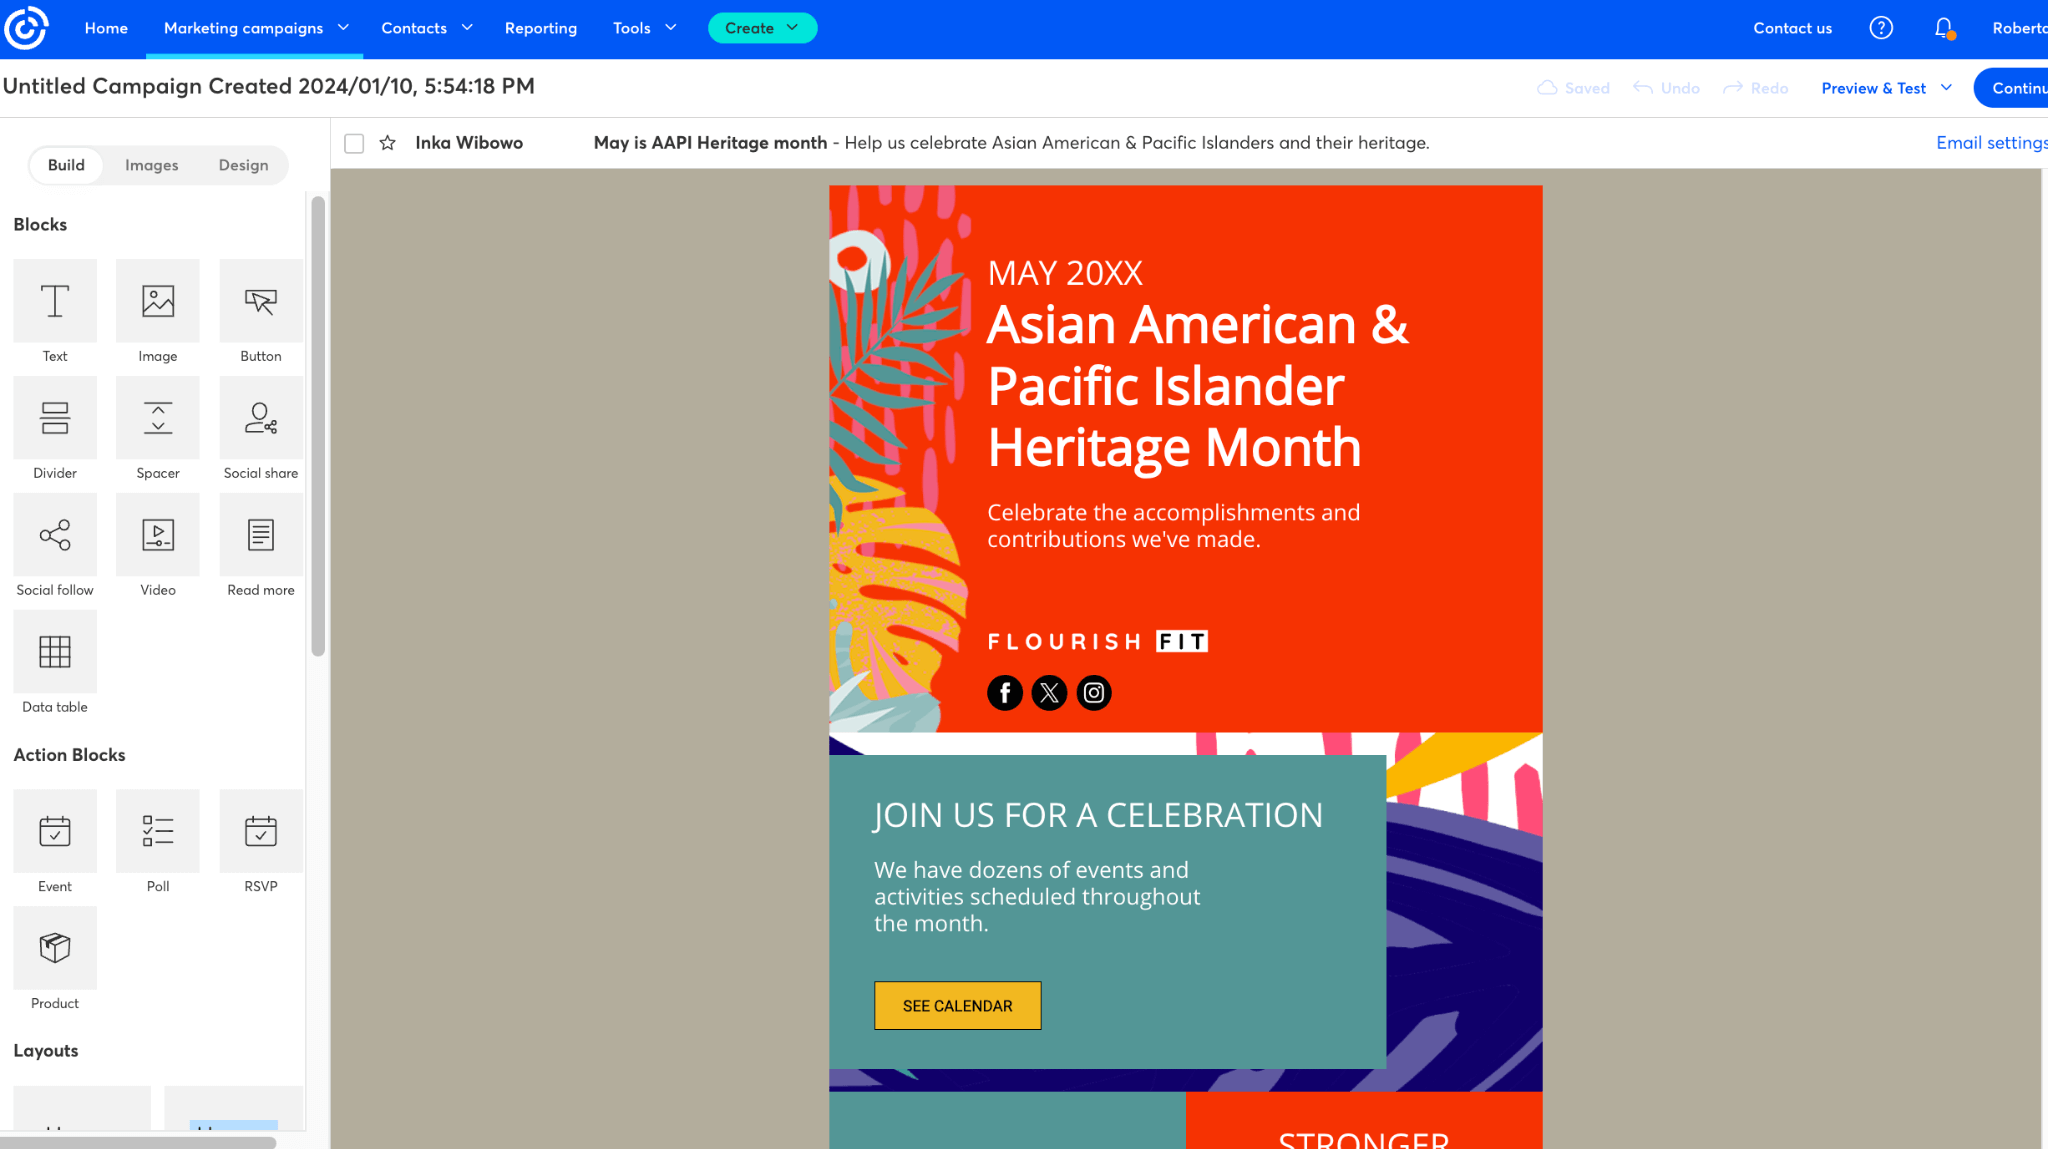
You can edit your sender details, email subject, and preheader by clicking on the tab above the email editor. You can also get an idea of how it’ll look in your recipient's inbox.
Once you are happy with the overall look and feel of your first email campaign, you can head over to “Preview and Test” in the top right corner of the email campaign editor.
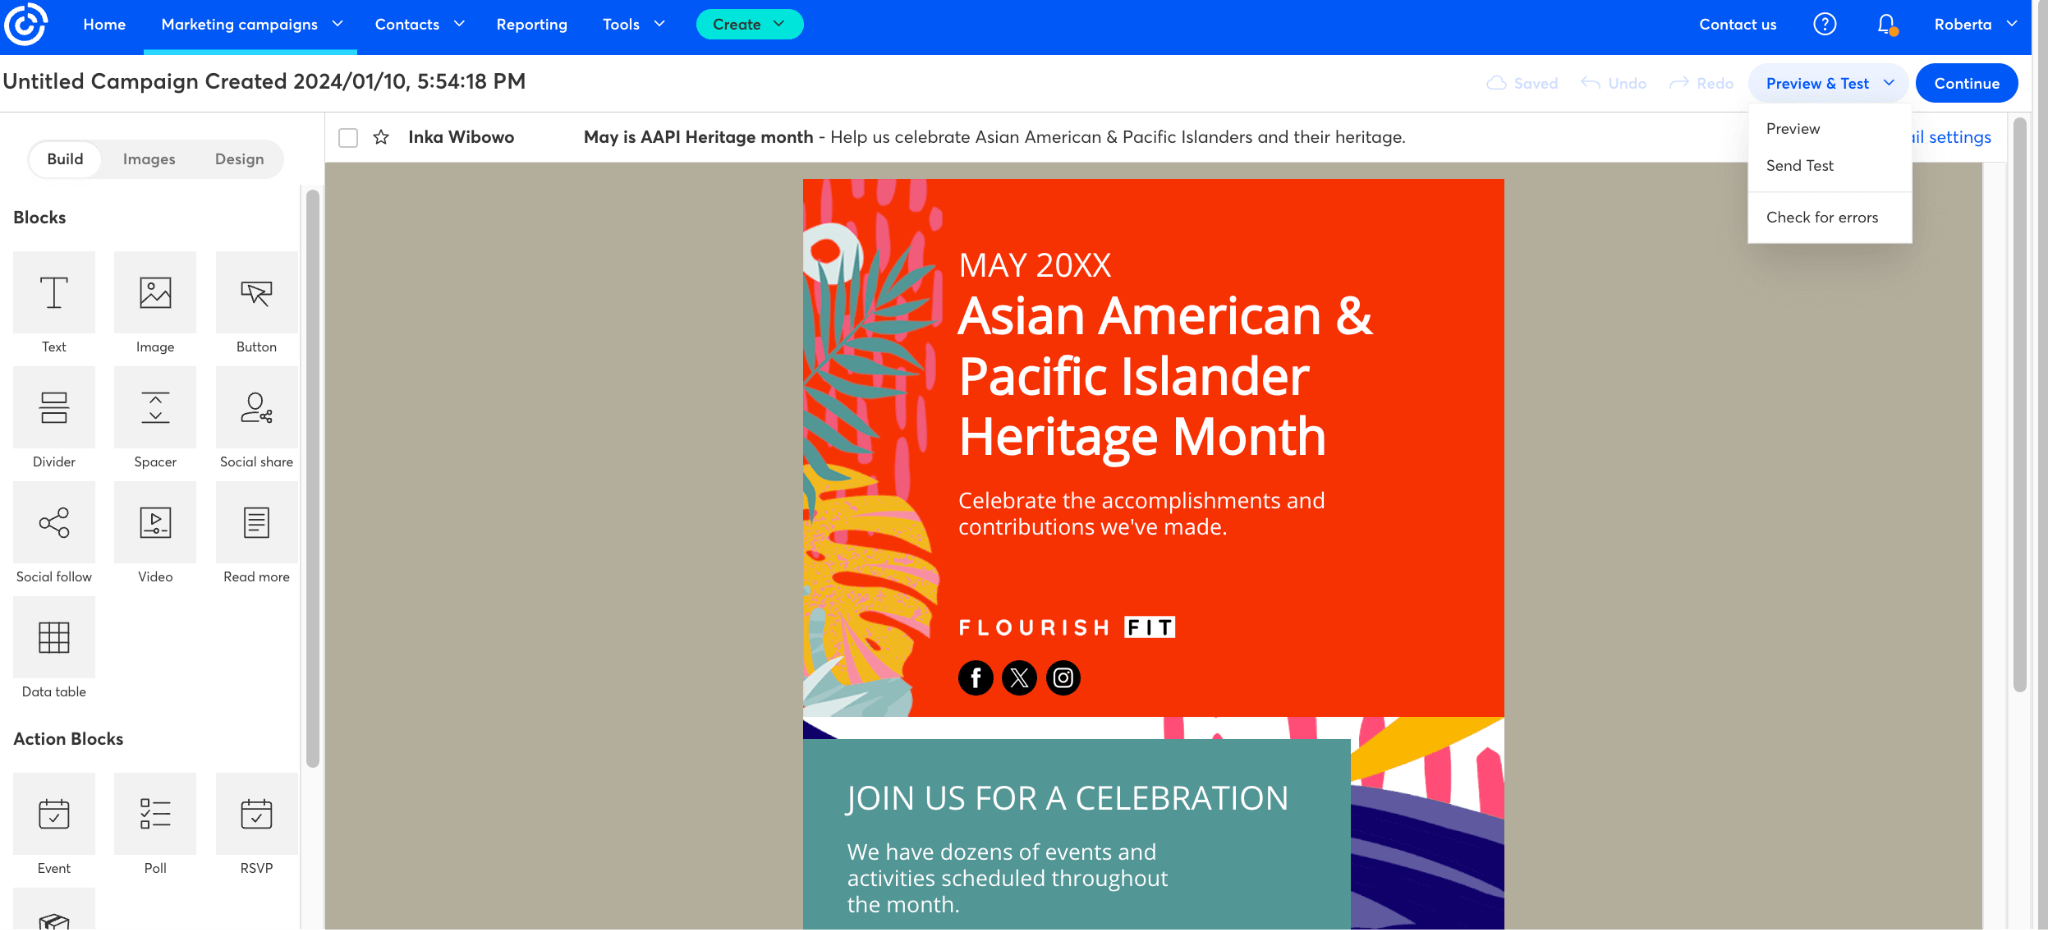
This gives you the option to preview your email on different devices, send a test to yourself or a team member/client, and lastly, a pretty impressive feature – “Check for errors”. This tool scans your email for any common mistakes such as broken links or subject line length, and encourages better email practices.
Step 5: Preview and Send Your Email Campaign
- Once you are happy with the email campaign you can click “Continue”. Now you’ll have the chance to review and edit your sender details, including the “From Name,” “From Email,” and “Email Subject”, and last but not least, select your email list.
- Now you can schedule it for a specific date and time or send it immediately.
And voila! You've successfully created and sent your first email campaign in Constant Contact.
Constant Contact Tutorial: Conclusion
We hope this Constant Contact setup guide has helped get you started with this powerful email marketing platform, from your initial account setup to sending emails that generate leads. Good luck in your Constant Contact journey!
Want to start setting up more advanced campaigns with Constant Contact? Check out our guide on building a marketing automation strategy.
If you have any further questions or need assistance with specific features, don't hesitate to leave a comment below!
The author
Learn more about us
Our Methodology
This article has been written and researched following our EmailTooltester methodology.
Our Methodology