
Email marketing is one of the most effective ways to engage with your audience, promote your products or services, and drive conversions. Mailchimp is a leading platform for businesses of all sizes, offering a range of powerful features to help you build, manage, and automate your email marketing campaigns.
In our detailed Mailchimp tutorial, we’ll walk you through how to set up Mailchimp from scratch, including creating an account, importing contacts, building your audience, setting up automations, and finally, creating a newsletter. By the end of this tutorial, you’ll be ready to take full advantage of Mailchimp’s capabilities and grow your business with targeted email campaigns.
Why Choose Mailchimp?
Mailchimp is one of the most popular email marketing platforms for various reasons:
- Beginner-Friendly: Its user interface is simple and intuitive, making it easy to get started even if you're new to email marketing.
- Handy Features: It offers features like audience segmentation, marketing automations, detailed analytics, and generative AI features, all designed to help you make the most of your marketing efforts.
- Ecommerce Integrations: Mailchimp connects seamlessly with popular e-commerce platforms like Shopify, Wix, WooCommerce, and BigCommerce, helping you sync customer data and target your campaigns effectively.
If you’d prefer to learn by watching, follow our Mailchimp tutorial video:

Step 1: Getting Started with Mailchimp
First things first, head over to Mailchimp and create your account. The good news is that if you have fewer than 500 contacts, you can start with Mailchimp's free forever plan which is their best choice for small businesses or those just getting started.
The free plan includes basic features such as single-step automation and audience segmentation. Once you’ve upgraded to a paid plan you’ll gain access to more advanced tools like A/B testing and much more detailed reports.
Set Up Your Account Preferences
Once your account is created, you'll need to input some key information about your business:
- Business Name and Website: These details will appear in your emails, helping recipients recognize your brand.
- Physical Address: This is required by law (under the CAN-SPAM Act) and will be included at the bottom of every email you send.
- Industry and Audience Information: This helps Mailchimp tailor its recommendations to your business type and audience.
MailerLite Email Marketing
The Affordable Mailchimp Alternative for Your Small Business
Step 2: Setting up your Domain
One of the most important steps you need to take when setting up your Mailchimp account is to verify your domain and set up email authentication methods such as DKIM (DomainKeys Identified Mail) and SPF (Sender Policy Framework). This helps to ensure that your emails land in your subscribers' inboxes, not their spam folders.
Here’s how you can do that in Mailchimp:
Verify Your Domain
Mailchimp requires you to verify the domain you’ll use to send emails. This step ensures that you own the domain, which adds credibility and most importantly, improves deliverability.
- Click your profile icon in the top right corner and select Account and Billing.
- In the Settings menu, click Domains.
- Click Verify a Domain and enter the email address you want to use to send emails.
- Mailchimp will send a verification email to this address with a code. Open the email and enter the code back in Mailchimp to complete the verification.
Set Up DKIM and SPF
To boost your email deliverability and authenticate your emails, it’s important to set up DKIM and SPF records in your domain’s DNS settings. These records prove that Mailchimp is allowed to send emails on your behalf.
- Access Authentication Settings: After verifying your domain, click on “Start Authentication”.
- Add SPF Record: To configure SPF, you’ll need to update your domain’s DNS settings. Log in to your domain registrar (like GoDaddy, Namecheap, or your hosting provider) and add a TXT record to your DNS settings
- Verify DKIM and SPF in Mailchimp: Once you’ve added the SPF and DKIM records to your domain’s DNS settings, go back to Mailchimp and click Authenticate. Mailchimp will check your DNS settings to confirm everything is set up correctly.
Test Your Setup
Once you’ve verified your domain and set up DKIM and SPF, it’s a good idea to send a test email to ensure your authentication is working properly.
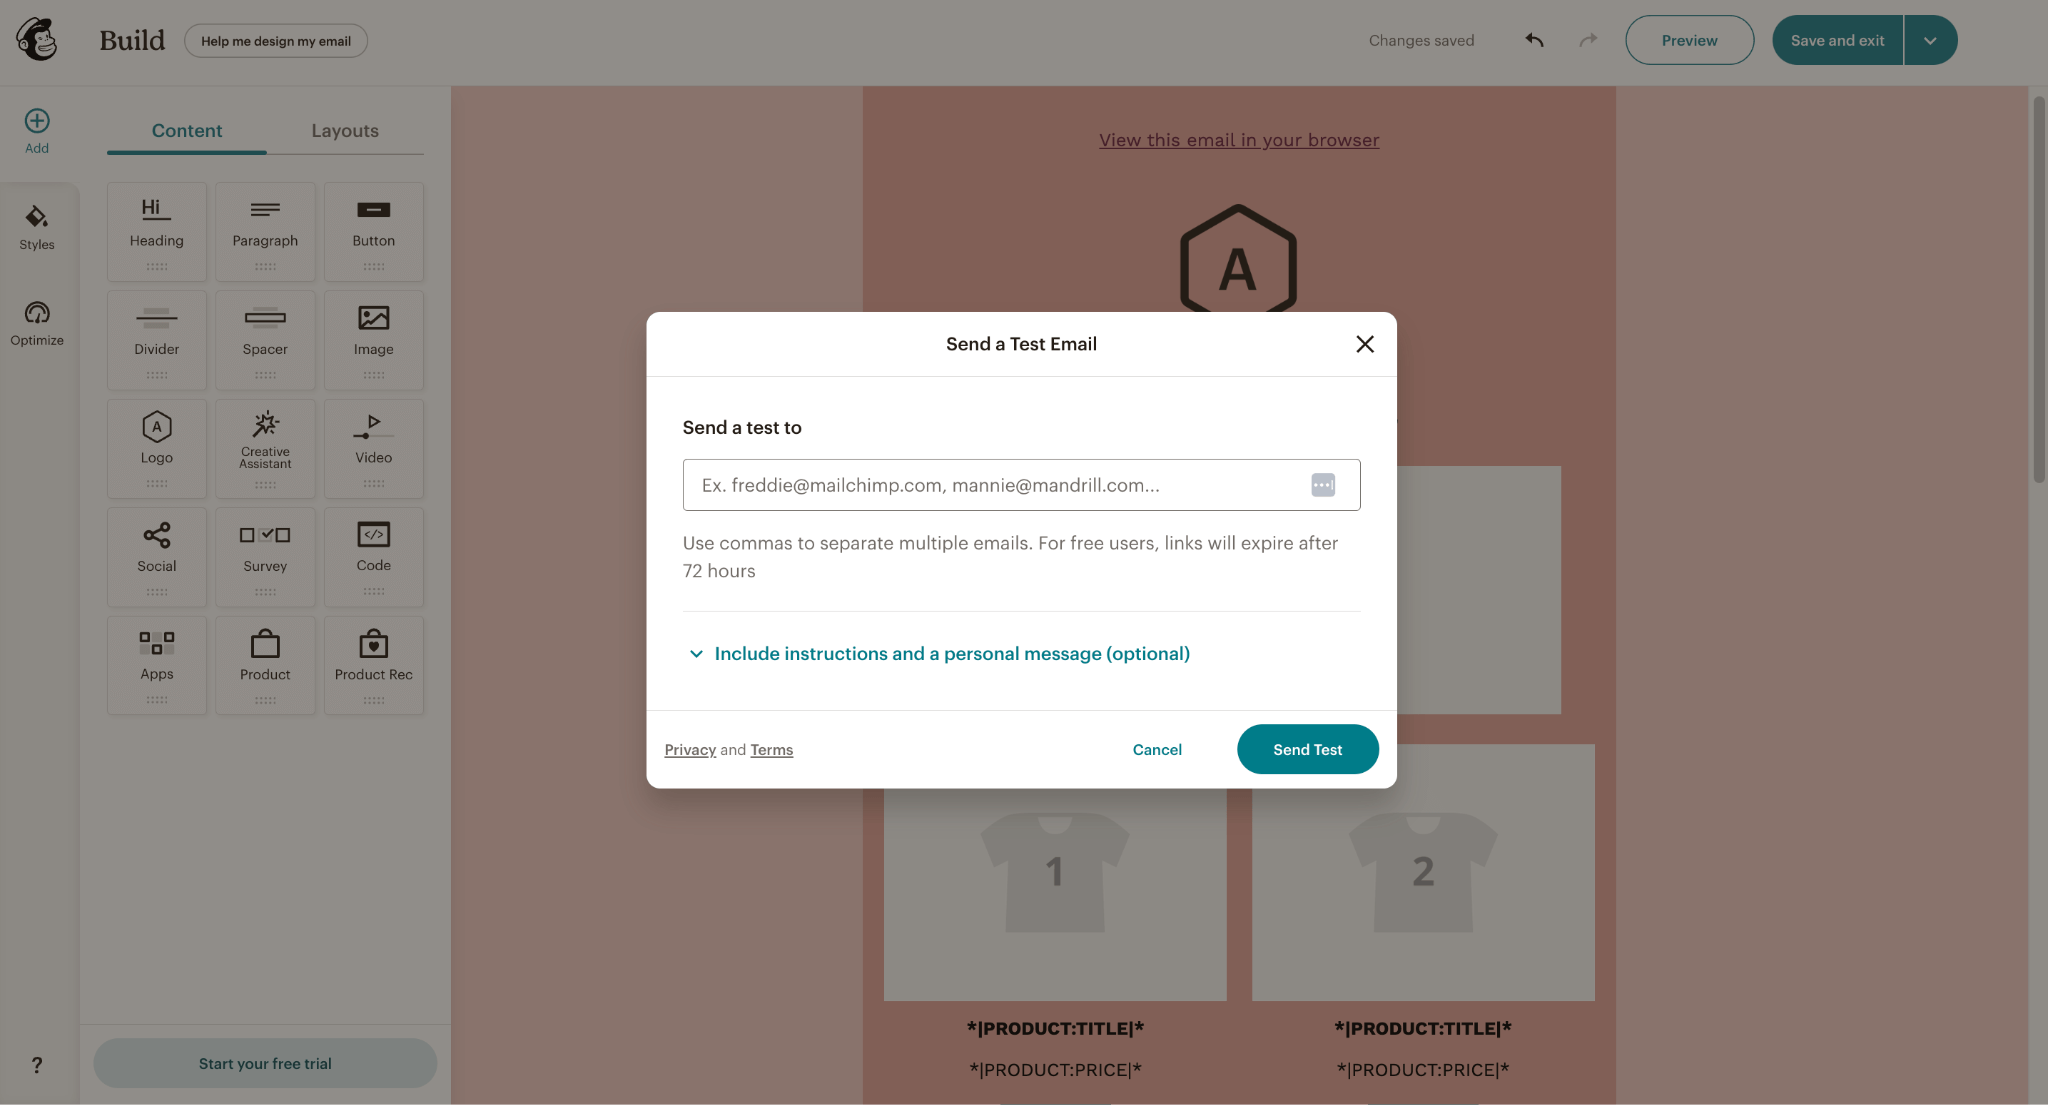
1. Send a Test Email: Go to any campaign you’ve created and use the Send a Test Email feature.
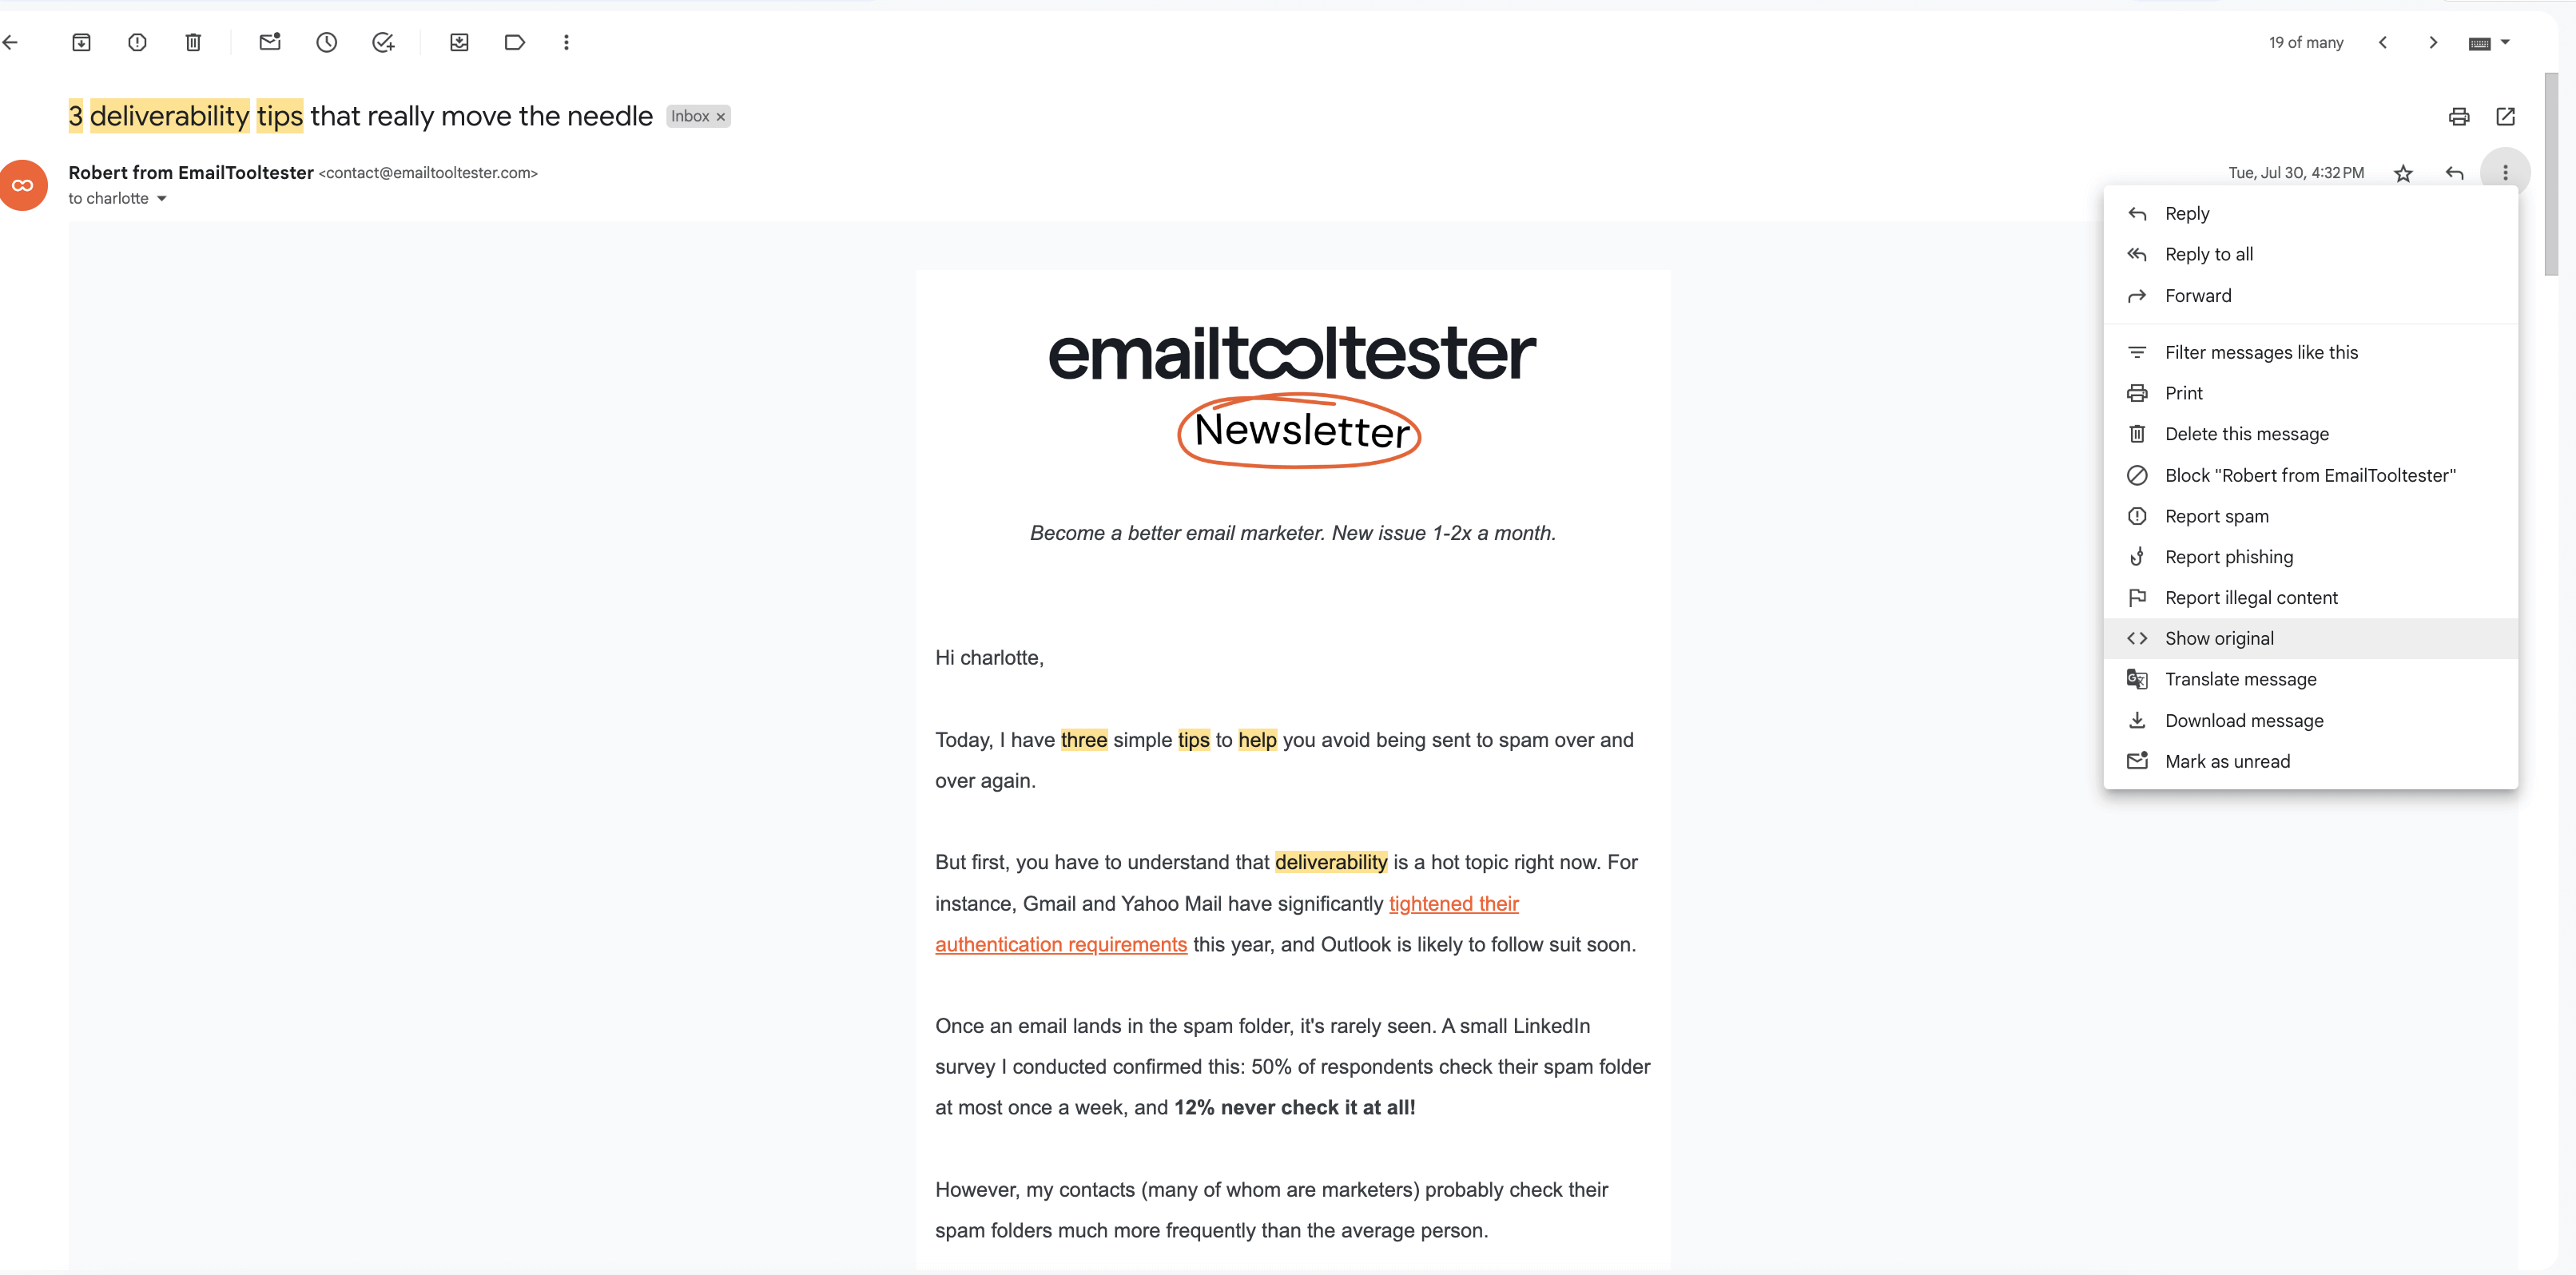
2. Check Email Header: In the test email, check the email headers to ensure both SPF and DKIM are passing. If you are on Gmail, click on the three dots, and then click on “show original” like below:
3. You should then see PASS next to your SPF, DKIM, and DMARC settings like so.
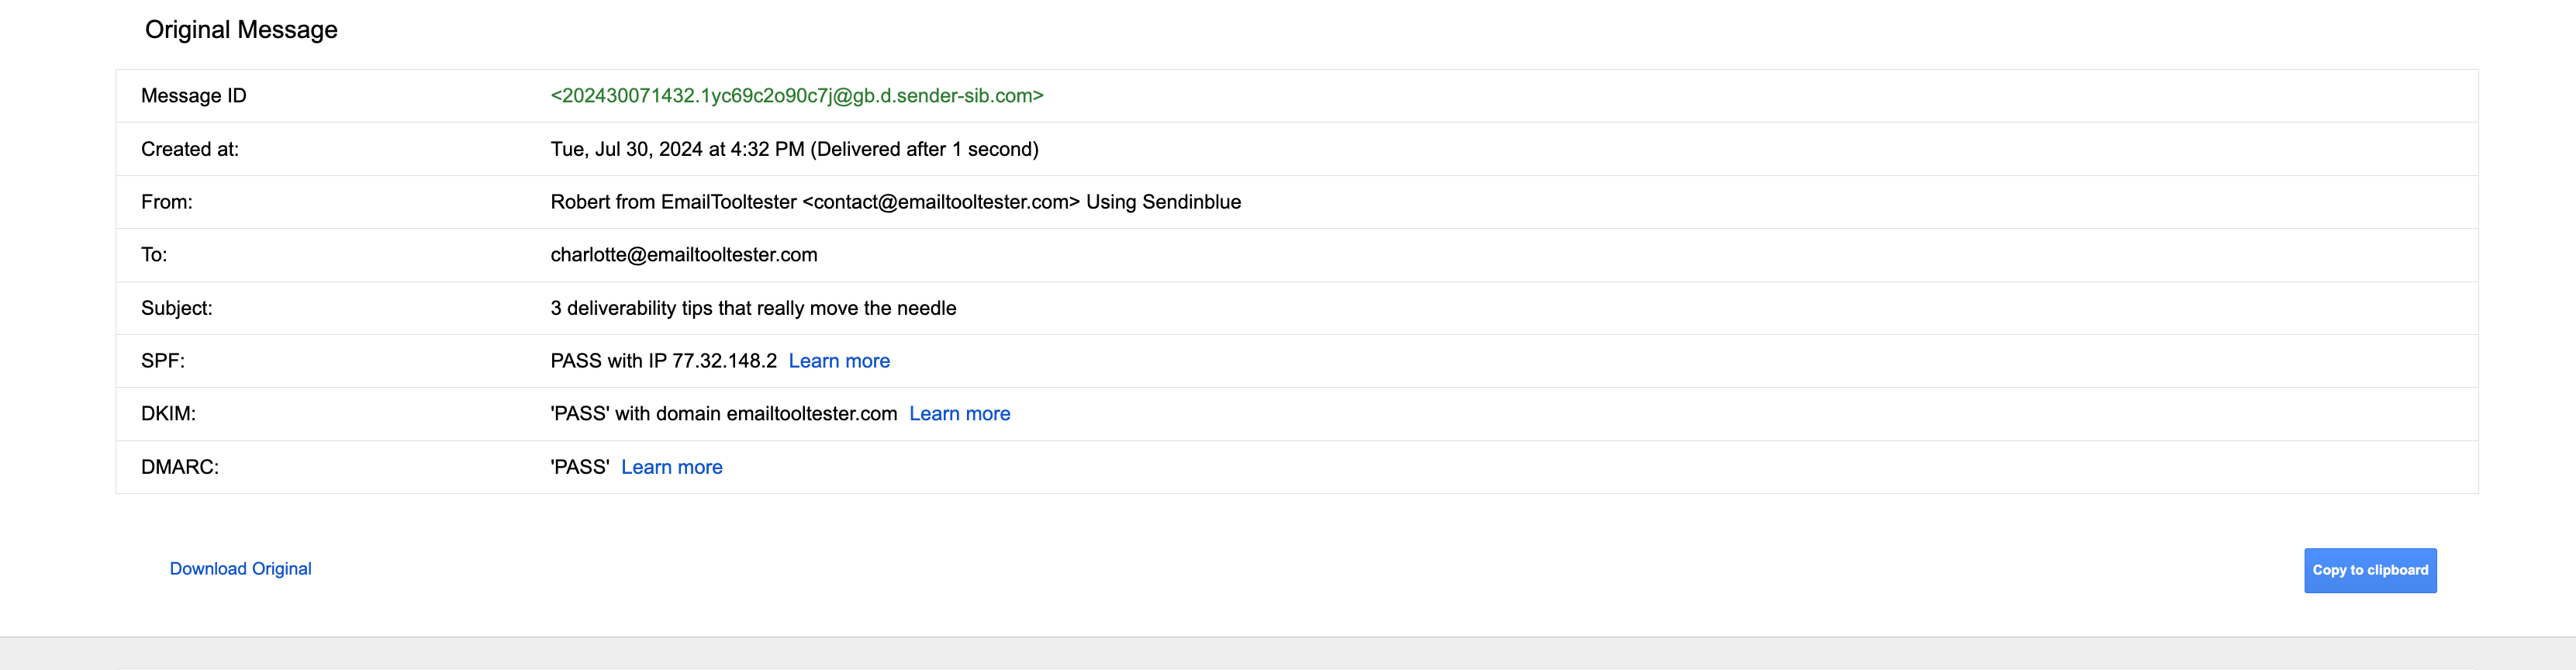
If all show PASS, then everything is working and set up how it should be.
Setting up your domain, DKIM, and SPF helps prevent your emails from being flagged as spam or phishing attempts. It also increases trust with email providers like Gmail, Outlook, and Yahoo, leading to higher deliverability and open rates.
Step 3: Setting Up Your Audience
In Mailchimp, an “Audience” is essentially your contact list. It’s where you store and manage all the people you want to communicate with through email campaigns.
While Mailchimp's free plan only allows for one audience, you can still segment this list into smaller groups based on customer behavior, demographics, or engagement.
We always recommend segmenting your audience as this will help you to keep your campaigns more targeted, making sure you send only the most relevant content to your audience.
Importing Contacts
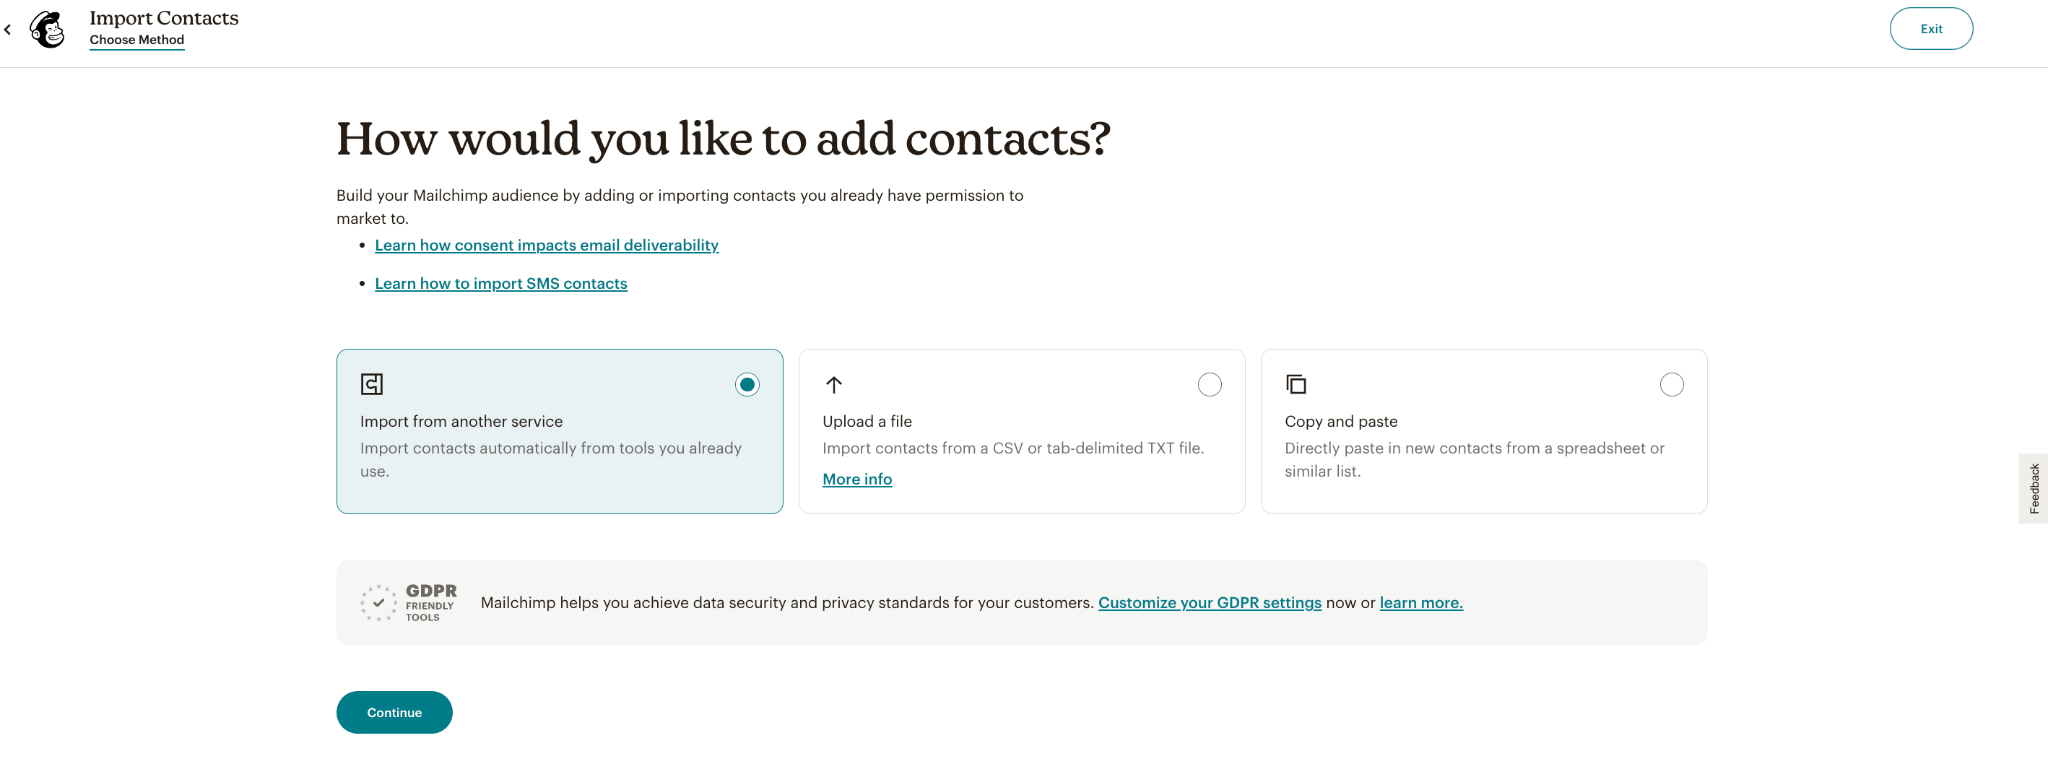
Once you've set up your audience, it's time to import your contacts. There are a few different ways to do this:
- Upload a CSV File: You can easily upload your existing contacts in a CSV format. Make sure to include fields like name, email, and any additional data like location or purchase history.
- Manual Entry: If you only have a few contacts, you can manually add them to your audience by typing them in or copying and pasting them.
- Import from Other Platforms: If you're switching from another email marketing provider, Mailchimp offers integration options for tools like Shopify, Squarespace and more. This makes transferring your contact list simple and quick.
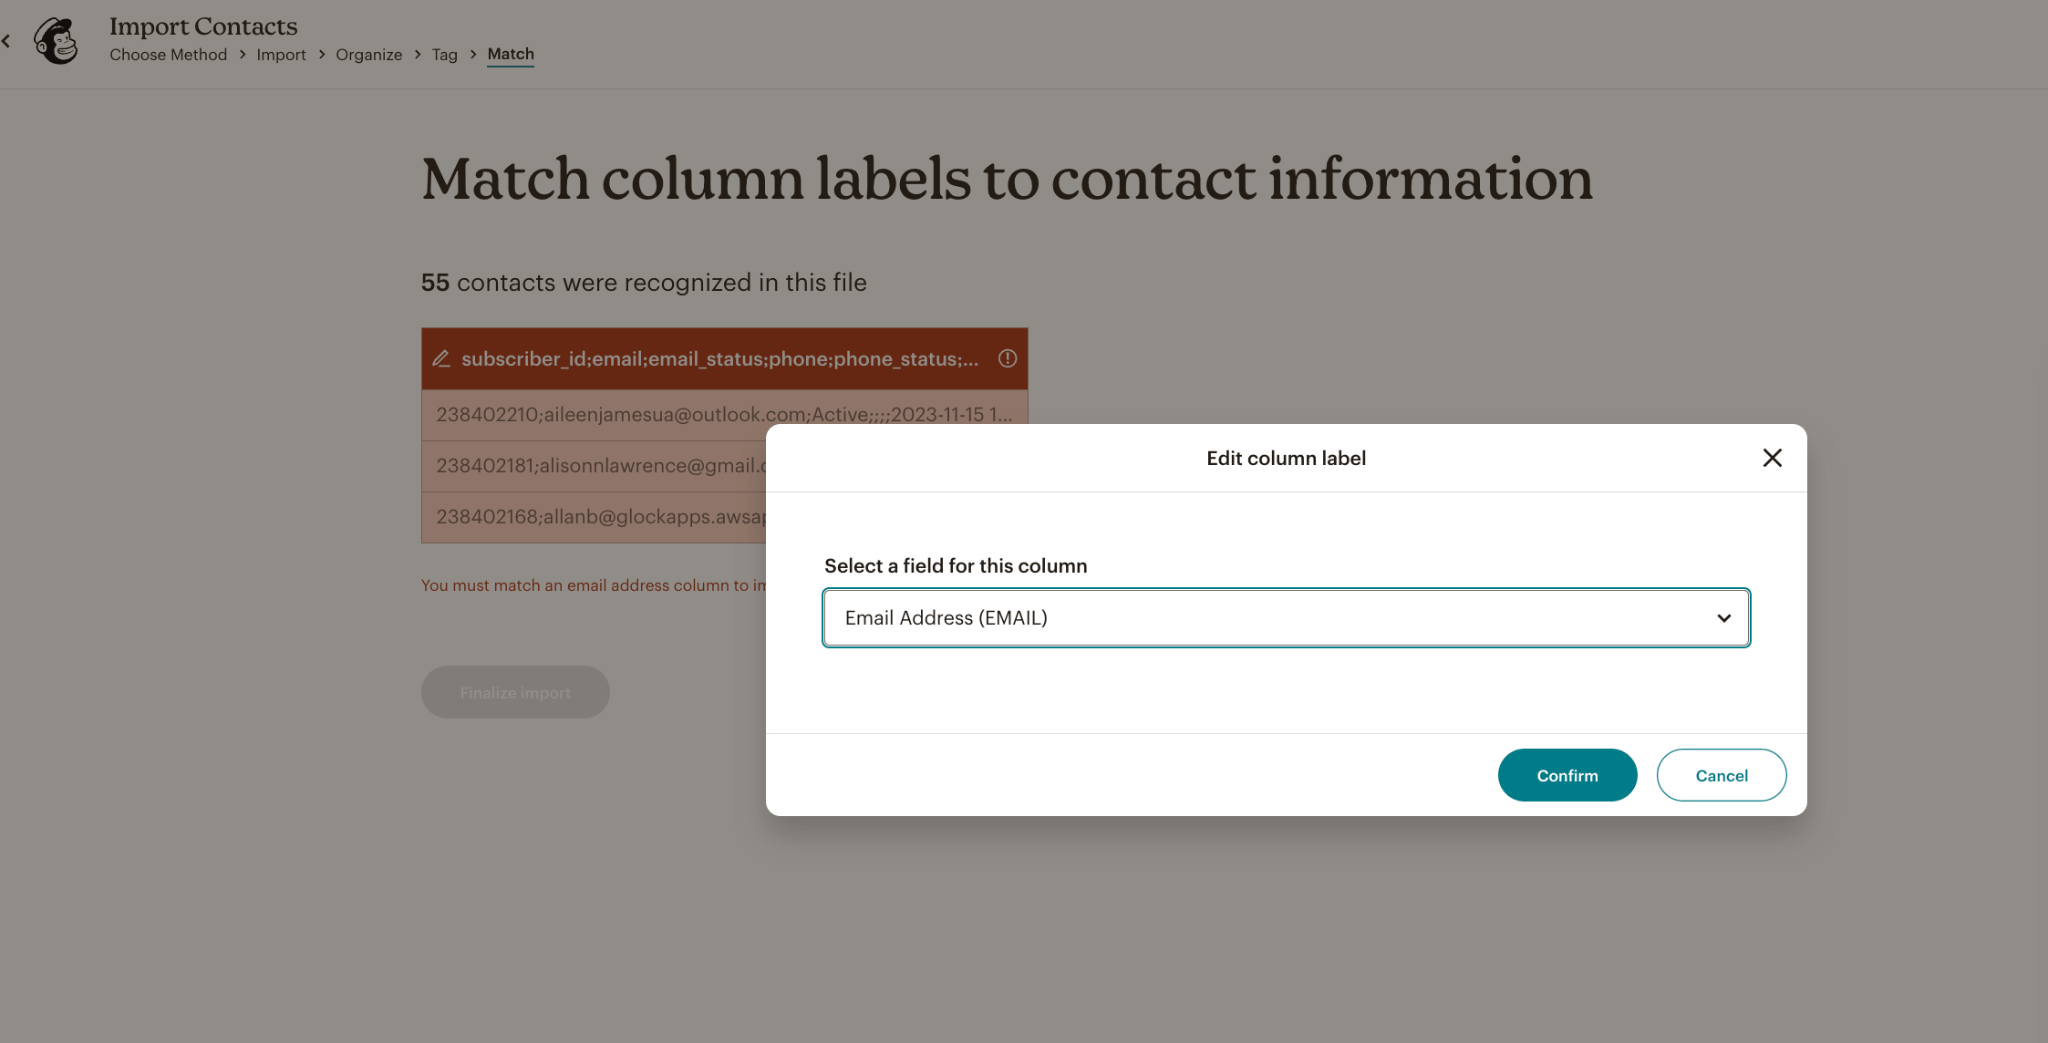
Organizing your Contacts
As your audience grows, it's important to keep your contact list organized. Use tags and segments to divide your audience into smaller, more targeted groups.
For example, you can tag contacts who have made a purchase in the last 30 days or segment those who haven’t opened any emails in the past six months. This helps you send more relevant content to each group, improving engagement and reducing the likelihood of unsubscribes.
We also wanted to give you a heads up on just how cheeky these chimps are – can you believe they count unsubscribed contacts towards your total audience count? Yep, pretty shocking.
Another reason to keep on top of your list hygiene.
Step 4: Growing your Email List
Once you’ve uploaded your contact list and neatly organized them into segments. It’s time to start focusing on growing your list.
As you can see, Mailchimp provides some quickstart actions and tips for creating a signup form, social post, and social ad. 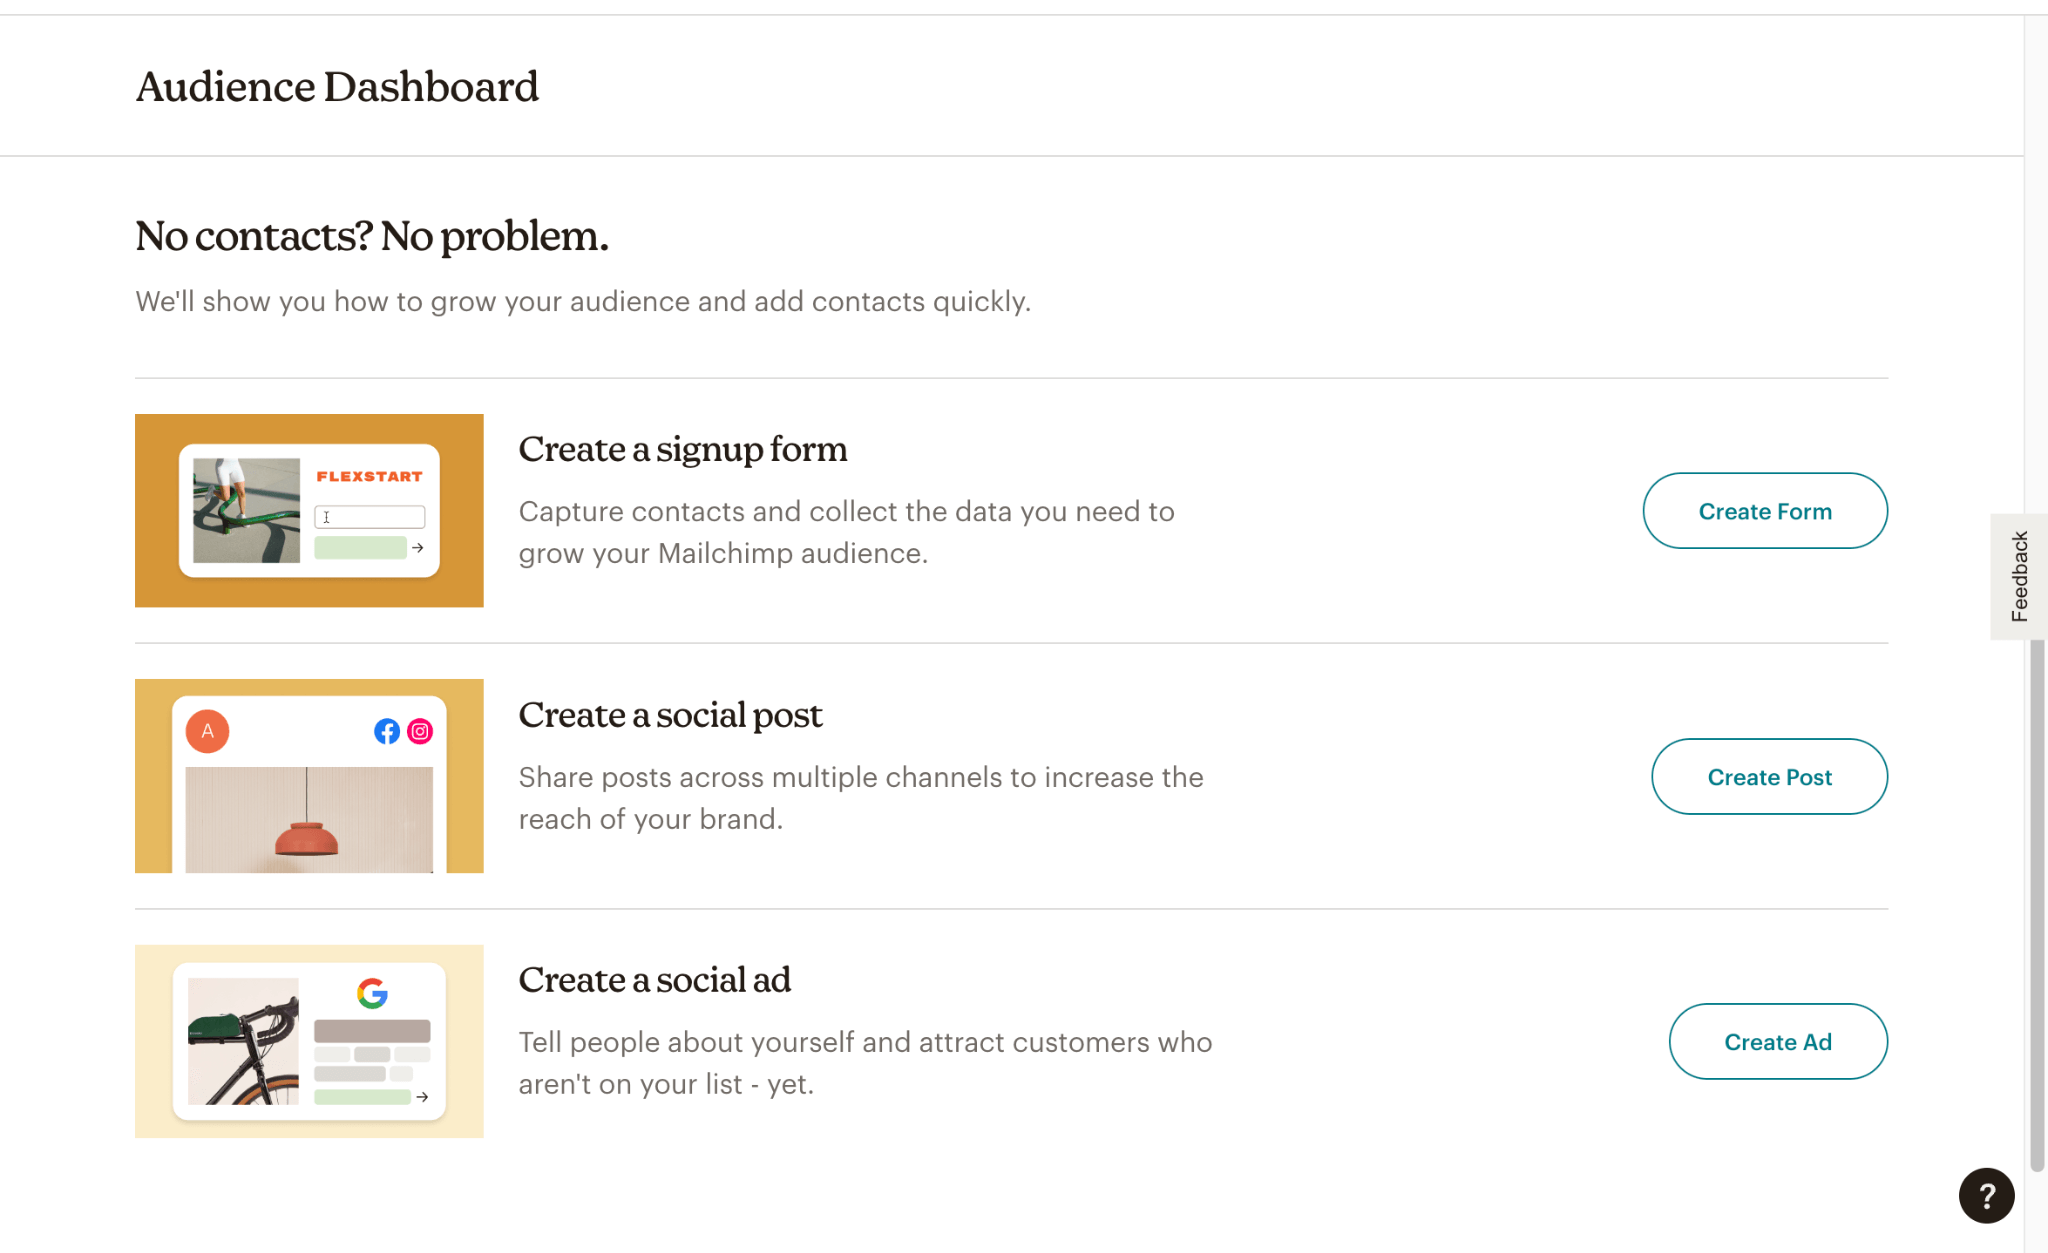
Choose a Signup Form Type
For this tutorial, we will start by creating a signup form, which is a key part of your email marketing strategy.
With Mailchimp, you can easily create signup forms that you can embed on your website or share on social media to grow your email list.
First, head to the Audience tab, and under “Signup Forms” click on “Create form”, selecting your form type. You can choose from the following form types:
- Embedded form: This can be embedded into any website.
- Pop-up form: Capture email/SMS contacts via popup form on your website.
- Signup landing page: A dedicated webpage to promote your brand and capture leads
Create your Signup Form
You can create and customize forms to collect important customer information such as email addresses, birthdays, and more. It all depends on which information is important to you.
For this Mailchimp tutorial, we’ll choose the embedded form.
First up, name your form. Then you can start playing around with the different fields, such as address, first name, and last name and you can even add custom fields.
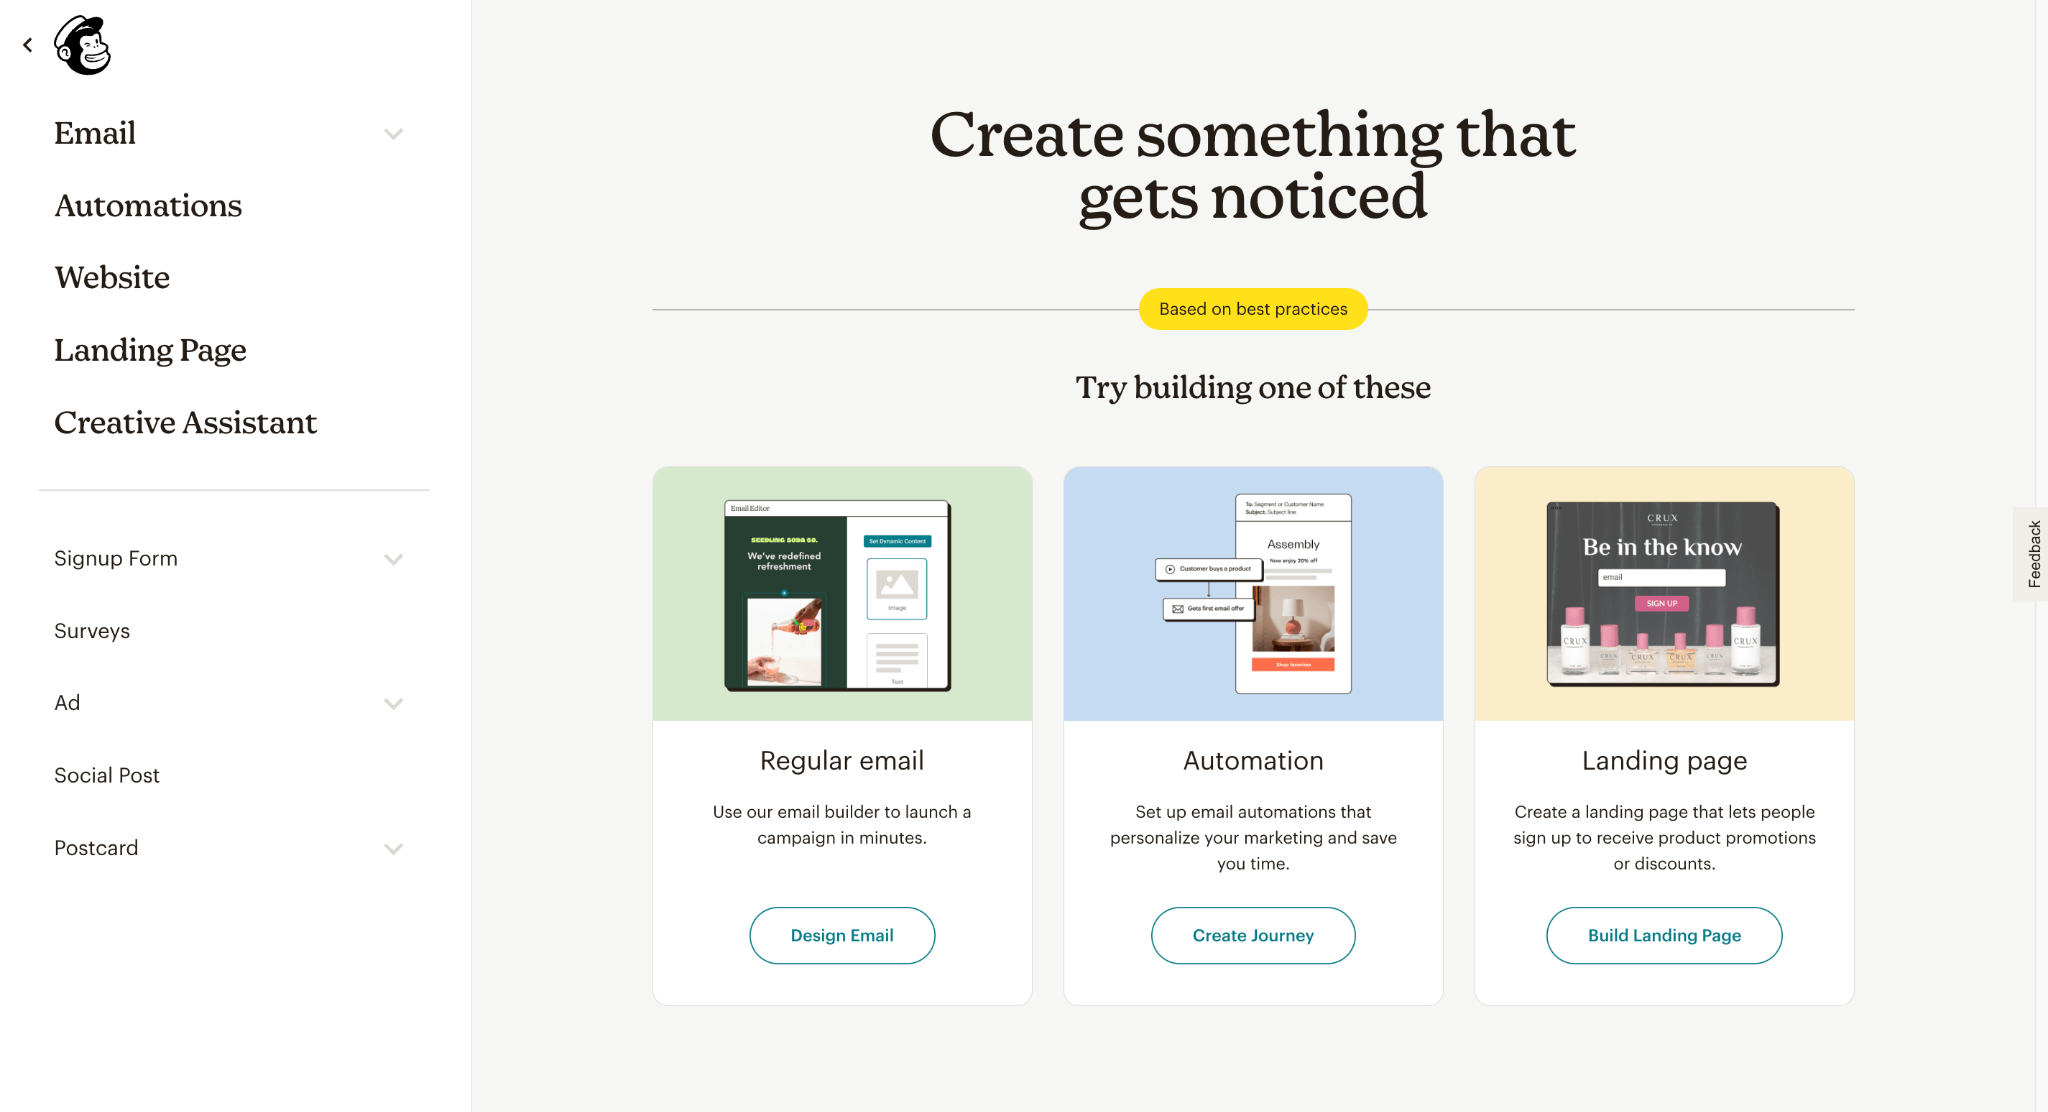
Step 5: Creating a Campaign
Now that your audience is set up, it's time to create a campaign.
Click on “Campaigns” in the left-hand menu and then select “Create a Campaign.” Mailchimp offers three different types of campaigns, but for this tutorial, we'll focus on the “Regular Email” option.
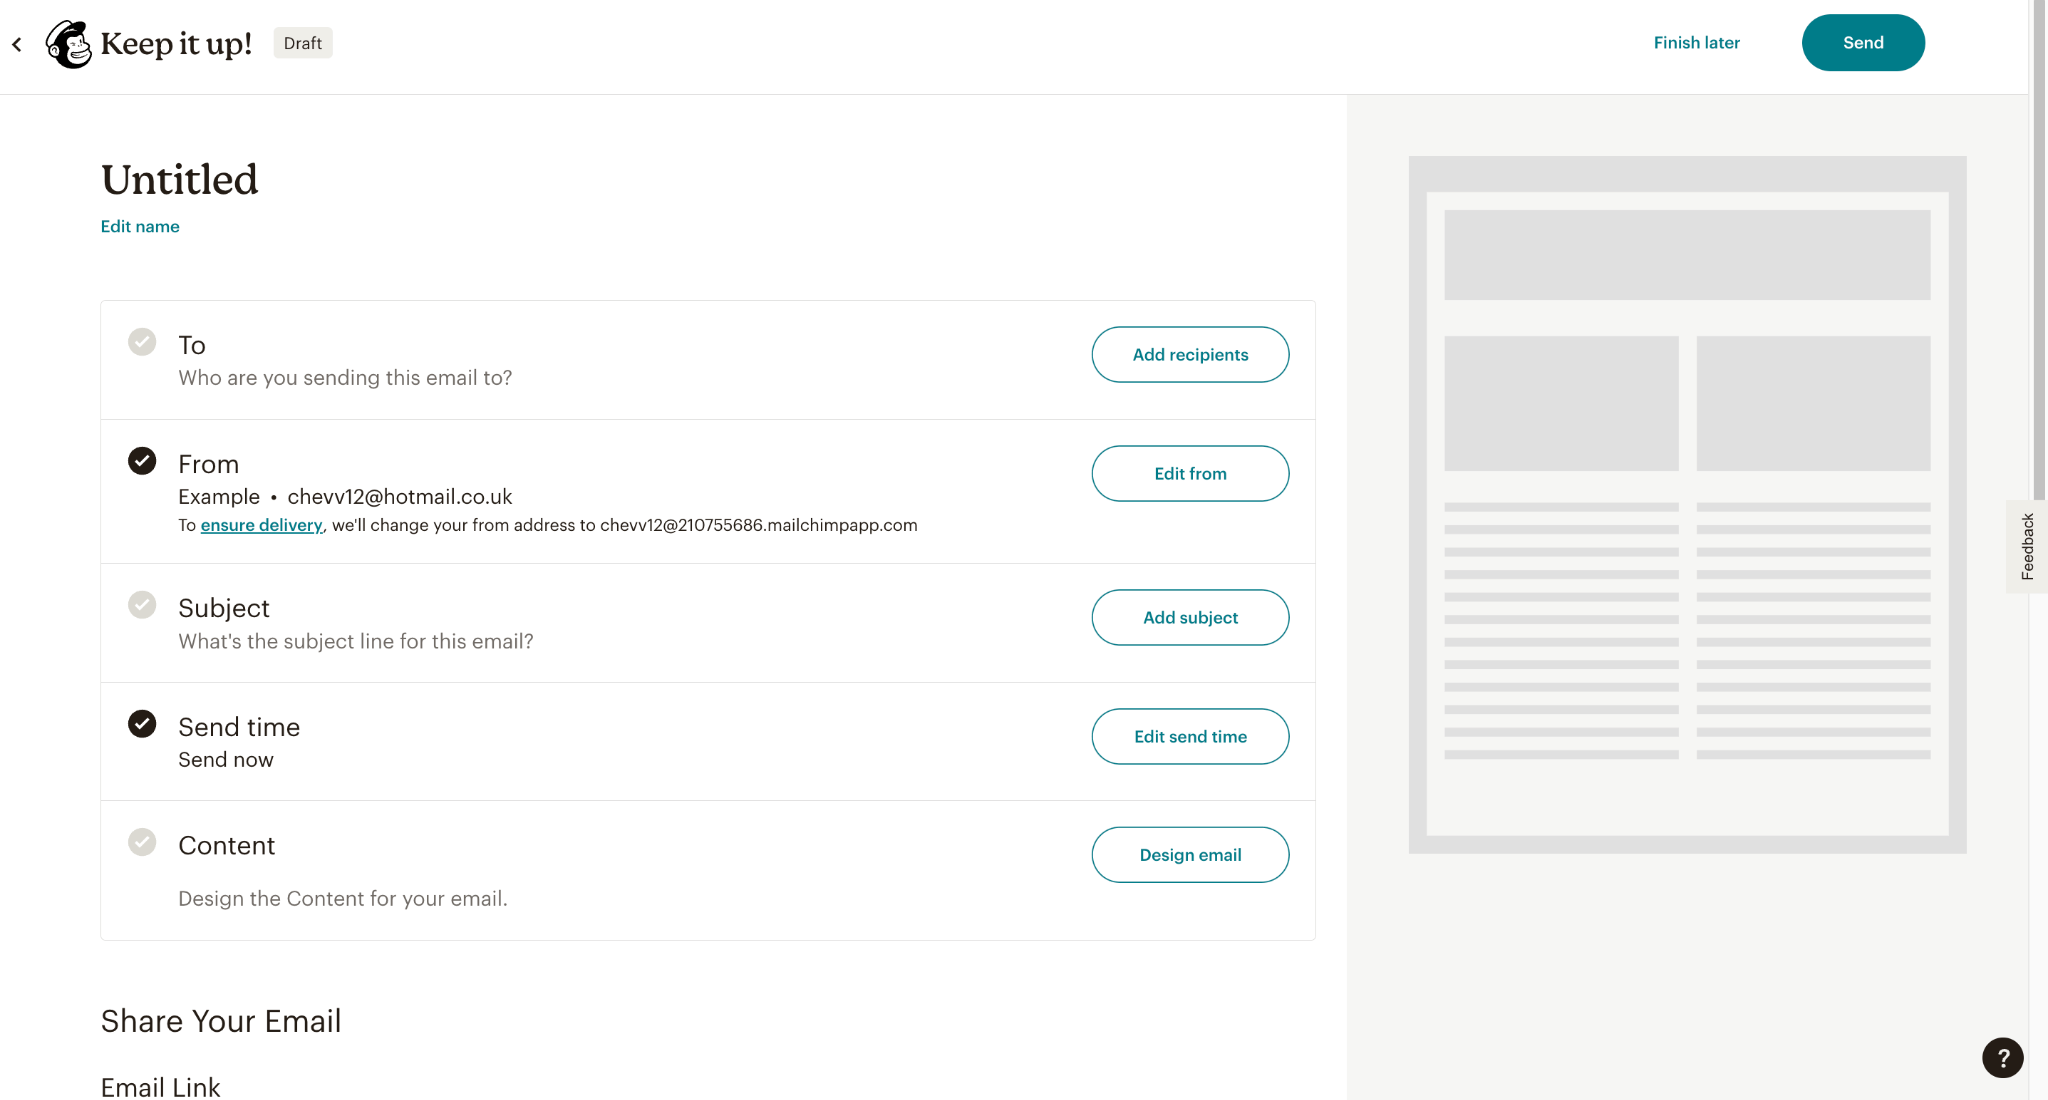
Designing your Email Campaign
Once you've clicked on the “design email” button, you'll be prompted to enter a subject line, sender name, and email address.
One thing I really like about Mailchimp is that you can see how your previous subject lines performed, so you can browse through them to get a good feel of what worked, and what didn’t.

Choose your Email Template
Once you’ve filled out these fields, it’s time to choose a template. Mailchimp provides several templates that you can filter by layout or theme. While the free options are very limited and pretty outdated, you do have the option to import your own template if you prefer.
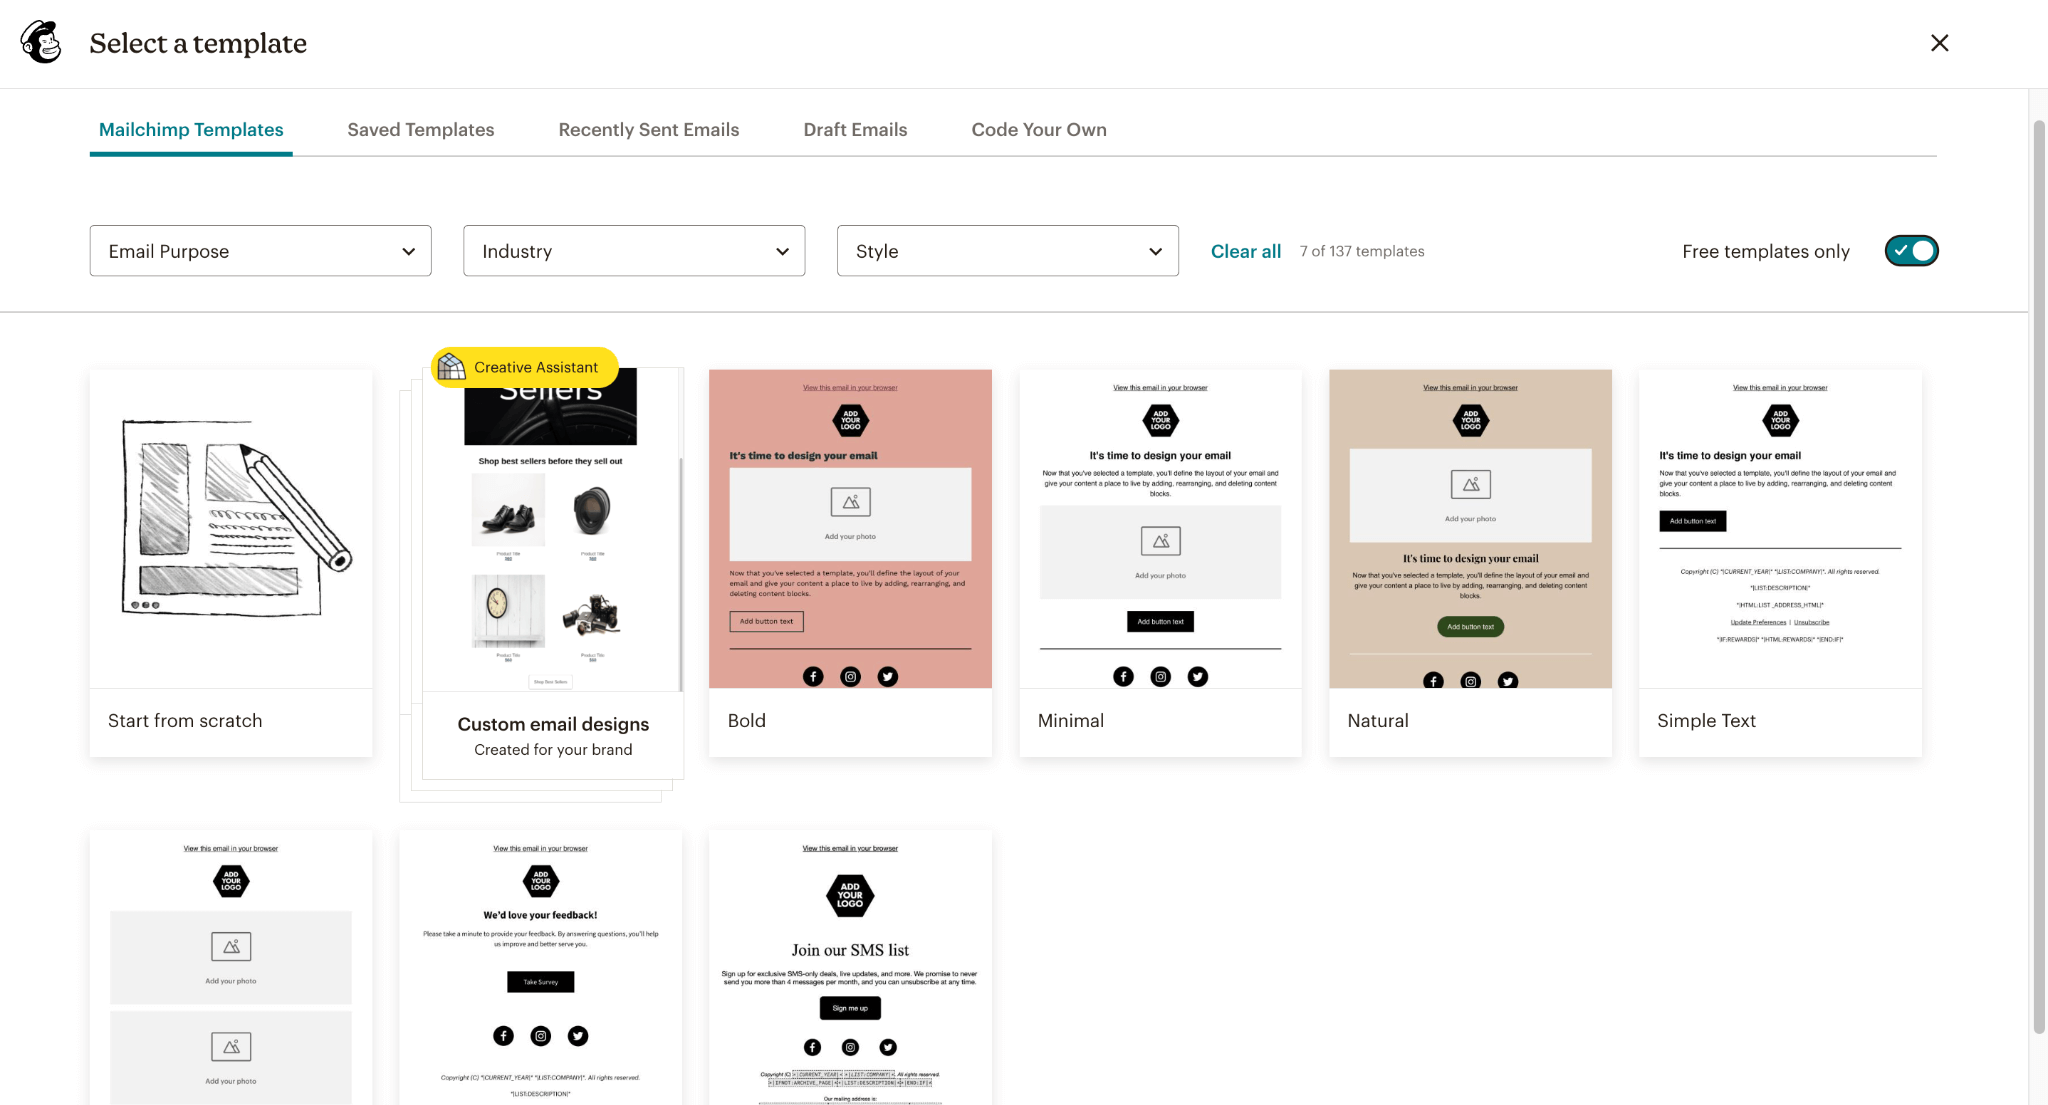
For this tutorial, let's use the “Bold” layout.
Step 6: Customizing Your Newsletter
Now comes the fun part—customizing your newsletter. Mailchimp's drag-and-drop editor allows you to add and rearrange blocks to create your desired layout. You can add text, images, videos, social media buttons, and even code for more advanced customization.
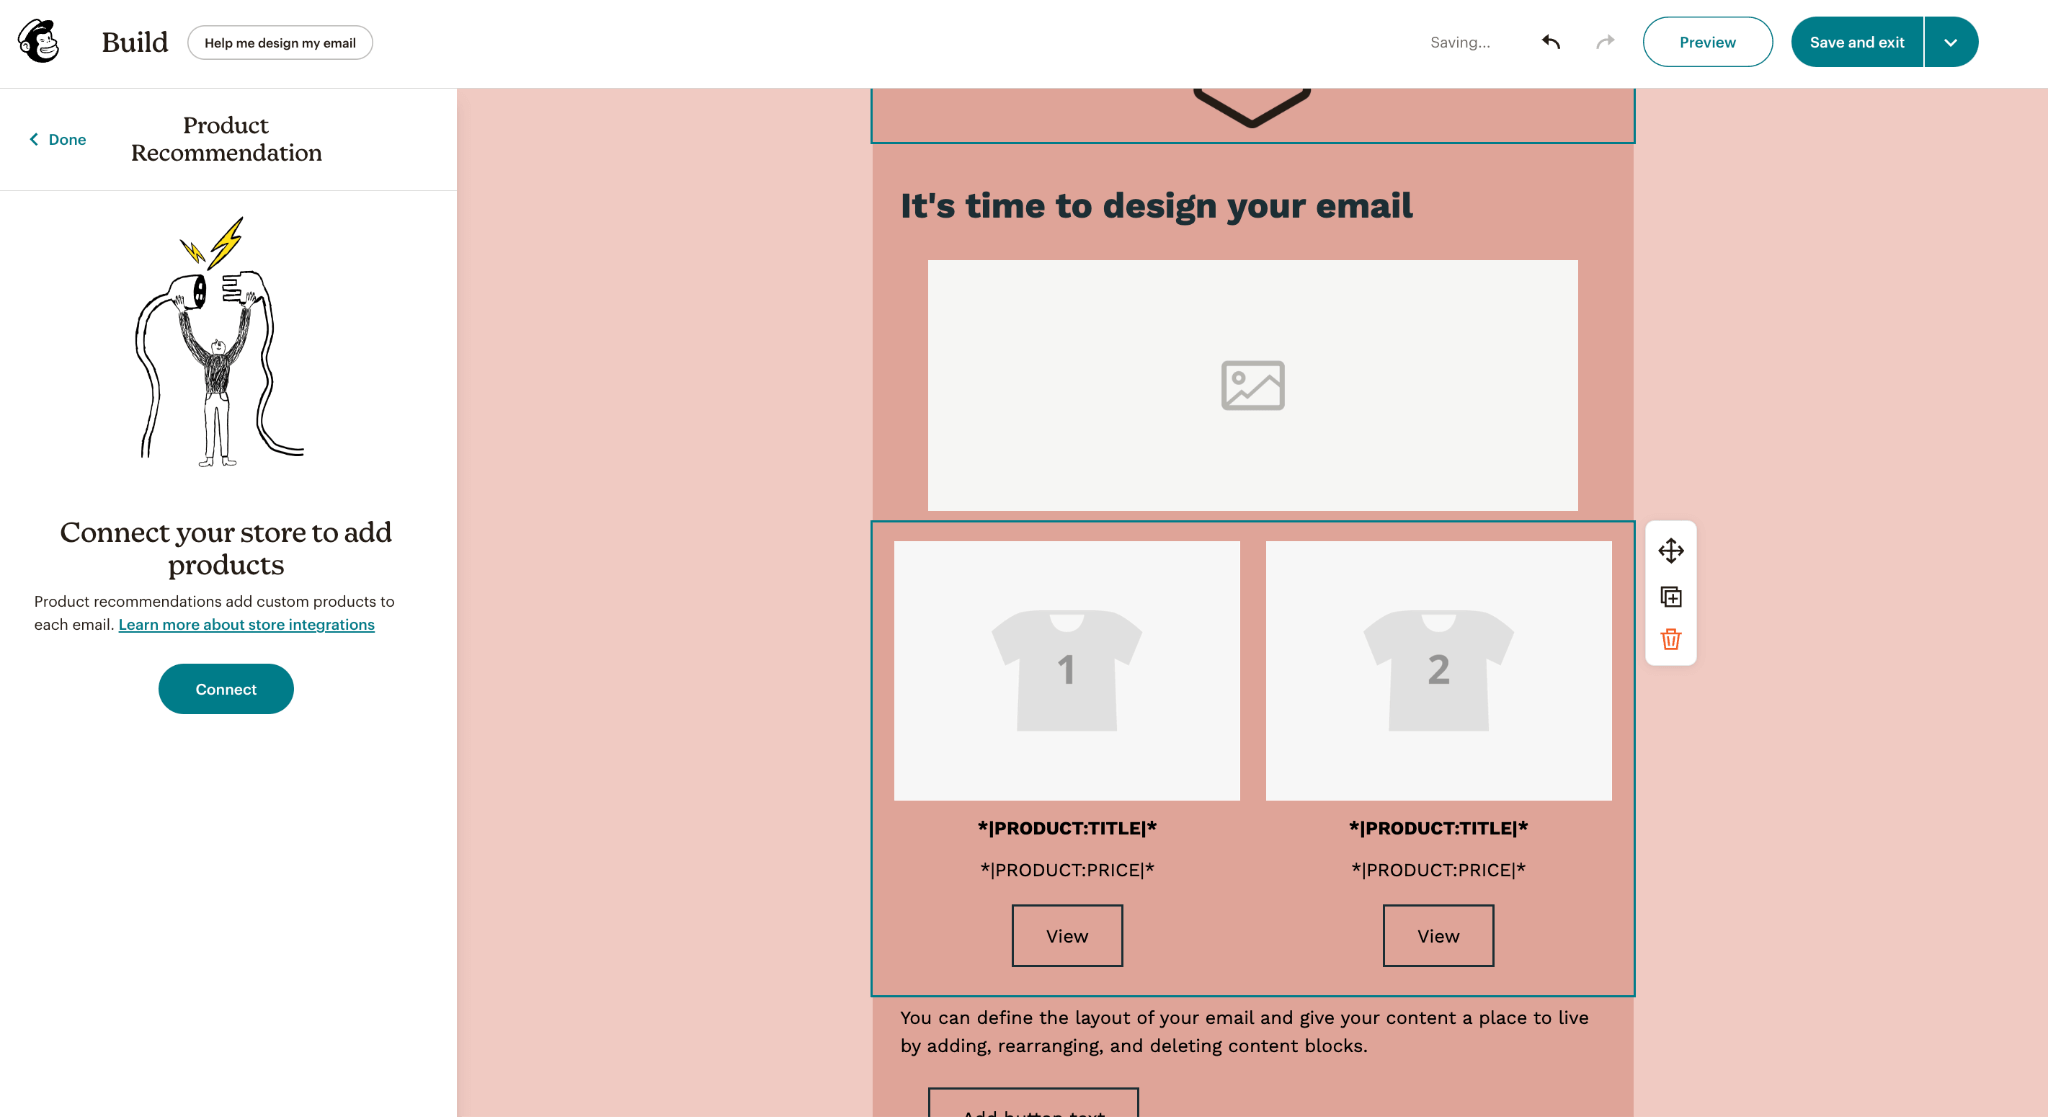
If you have an online store, you can connect it to Mailchimp and include product listings and custom product recommendations in your newsletter. Once you're happy with the design, click “Continue” in the top-right corner to proceed.
Step 7: Previewing and Testing Your Newsletter
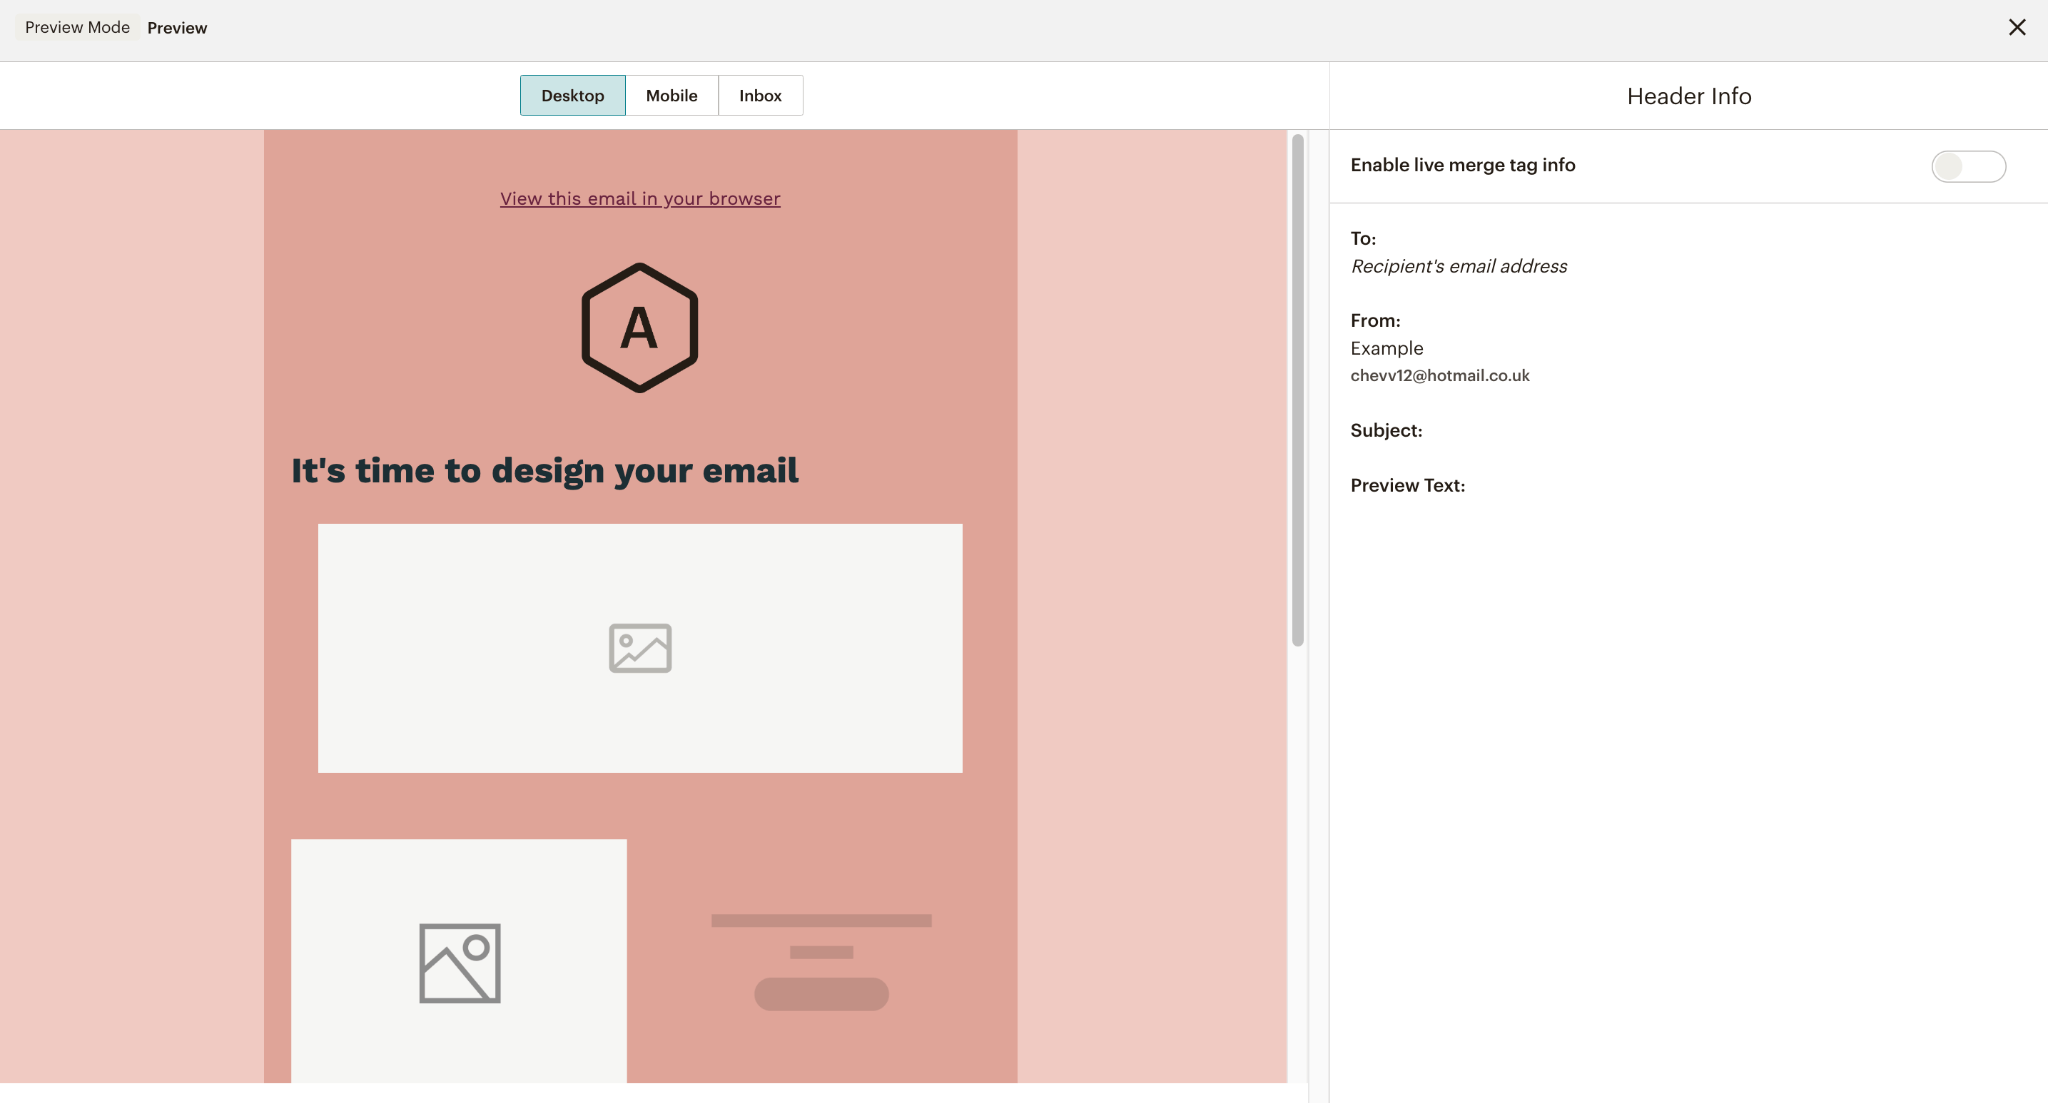
Before you send your newsletter, we recommend previewing it on both desktop and mobile devices, this can be done by pressing “preview” in the top right-hand corner.
From here, you can click to see your newsletter on desktop, mobile, and inbox. This is a handy little time-saving feature and a step we always recommend.
Mailchimp allows you to send test emails to yourself to ensure everything looks and functions as expected.
Step 8 – Send your newsletter
Double-check your contact list, sender name, and other details before sending your campaign. Then once you're ready, you can go ahead and send your campaign.
Alternatively, you can schedule your campaign for a time when your audience is most likely to engage. However, you’ll need to sign up for a paid plan for this.
Not Convinced Mailchimp Is For You?
In our opinion, Mailchimp isn’t the best option out there. There are plenty of alternatives that do a better job for much less money.
Mailchimp’s free plan has limitations, and its pricing for higher tiers can get steep really quickly. If I were you, I’d consider other options such as the following:
MailerLite: Generous Free Plans & Advanced Automation
MailerLite offers a beginner-friendly platform with a free plan that supports up to 1,000 subscribers and 12,000 monthly emails—more than Mailchimp's free tier.
Best for: Budget-conscious businesses wanting robust automation and easy-to-use design features.
ActiveCampaign: High Deliverability & Advanced Segmentation
ActiveCampaign stands out for its excellent deliverability rates, ensuring your emails reach the primary inbox.
Best for: Growing businesses needing reliable deliverability, advanced automation, and CRM integration.
Omnisend: Tailored for E-Commerce Success
Omnisend is designed for e-commerce businesses, offering tools that drive conversions and enhance customer engagement.
Best for: E-commerce stores looking to grow sales through targeted, multi-channel automation.
Final Thoughts
As you can see, getting started in Mailchimp is fairly simple. However, if you're still not sure Mailchimp is the right platform for you, there are other alternatives.
While Mailchimp is a great entry point for email marketing, we find it to be overpriced for the features it offers, especially as your needs grow.
There are email providers like Mailchimp that provide more flexibility with advanced automations, better deliverability and sales integrations, and specialized tools for e-commerce marketing—all at more competitive prices.
Your choice ultimately depends on your business goals, audience size, and need for advanced features. Whichever email marketing platform you choose, focus on building targeted, engaging campaigns that provide value to your subscribers—and watch your email marketing efforts pay off!

The author
Learn more about us
Our Methodology
This article has been written and researched following our EmailTooltester methodology.
Our Methodology