EmailTooltester is supported by readers like yourself. We may earn a commission when you purchase through our links. Of course, this won't increase the cost for you.
In the competitive world of e-commerce, email marketing is an important tool for engaging customers and boosting sales. Klaviyo has quickly become a go-to platform for many online store owners, especially those on Shopify, thanks to its powerful features and seamless integration.
In this in-depth Klaviyo tutorial, we will show you how to:
- Set up your Klaviyo account
- Connect it to your Shopify store
- Upload your first contact list
- Segment your audience
- Activate your first welcome automation, and finally,
- Send your first campaign.
And it doesn’t stop there – along the way, we’ll share some nice little tips for ecommerce email marketers.
You can also watch our detailed Klaviyo tutorial video here:
We hope that by the end of our Klaviyo tutorial guide, you'll be fully equipped to start sending impactful email campaigns that effectively reach and engage your customers. Now, let’s get started!
How to Connect Klaviyo with Shopify
Klaviyo has quickly become a top email marketing choice for Shopify store owners and it’s no surprise why. Shopify has invested $100 million in Klaviyo, recommending it as the go-to email service provider (ESP) for Shopify merchants. To me, this kind of investment just reconfirms the potential that Klaviyo has as an ecommerce email marketing platform.
Step 1: Installing Klaviyo on Shopify
To begin, you’ll need a Shopify store. However, if you don’t have one yet, you can sign up for a free trial in just a few simple steps.
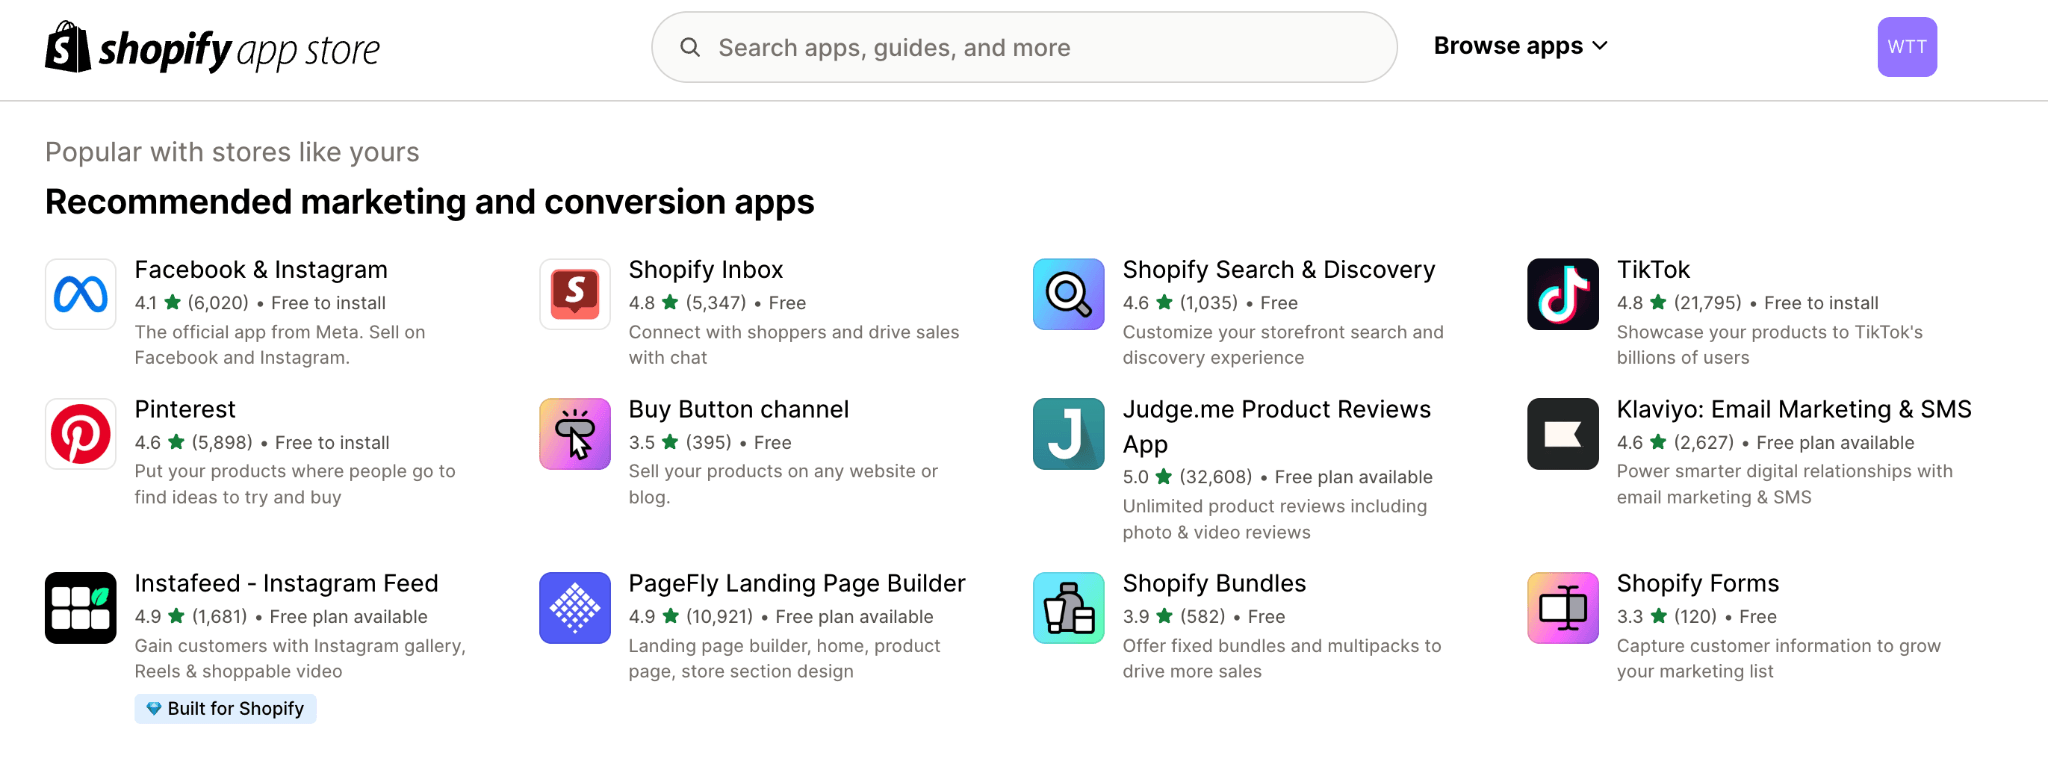
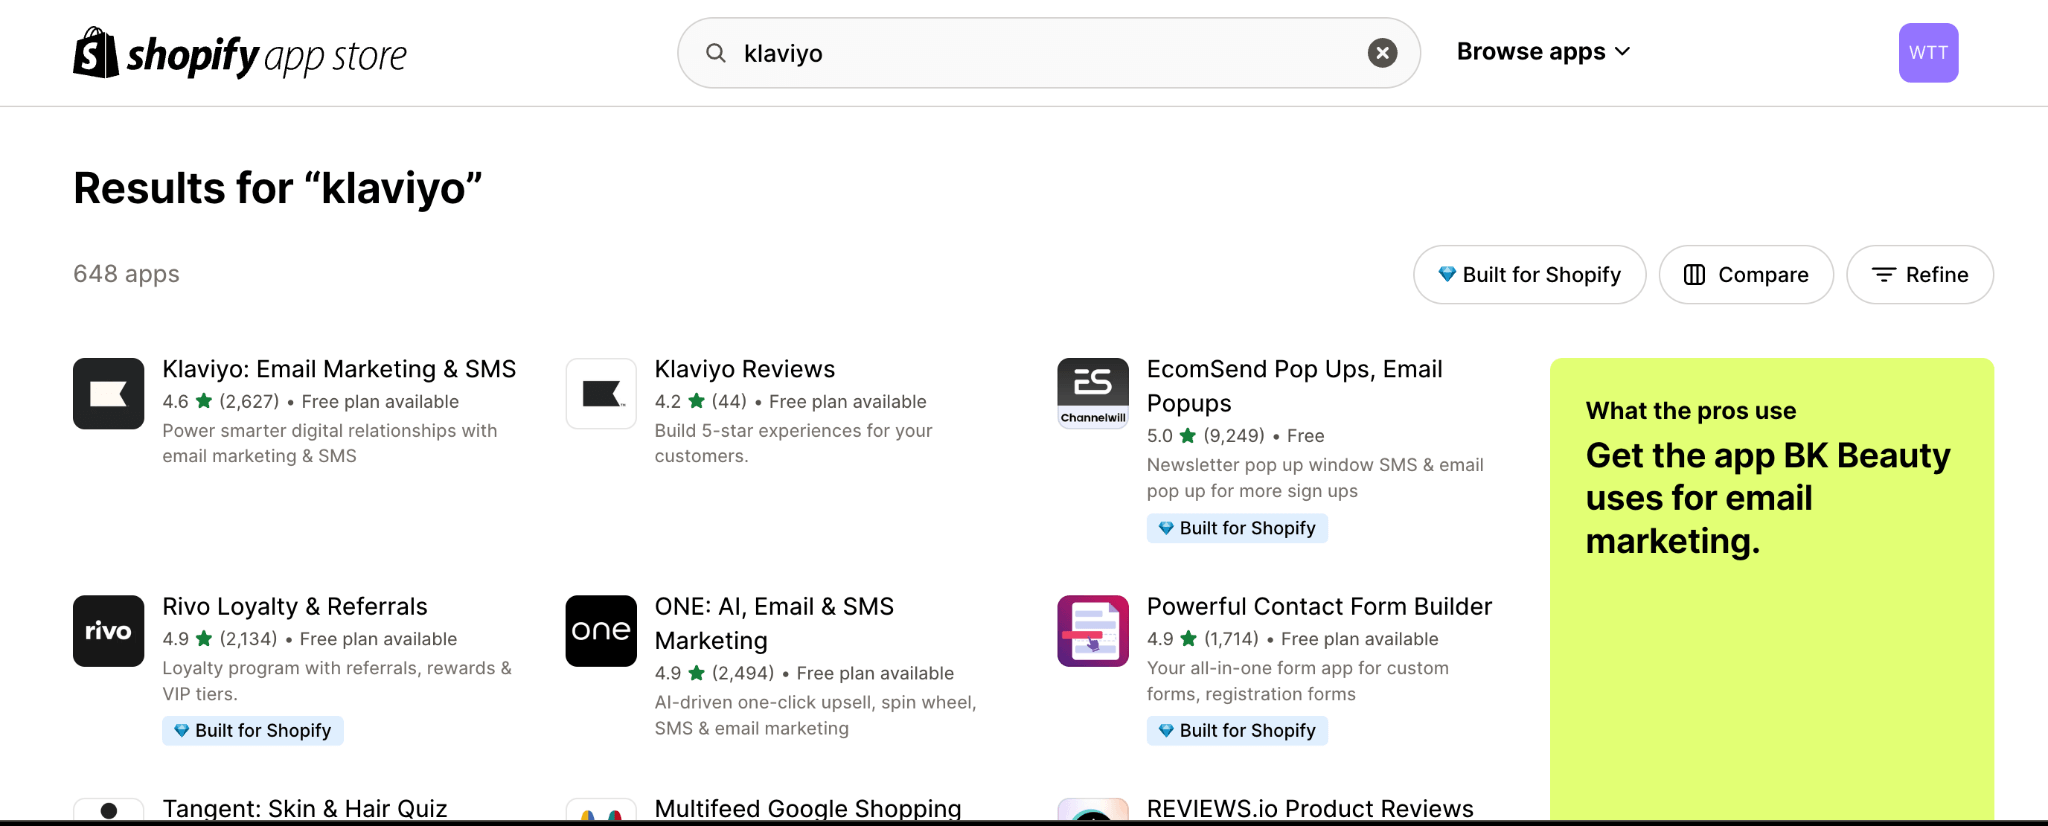
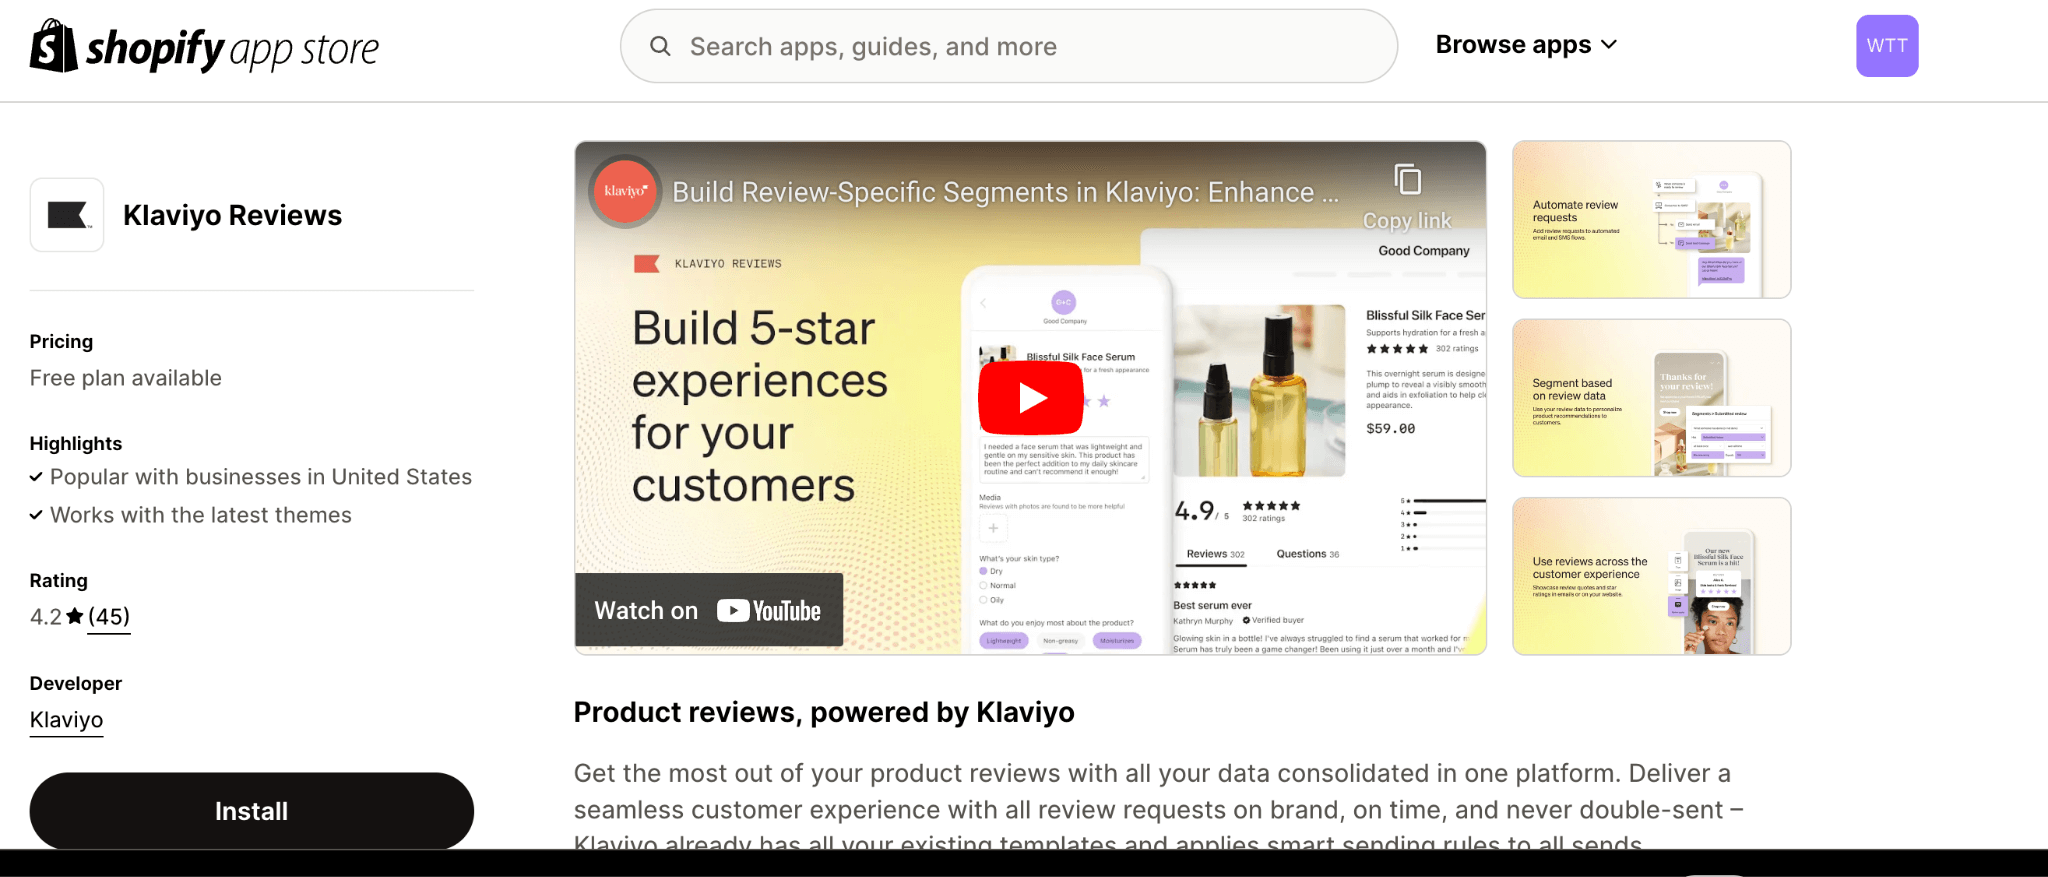
Once you've signed in, head over to the Shopify App Store, search for “Klaviyo,” and install the app. Make sure you choose the option “Klaviyo: Email Marketing and SMS” and not the Klaviyo Reviews app, which serves a very different purpose. It’s actually a really beneficial feature for ecommerce shop owners, so we’ll go into more detail on this later!
Step 2: Integrating Your Store with Klaviyo
Once you’ve installed the Klaviyo app, you'll be asked to create a new Klaviyo account. If you haven’t signed up, you can sign up for free here. They will ask you a few simple questions such as company name, website, etc.
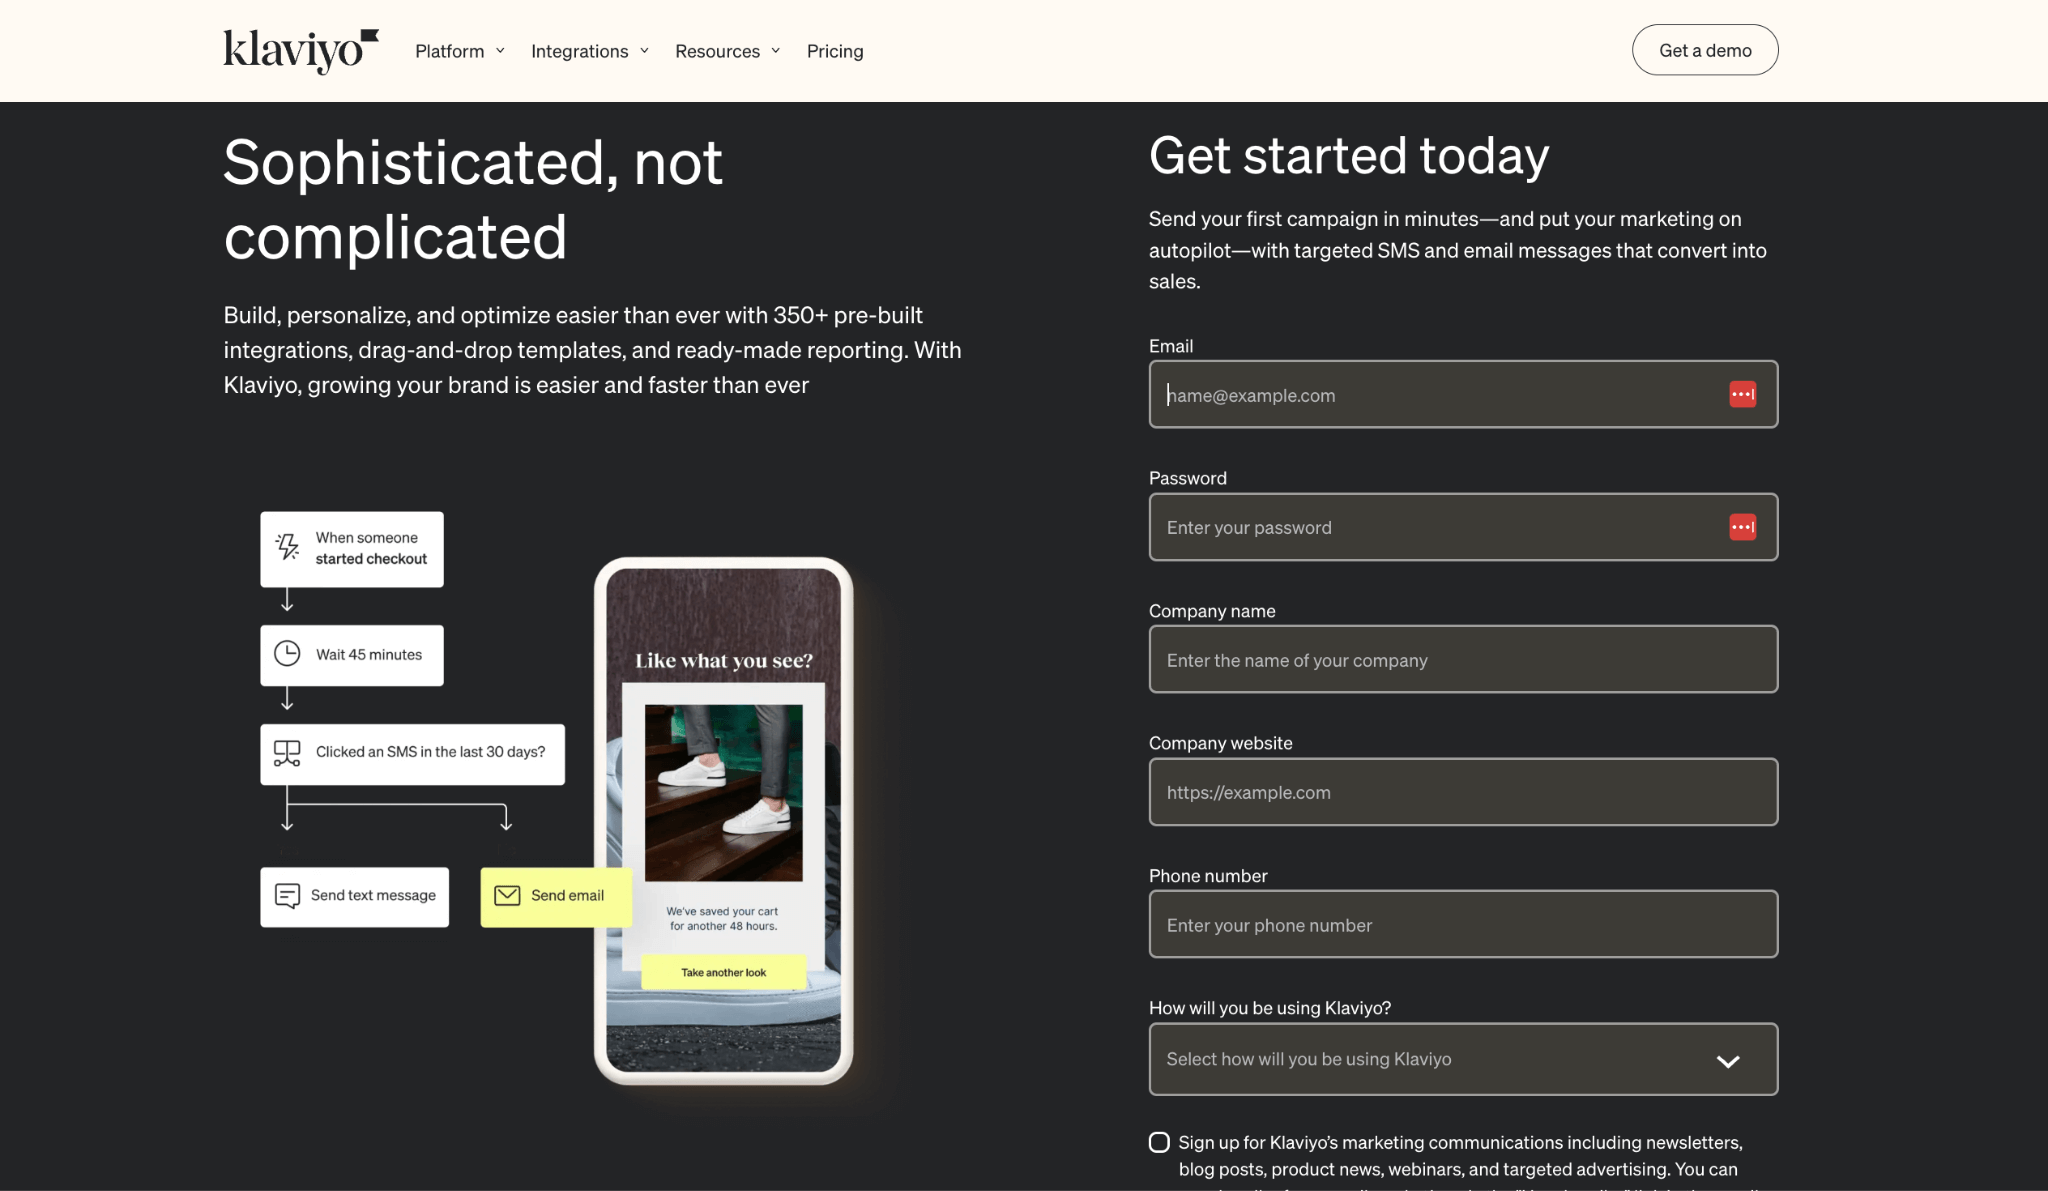
Alternatively, if you do already have an account, you can sign in directly. Klaviyo will open in a separate tab once installed, and you’ll then be guided through the necessary steps to sync your Shopify subscribers and profiles.
Be sure to check the right boxes to sync all the profiles and data such as email addresses and phone numbers.
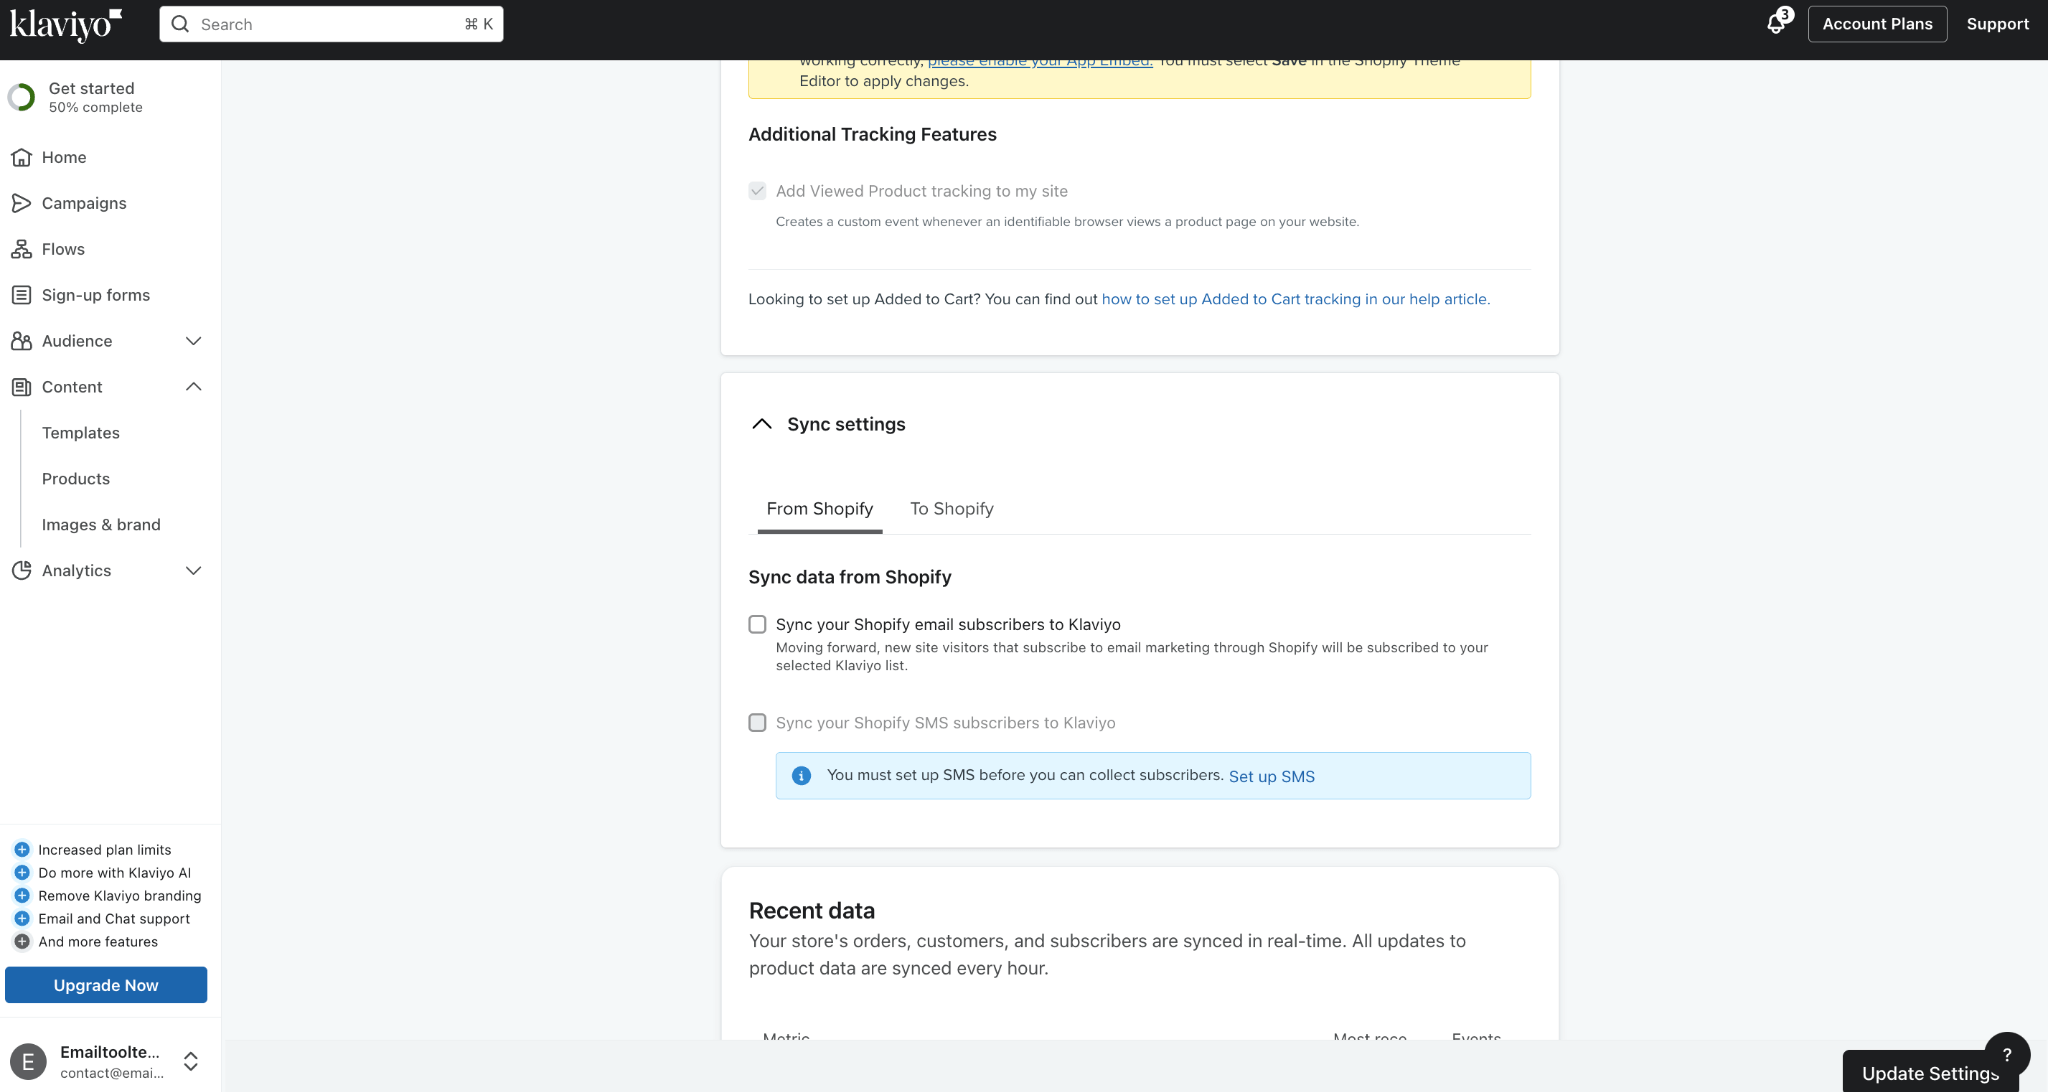
Step 3: Setting Up Sender Information
Once Klaviyo is connected to Shopify and you’ve transferred the important data, you'll need to configure your sender information. This includes your sender name, which will appear in recipients' inboxes, and your sender email address.
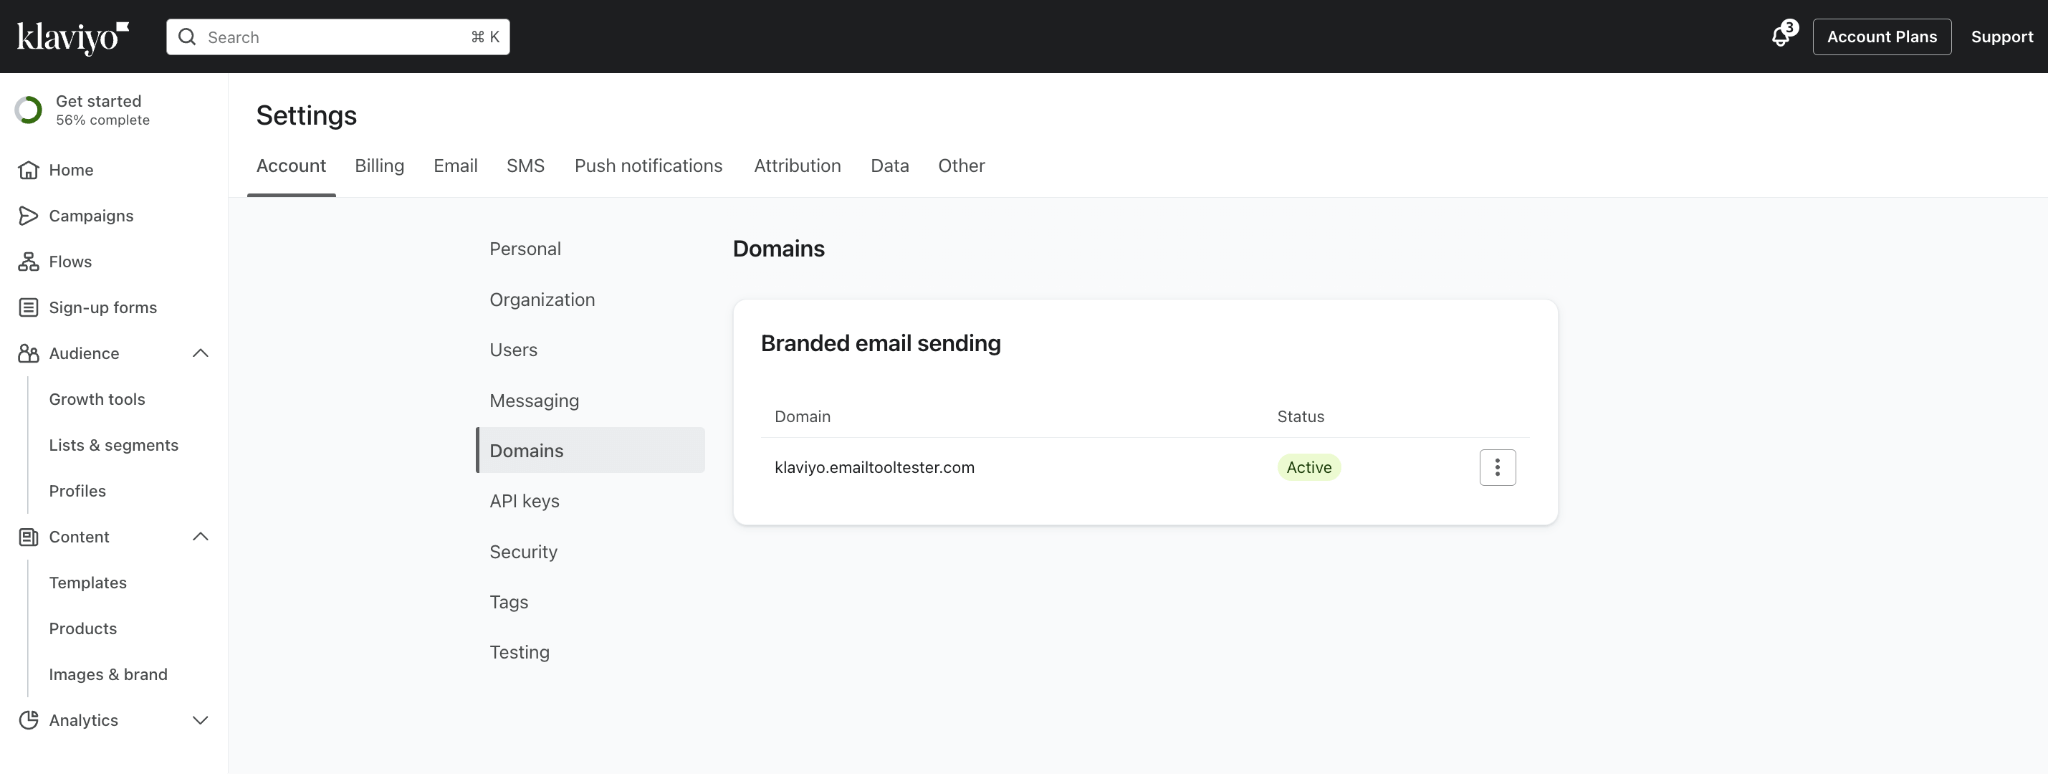
It's important to use an email that encourages replies, such as “hi@yourdomain.com,” rather than a “no-reply” address. This helps to invite two-way communication with your audience, which can help to build a relationship with your customers and potential customers.
Lastly, the most important part when setting up your sender information is to set up domain authentication to improve email deliverability, which helps to improve the chances that your campaigns land in your subscribers’ inboxes.
Klaviyo supports domain authentication through SPF and DKIM records, which you can set up in your domain’s DNS settings. You can read more here on how to get your authentication set up. If you need further assistance, we also offer our own email authentication service.
Step 4: Choosing Your Marketing Channels
Klaviyo offers both email and SMS marketing options. If you're just starting your marketing venture, we recommend focusing on email marketing first. SMS marketing can be added later as your business grows (more information about Klaviyo’s different pricing plans is available here).
However, if you are already using SMS marketing on another platform, Klaviyo will allow you to integrate both channels seamlessly.
Setting Up Your Klaviyo Account
Step 5: Enabling Website Tracking
Website tracking is a powerful feature of Klaviyo that allows you to monitor customer behavior on your site. For example, you can track behavior such as the following:
- When someone views your products
- When a customer adds items to their cart
- When they start the checkout process.
![]()
- To enable website tracking, head to the “Email > Tracking” section within your Klaviyo account settings.
- Copy the provided tracking code and paste it into the header of your Shopify store’s theme files, or use a Shopify app that allows you to add custom scripts.
- It's a good idea to also verify the installation by visiting your website and checking that visitor data is being recorded in Klaviyo.
Step 6: Importing Contacts
Before importing your contact list, I’d suggest taking the time to clean up your list by removing outdated or inactive contacts. This helps maintain a healthy email list, which also helps to improve your overall deliverability rates.
- Log in to your Klaviyo account and navigate to the “Lists & Segments” section from the left-hand menu.
- If you don’t already have a list set up, click “Create List/Segment” and choose “List” to create a new one. Name your list something descriptive, like “Newsletter Subscribers” or “VIP Customers.” If you have an existing list, select it.
- Click on the list you want to add contacts to, then select “Manage List” and choose “Import Contacts” from the dropdown menu.
- You’ll be prompted to upload your contact file. Klaviyo supports CSV files, so make sure your list is saved in this format. Drag and drop your CSV file into the upload area or click to browse your computer for the file.
- Once your file is uploaded, Klaviyo will ask you to map the fields from your file to the appropriate Klaviyo fields (e.g., Email, First Name, Last Name). This step ensures that all your contact information is accurately imported.
- During the import process, ensure that the subscription status for each contact is correctly set. If a contact is unsubscribed, make sure this is reflected to avoid any consent issues.
- After mapping your fields and setting the subscription status, review your import settings one last time. Once you’re satisfied, click “Start Import” to begin the process.
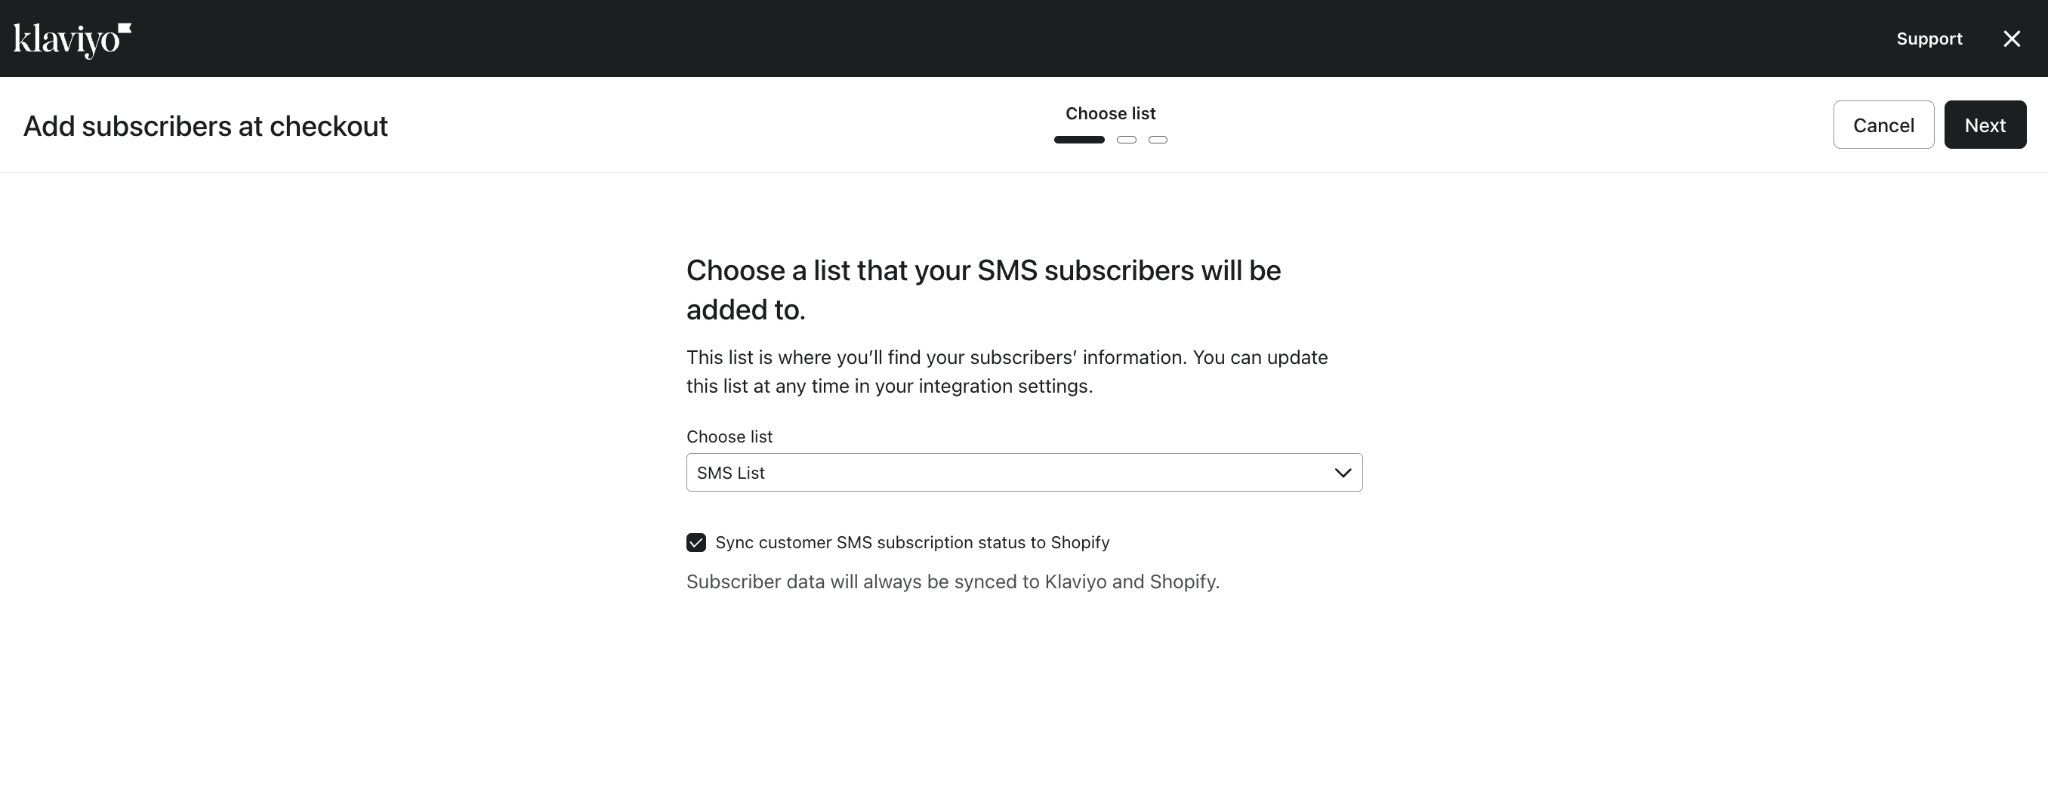
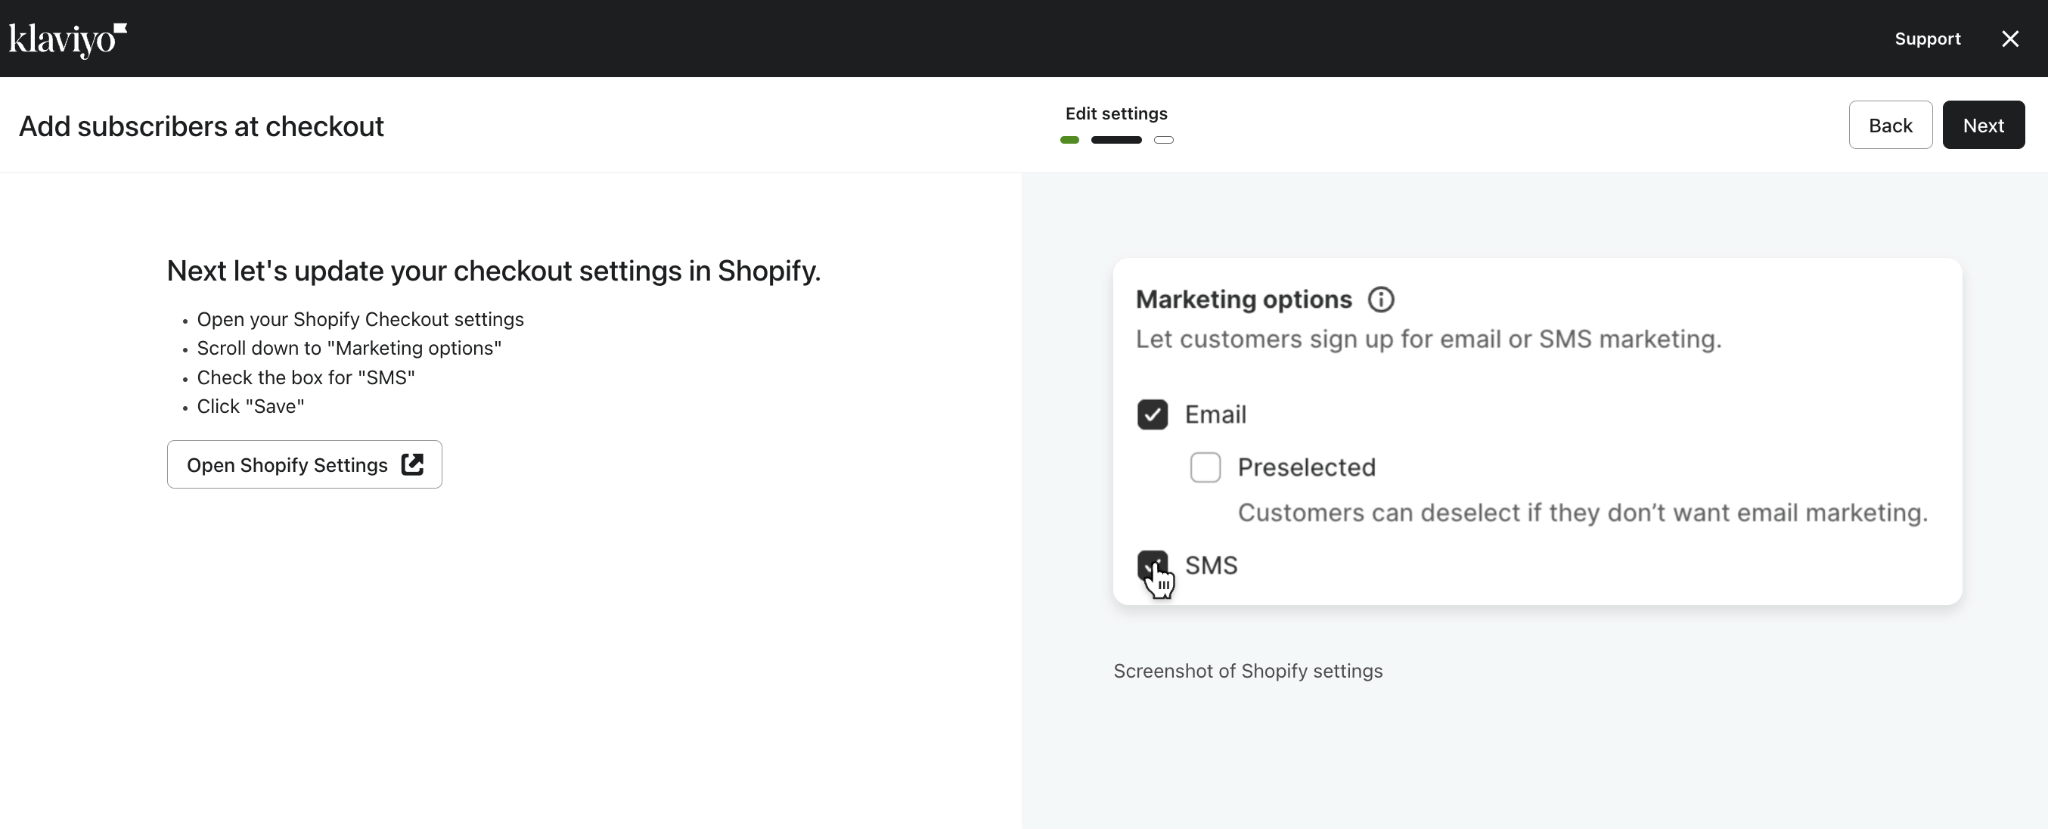
As you can see from our screenshots, Klaviyo and Shopify offer some really handy features for ecommerce businesses to take advantage of such as prompting your audience to sign up for SMS or email marketing at the checkout.
Step 7: Building Your Brand Library
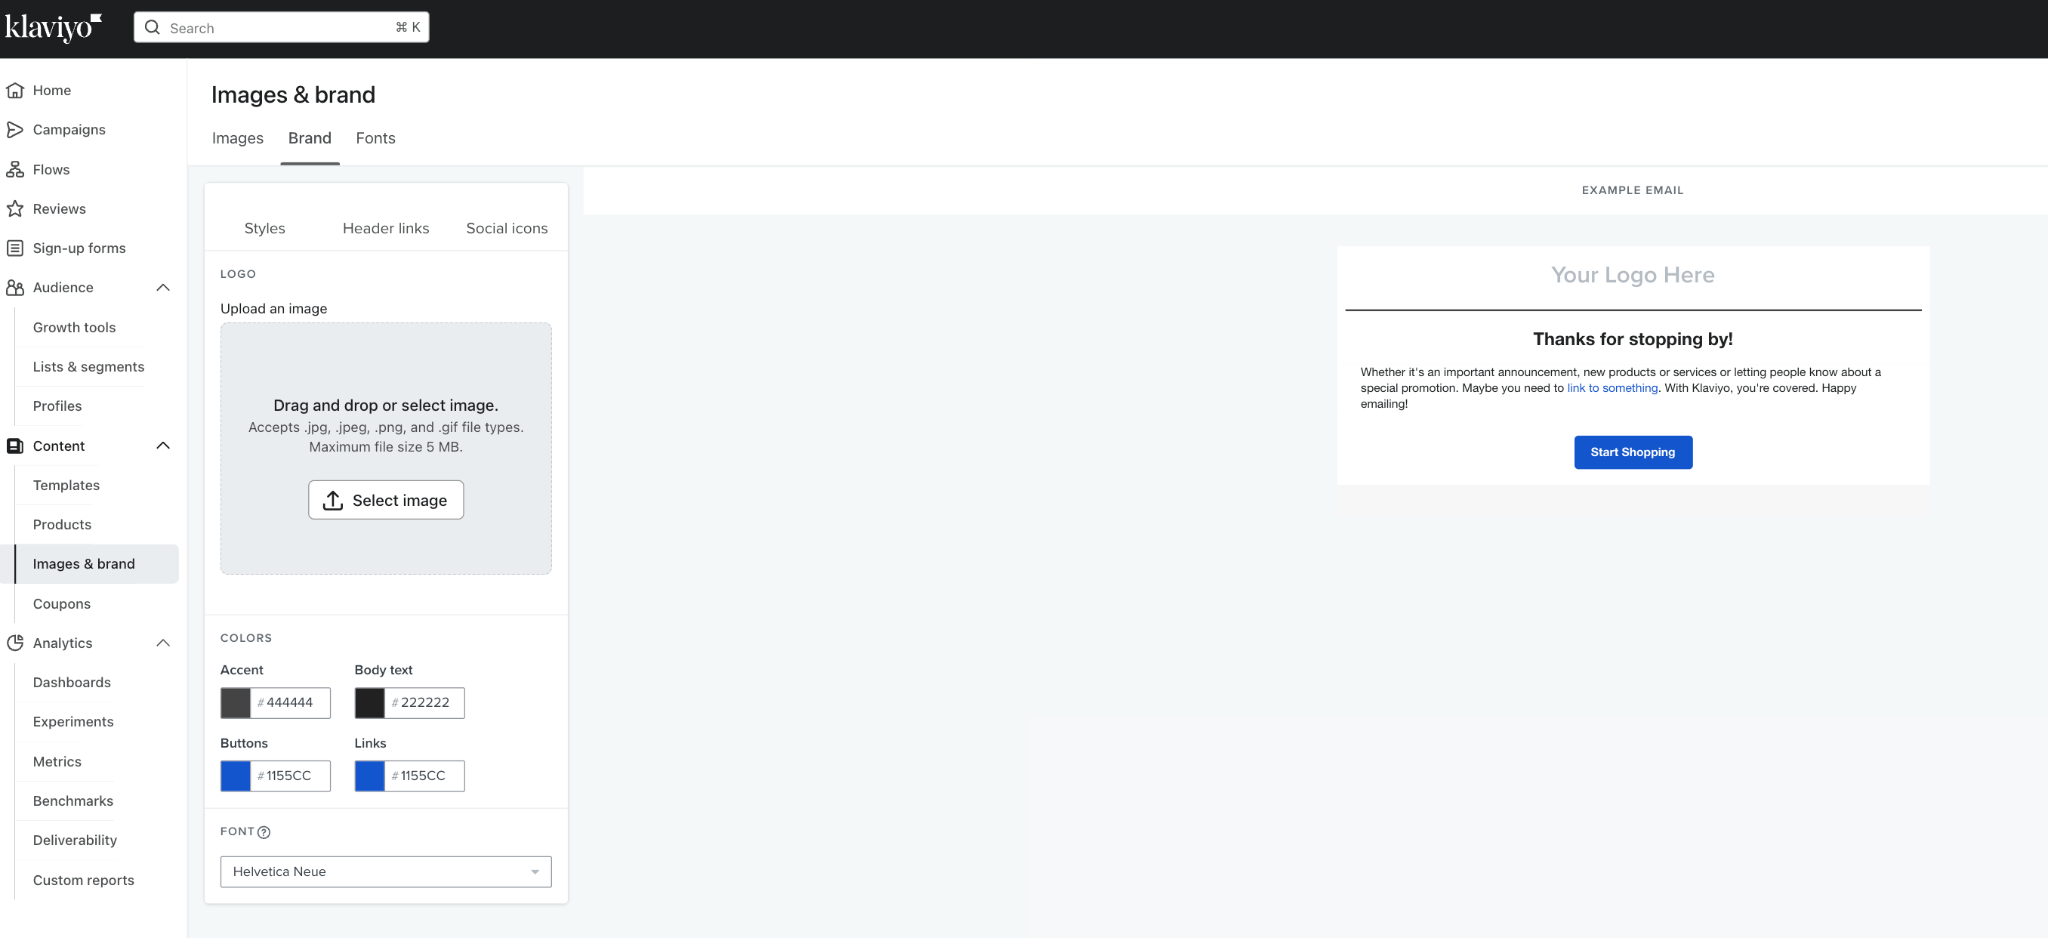
Customize your Klaviyo account by uploading your brand's logo, and setting your brand font and colors in Content > Images and Brand.
These elements will be automatically applied to your email templates, ensuring a consistent look and feel across all of your communications.
Creating Your First Automation
Step 8: Create a Welcome Flow
One of the most important automated workflows you can implement is a welcome flow. Welcome flows are crucial especially for ecommerce because they create a positive first impression and set the tone for your relationship with new subscribers.
When someone signs up for your emails, they’re expressing interest in your brand, and a welcome flow takes advantage of that moment of engagement.
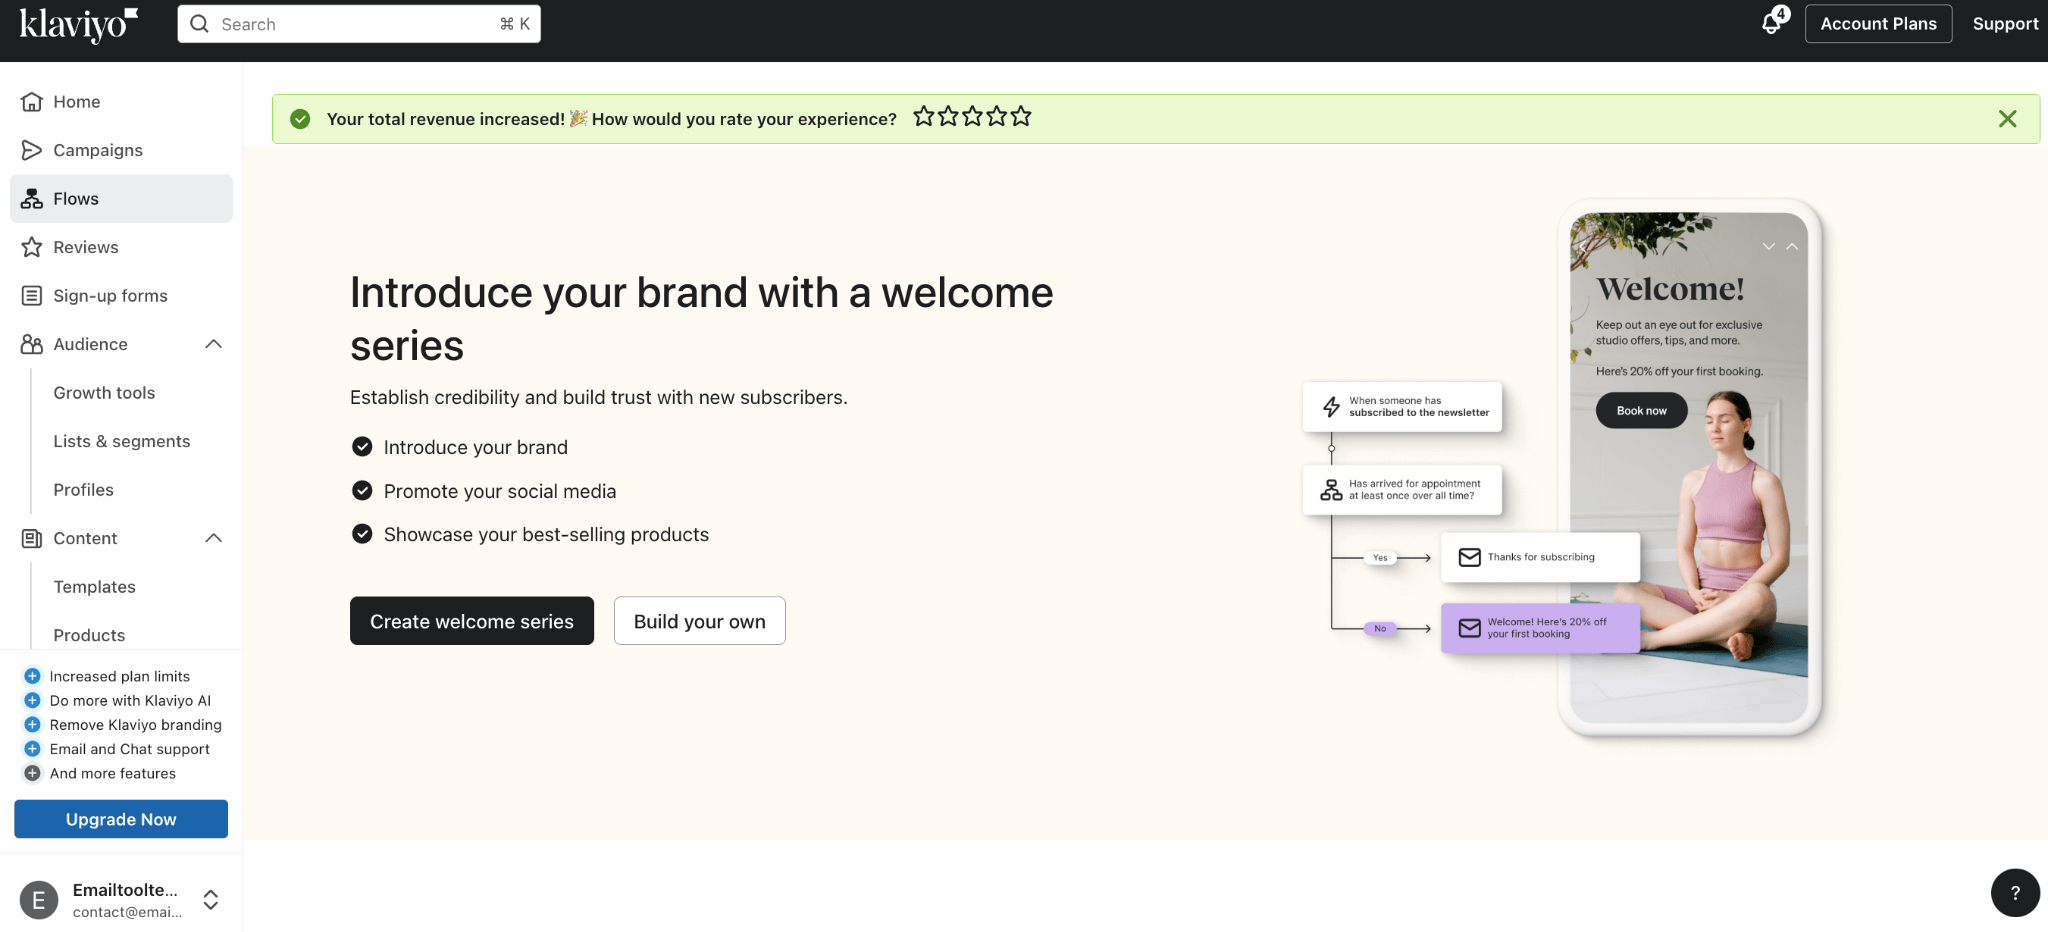
1. First, head over to the “Flows” section. As shown in the screenshot, the process to get started is straightforward. You can begin by clicking on “Create Welcome Series.” This action will take you to the automation flow builder, where you'll set up your email sequence.
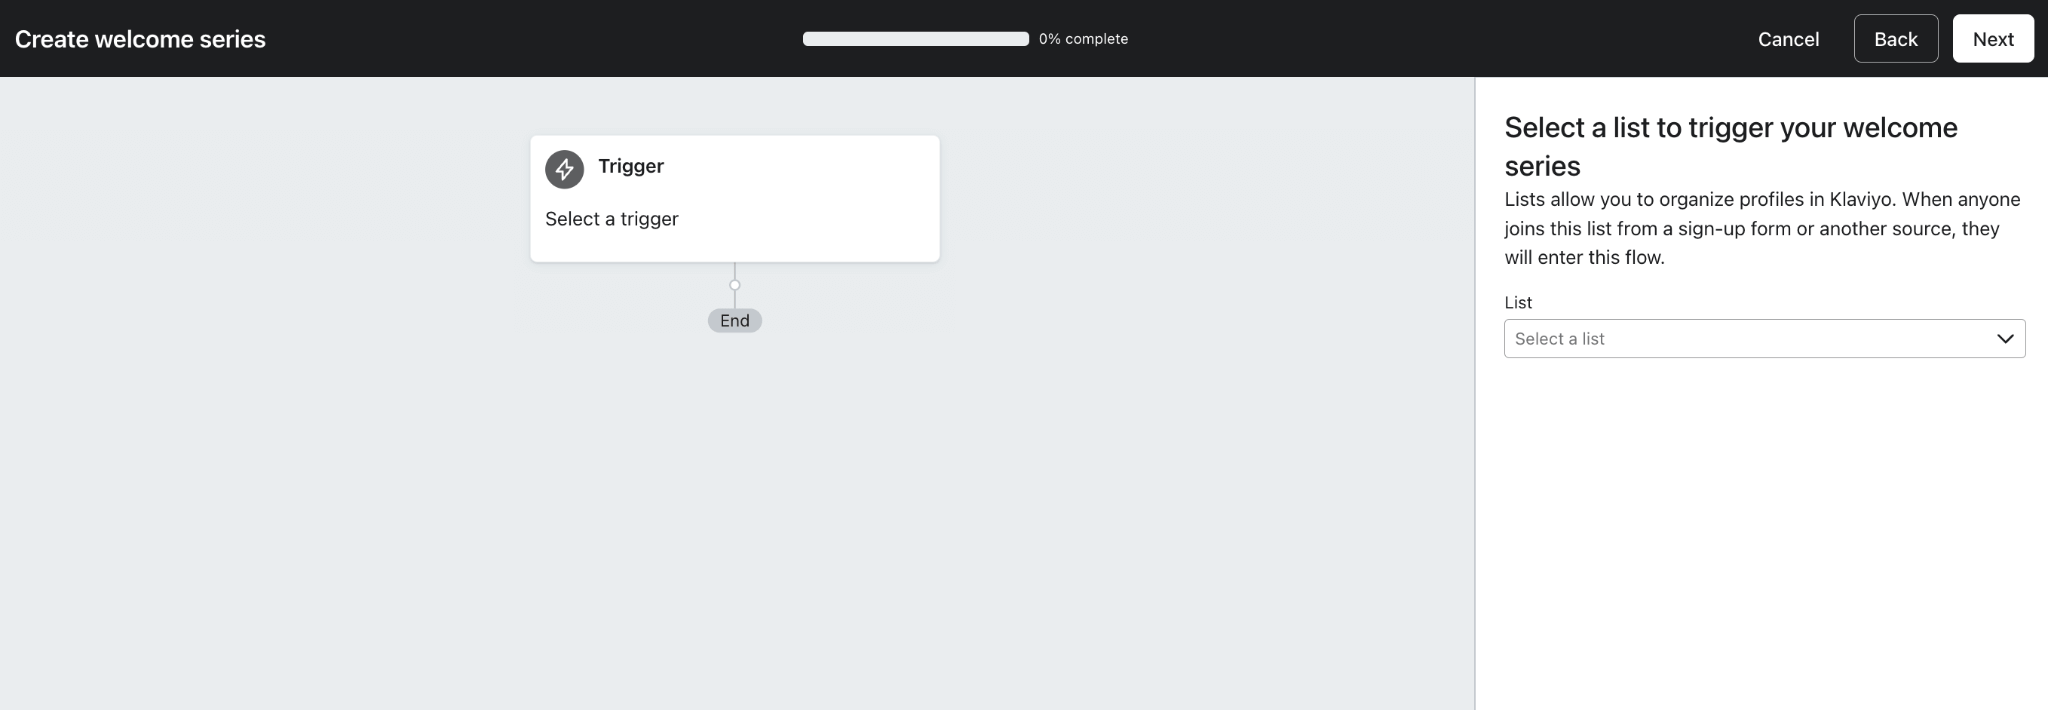
2. In the flow builder, the first step is to choose the list for new subscribers to enter into, and to trigger this flow. For example, you might select your primary email list, which contains the majority of your subscribers. When a new subscriber enters this list, this will initiate the welcome series, ensuring that they automatically receive your welcome emails.
3. From here, you can customize the sequence to fit your brand’s messaging and engagement strategy (e.g. the number of emails, the timing of when they’re sent, the content of the emails), making sure each new subscriber receives a warm introduction to your business.
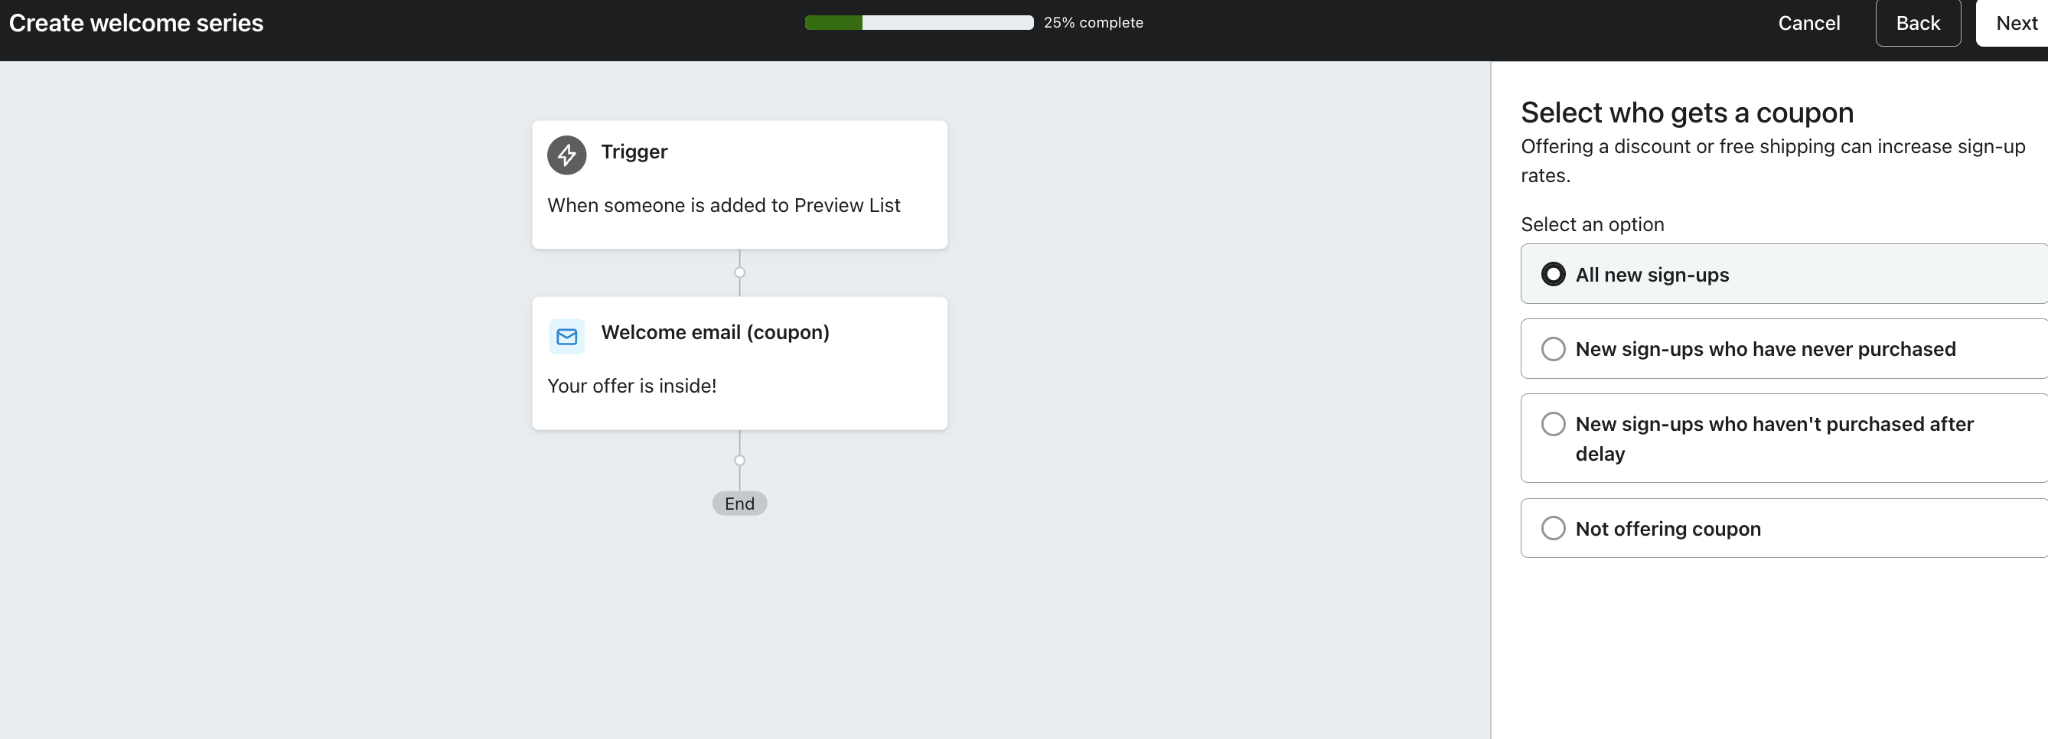
4. Now that you’ve already connected your Shopify store to Klaviyo, you can take advantage of this by offering a welcome discount to incentivize your new signups.
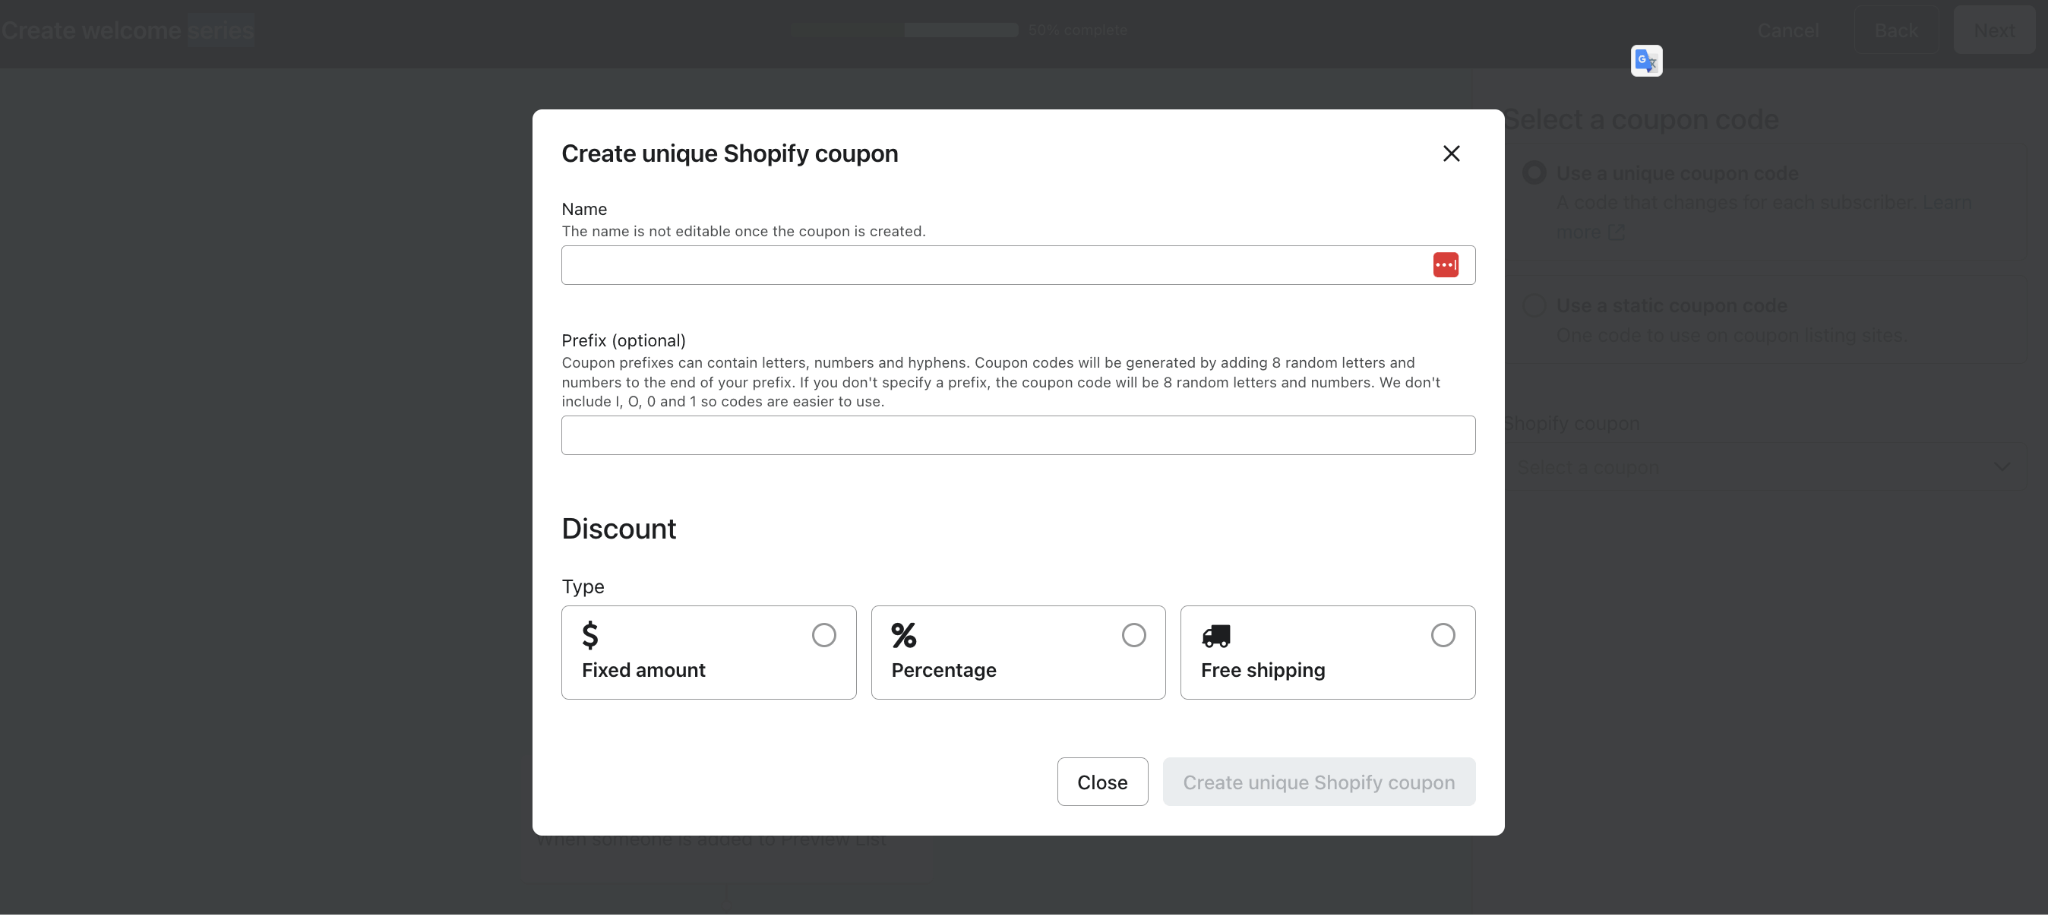
5. Klaviyo allows you to set up either a static or unique coupon code. We recommend using a unique coupon code, as they offer better security and can be personalized with expiration dates, creating a sense of urgency (and hopefully maximizing that revenue).
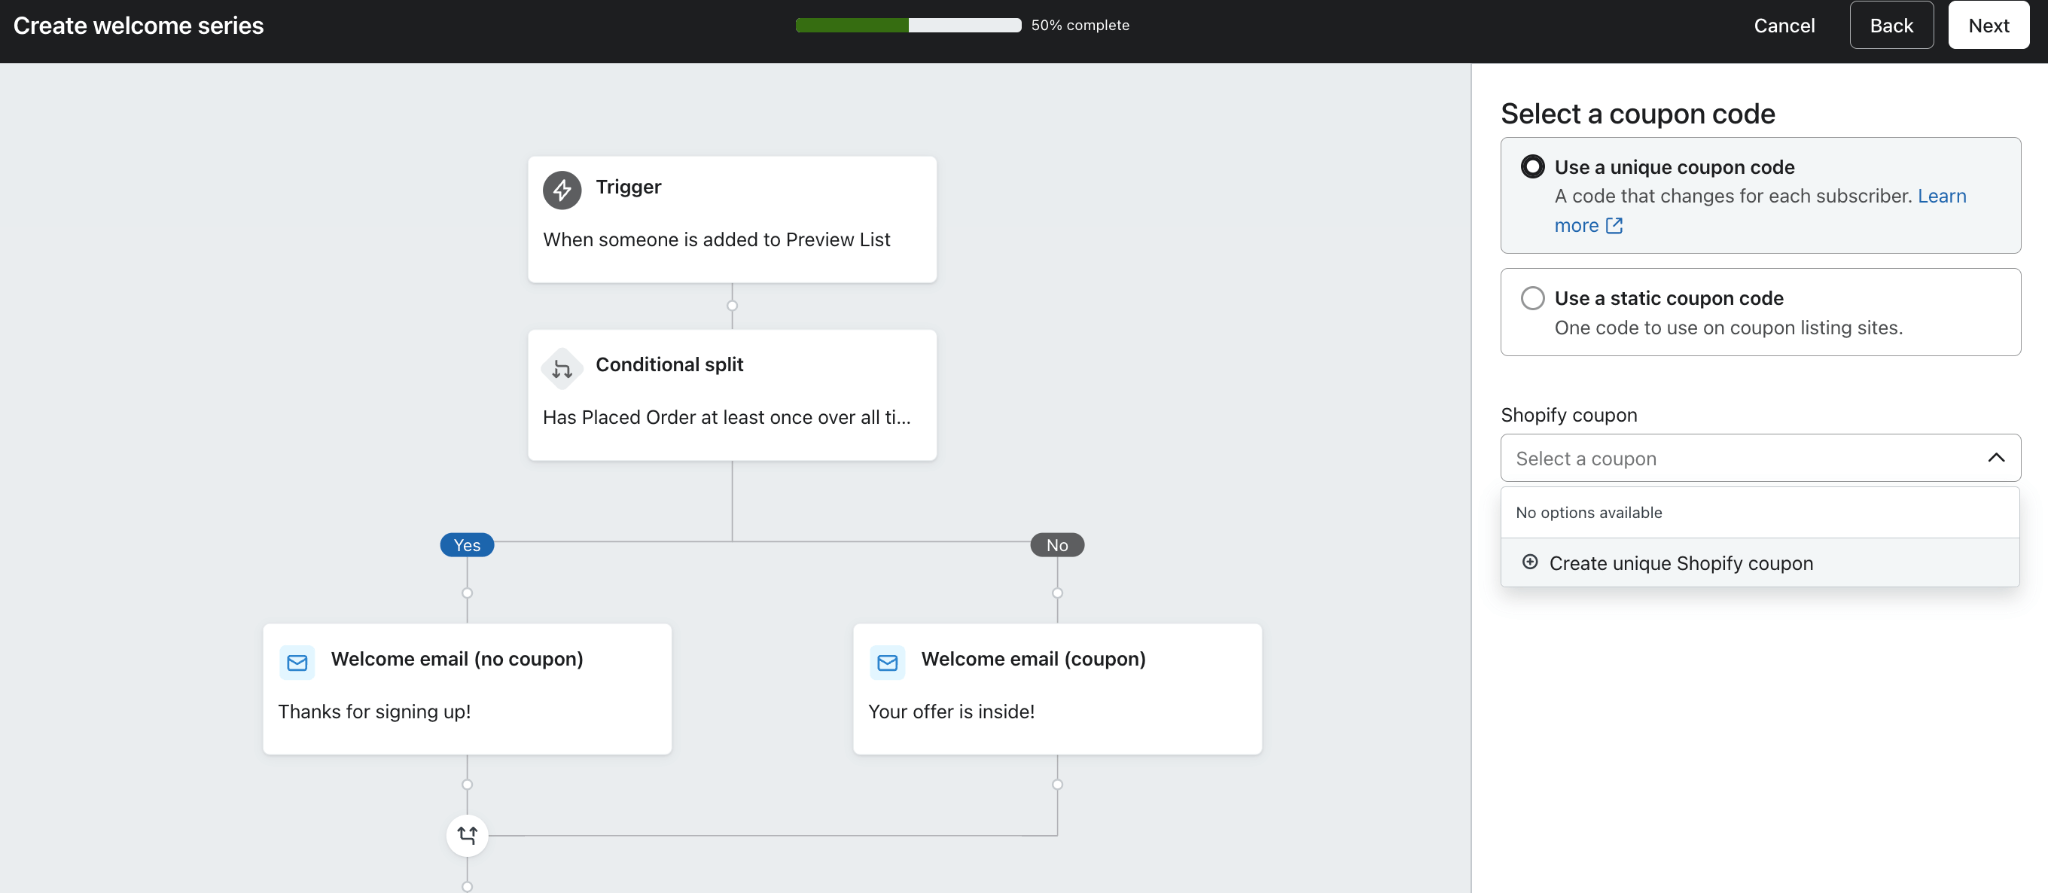
What I really appreciate about Klaviyo is its user-friendliness. Whether you are setting up your first automation or creating a discount code to send to your customers, it’s so easy to make your way around the platform.
You don’t have to spend endless amounts of time hunting for the right settings—everything is clearly labeled and organized for a smooth experience. You’ll even find descriptions around the platform to help you get started independently.
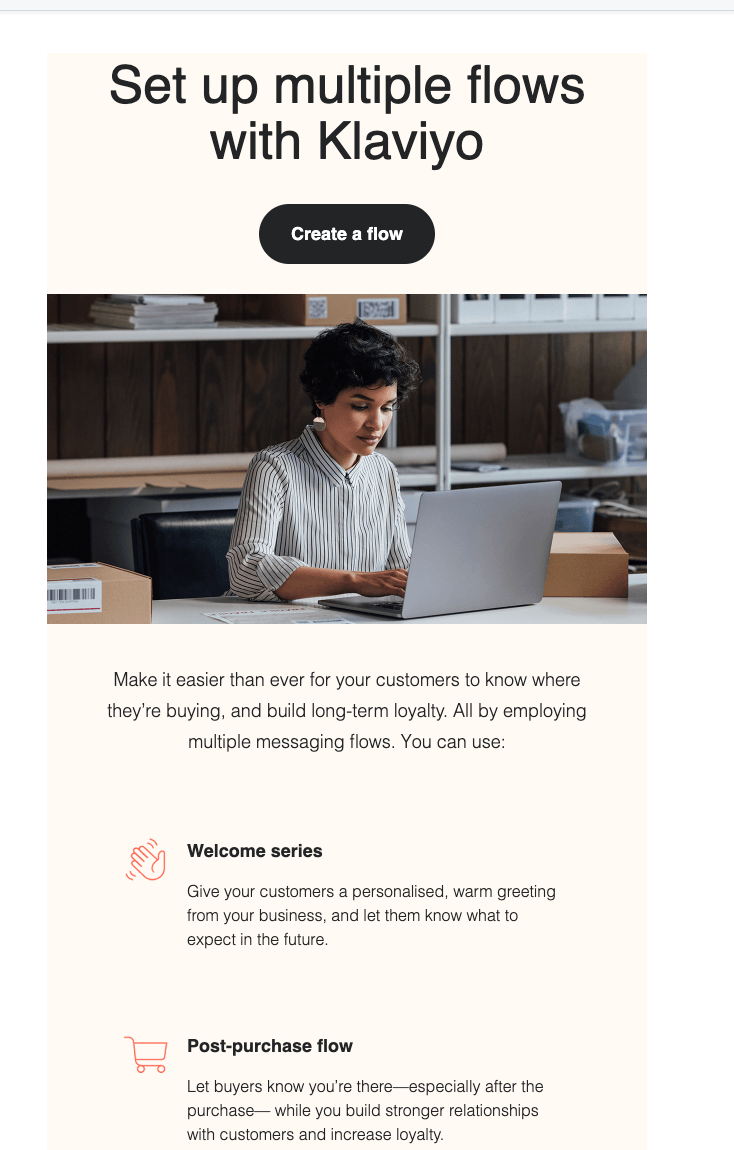
They also send a series of emails (with your permission, of course) to help you get your account set up, including guidance on creating welcome emails and more.
Step 9: Creating an Abandoned Cart Flow
Next up, it’s time for the next most important workflow for your ecommerce email marketing, the Abandoned cart flow. This automation flow is essential for recovering any lost sales.
Abandoned cart flows help by addressing one of the most common challenges in e-commerce: studies show that nearly 70% of online shopping carts are abandoned before the customer completes their purchase. So if you don’t have an effective strategy and workflow in place to recover these lost sales, you’ll sadly wave goodbye to a good amount of potential revenue.
Thankfully, Klaviyo makes setting up an effective Abandoned Cart flow a breeze by offering pre-built templates and a detailed guide to help you get started.
Here’s how to create your first Abandoned Cart flow with Klaviyo:
1. Just like before, start by heading over to the Flows section in Klaviyo and selecting the option to create a new flow. Choose the “Abandoned Cart” template from the available options.
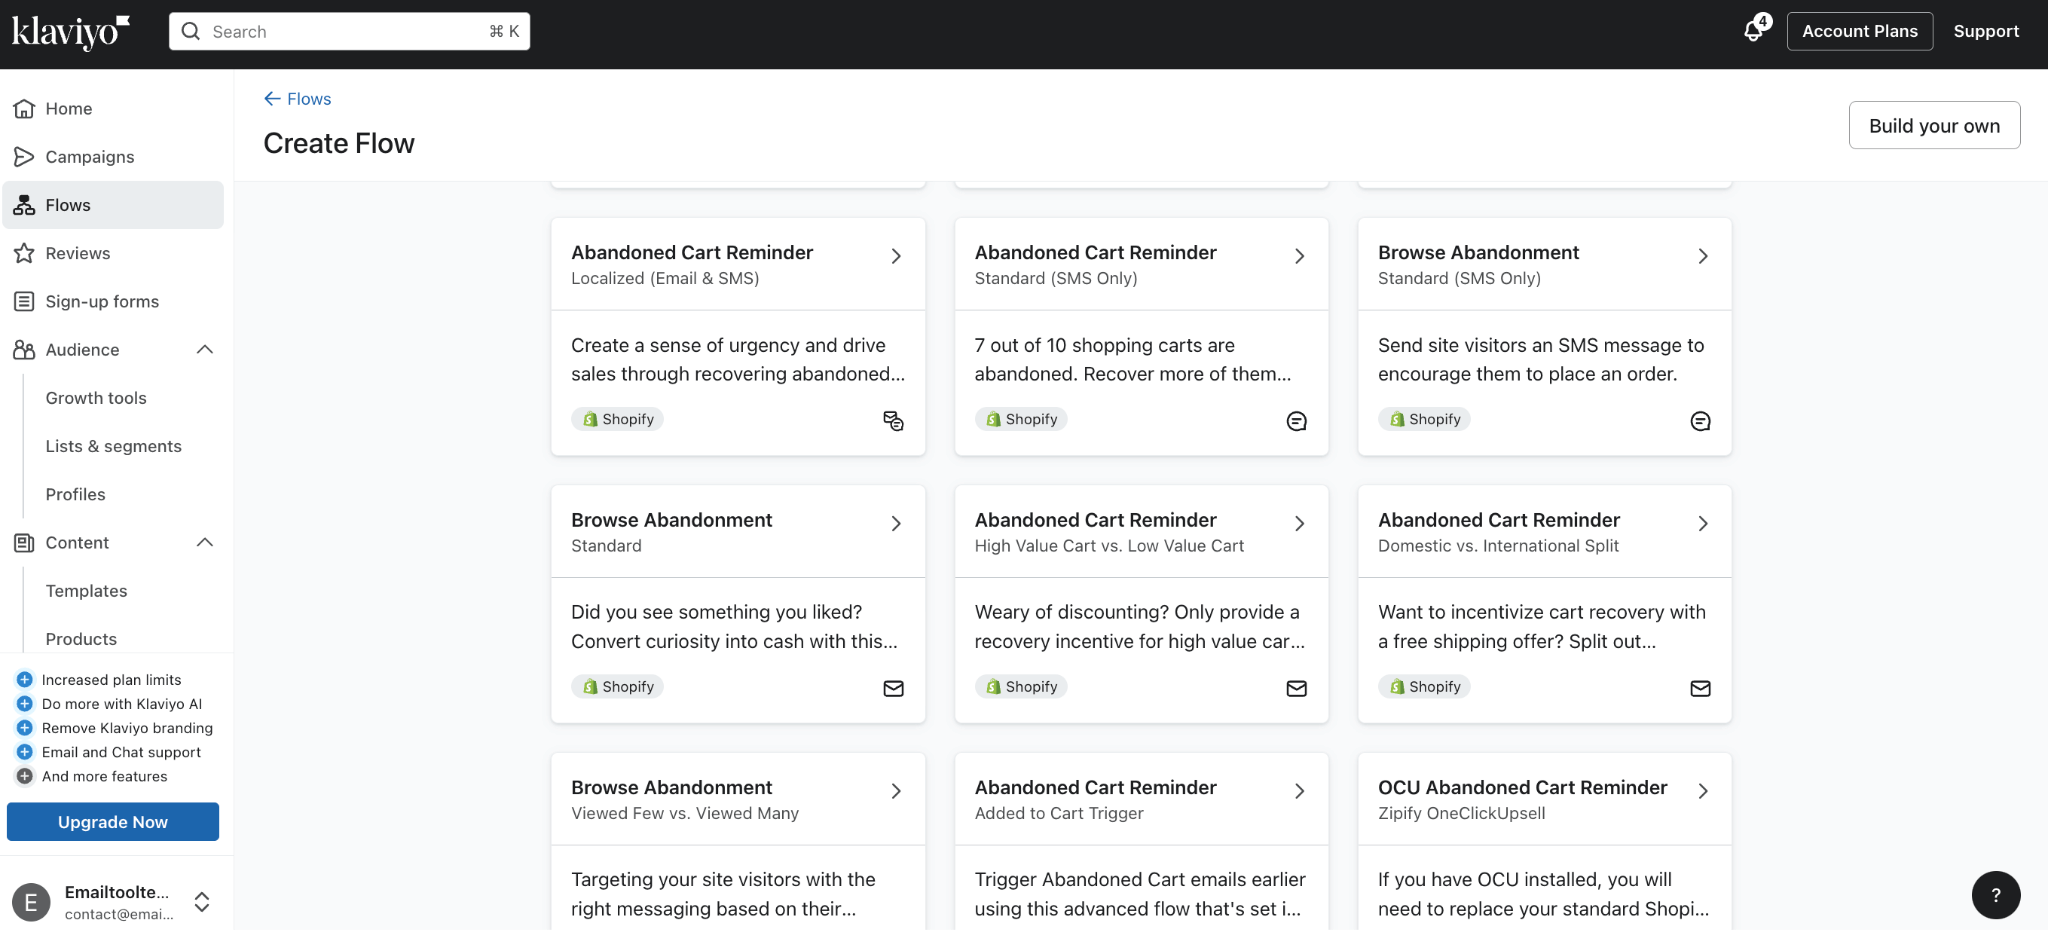
2. Klaviyo’s flow builder allows you to customize the sequence of emails sent to customers. You can choose how many emails to include in the series, the timing between each email, and the content of each message.For example, you might send the first reminder email four hours after cart abandonment, followed by a second email 24 hours later, and a final reminder 48 hours after that.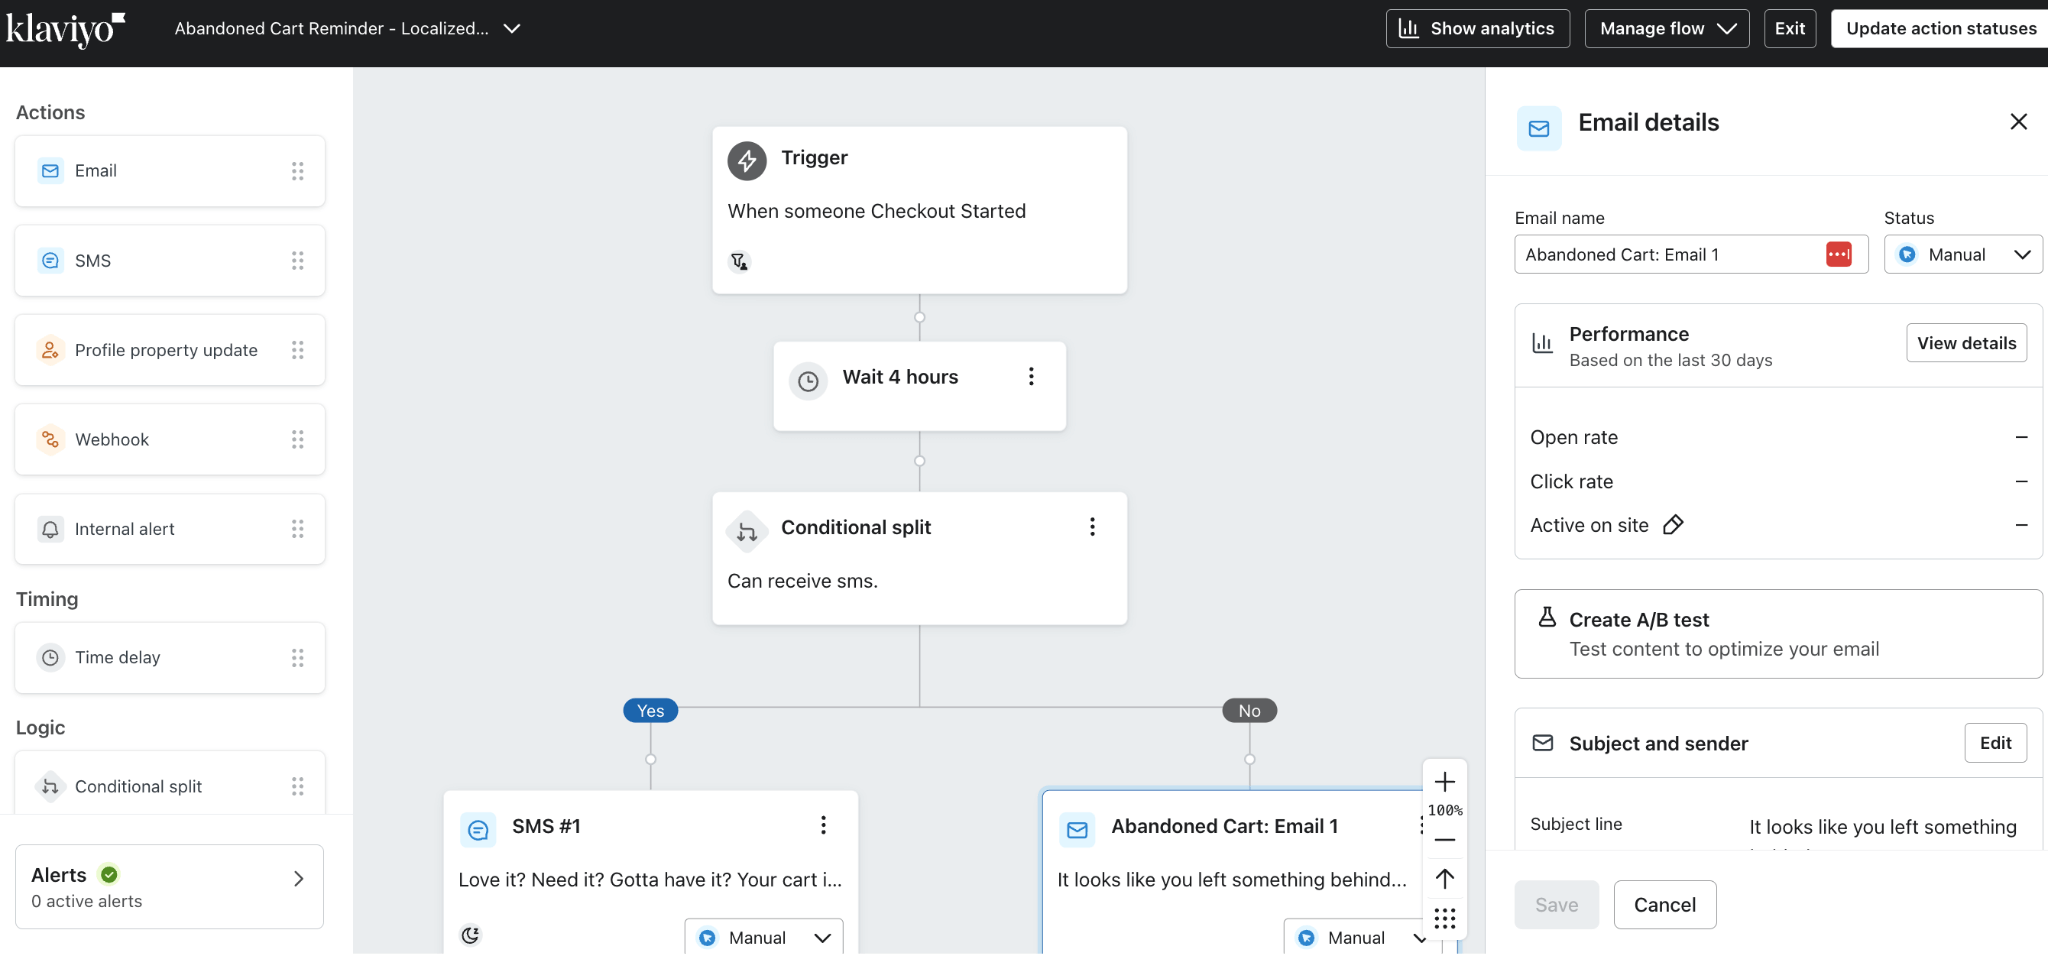
3. In addition to email, Klaviyo allows you to incorporate SMS reminders as part of your Abandoned Cart flow. This multi-channel approach can further increase the likelihood of recovering lost sales, as customers are reminded through both email and text.
4. Use the content blocks on the left to personalize each email with the items they left in their cart, and any special offers you want to include. Klaviyo’s templates are designed to make this process easy, ensuring that each email feels tailored to the individual customer.
5. Consider adding a time-sensitive discount or free shipping offer in your Abandoned Cart emails to create urgency. Let customers know that the offer expires soon, encouraging them to take action before they miss out.
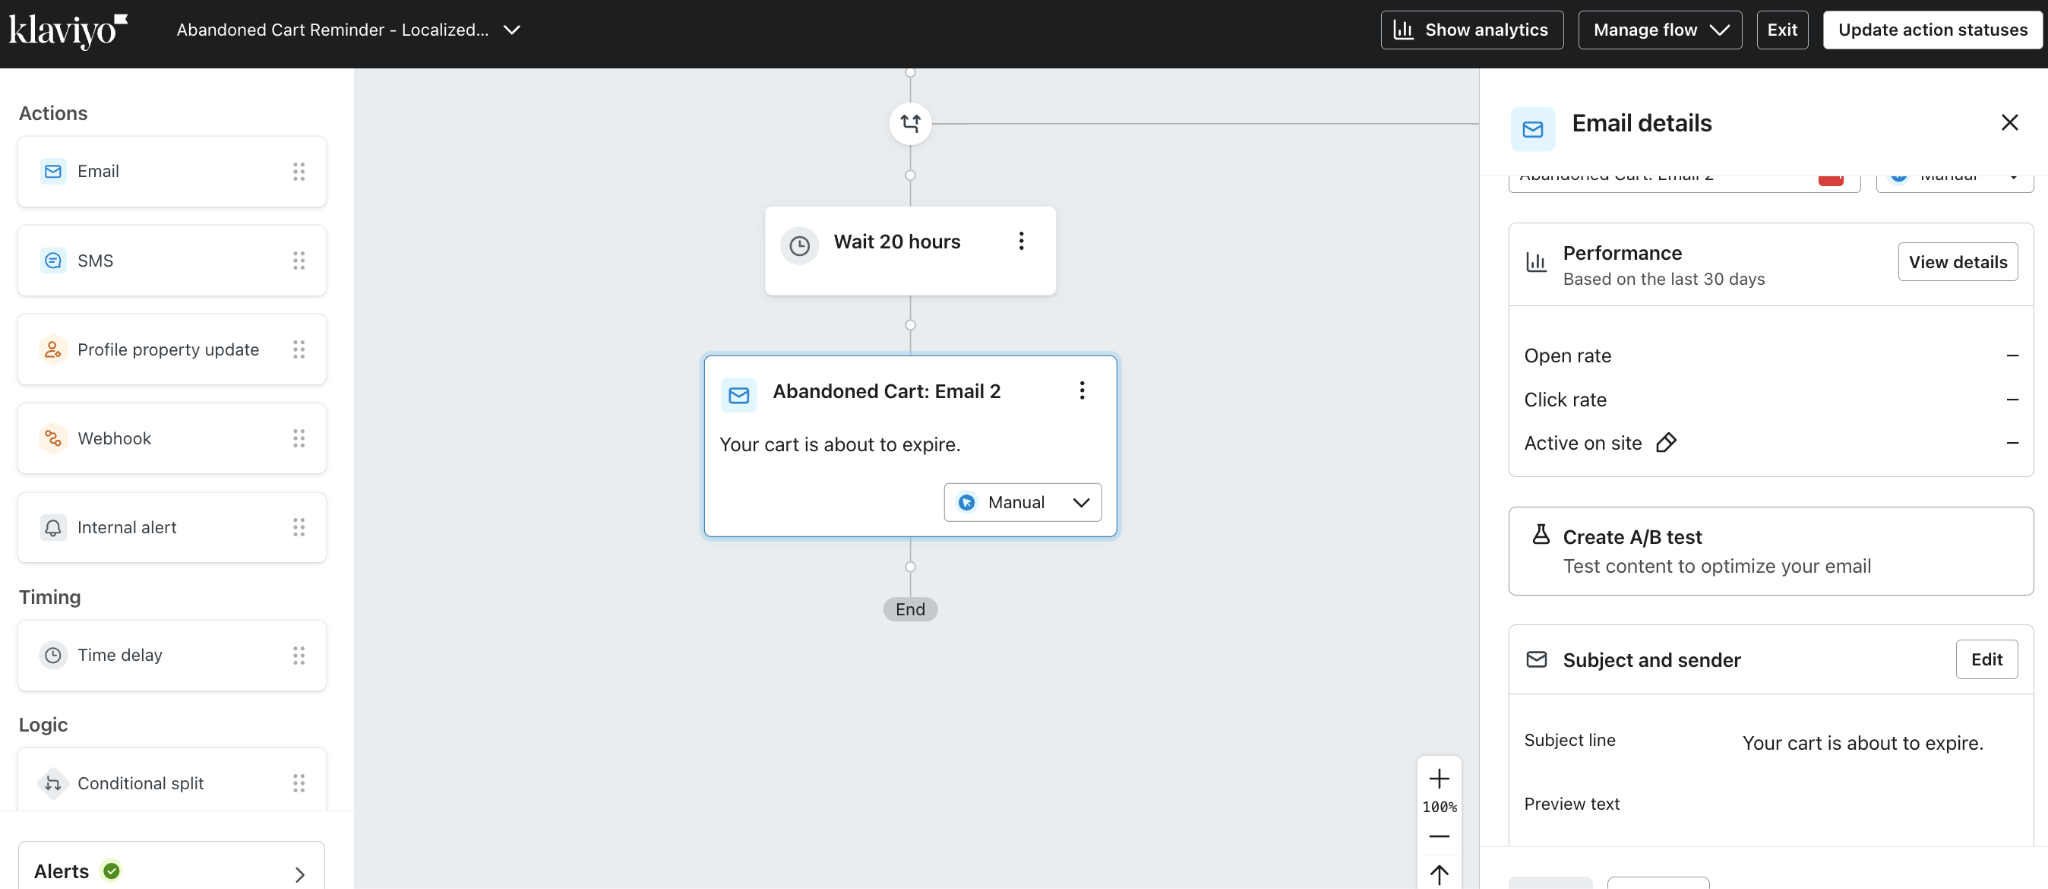
6. Once your Abandoned Cart flow is set up, it’s important to monitor its performance. Klaviyo provides detailed analytics that allows you to track open rates, click-through rates, and conversion rates. Use this data to make adjustments and optimize your flow for better results. You may want to play around with the wait time of your campaign or even the copy for example.
7. In addition to email, Klaviyo allows you to incorporate SMS reminders as part of your Abandoned Cart flow. This multi-channel approach can further increase the likelihood of recovering lost sales, as customers are reminded through both email and text.
Sending your first campaign with Klaviyo
Step 10: Sending Your First Campaign with Klaviyo
Unlike automated flows, campaigns are single, one-time emails sent to targeted segments of your list. An example of this is a newsletter or a sales promotional email. We believe that proper segmentation is essential when sending campaigns to ensure you’re reaching the right audience without overwhelming them.
Afterall, sending too many emails in a short period can lead to unsubscribes, so it's important to get that email frequency balance just right.
Step 9: Creating and Sending your first Campaign
Here’s how to create your first campaign:
1. Access the Campaigns Section: Log in to your Klaviyo account, navigate to the Campaigns section, and click on “Create Campaign.”
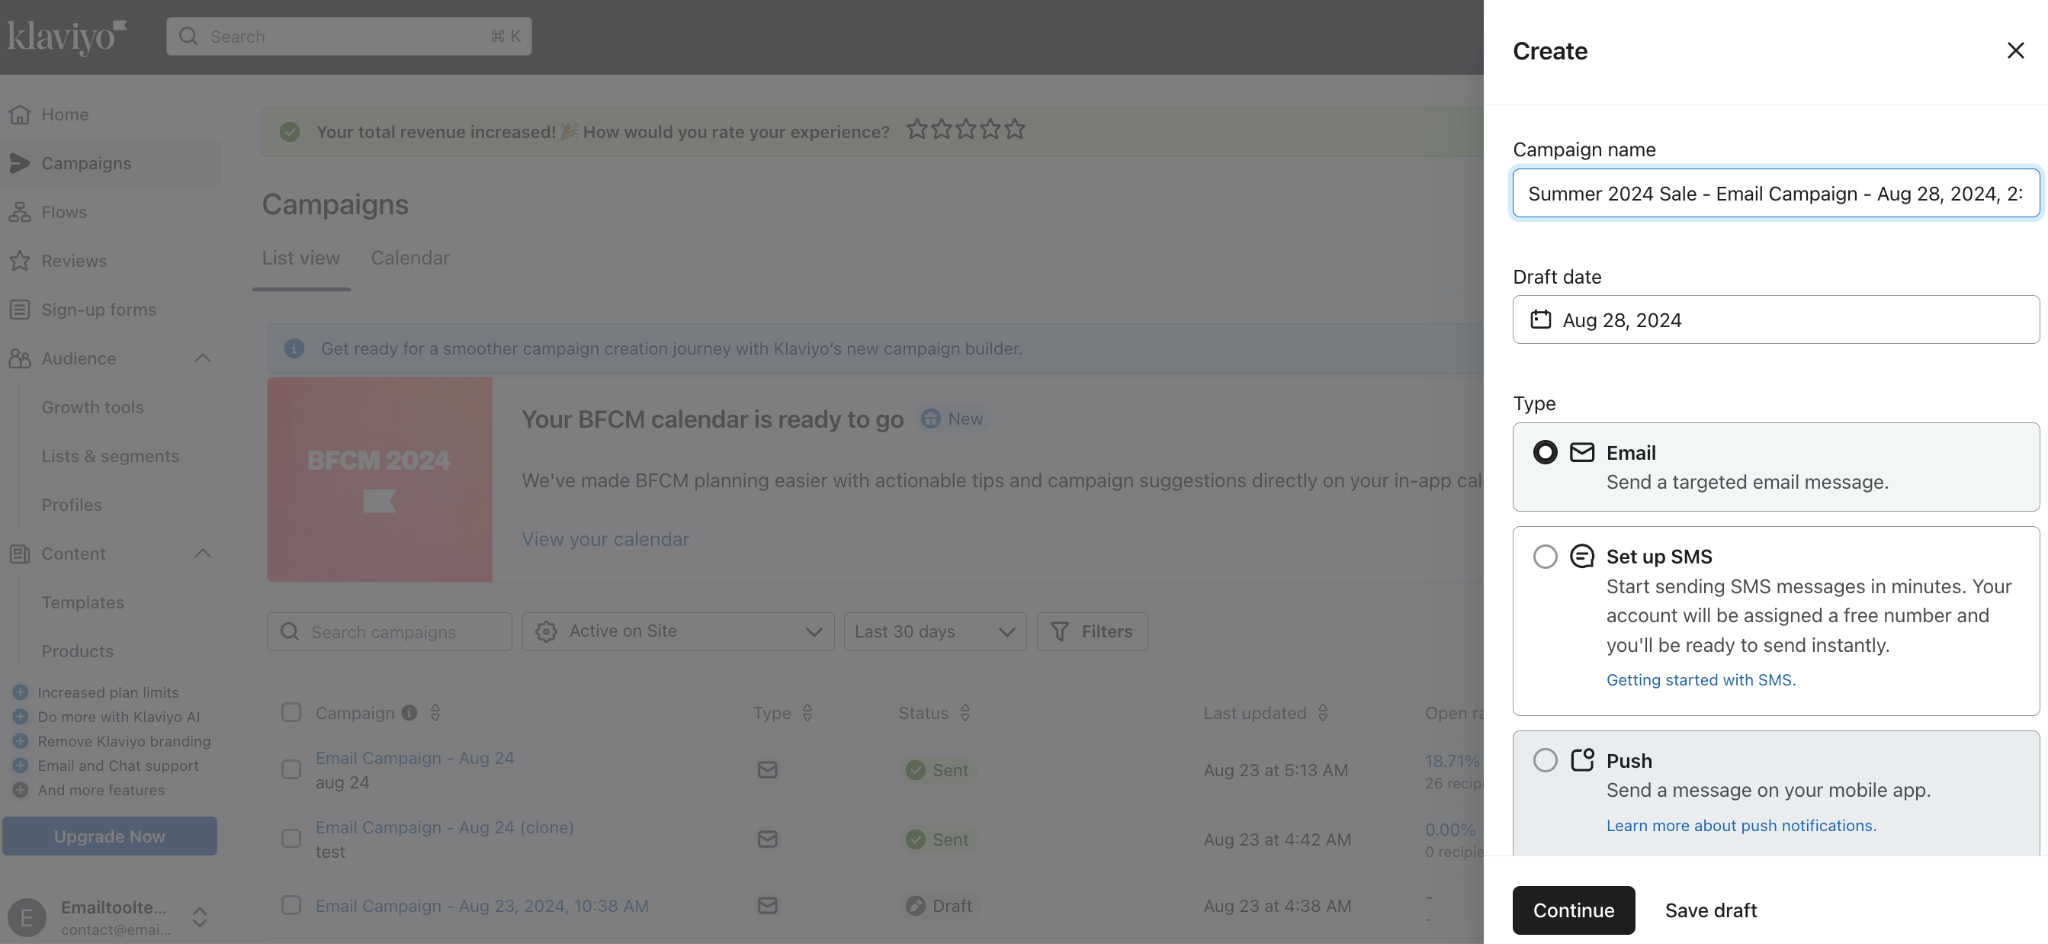
2. Name Your Campaign: Give your campaign a descriptive name to help you easily identify it later, e.g. “Black Friday 2024 Email 1”.
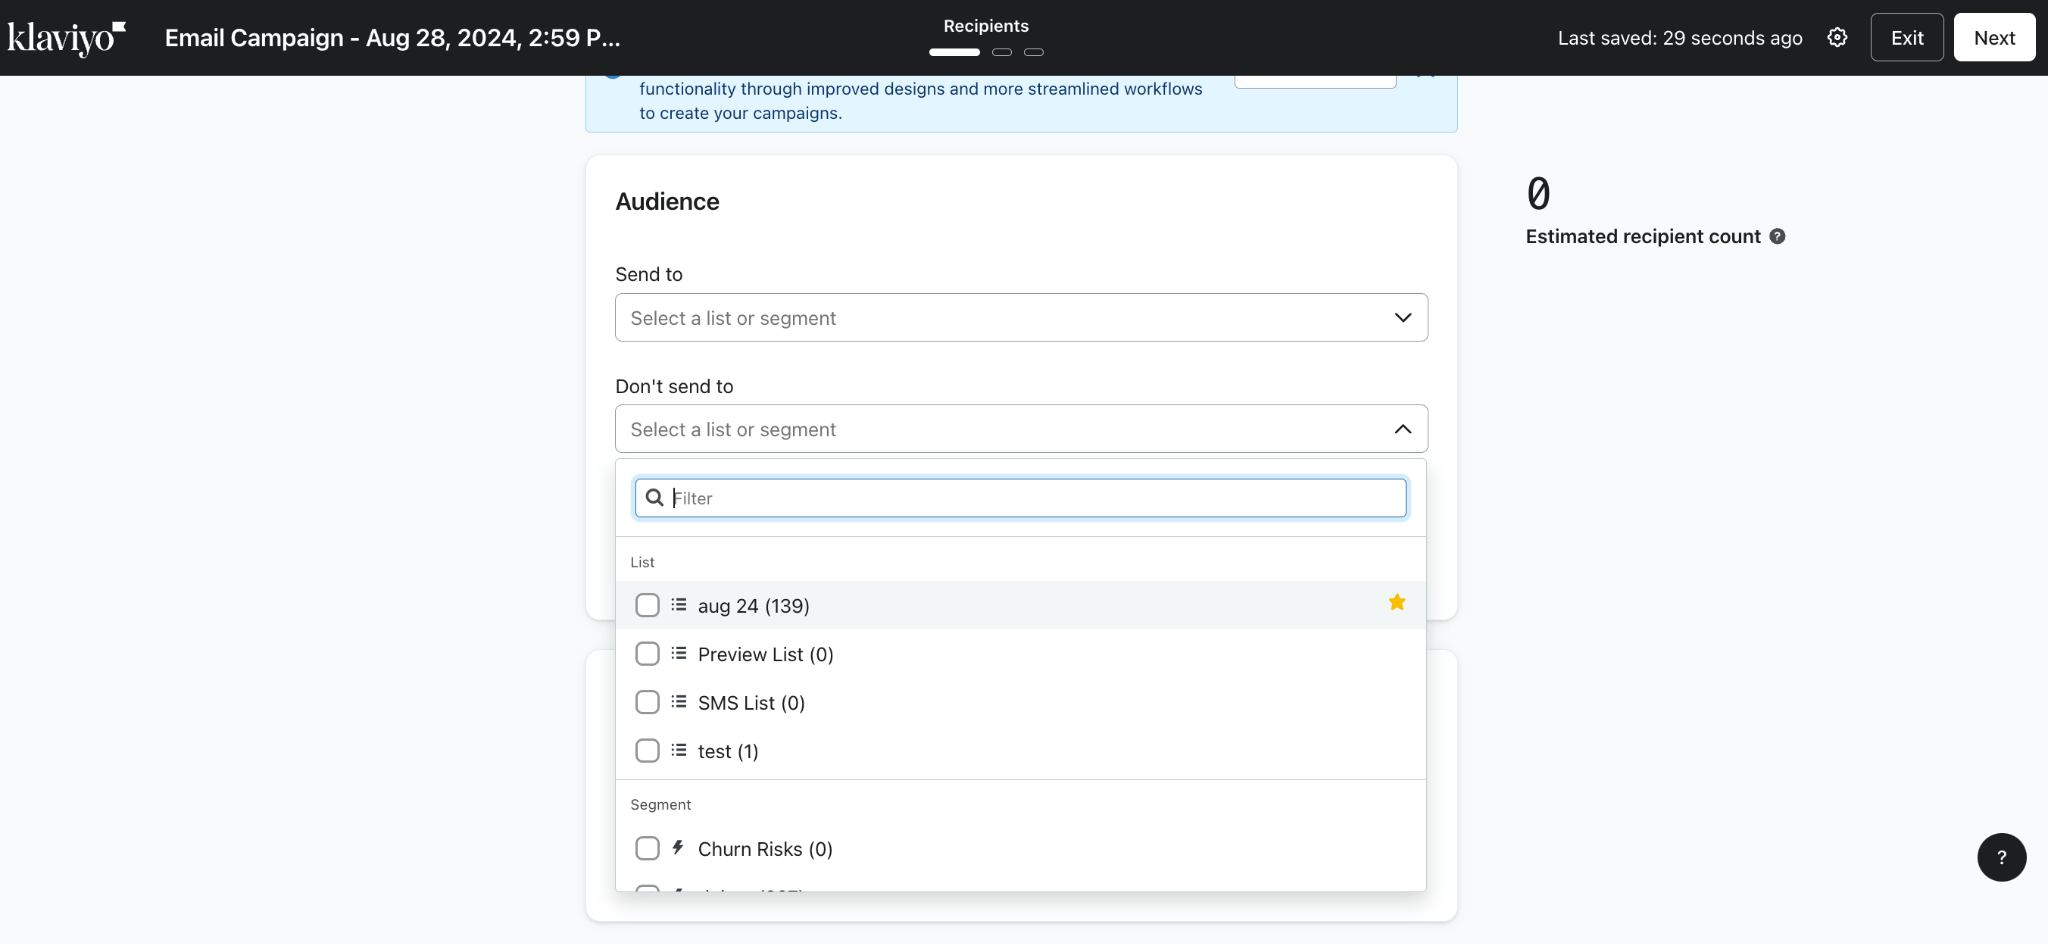
3. Segment Your Audience: Choose or create an audience segment. For example, you might exclude recent purchasers or those who have received an email in the last 16 hours. This helps maintain a balanced email frequency and reduces the chance of unsubscribes.
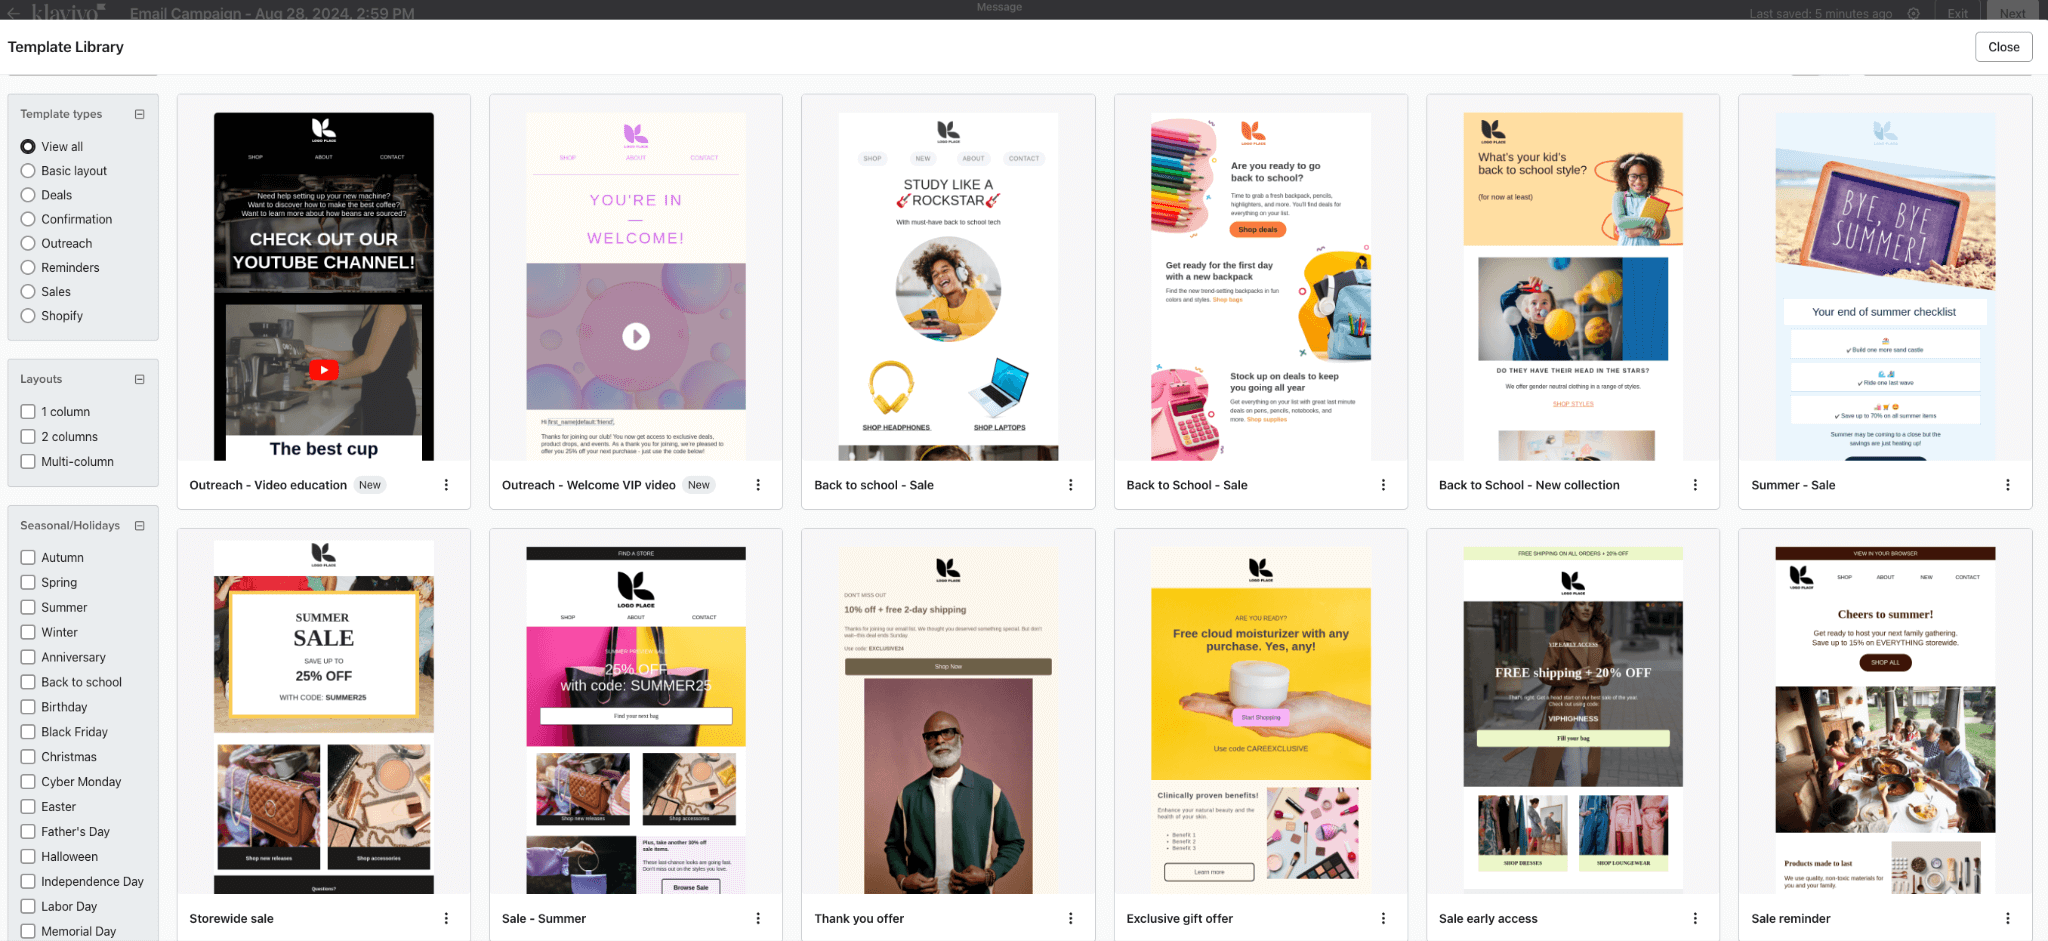
4. Choose a template: Klaviyo offers a strong selection of templates that you can categorize by template type such as Outreach, Reminders, Confirmation, and more. You can also filter by seasonal holidays and more. This is the important part: you should choose a template that helps you to reach what you want this email campaign to achieve. Is it promoting a product, sharing news, or encouraging sign-ups? Your objective will guide the layout, content, and call-to-action.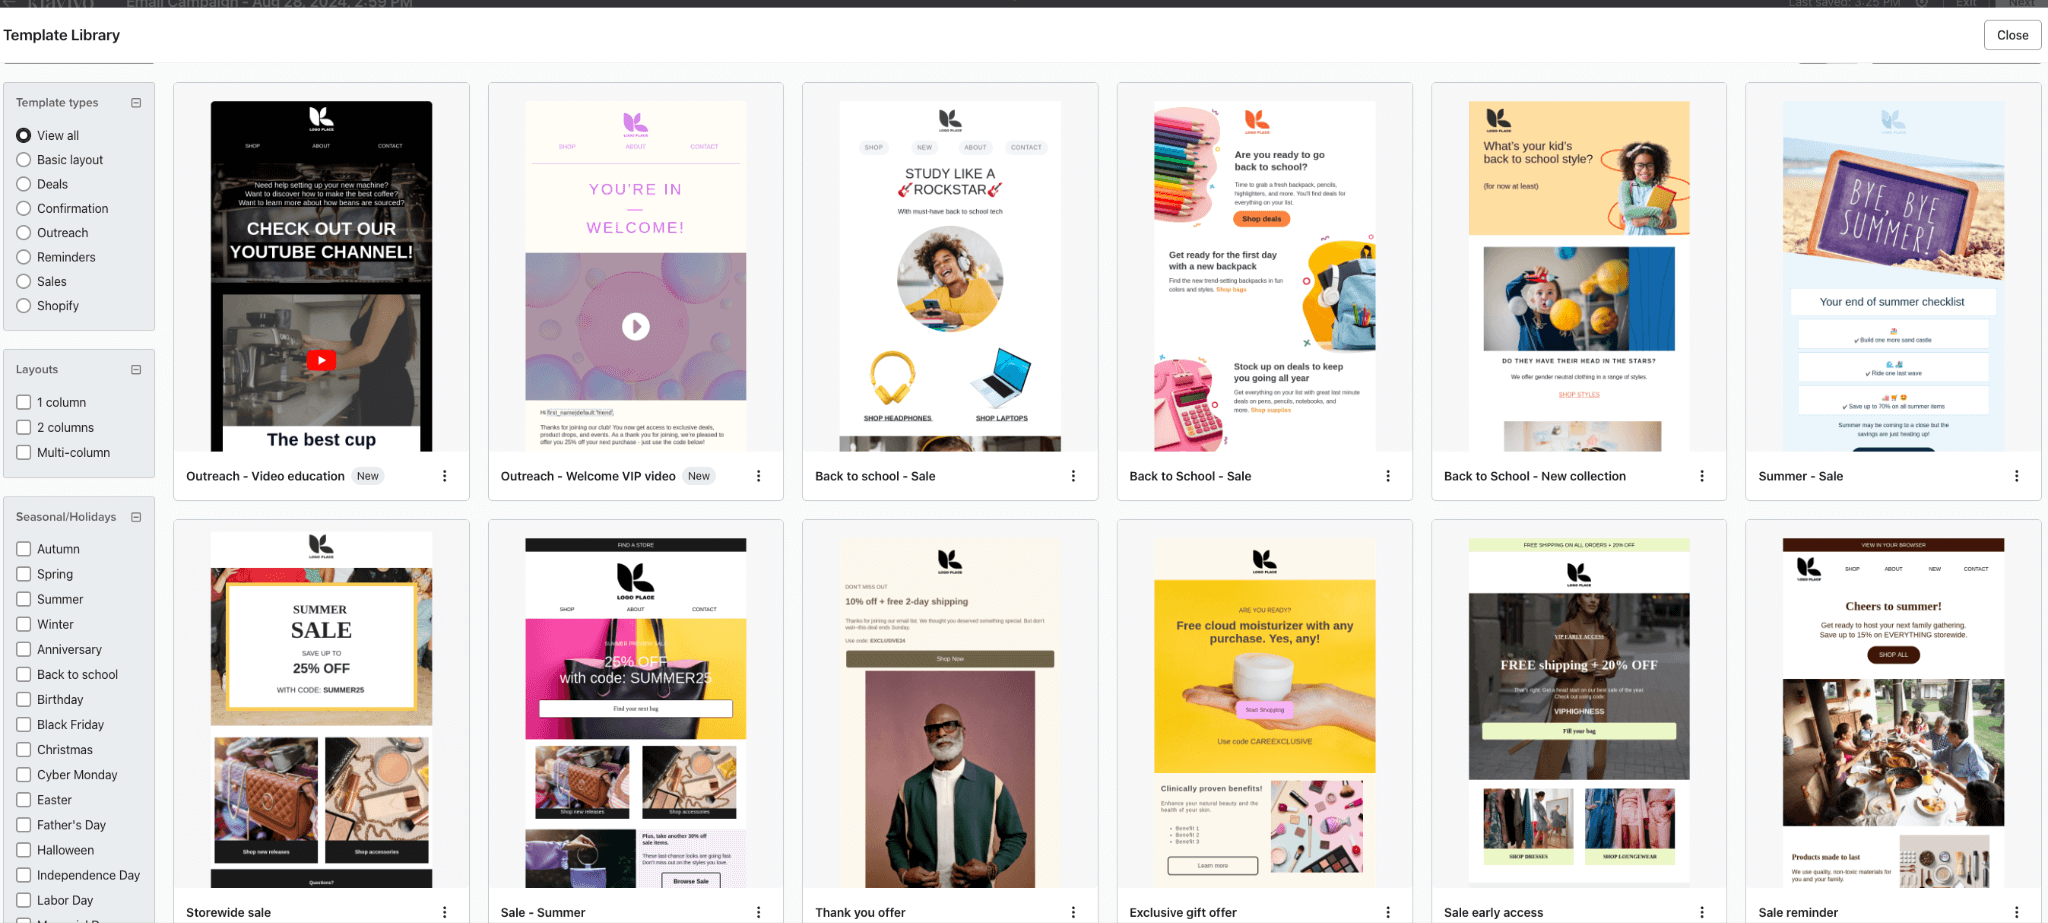
5. Once you’ve selected your ideal template, it's finally time to use Klaviyo's renowned drag-and-drop editor to start customizing your email content.
6. The content of the email campaign is up to you however, we recommend keeping your design minimalistic. Use white space to separate sections and make your content easy to scan. Use a good balance of imagery and text, with your brand colors, fonts, and logo to create a consistent look and feel.
7. After you’ve played around with the look and feel, be sure to check that your email campaign is optimized for both desktop and mobile views. We recommend sending a test email to see how it looks on multiple devices.
8. Finally, double-check your settings, preview your email, and then either send it immediately or schedule it for later. Try to consider what is the best time for your audience to receive this email and plan accordingly.
Klaviyo Reviews
Now you’ve set up your Klaviyo account for email marketing, it’s also worth exploring one other tool that we think can complement your email marketing strategy. One such tool, which we mentioned earlier is Klaviyo Reviews. This feature is designed to help you gather valuable customer feedback directly on your product pages.
Positive reviews can encourage potential customers to make a purchase.
Step 11: Setting Up Klaviyo Reviews
1. Head back over to the Shopify App Store, search for “Klaviyo Reviews,” and install the app on your Shopify store
.
2. Once installed, go to the Klaviyo Reviews settings within your Shopify admin. Customize the review forms, display options, and notification settings according to your preferences.
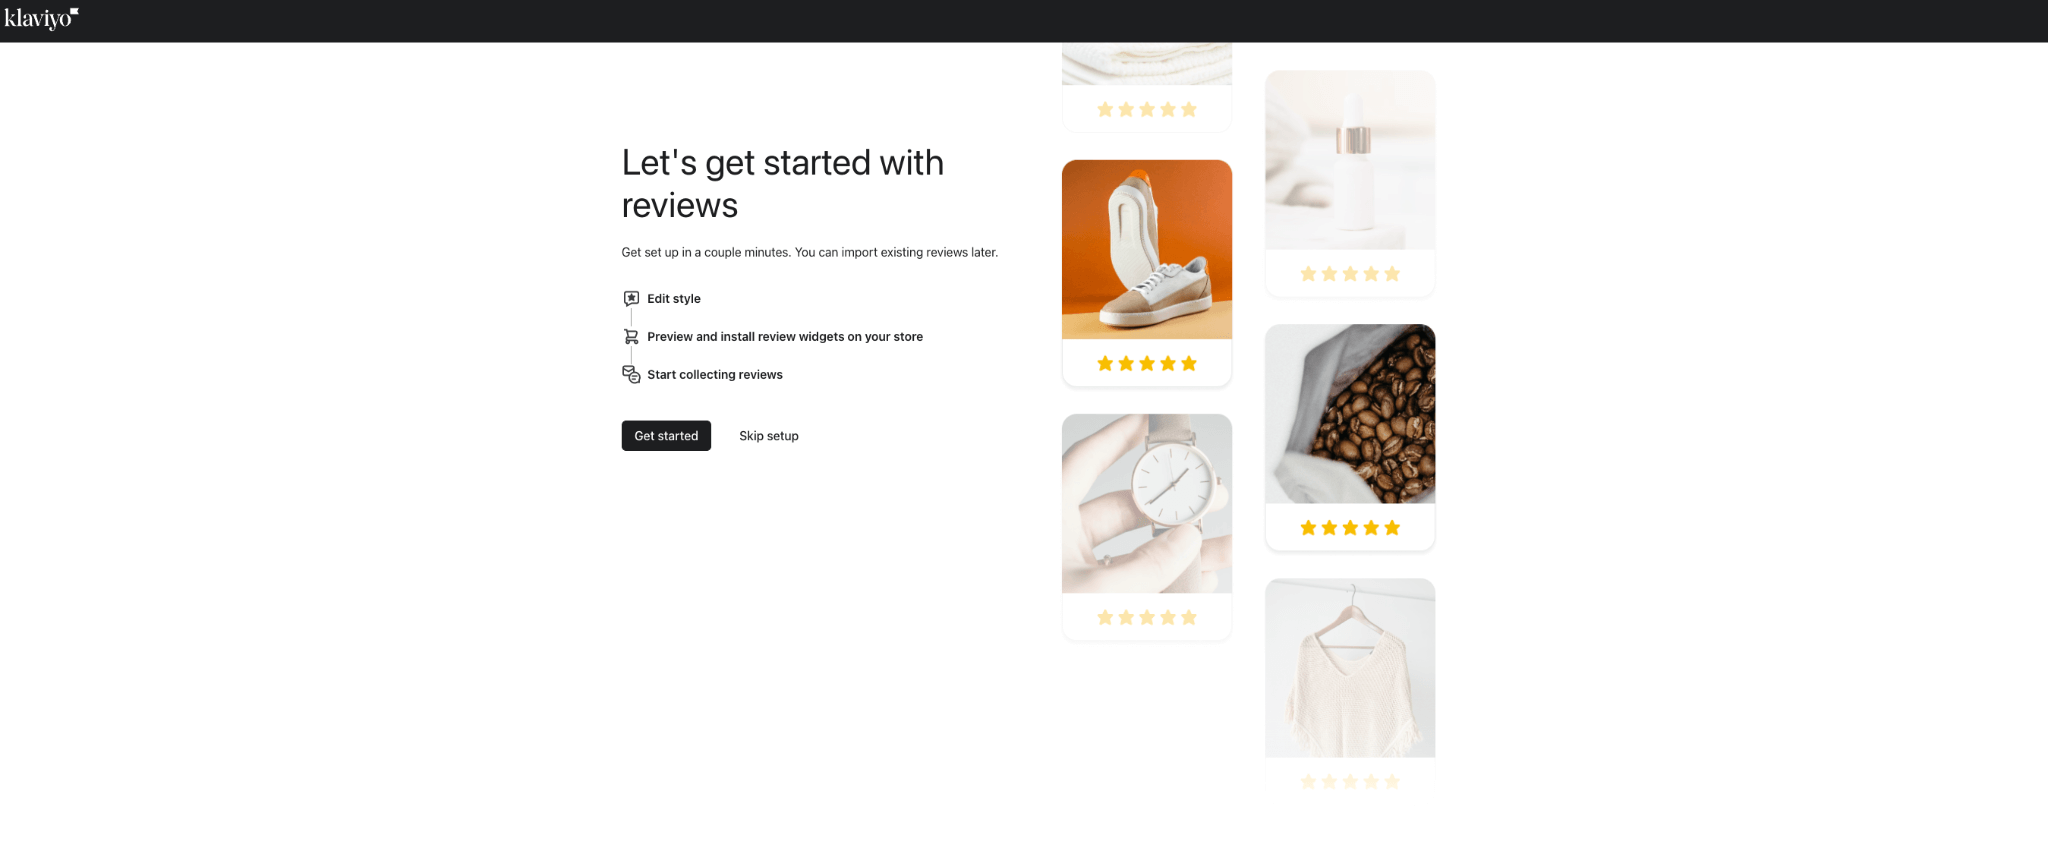
3. In Klaviyo, you can then create an automated flow to send a review request email. Set the trigger for a few days after a customer receives their order, encouraging your customers to leave a review through the Klaviyo Reviews app.
Final thoughts; Klaviyo Tutorial
We hope you enjoyed our Klaviyo tutorial! Hopefully, with this guide, you now have the knowledge under your belt to get started on your ecommerce email marketing journey.
Choosing Klaviyo for your ecommerce marketing is already a step in the right direction. With so many handy automations and integrations, you’ll be bringing in that revenue in no time.
It's important to remember that a successful email marketing strategy requires continuous optimization.
For this reason, we recommend regularly reviewing your campaign analytics to identify what’s working and where improvements can be made. It’s all about trying new things to see what works for you and your customers!
We keep our content up to date
06 May 2025 - Added Klaviyo Flows video
20 Dec 2024 - Added Youtube video
Our Methodology
This article has been written and researched following our EmailTooltester methodology.
Our Methodology
