
Thinking about signing up or switching to MailerLite? Great choice!
![]()
We believe MailerLite is one of the best email marketing platforms out there, so much so that we even rewarded it with our “Ease of Use” badge for 2024.
In addition to this, they also won our latest deliverability test, scoring 95.4%.
On top of these great results, they also offer an impressive feature set and some of the most affordable plans we’ve seen. And while it may not have the most advanced email marketing capabilities, it's an extremely easy-to-use platform, meaning it shouldn’t take long for you to get to grips with it.
In this MailerLite tutorial, we'll provide a step-by-step guide to help you become a pro at this excellent email marketing tool. We'll cover all things from your initial account setup and importing your contact list, all the way through to creating and sending your first email campaign. So, let's dive in and start discovering the full potential of MailerLite together!
If you’d prefer to learn by watching, follow our MailerLite tutorial video:

Who is this MailerLite Tutorial for?
This MailerLite tutorial is perfect if:
- You’re a beginner and need a step-by-step walkthrough of how to get started with MailerLite
- You’re looking to set up a signup form or newsletter campaign in MailerLite.
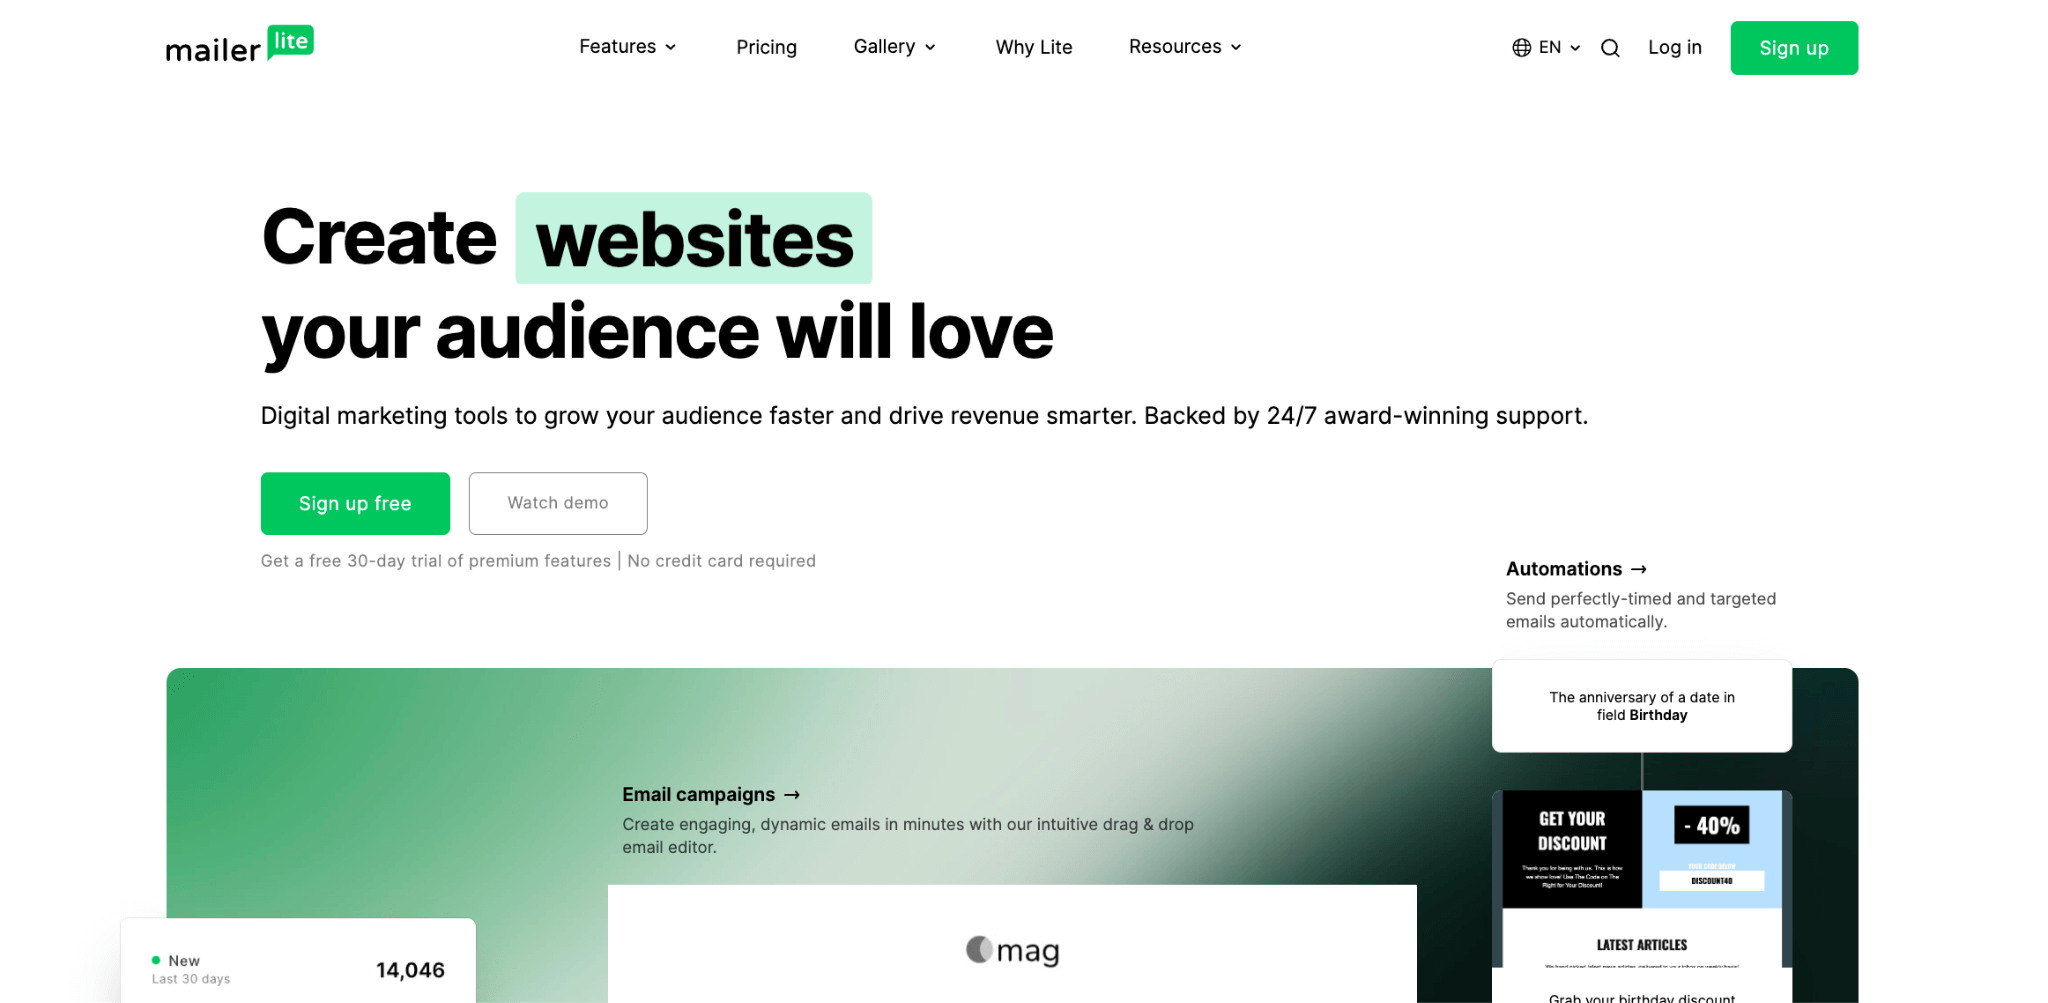
Step 1 – Creating Your MailerLite Account
Luckily for you, setting up your MailerLite account is an absolute breeze. All you need to do is head to the MailerLite homepage and you’ll find not one but two signup buttons, one in the top right-hand corner and the other in the middle of the screen.
MailerLite landing page
Once you click on the button of your choice, you’ll be taken to a signup page where you can sign up with your Google or Microsoft account – which is usually the easiest way to sign up. But for this tutorial, we’ll choose the email signup option.
You'll be asked to fill out the following information:
- your company name
- full name
- email address
- and password
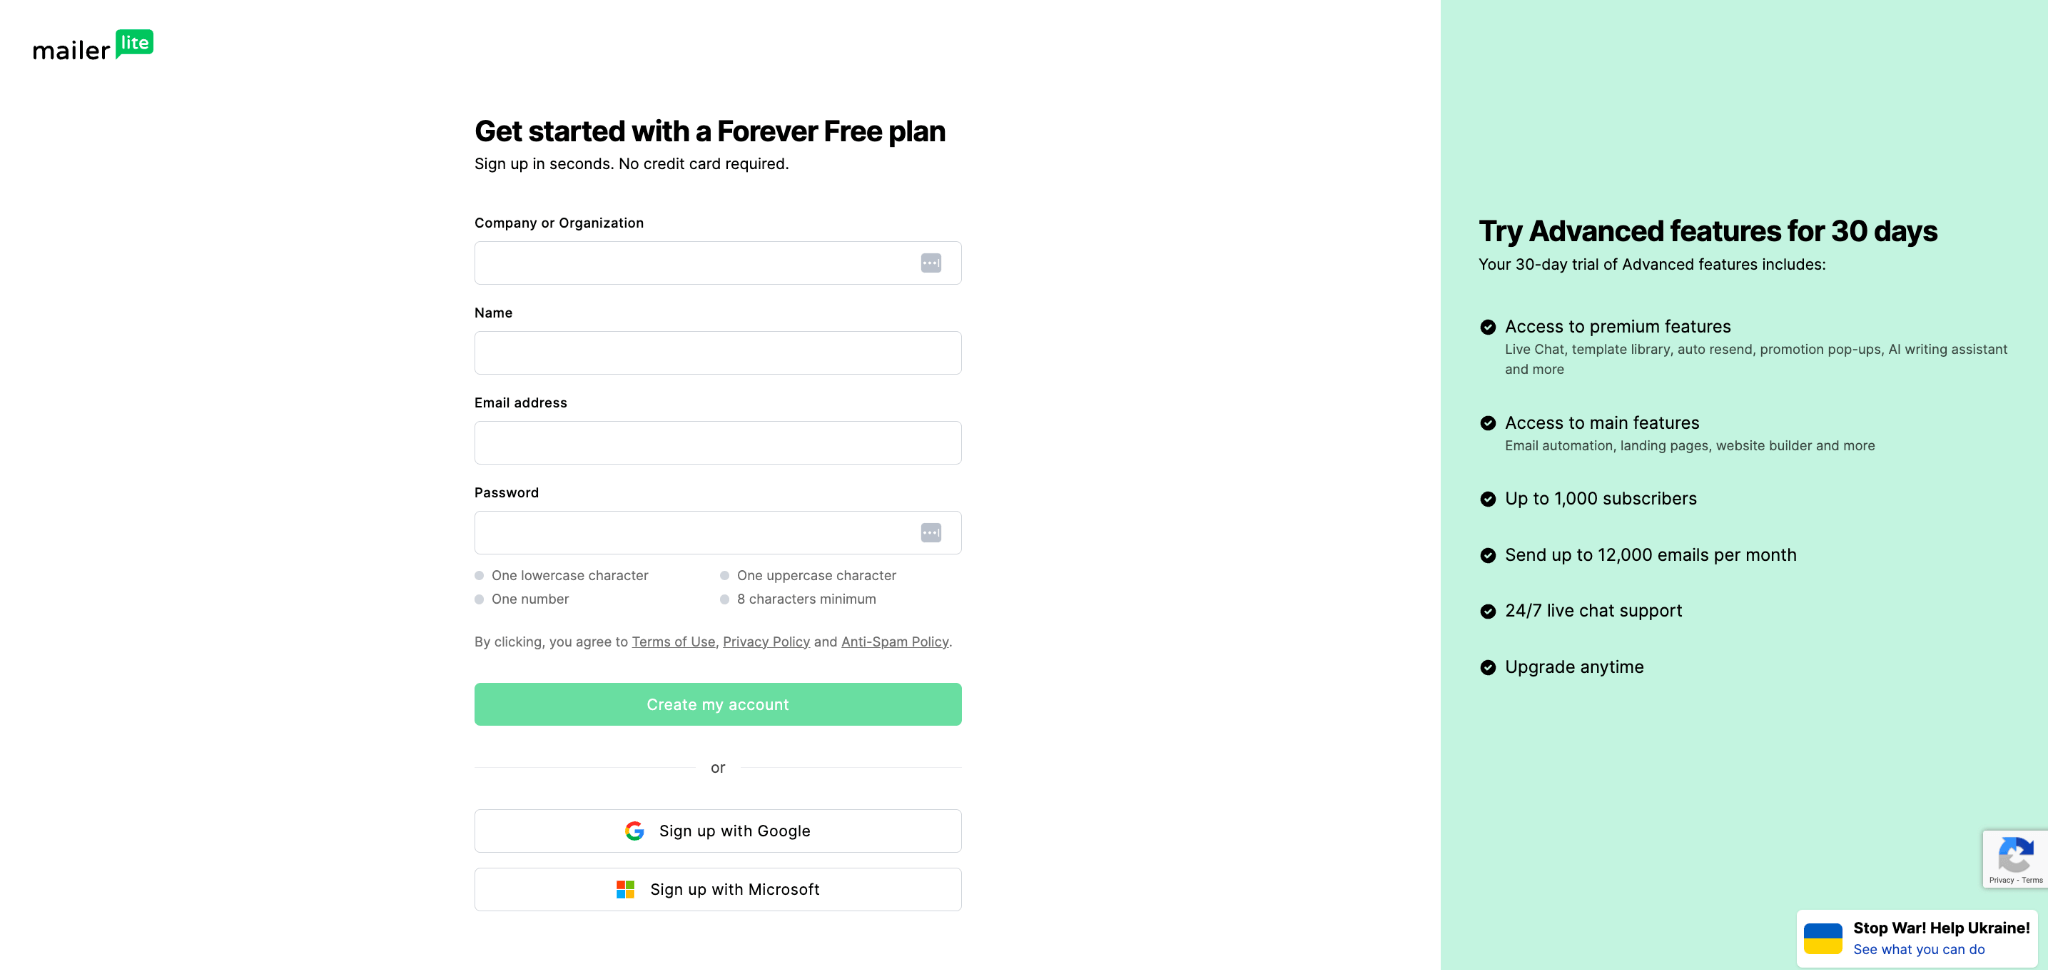
MailerLite forever free plan signup page
Then, once these are filled out, click the “Create my account” button. From here, you’ll receive a verification email in your inbox. MailerLite will promptly send you a verification email to confirm your identity.
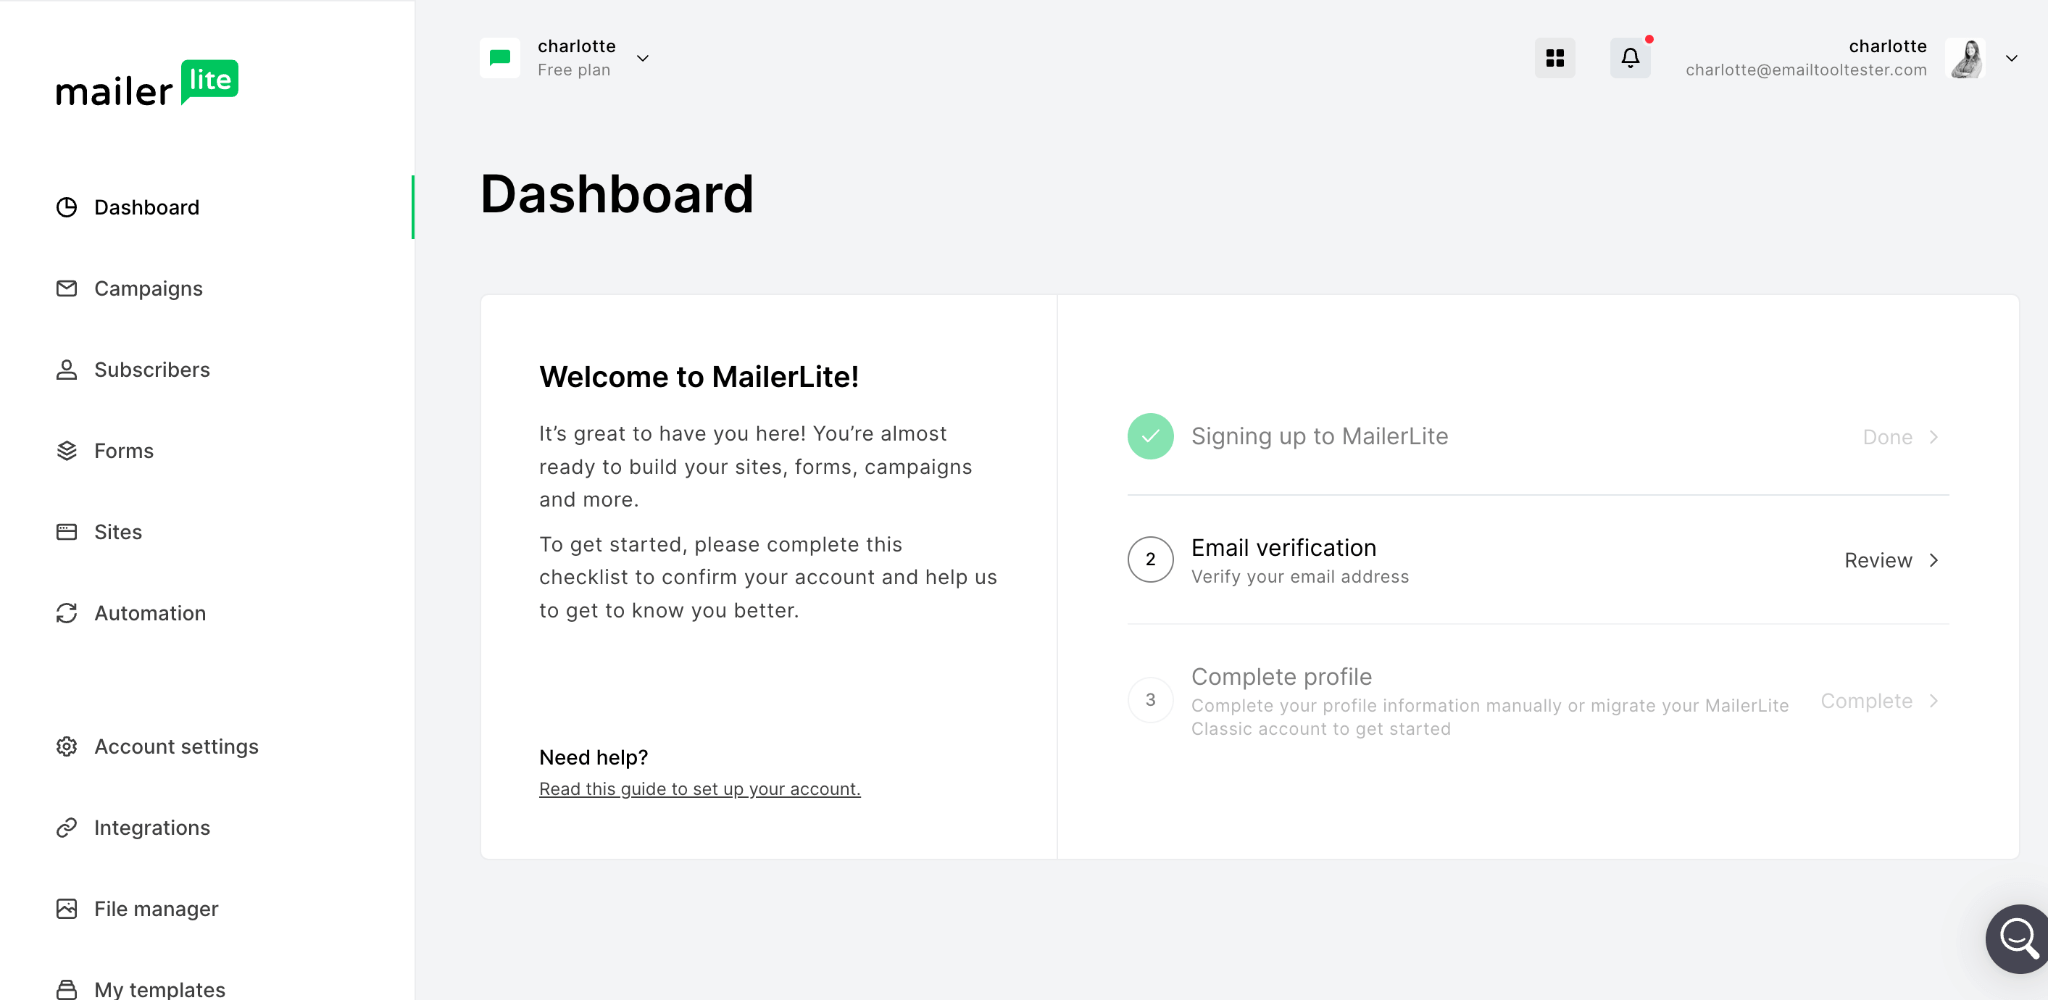
MailerLite dashboard example
Simply click on the verification link in your inbox, and you'll be taken back to the website to complete your profile by providing your website URL.
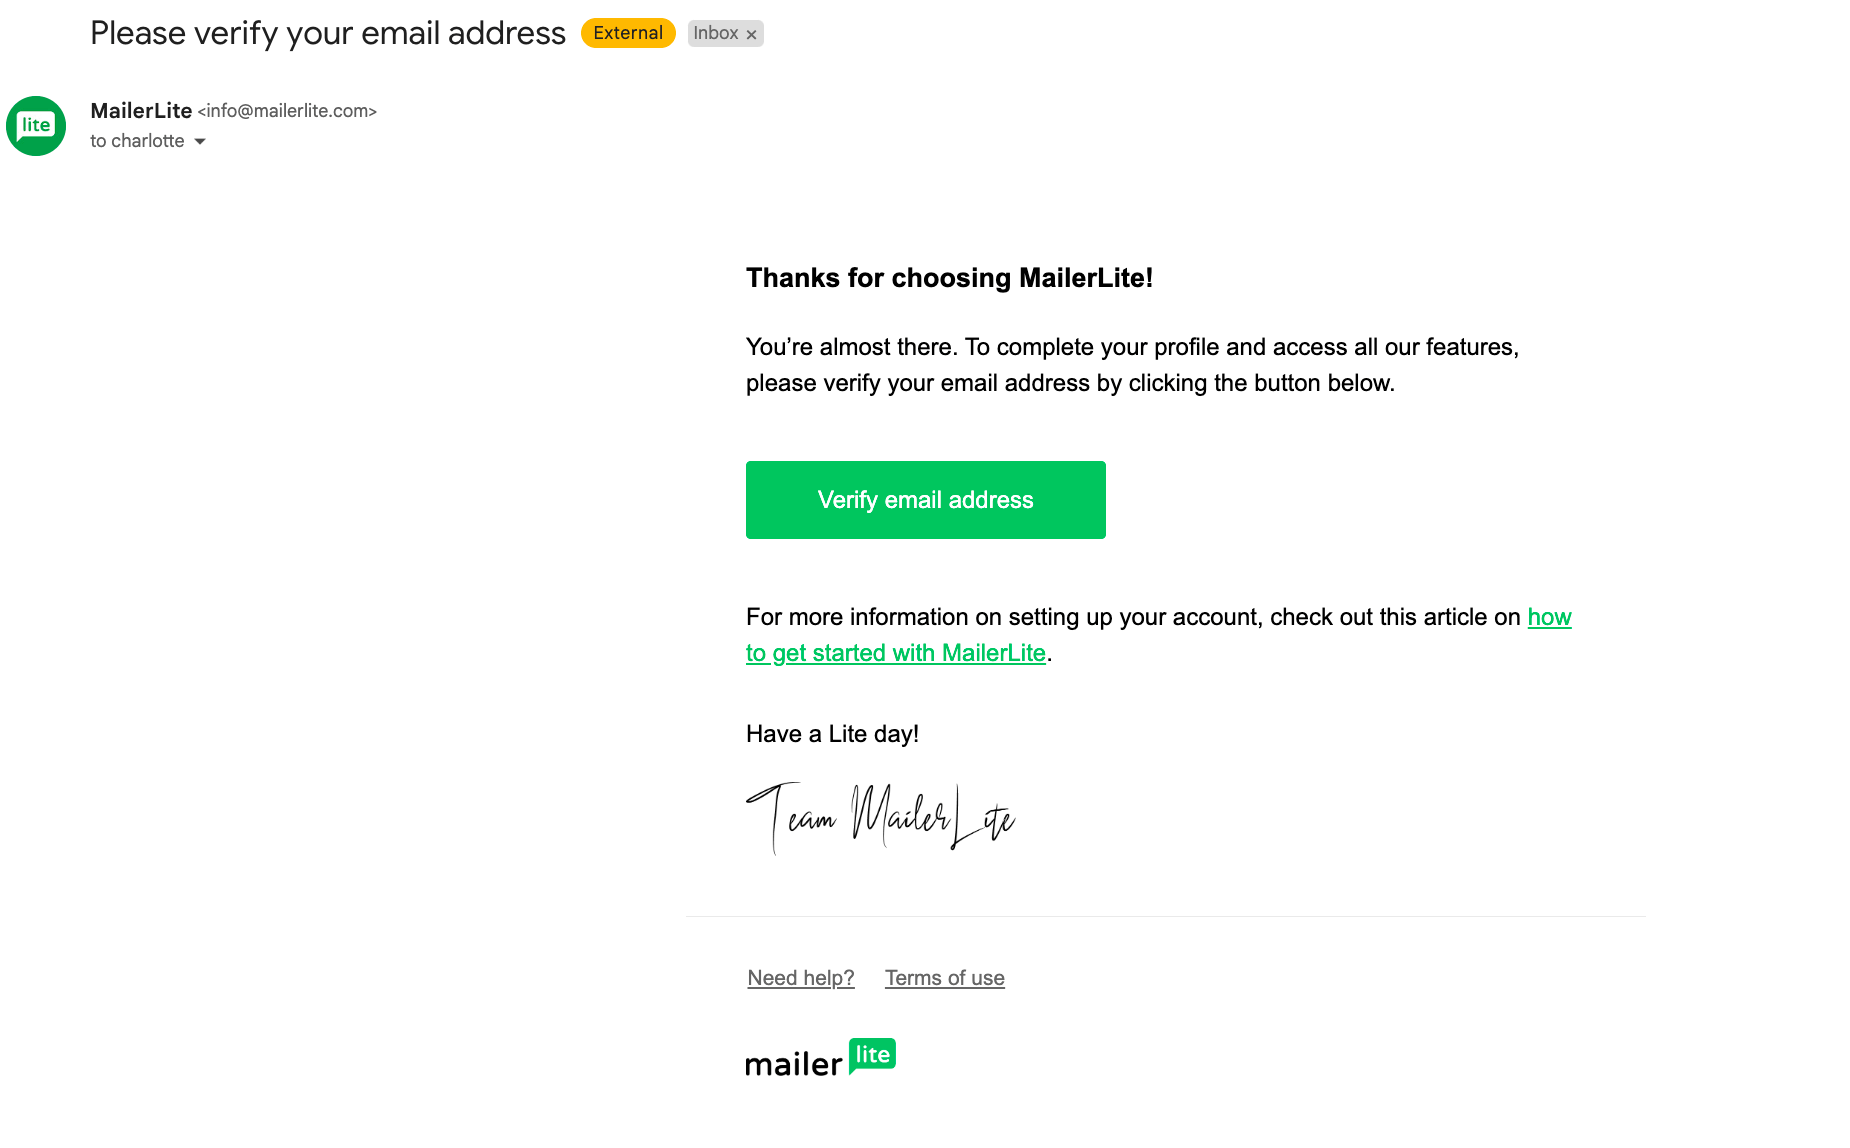
MailerLite email verification example
Don’t worry if you don’t have a website. Instead, you’ll be asked to enter your social pages or explain why you don’t have a website – this is just a small step to ensure compliance with MailerLite's terms and conditions.
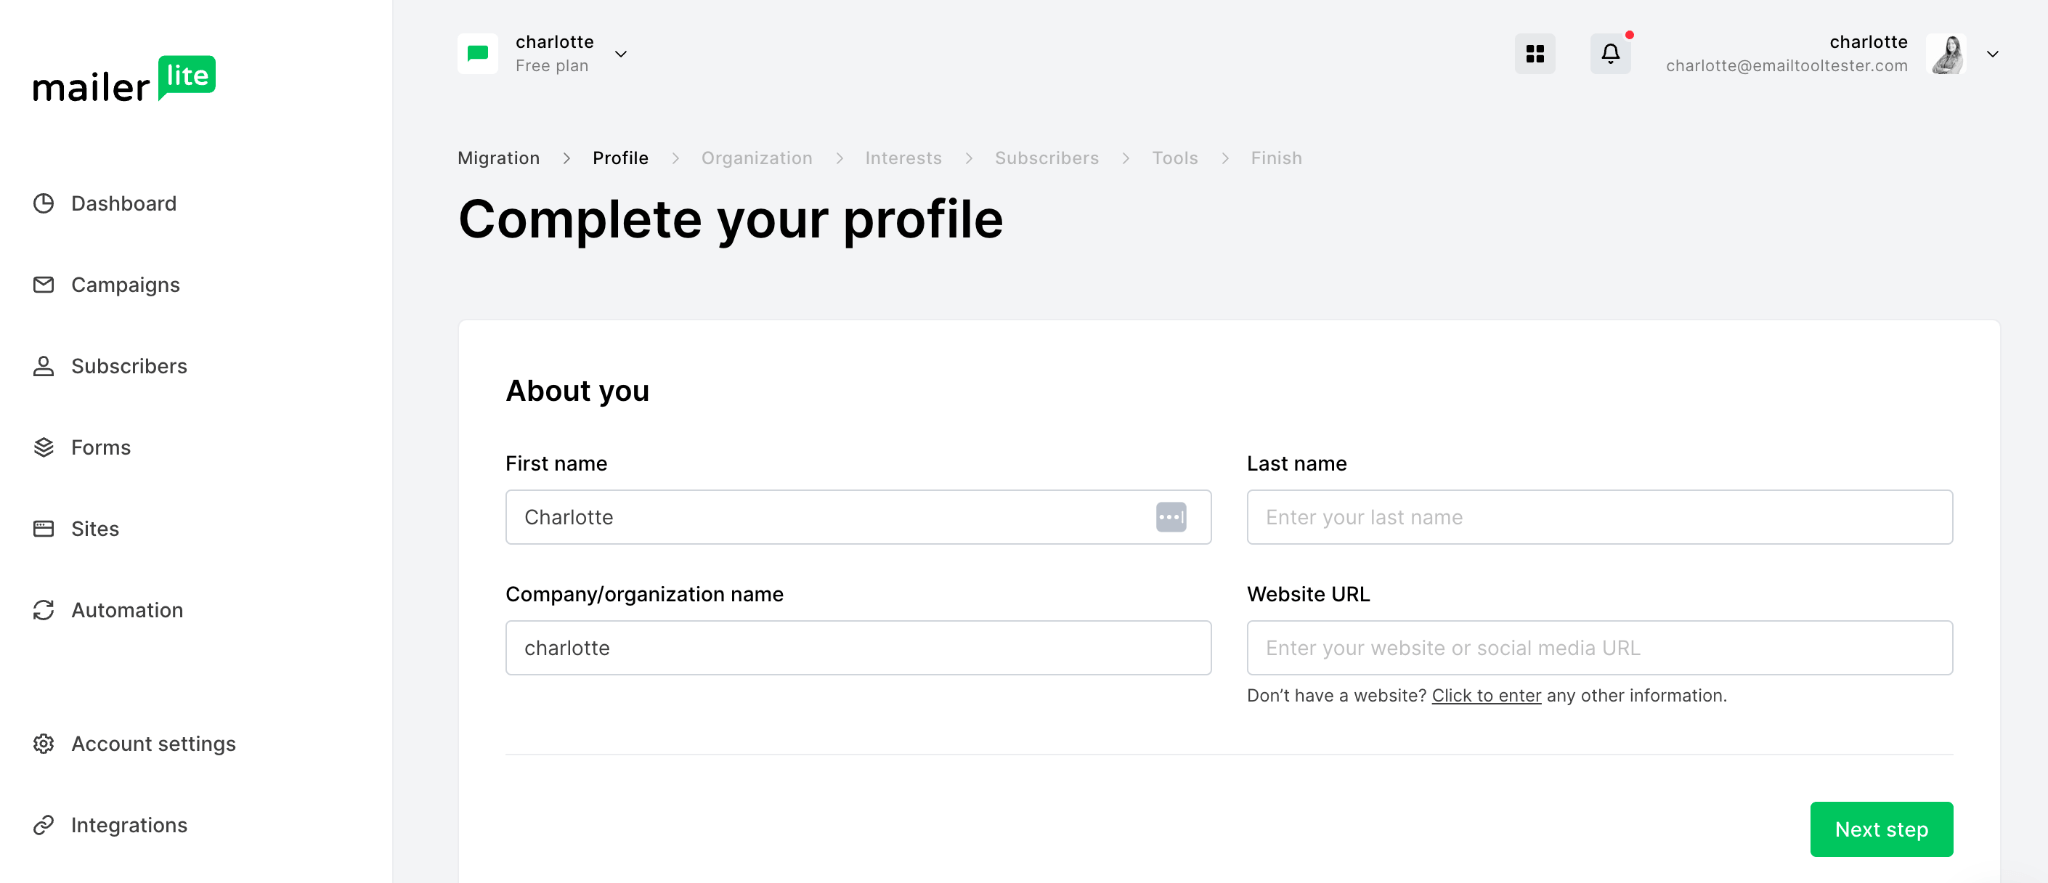
MailerLite profile setup page
Step 2 – Setting Up Your Preferences
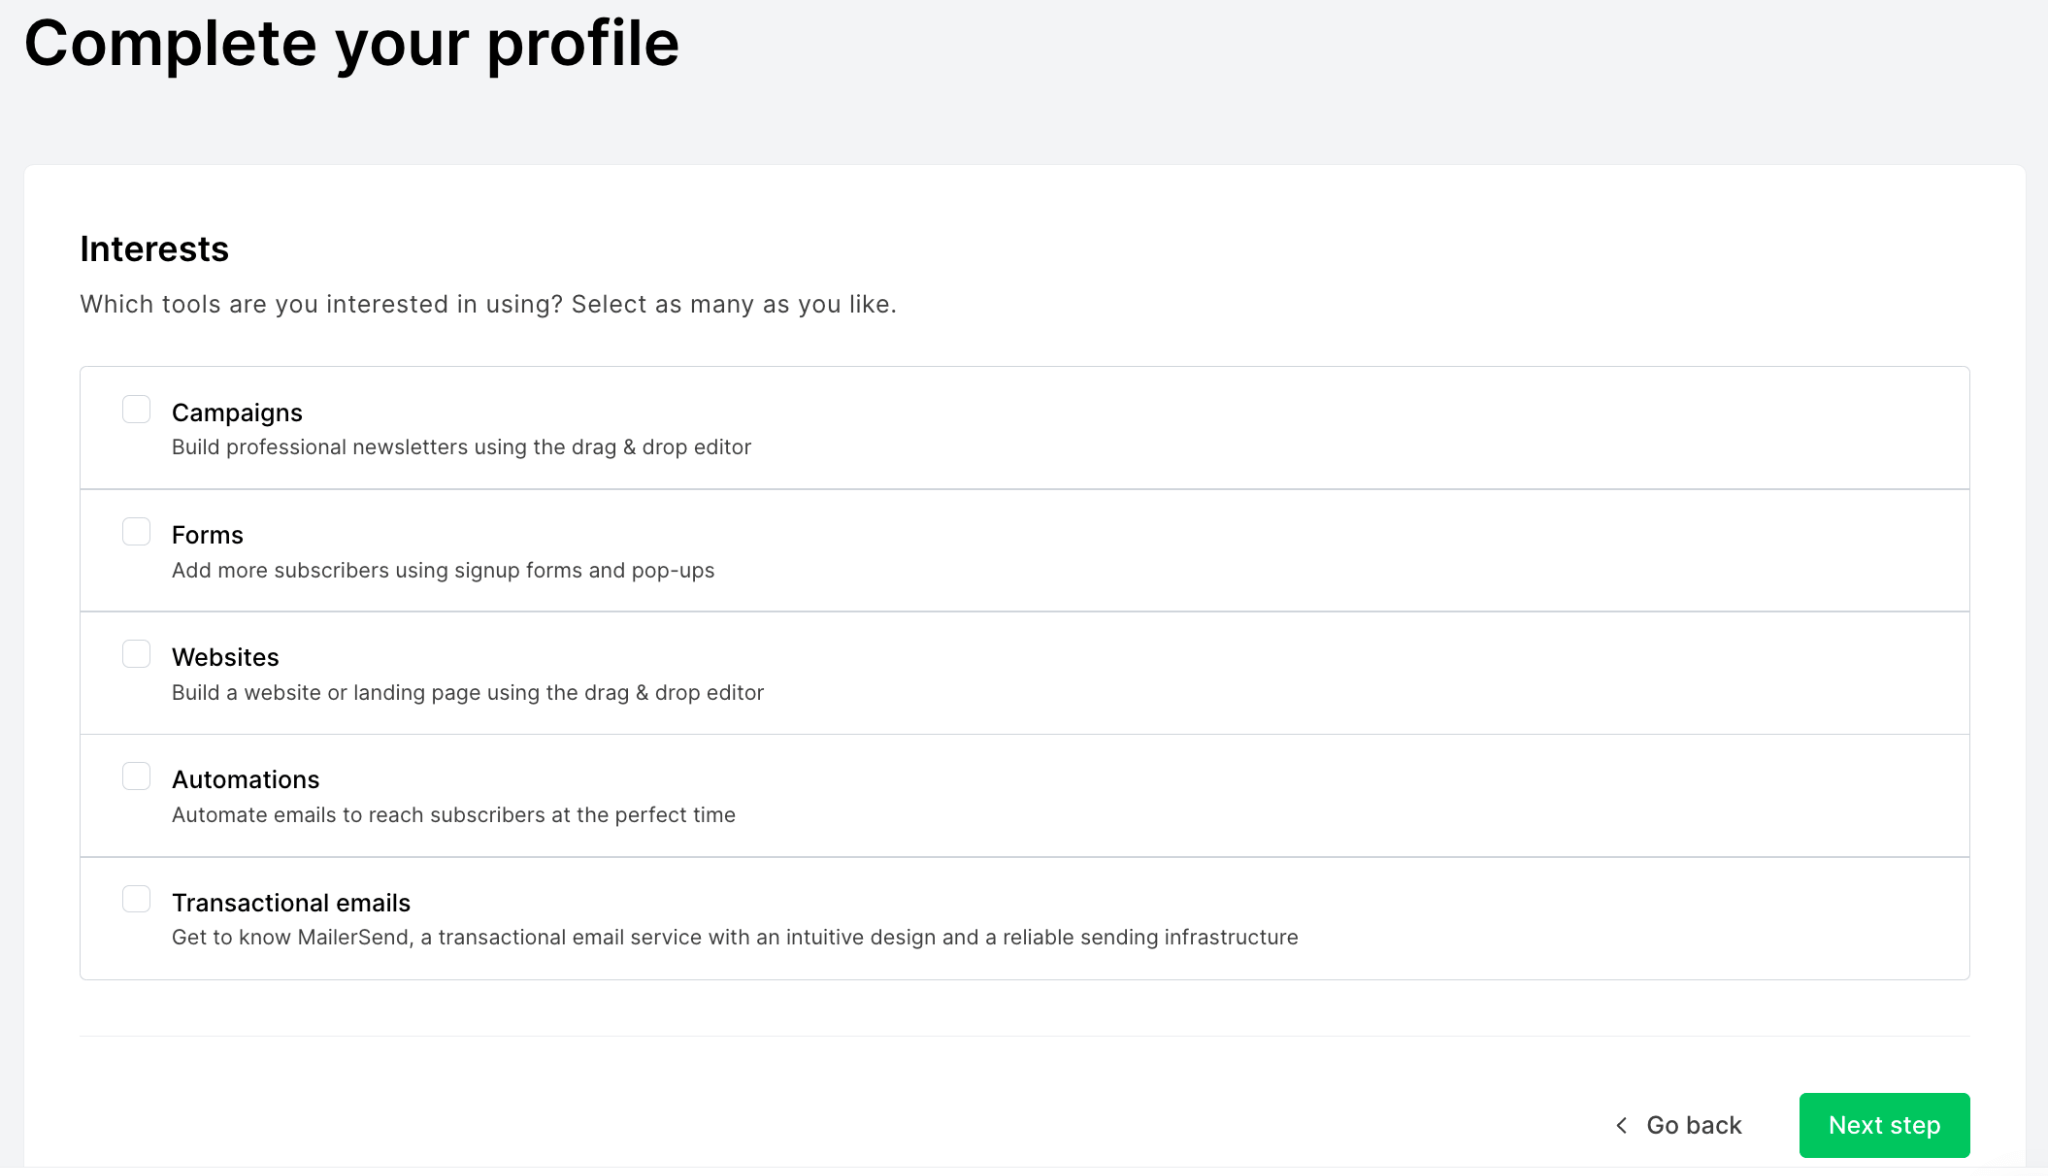
Now, let's fine-tune your MailerLite preferences. Depending on the information you choose to enter, you'll need to complete a few more steps, including entering your company address and selecting the features that interest you. You can choose from the following options:
- Campaigns
- Forms
- Websites
- Automation (see some automated email examples here if you’re not sure what these are)
- and Transactional Emails (learn more about transactional emails here)
This part is up to you; you can choose the options that align with your business needs. Feel free to select all of them if they are relevant.
MailerLite signup steps
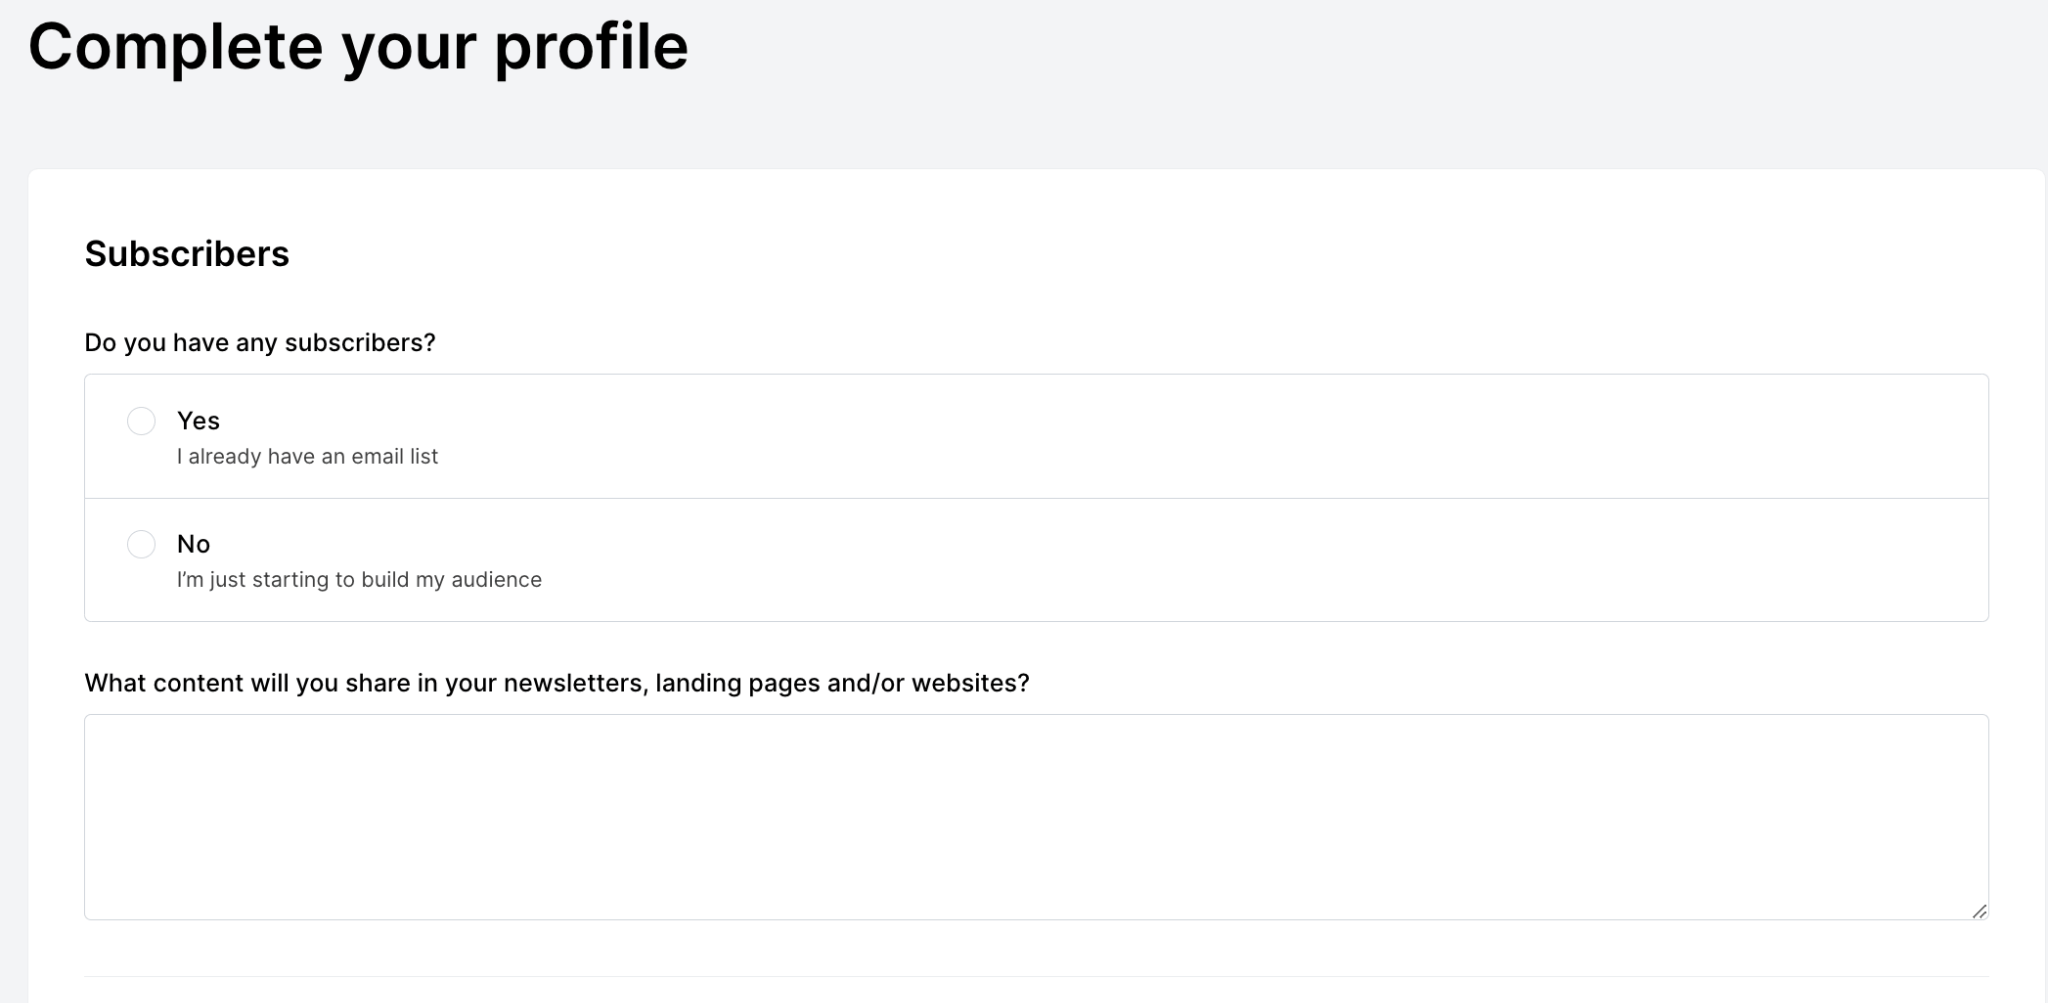
Once you’ve selected your interests with MailerLite, you’ll be asked where you have any existing subscribers. This simply means whether you’d like to import an email list. If you don’t have any contacts yet, don’t worry – there are plenty of ways to collect new emails for your contact list.
MailerLite profile setup, subscriber info
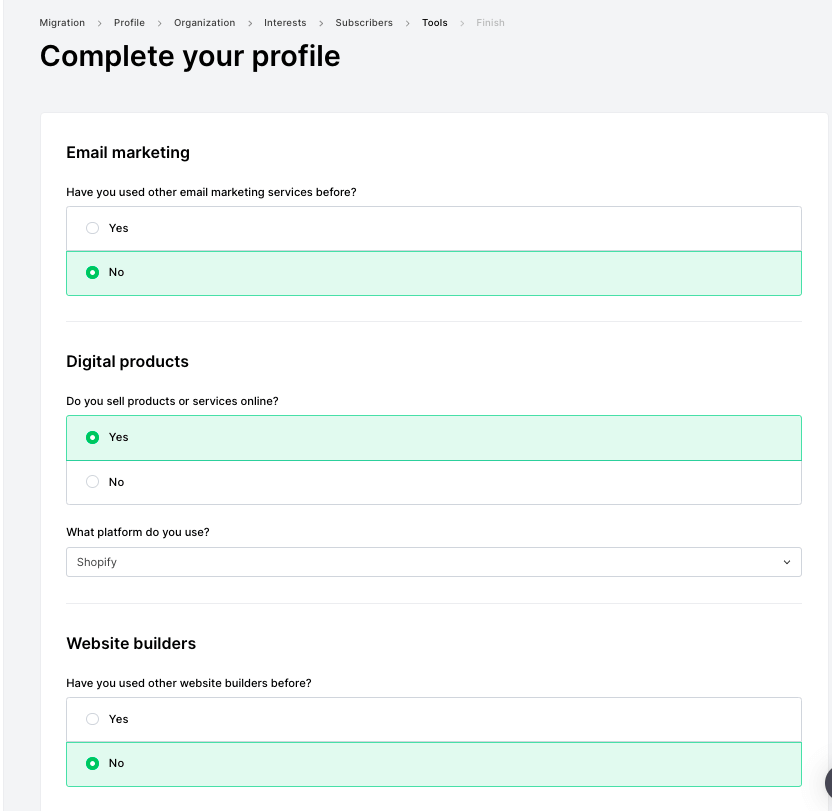
Then finally, you’ll be asked about your experience with email marketing services, whether you sell digital products or services online, and also about your experience (or lack of) with website builders.
MailerLite signup process
Step 3 – Welcome to the MailerLite Dashboard
Now that you've completed the initial setup and your account has been approved, you’ll be able to enter your very own MailerLite dashboard. This user-friendly interface will serve as your control center, allowing you to manage email campaigns, subscribers, and more with ease – so it’s a good idea to familiarize yourself with it.
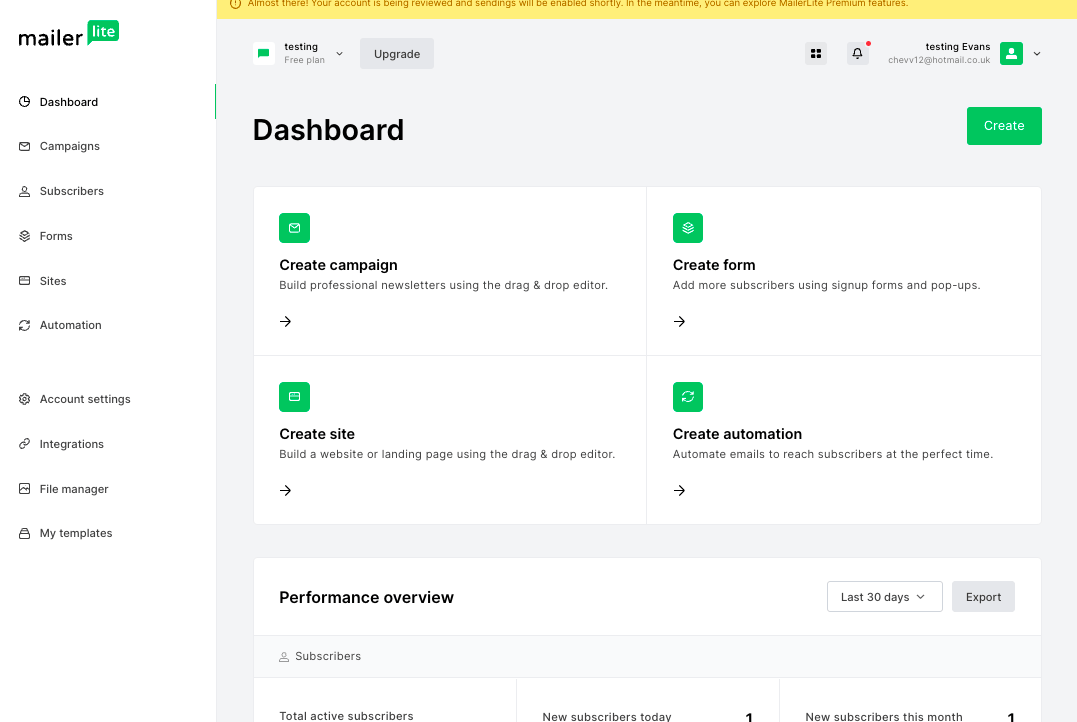
MailerLite dashboard preview
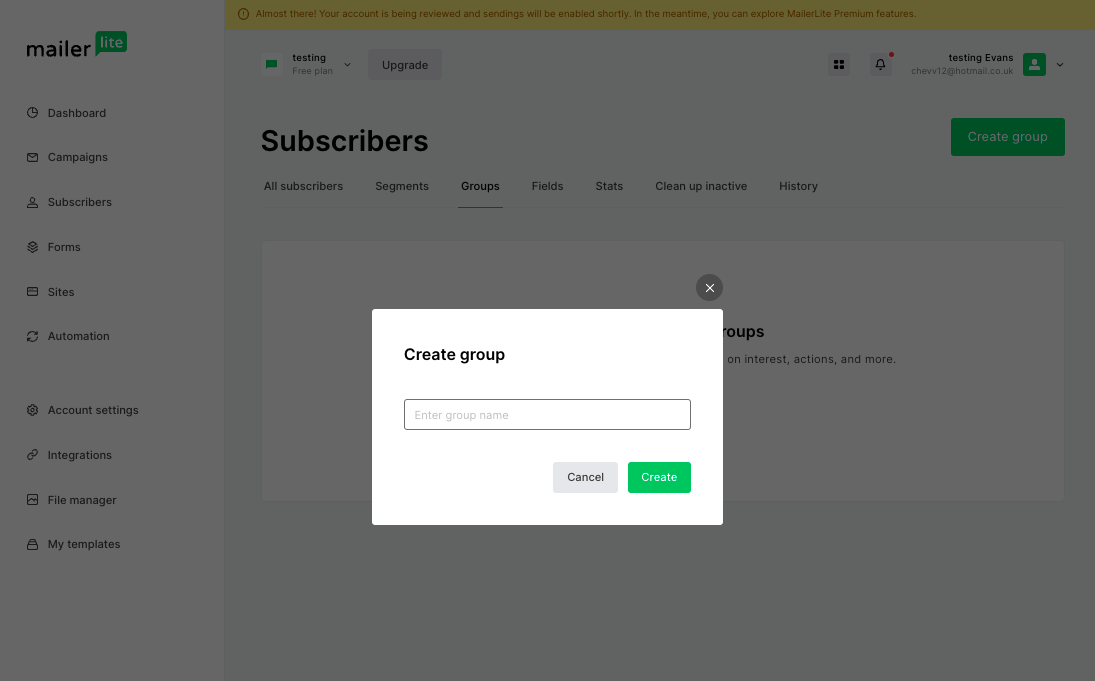
Step 4 – Creating Subscriber Groups
Next up, let's organize your contacts. This part is crucial for targeted email marketing and general list hygiene. To create subscriber groups, head over to the “Subscribers” tab in the top menu and click on “Groups.” You can start by choosing a group name that differentiates these users, such as “Customers.”
MailerLite group creation process
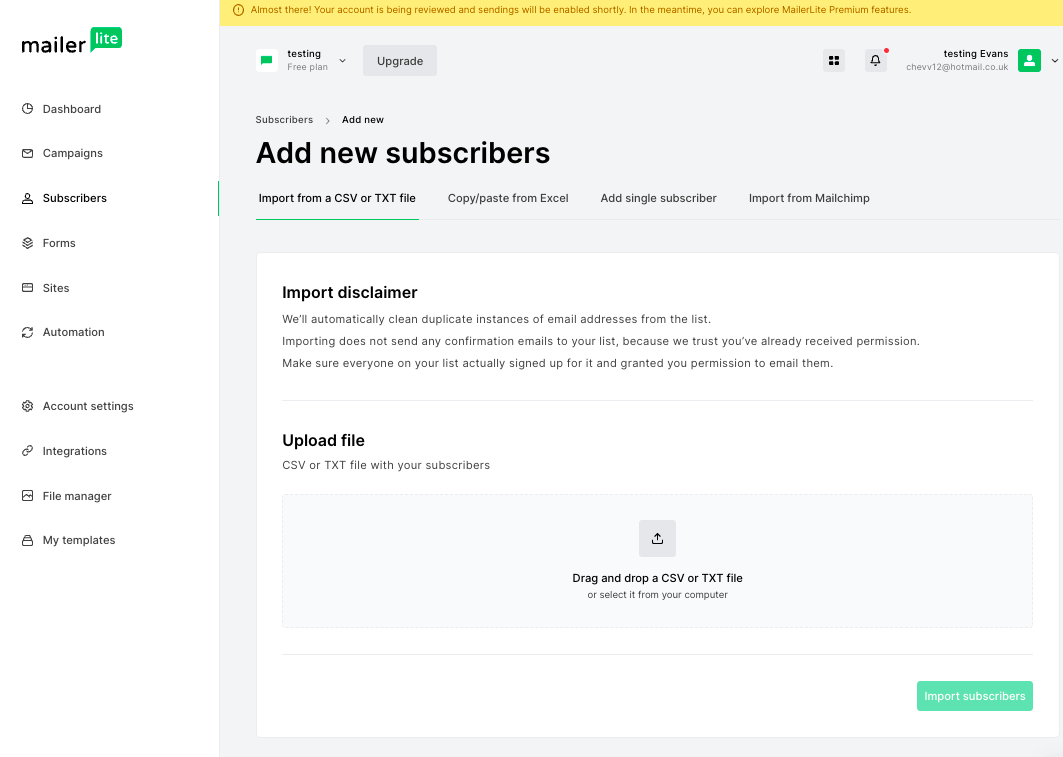
Then within the Subscribers tab, click on the button in the right-hand corner that says “Add subscribers”. You can upload your contacts using the following methods: importing from a CSV file, copying and pasting from Excel, or manually adding a single subscriber.
MailerLite adding new subscribers
Step 5 – Designing a Signup Form
Capturing email addresses from your website visitors is essential for building a strong email list. Click on the “Forms” tab in the top menu to get started. You have two options here: Create a popup form or an embedded form. In case you are unsure of what these forms look like and the difference between the two, here’s a quick explanation:
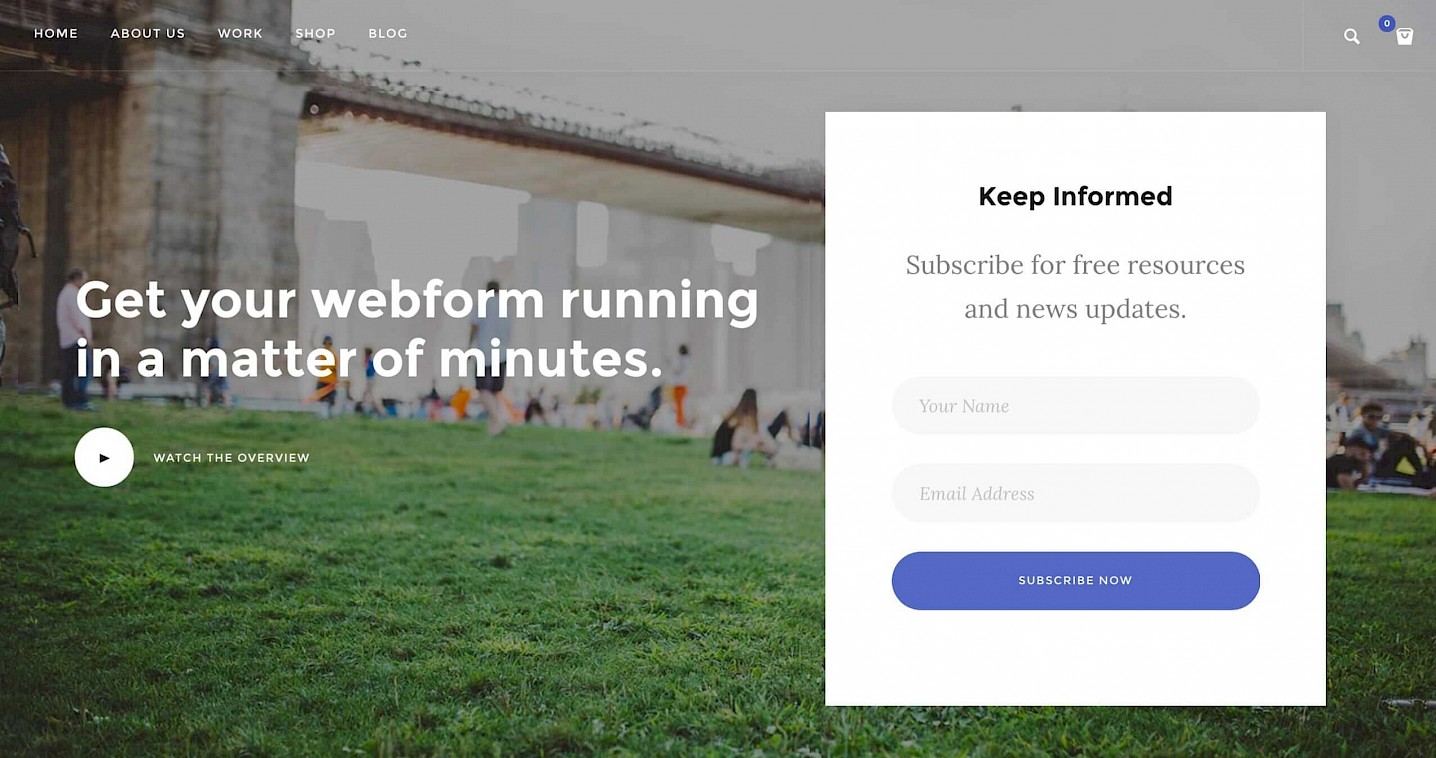
- A popup form is exactly what it says on the tin. Imagine you are scrolling through your favorite clothing website and suddenly you are presented with a popup window asking you to provide your email address to receive a special discount. Here is an example:
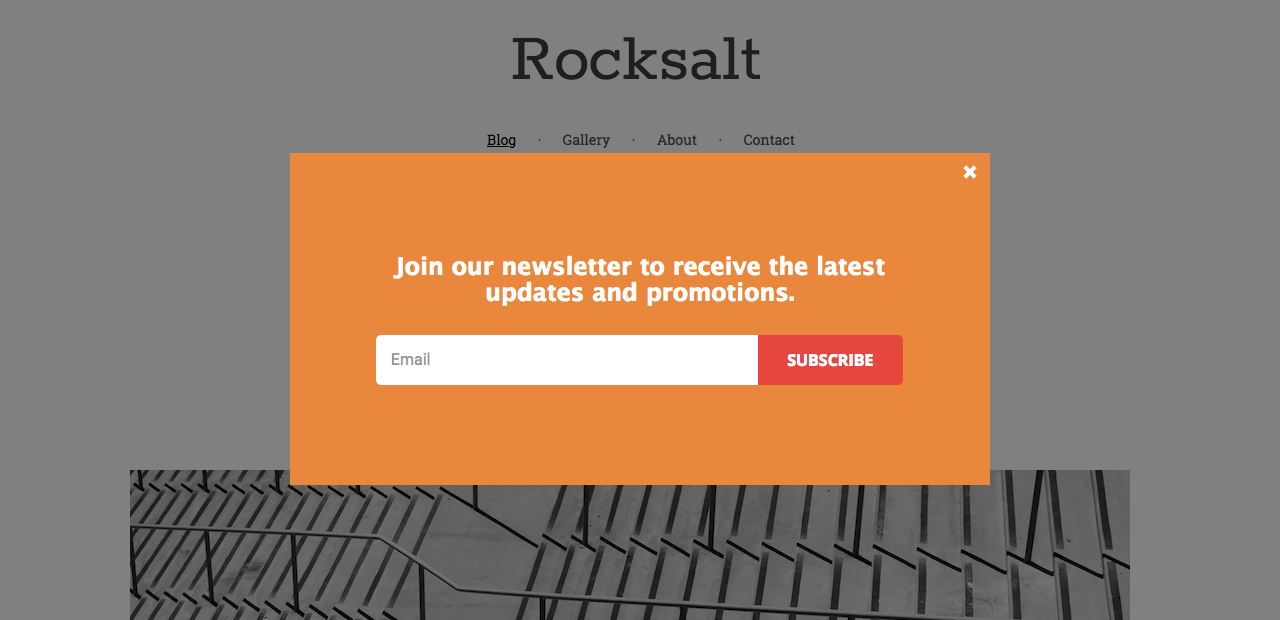
MailerLite newsletter pop-up example
An embedded form is one that is fixed within the site, you may find it when you scroll to the bottom of the page, prompting you to sign up to their newsletter or similar.
MailerLite embedded form example on live website
For this tutorial, we chose a Popup form.
First, give it a name (for internal use – this won’t be visible to subscribers), then select the user group you want to target. Then, pick a form template from MailerLite's collection of free, customizable templates.
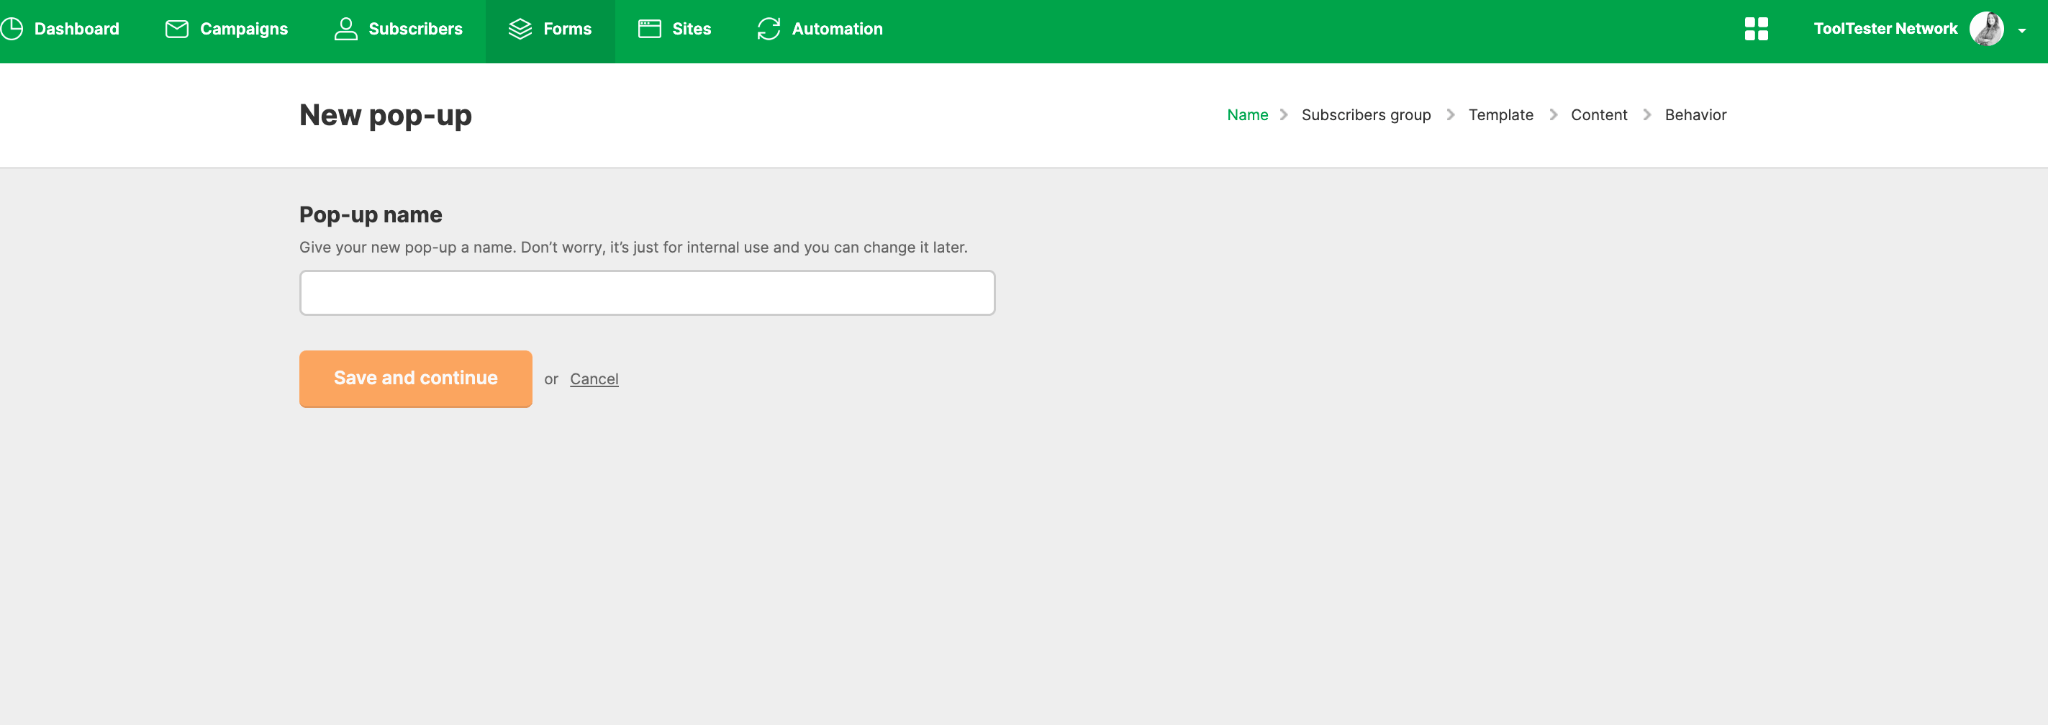
MailerLite creating a new pop-up
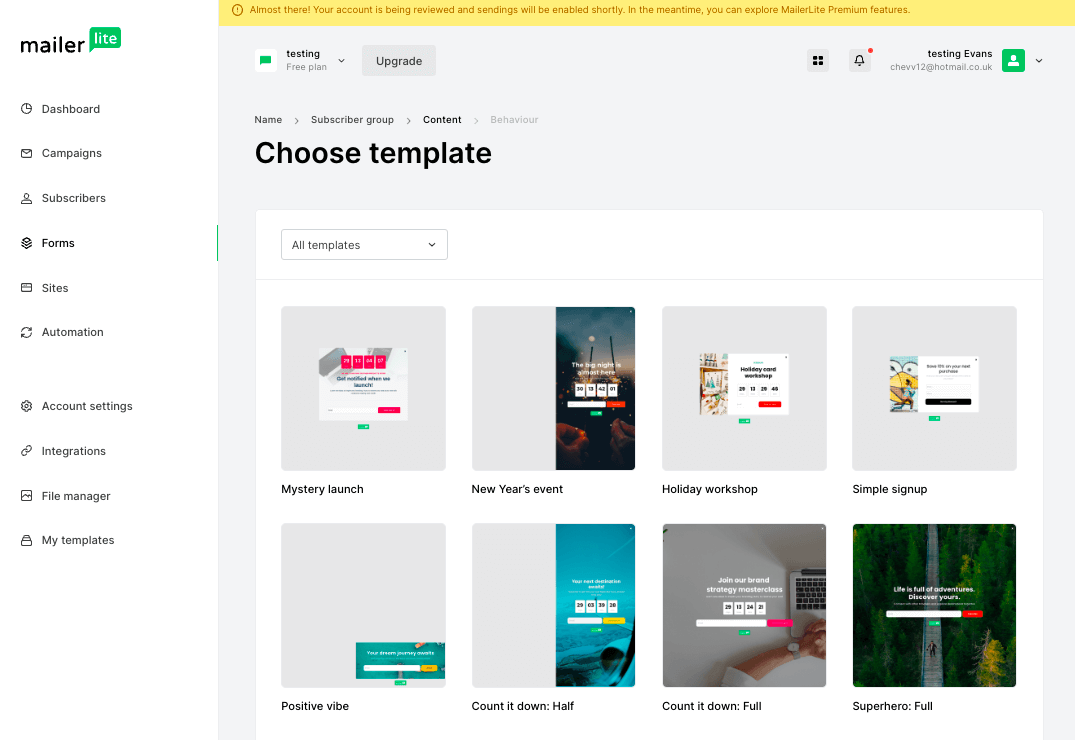
MailerLite popup templates
When your design is ready, you can set user behavior settings, like displaying the popup after a certain time or when the visitor scrolls down the page.
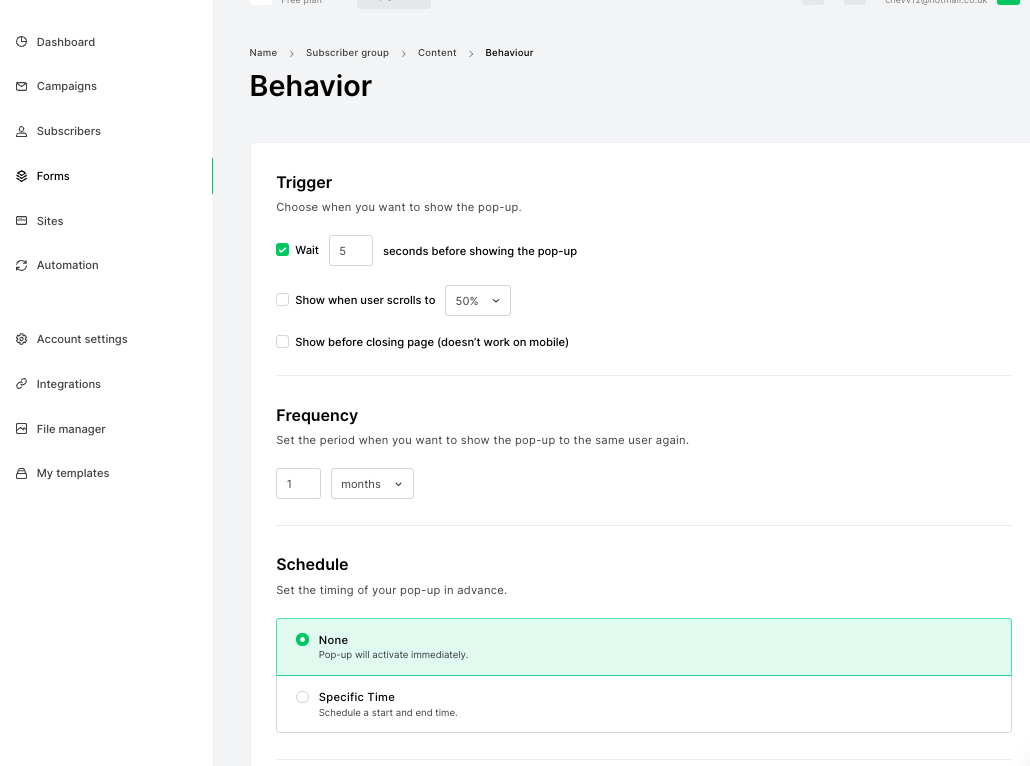
MailerLite popup behaviour settings
Once everything looks good, simply copy and paste the JavaScript provided and add the code onto your website or use the dedicated plugins for WordPress or Shopify. And now you can watch your contact list grow!
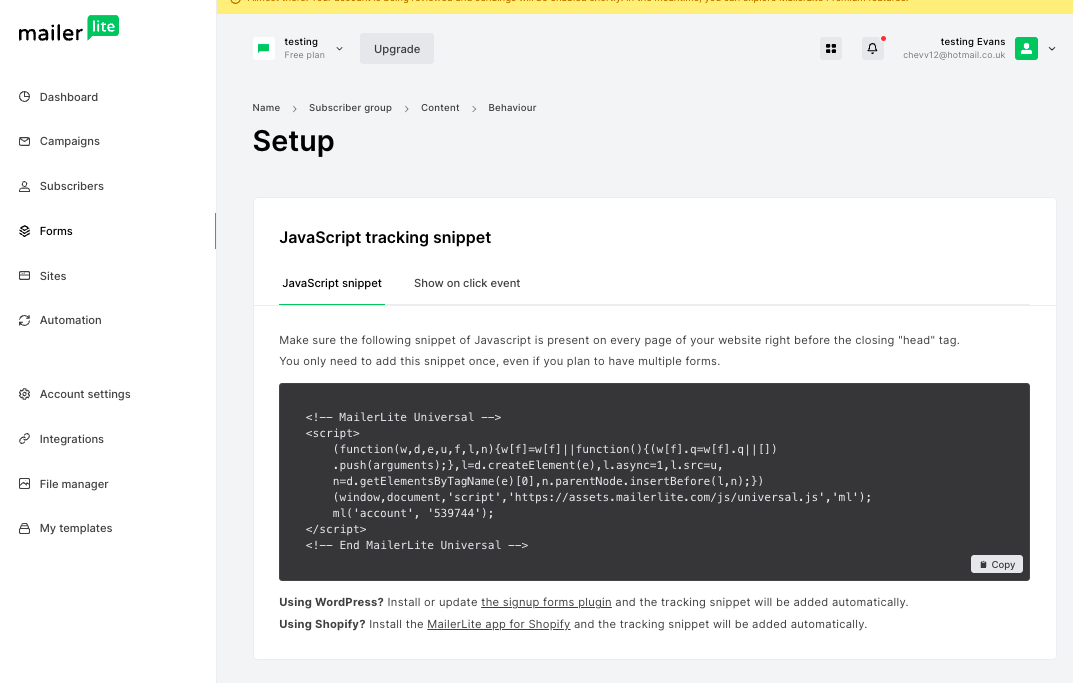
MailerLite form setup process
Step 6 – Crafting Your First Email Campaign
Now comes the exciting part – creating your first email campaign! Click on the “Campaigns” tab in the top menu and then select “Create Campaign.”
MailerLite offers various campaign types, including regular emails (like newsletters), A/B split campaigns, Auto resend, and RSS campaigns. For this MailerLite tutorial, we'll go with a regular campaign.
MailerLite email campaign setup
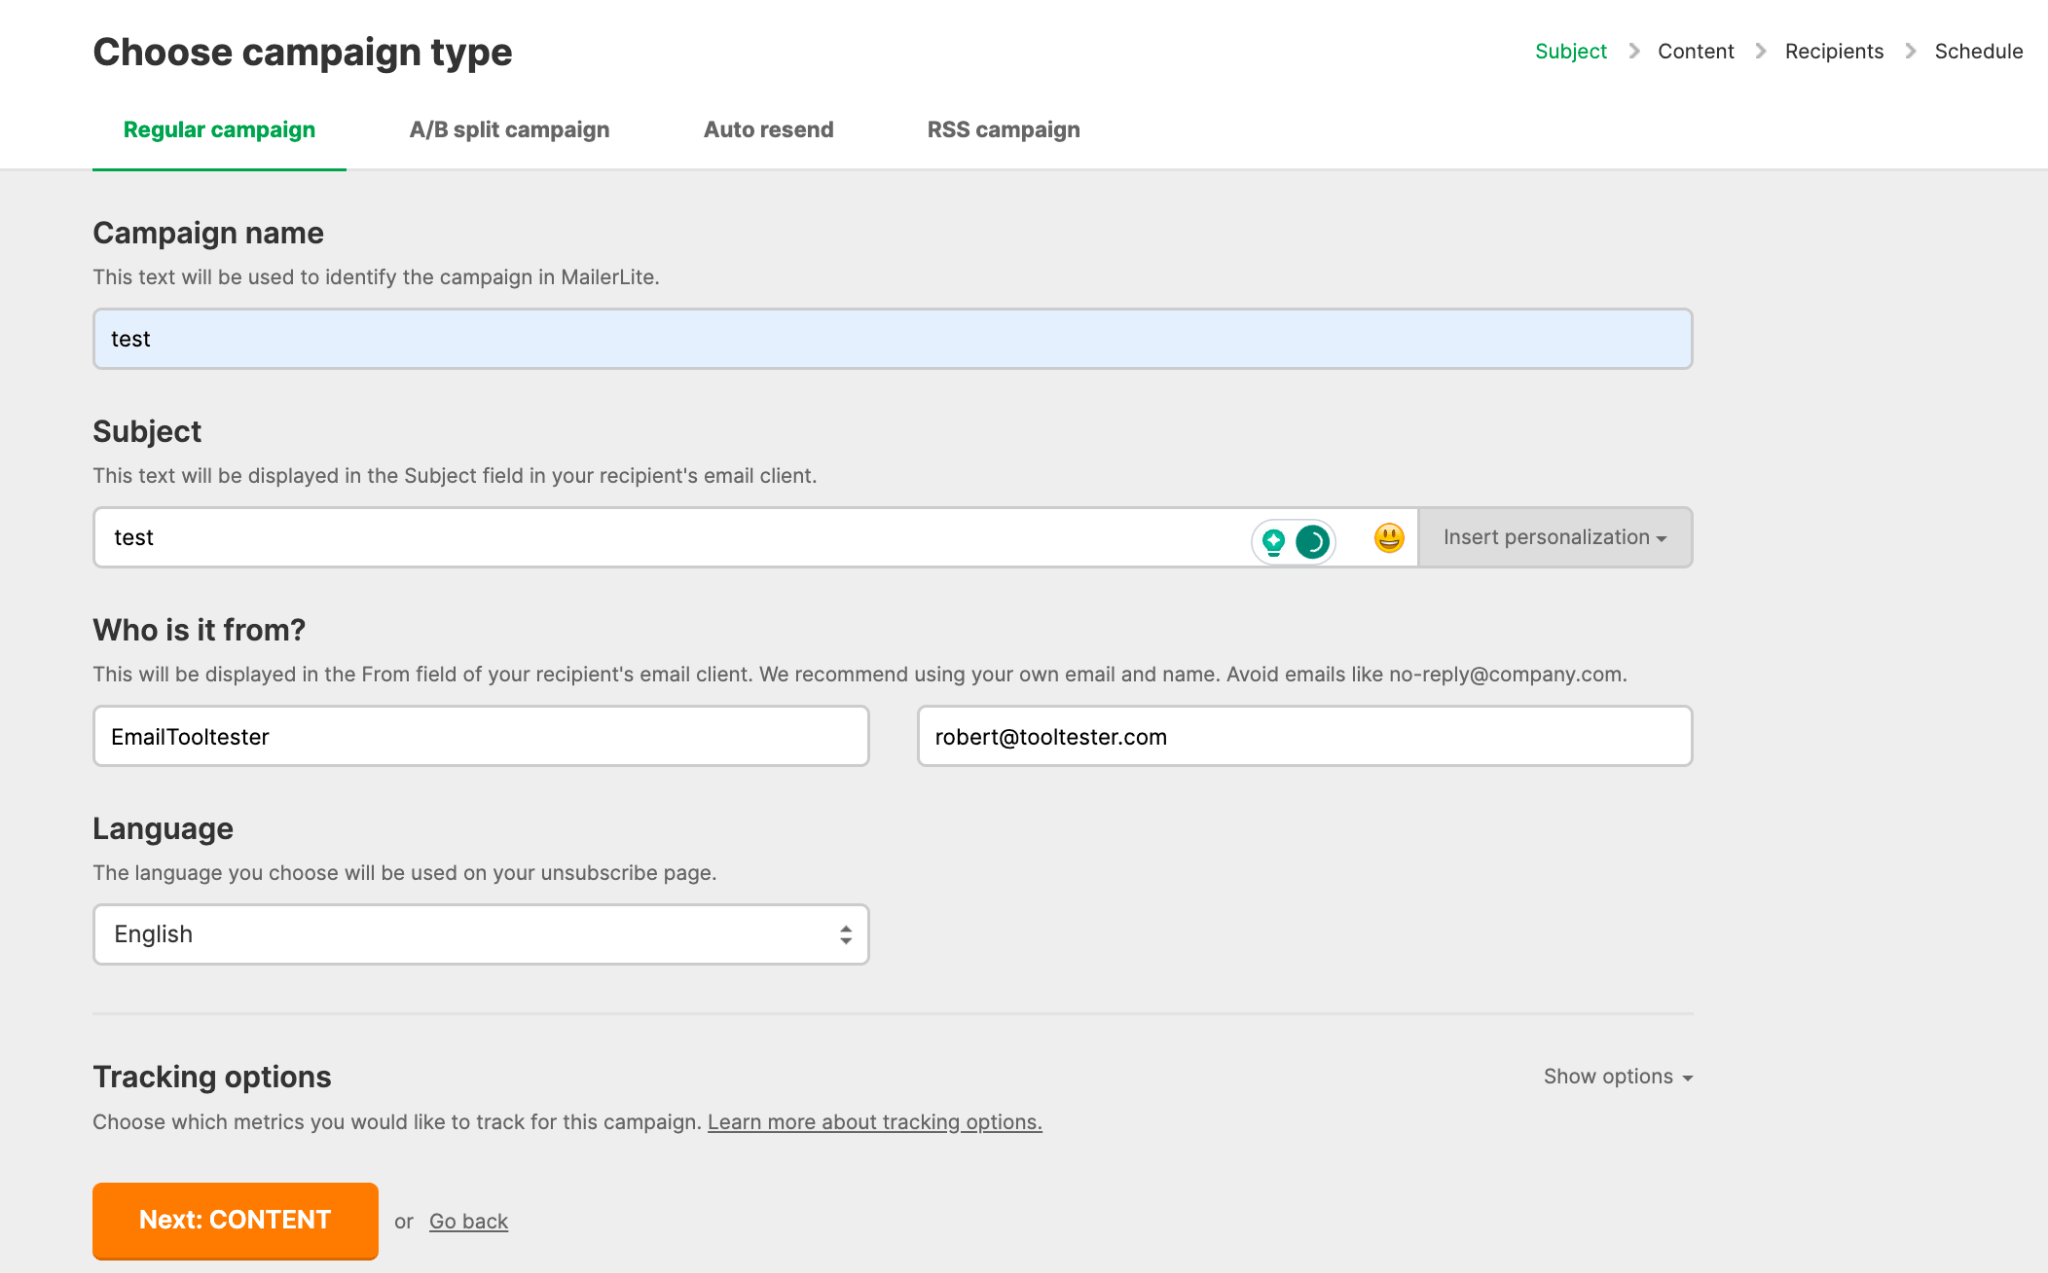
Here you’ll need to fill in the following:
- Your Campaign Name – this is for internal use so use something that will help you to identify the campaign against others.
- Your Subject – Choose this wisely, first impressions count! You can read our guide on subject line best practices if you are stuck for ideas.
- Sender – this is who your campaign is being sent from, so pick the name of the person or brand you’d like to represent this email campaign.
- Preheader – You can use this to give your users an idea of what the campaign is about (you can learn more about crafting the perfect preheader here).
- Recipients – Select the email list that you’d like to send this campaign to.
- And last but not least – select the Language. Please note that this is only for the unsubscribe page.
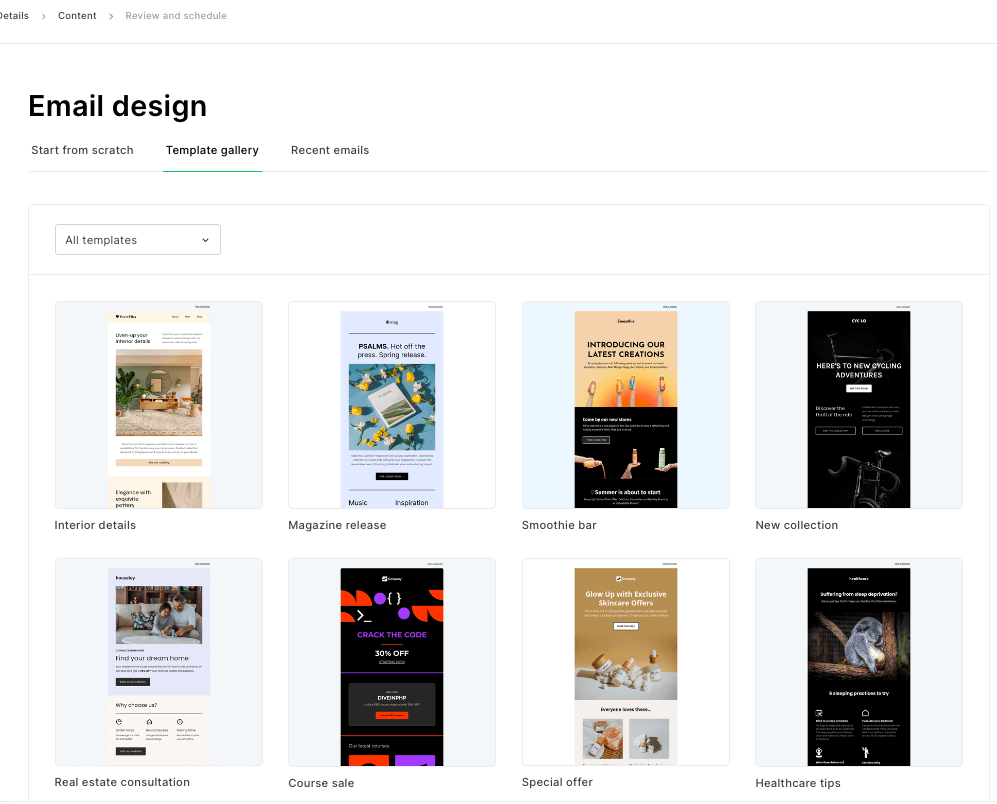
Next, it's time to choose a template for your email. MailerLite provides nearly 100 email templates for you to choose from during your trial period. However, please note that these templates are unavailable on the Forever Free plan.
MailerLite email campaign templates
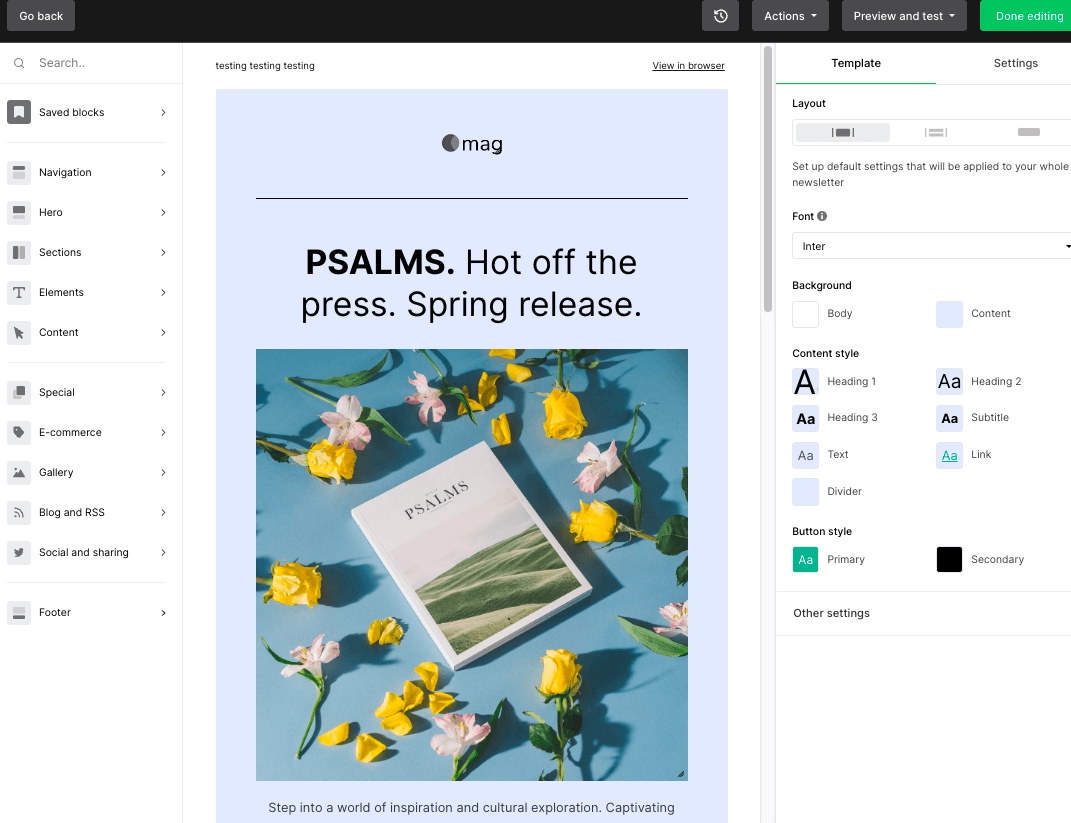
Once you've chosen a template, it's time to unleash your creativity! MailerLite's drag-and-drop editor makes it easy to add images, text, buttons, and more. Play around with different layouts, colors, and fonts until you're satisfied with the look and feel of your email campaign.
MailerLite email campaign editor
Step 7 – Test and Send Your First Campaign
Once you've crafted an email campaign that you are proud of, hit “Done editing”. It’s finally time to send your first email campaign!
Before sending, we recommend sending a free test preview to your inbox to ensure everything looks just right. Once you're happy with the final result, choose either “Send now”, “Send later”, or “Based on timezones” under “Schedule your campaign. You can select which one suits your needs depending on your audience, the timezone, and the current time. (Also check out our guide on the best times to send newsletters if you need a bit of extra help.)
There you have it – a quick and easy tutorial on setting up your MailerLite account and creating an email campaign like a pro email marketer. We hope you found this guide helpful in getting started with MailerLite. If you have any questions or need further assistance, please check out the links in the description or leave a comment below. We're here to help! And if you’d like to find out more about this amazing tool, check out our full Mailerlite review, where we discuss the pros, the cons, and much more.
> Start sending your campaigns in MailerLite for free
The author
Learn more about us
We keep our content up to date
07 Sept - General Update
Our Methodology
This article has been written and researched following our EmailTooltester methodology.
Our Methodology