
EmailTooltester is supported by readers like you. When you purchase through our links, we may earn a commission that helps keep our reviews independent and free.
Starting your first newsletter can feel intimidating, especially when there are so many tools out there promising to help you grow, engage, and monetize your audience. But not all of them balance ease of use with powerful features.
That’s where Kit really shines.
It’s designed for creators in mind: simple enough to get your first newsletter out the door in minutes, yet flexible enough to scale with you. Whether you want to build automations, segment your audience, or even sell products or subscriptions, Kit has you covered.
In fact, here at EmailTooltester, we’ve tested dozens of platforms, and Kit consistently comes out as one of the most user-friendly options for beginners. The free plan is especially generous, allowing up to 10,000 subscribers (a level of generosity you won’t find with most other providers!).
I’ve put together this beginner-friendly Kit tutorial to walk you through the exact steps to:
- Sign up and set up your Kit account
- Create your first landing page to capture subscribers
- Send your first newsletter (a “broadcast” in Kit)
- Organize subscribers with tags and segments
- Automate a welcome sequence
- Track performance and improve your emails over time
And if you prefer to learn by watching, you can follow our Kit Tutorial on YouTube:
1. Signing up and getting started with Kit
Head over to Kit’s homepage and click “Get Started for Free.”
You’ll be asked to provide:
- Your name
- Your email address
- A password
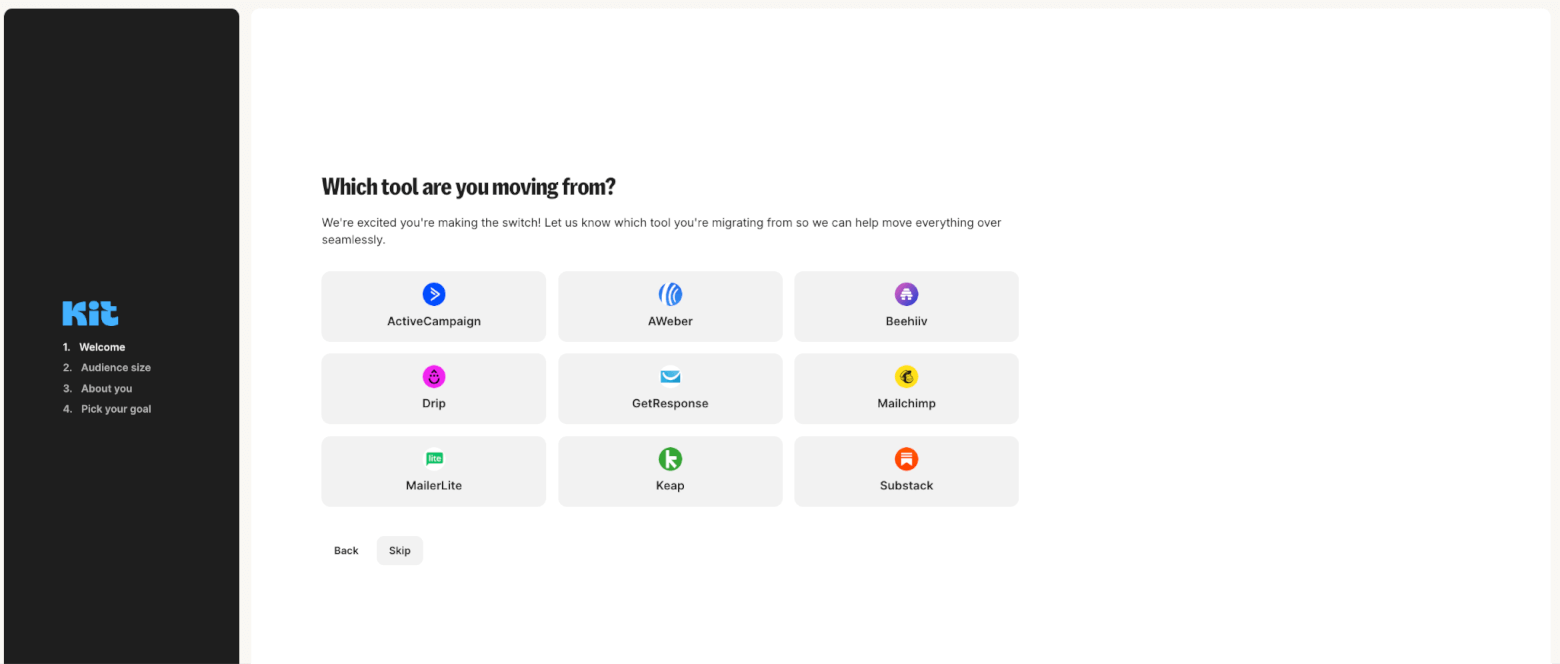
Once you’re in, Kit will ask you some setup questions:
- Do you already use an email marketing tool?
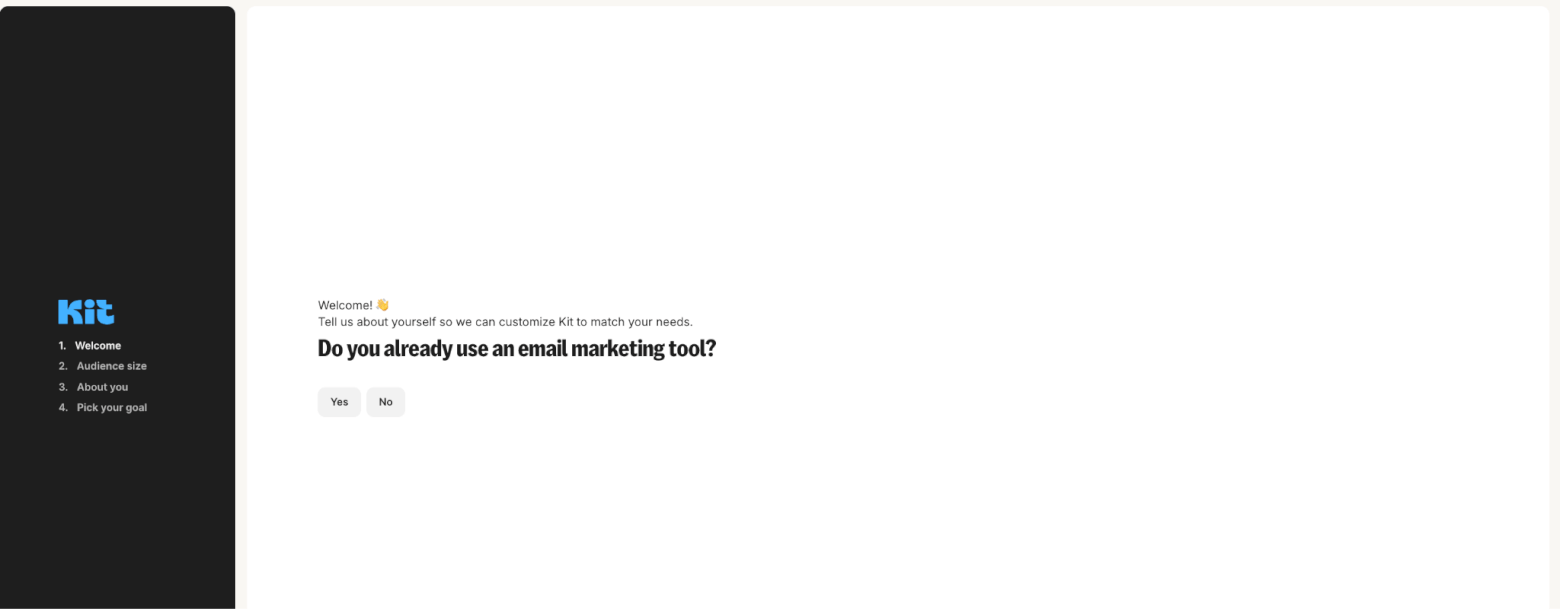
- How many subscribers do you have?
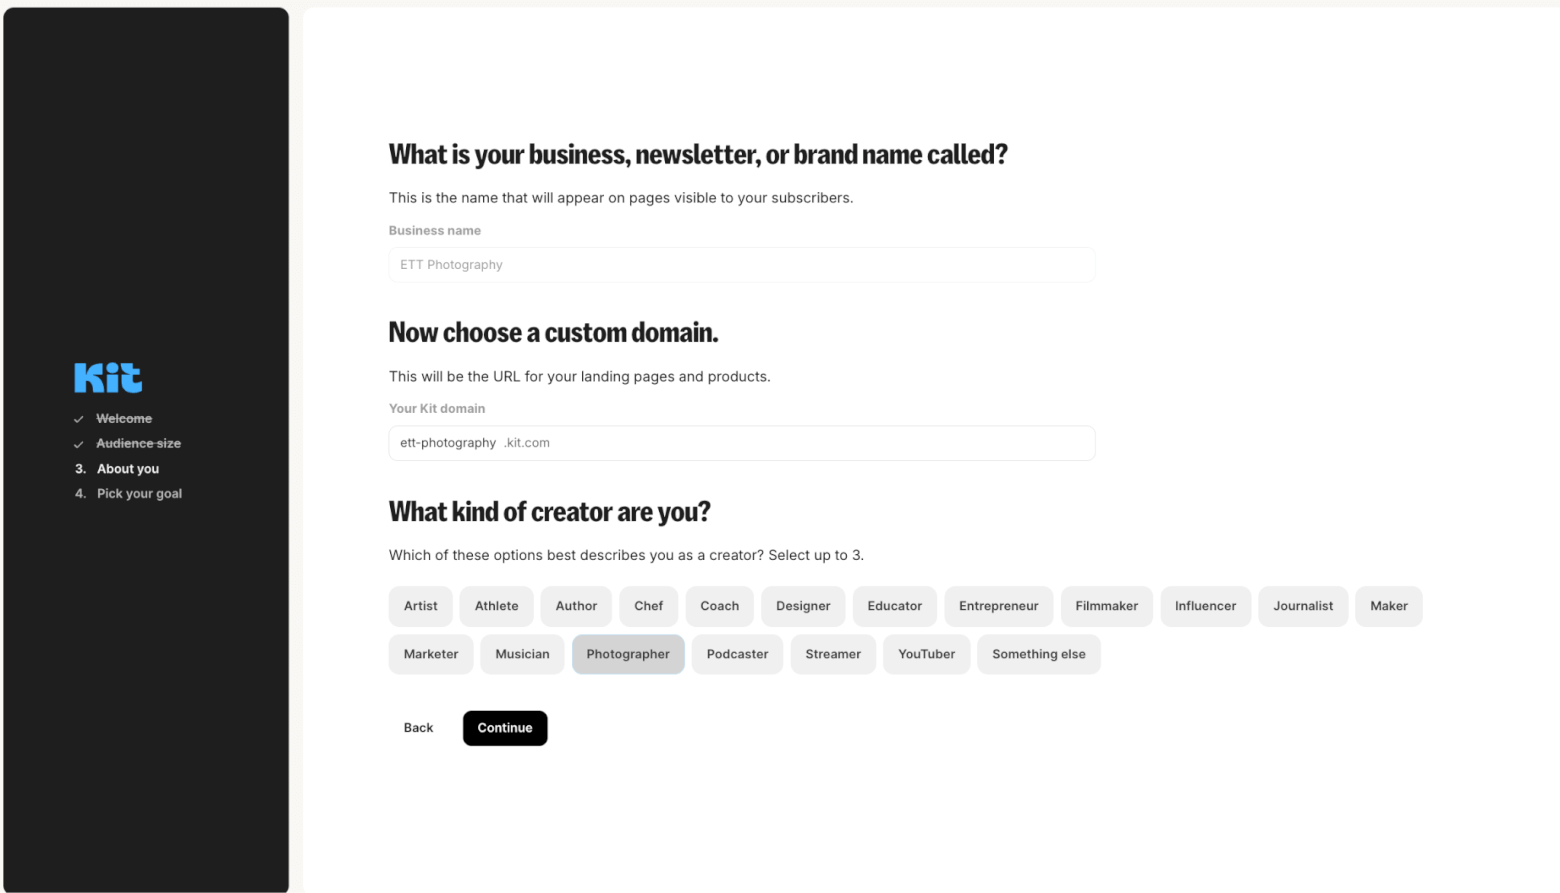
- What’s your business name and industry?
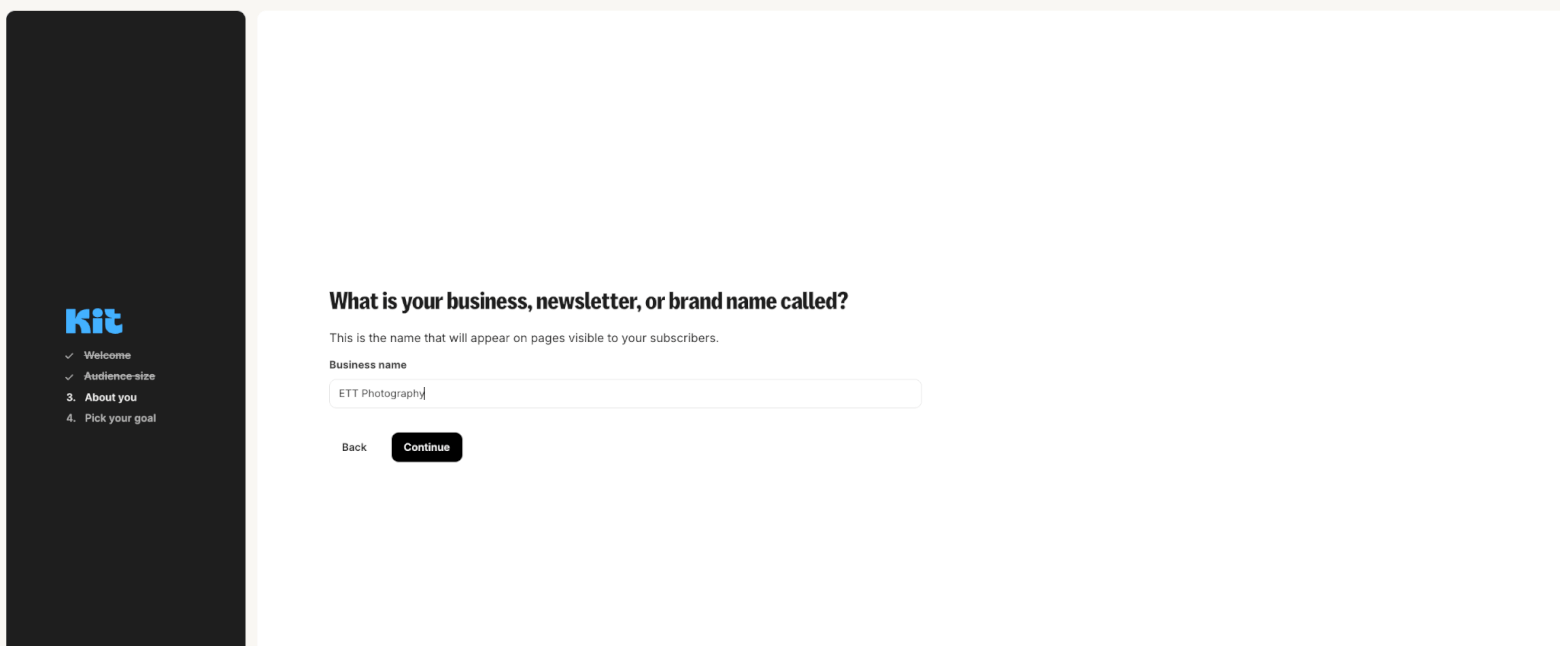
For this tutorial, we’ll set up a newsletter for a fictional photography business called ETT Photography. We’ll start with 0–1,000 subscribers, choose “Photographer” as the creator type, and use Kit’s free custom domain option to host our landing page (e.g., ett-photography.kit.com). You can always change this later if you’d like to use your own domain.
Choosing a plan
New accounts begin with a 14-day free trial, and no credit card is required – something we LOVE to see! Signing up for a trial should be a straightforward process, and Kit provides just that.
Before your free plan expires, make sure you contact Kit’s support team to be switched over to the Newsletter Plan. Otherwise, you’ll be asked to upgrade to one of Kit’s paid plans.
This free plan includes:
- Up to 10,000 subscribers
- Unlimited emails
- Unlimited forms and landing pages
- Basic email editor and broadcast features
It’s easily one of the most generous free offers in the market. To switch:
- Click your profile icon (top-right).
- Select Help.
- Click Send us a message.
- Write something like: “I’d like to switch to the Newsletter Plan.”
Once you’re set up, you’ll land on the Kit dashboard, where you can manage everything from subscribers to emails and automations.
2. Creating your first landing page
Now, let’s build a way to capture subscribers. If you don’t have a website yet to embed a form on, Kit’s landing pages are the easiest way to start.
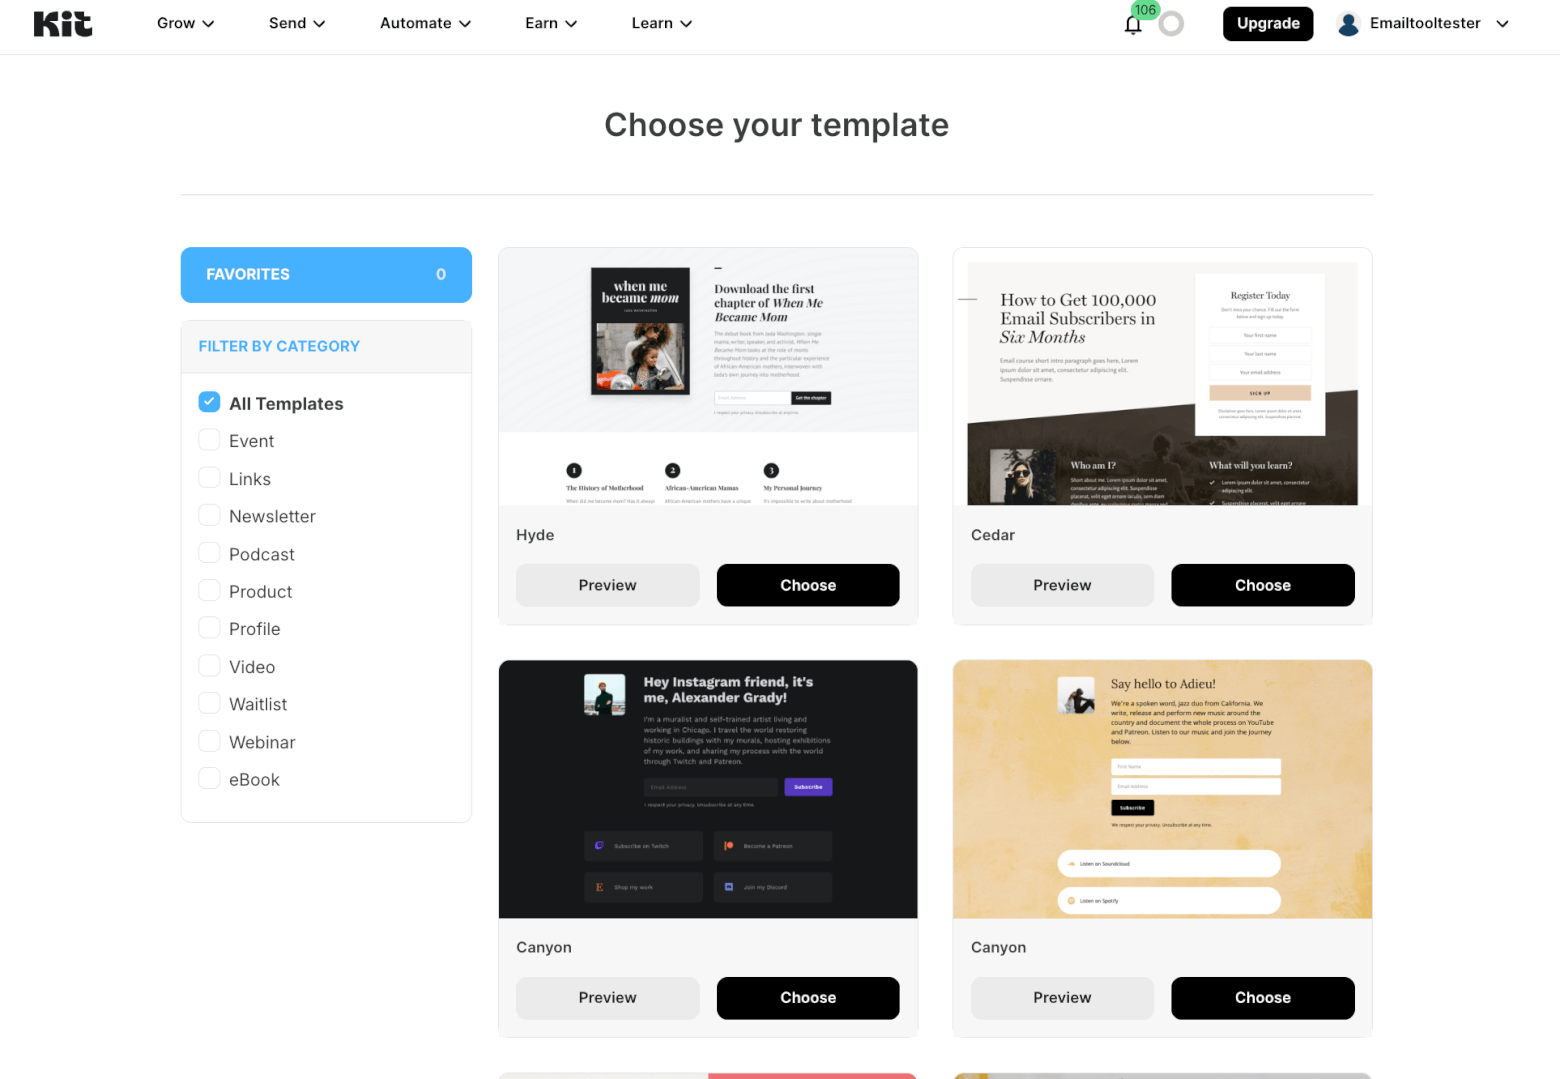
- From your dashboard, click Grow → Landing Pages & Forms → Create New → Landing Page.
- Filter templates by Newsletter (although you can also browse other templates such as “Webinar” or “eBook” if you’re looking to offer newsletter subscribers a lead magnet). Kit offers dozens of designs. For example, the “Pierce” template is a clean option that works for creators in many industries.
- Select a template and open it in the editor.
Customizing your design
Kit’s editor is very visual:
- Edit text: Click directly on a heading or paragraph and type your own copy. Example: change the main heading to “Level Up Your Photography”.
- Replace images: Click the placeholder image → Replace → Upload your own, or pull free stock photos from Unsplash.
- Adjust styles: Go to General Styles to update fonts, background colors, and card designs
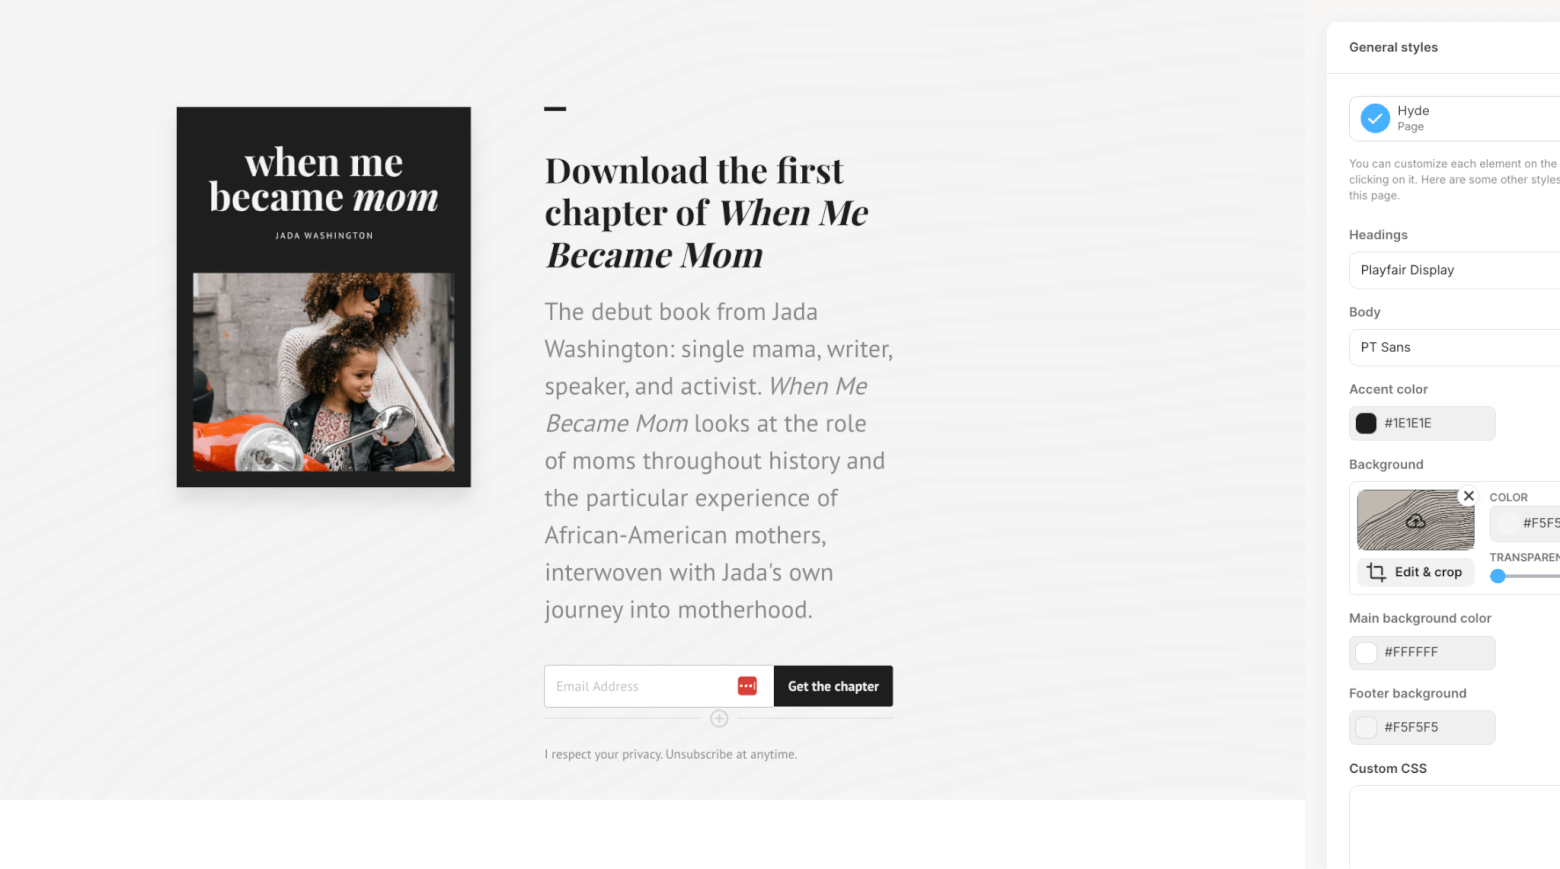
- Add fields: Use the + button to insert extra fields like First Name. Drag and drop to reorder them.
💡 Tip: We recommend keeping your form simple: asking for just a first name and email usually leads to higher conversion rates.
Incentive emails and double opt-in
By default, Kit enables double opt-in, meaning new subscribers receive a confirmation email before being added to your list. We recommend keeping this double opt-in email as it helps to maintain good deliverability.
- However, if you’d like to change this, go to Settings → Incentive → Switch on autoconfirm new subscribers
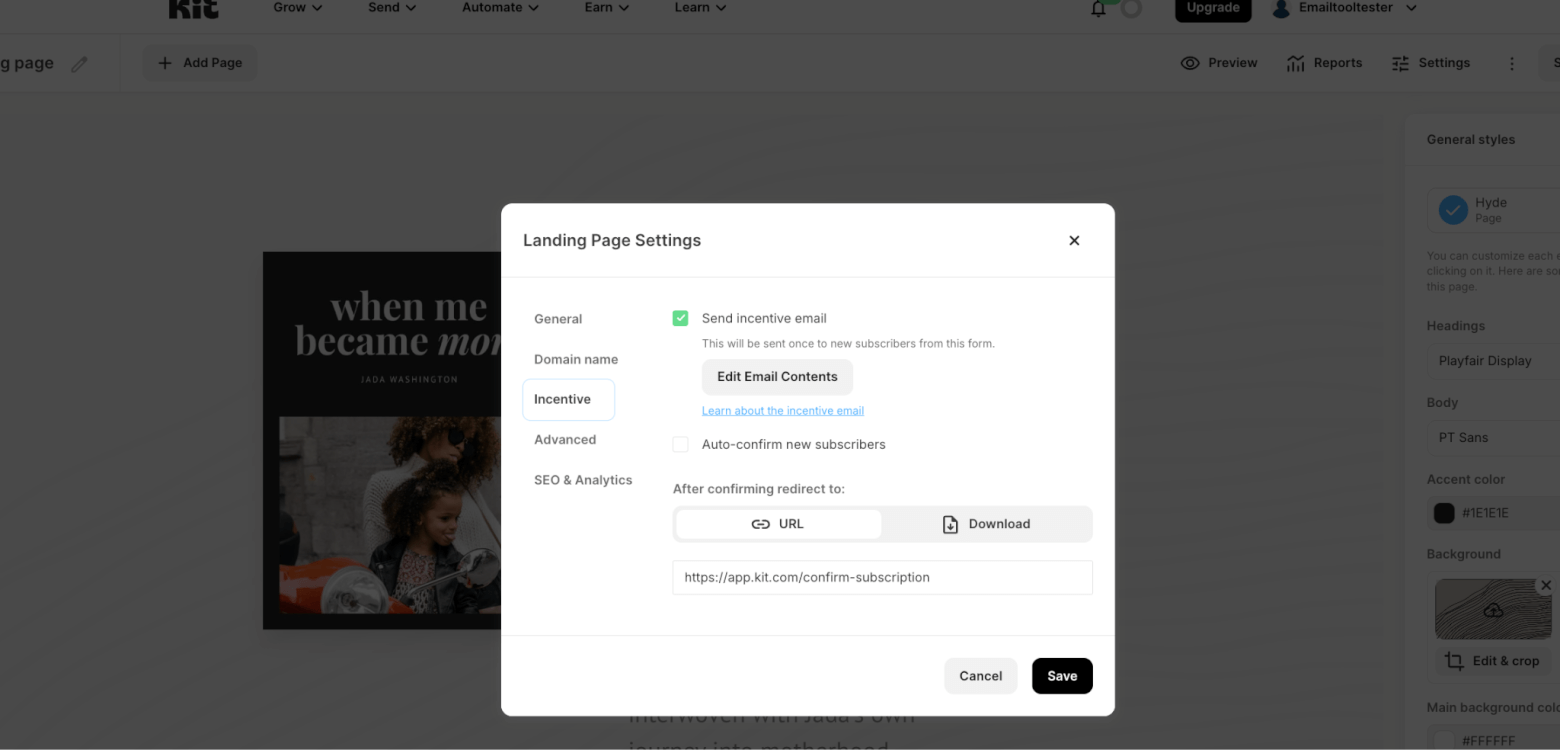
- You can edit the confirmation message, attach a lead magnet, or disable double opt-in (though keep in mind it’s legally required in some countries).
Publishing your page
When you’re happy with the design:
- Click Publish.
- Copy the shareable link provided by Kit.
- Add it to your Instagram bio, LinkedIn profile, or anywhere else you promote your work.
And that’s it – you now have a working landing page to collect subscribers!
3. Sending your first newsletter (Broadcast)
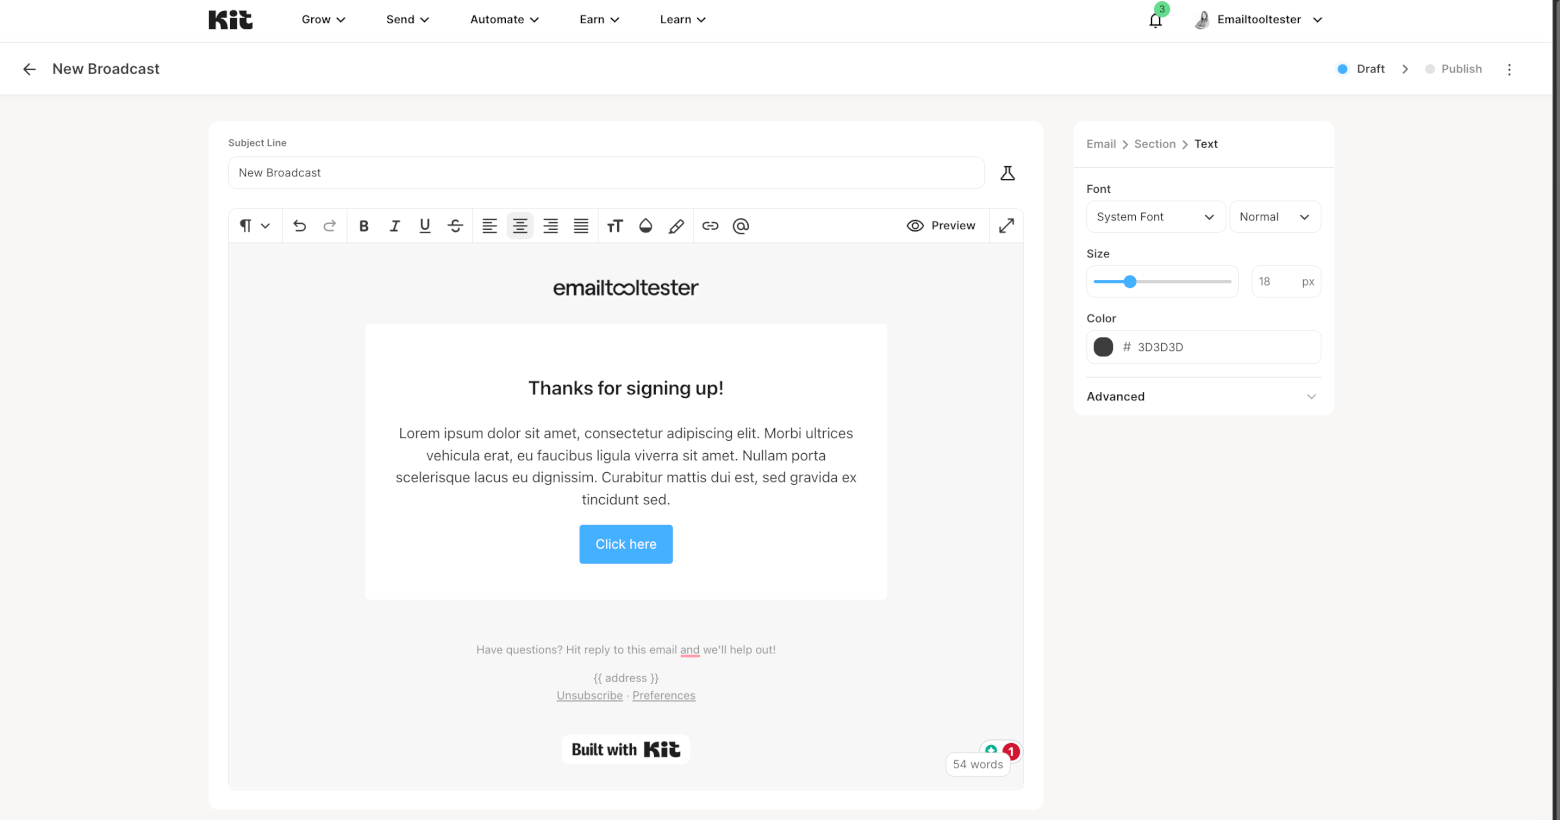
Once you’ve collected some subscribers, it’s time to send your first newsletter. In Kit, newsletters are called Broadcasts.
- From the dashboard, click Send → Broadcasts → New Broadcast.
- Choose a template. The Story template is a good starting point.
- Enter your subject line. If you’re stuck, click the AI icon for automatic suggestions.
- Start editing your newsletter using the drag-and-drop editor.
Editing your newsletter
The editor works just like the landing page builder:
- Replace text and images inline.
- Insert new blocks like buttons, headings, or product cards with the + icon.
- Match fonts, colors, and brand styles under Design.
Always use the Preview option to check desktop and mobile layouts. Then send a test email to yourself.
Sending options
When you’re ready:
- From email: Verify the sender address you signed up with. For larger lists, set up a custom domain under Settings → Email.
- Audience: By default, all subscribers receive your broadcast. You can add filters to target by form, tag, or purchases.
- Timing: Choose Send Now or schedule for later.
Finally, hit Send Broadcast. Congratulations – your first newsletter is live!
If you’d like to make it public, Kit also gives you the option to “Publish to web”. This means your newsletter will appear on your Creator Profile, similar to how posts work on Substack — making it easier for new readers to discover your content and subscribe directly. You can toggle this on or off before sending, or update it later from your broadcasts list.
4. Organizing your subscribers with tags and segments
As your list grows, you’ll want to organize subscribers for better targeting. Kit offers:
- Tags: Flexible labels you can apply manually or automatically (e.g. “Downloaded Guide,” “Photography Workshop Attendee”). Learn more about tagging here.
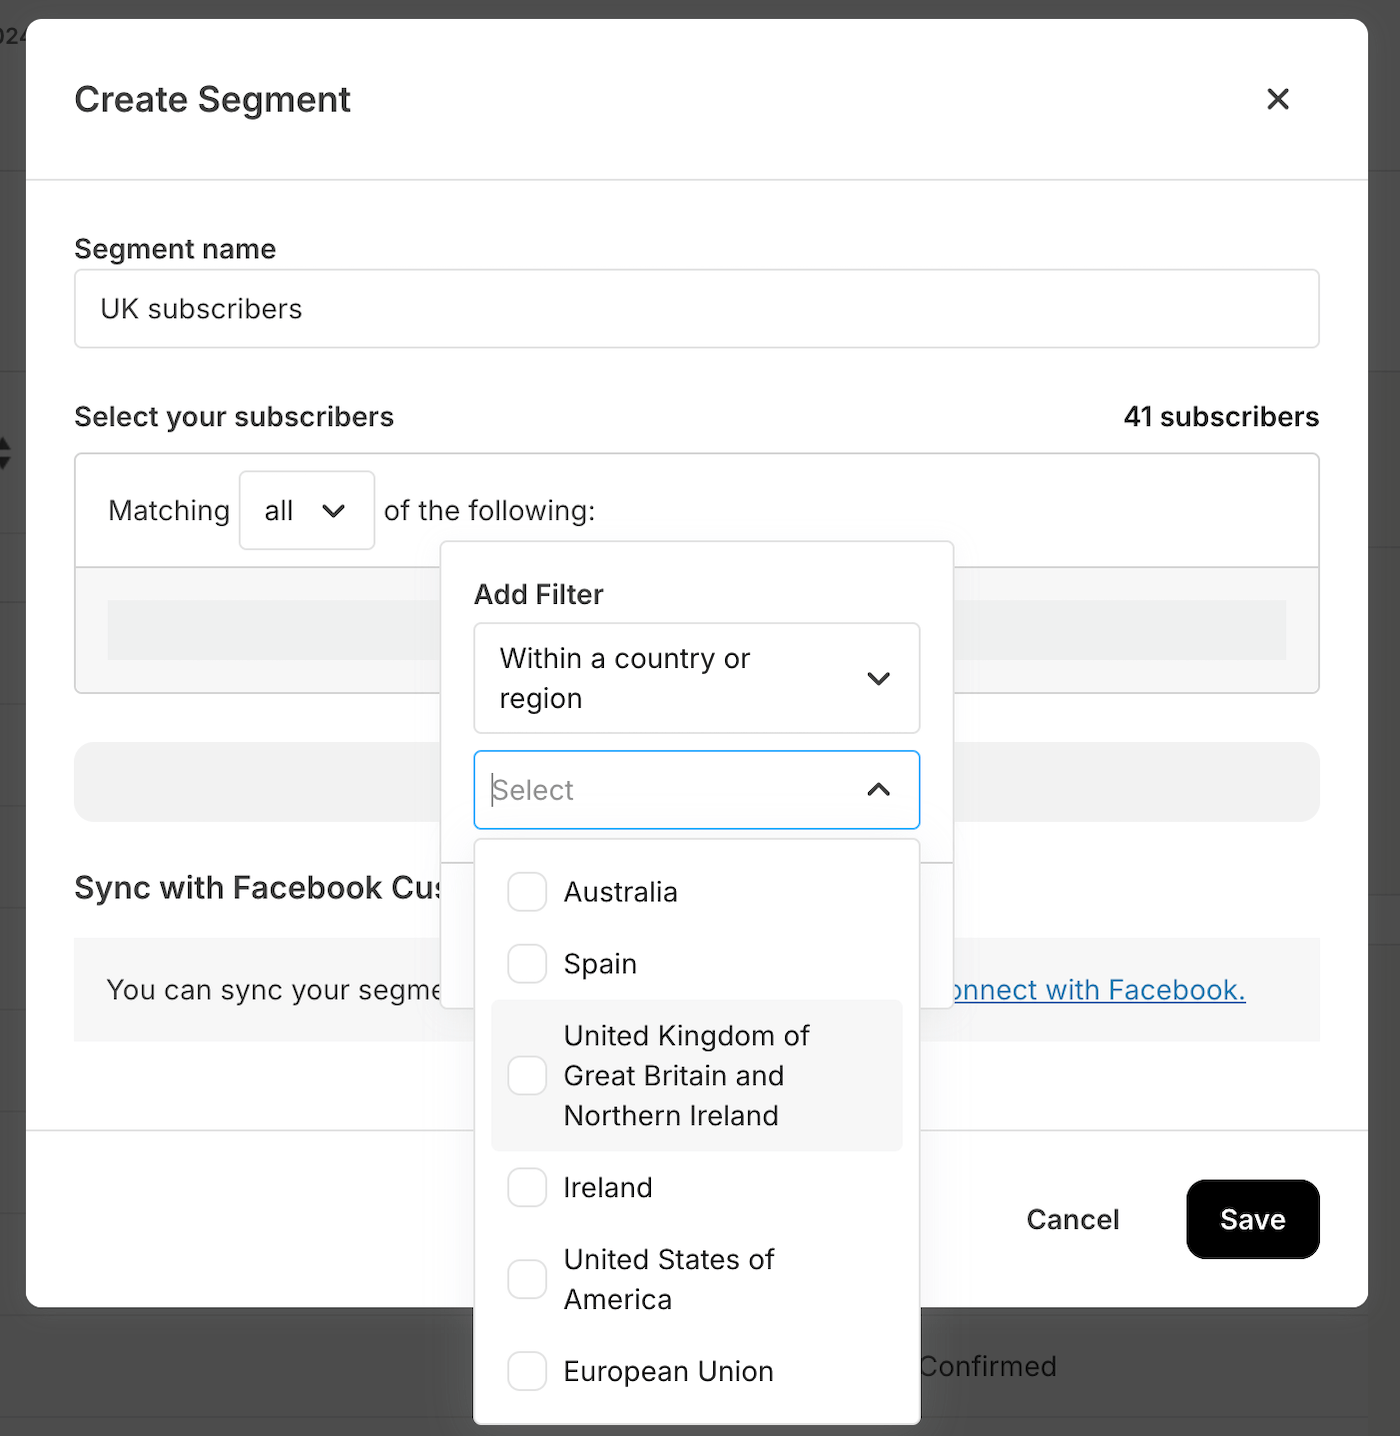
- Segments: Groups of subscribers based on filters (e.g. people with a certain tag, or those who joined in the last 30 days). Learn more about segmentation here.
To create a segment:
- Go to Grow → Subscribers → Segments → New Segment.
- Add filters like: Tag = Workshop Attendee OR Subscribed via Landing Page X.
- Save and use the segment in future broadcasts.
This makes it easy to send personalized content without creating multiple lists.
5. Automating your welcome sequence
Manual emails are great, but automations let you engage subscribers on autopilot. The simplest example is a welcome email. (Note that on Kit’s free plan, you’ll only be able to set up 1 automation.)
- Go to Automate → Visual Automations → New Automation.
- Select Welcome Sequence.
- Choose the trigger (e.g. Subscriber joins Landing Page X).
- Add your first email block and write a warm welcome message.
Want to create a series? Add a Time Delay step (e.g. wait 2 days), then drag in another email.
Ideas for your sequence:
- Email 1: Welcome message + introduce your story
- Email 2: Share your best resources or blog posts
- Email 3: Offer a discount or promote a product
Kit also allows conditional splits, so you can branch emails based on whether a subscriber opened or clicked.
6. Tracking performance in Kit
After you send a broadcast or set up an automation, you’ll want to see how it performs.
- Go to Send → Broadcasts and click on an email to view stats.
- Metrics include open rate, click-through rate, and bounce rate.
- For automations, open the workflow and click See Stats to track how many subscribers started or completed the sequence.
If performance is low, try:
- Testing different subject lines (use AI or run A/B tests on paid plans).
- Adjusting send times.
- Adding stronger calls-to-action in your emails.
7. Beyond the basics: selling and monetizing
Even on the free plan, Kit offers built-in monetization tools:
- Paid newsletters: Charge subscribers for premium content.
- Digital products: Sell eBooks, courses, or presets directly from your emails.
- Tip jars: Allow supporters to contribute one-time payments.
This makes Kit especially appealing for independent creators, bloggers, and freelancers who want everything under one roof.
Final tips (and next steps)
Bravo! You’ve just:
- Signed up for Kit
- Built a subscriber landing page
- Sent your first newsletter
- Organized subscribers with tags and segments
- Automated a welcome sequence
- Learned how to track results
That’s more than enough to launch your first newsletter. But Kit has much more to offer — from advanced automations to integrations with Shopify, WordPress, and other tools.
Ready to keep learning? Check out our full Kit review for an in-depth look at features, pricing, and alternatives.
Final thoughts: Kit Tutorial
If you’re a beginner, Kit makes starting a newsletter feel less overwhelming. It’s simple to use, the free plan is incredibly generous, and the creator-focused tools mean you can grow and even monetize your audience quickly.
Follow the steps in this guide and you’ll be on your way to building a successful newsletter in no time.
> Check out our full Kit review.
The author
Learn more about us
Our Methodology
This article has been written and researched following our EmailTooltester methodology.
Our Methodology