EmailTooltester is supported by readers like you. When you purchase through our links, we may earn a commission that helps keep our reviews independent and free.
 Here at EmailTooltester, we love Brevo!
It’s simple enough for beginner email marketers, powerful enough for growing teams, and offers a full range of features from basic newsletter creation to advanced automations. In fact, we actually use Brevo ourselves at EmailTooltester for everything from newsletters to complex workflows, so we know the tool inside out.
If you're not quite ready for our full course—or the (more limited) Brevo Academy—we have also created this taster tutorial (which we’d recommend using alongside our Free Starter Course).
In this tutorial, we’ll walk you through how to set up and start using Brevo for your email campaigns.
You’ll learn how to:
- Set up your account and authenticate your email
- Import contacts and create signup forms
- Build your first email campaign using Brevo’s drag-and-drop editor
- Segment your audience for more personalized communication
- And create automated workflows that keep your subscribers engaged – even while you sleep
Let’s get started and help you build a smarter, more consistent email marketing system with Brevo.

1. Signing Up and Getting Started with Brevo
To begin, head over to brevo.com and click “Sign up for free.” No credit card is required.
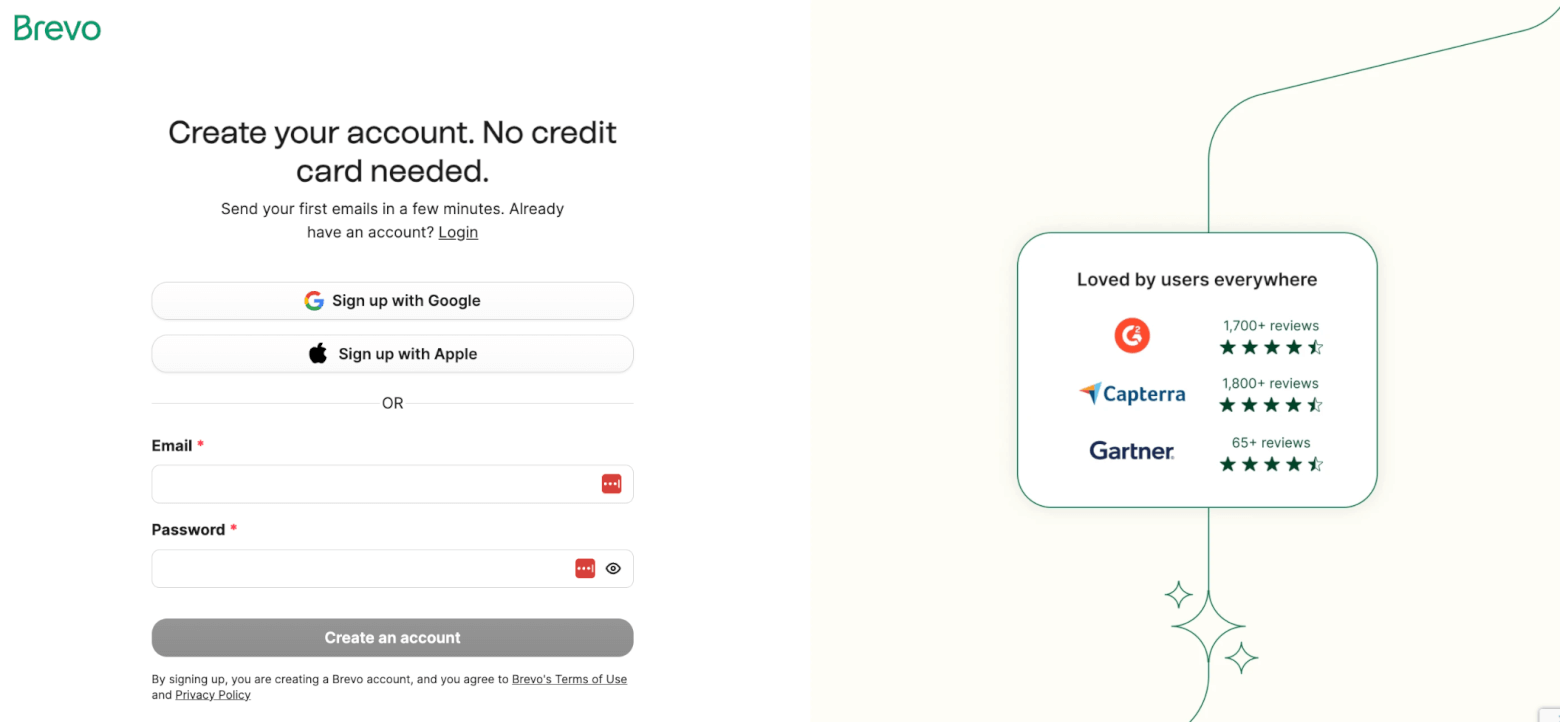
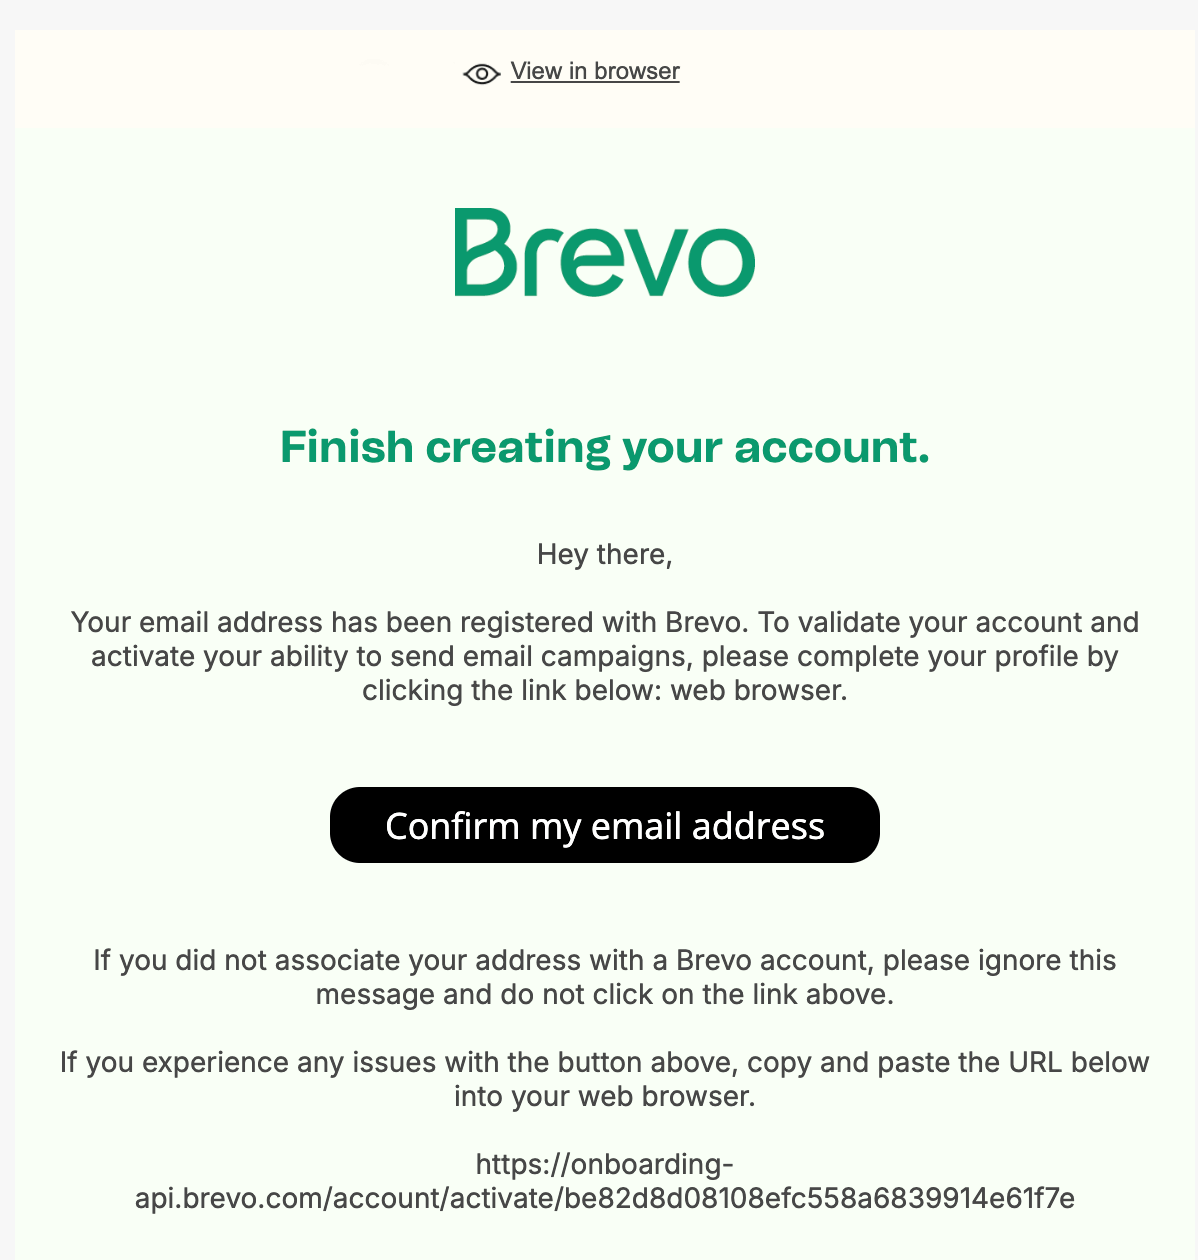
You’ll be asked a few simple questions to create your account, like your name, email address, company name, and website (if you have one). Choose a strong password and verify your email address when prompted.
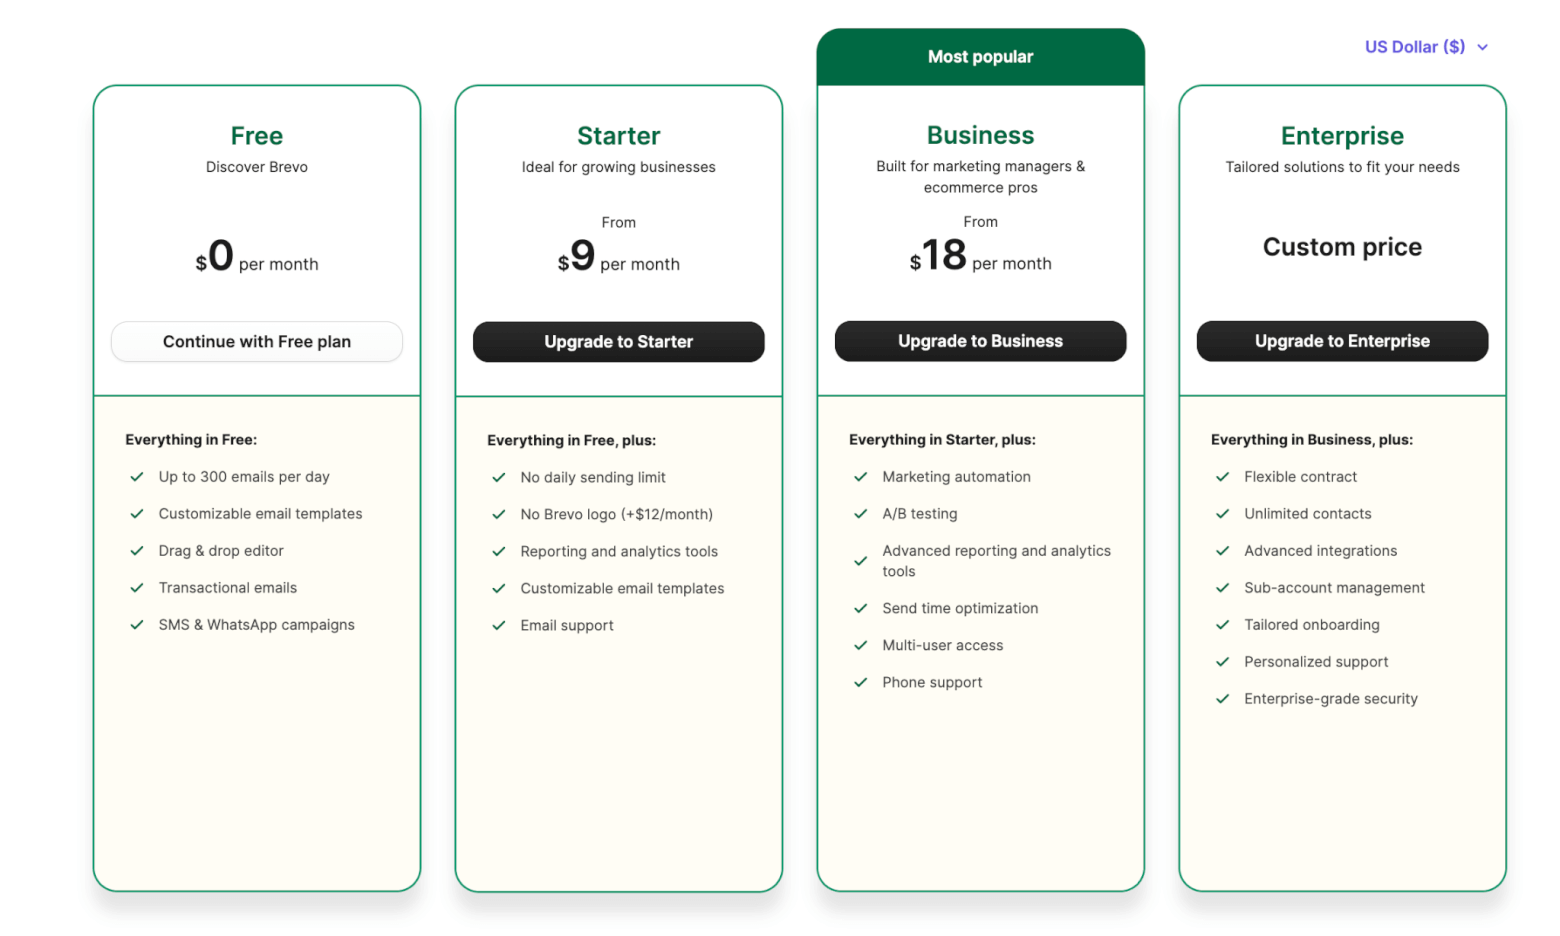
Choosing a Plan
Once your account is active, you’ll be asked to choose one of Brevo’s pricing plans. Brevo offers a generous free plan, but if you’re planning to send emails regularly or unlock premium features like A/B testing and Smart Send Time, upgrading might be worth it. You can always start free and upgrade later.
When you are ready to upgrade to a paid plan, make sure to make the most of our exclusive deal.
👉 Get 50% off the first 3 months with our exclusive Brevo coupon code.
Once your account is set up, log in to your dashboard. Brevo will walk you through a short onboarding checklist to help you get familiar with the interface.
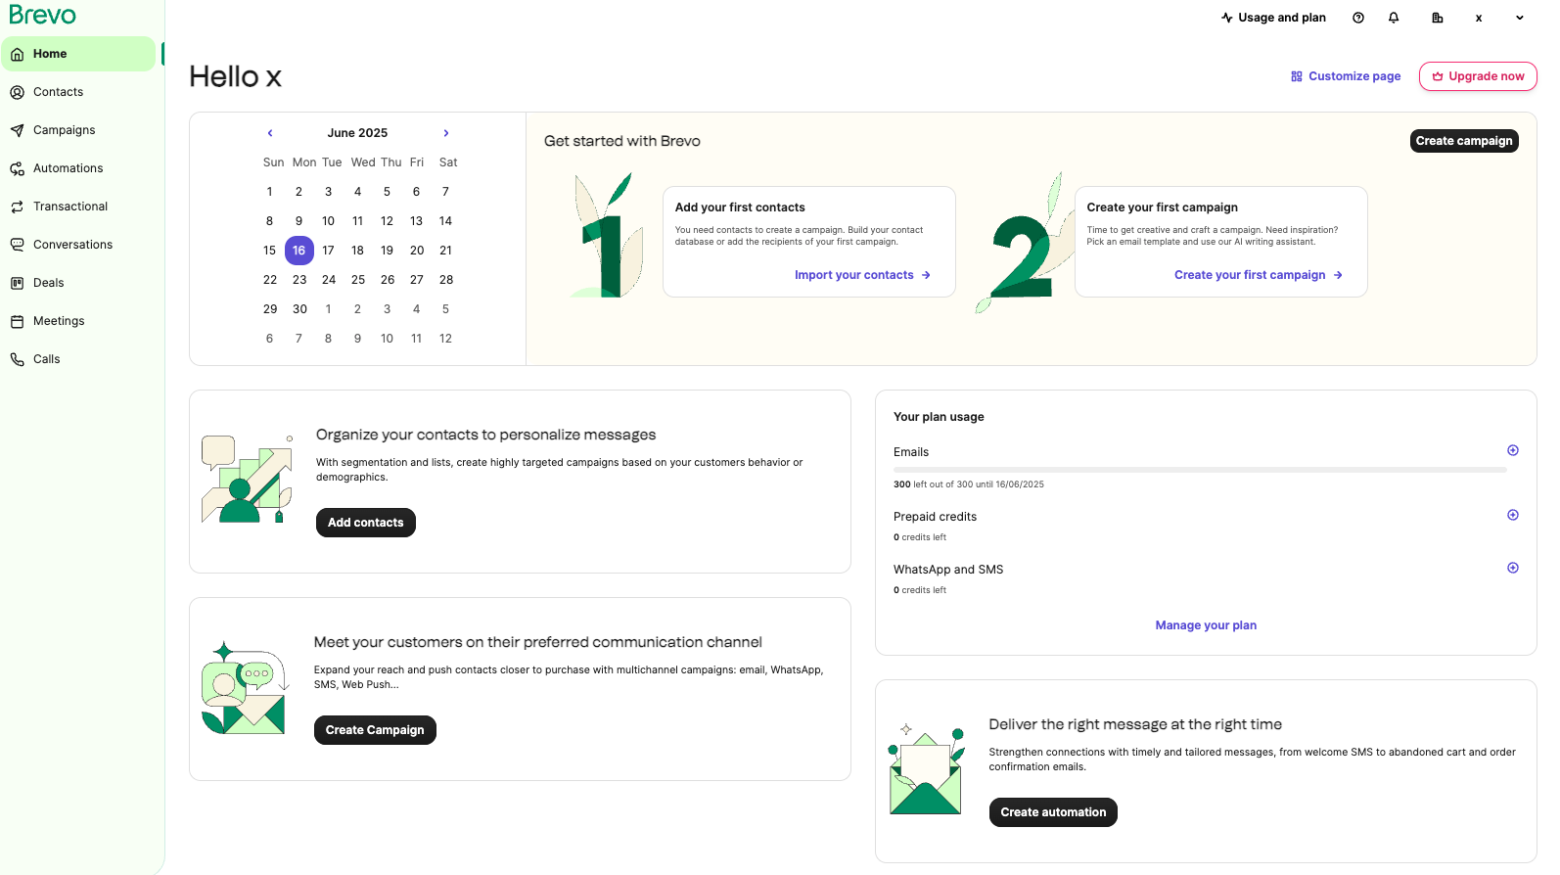
From the left-hand menu, you’ll find key sections like:
- Contacts – Where you manage your subscriber lists, forms, and landing pages
- Campaigns – Create and send one-off emails like newsletters
- Automations – Build workflows like welcome series or cart recovery emails
- Transactional – Set up emails triggered by user actions (e.g., abandoned cart reminders, order confirmations)
- Conversations, Deals, and Meetings – Tools for live chat, CRM, and appointment scheduling
Take a moment to explore the dashboard, and then we’ll move on to authenticating your email domain.
You can also watch our video to see how to get started with Brevo.
2. Authenticate Your Email Domain
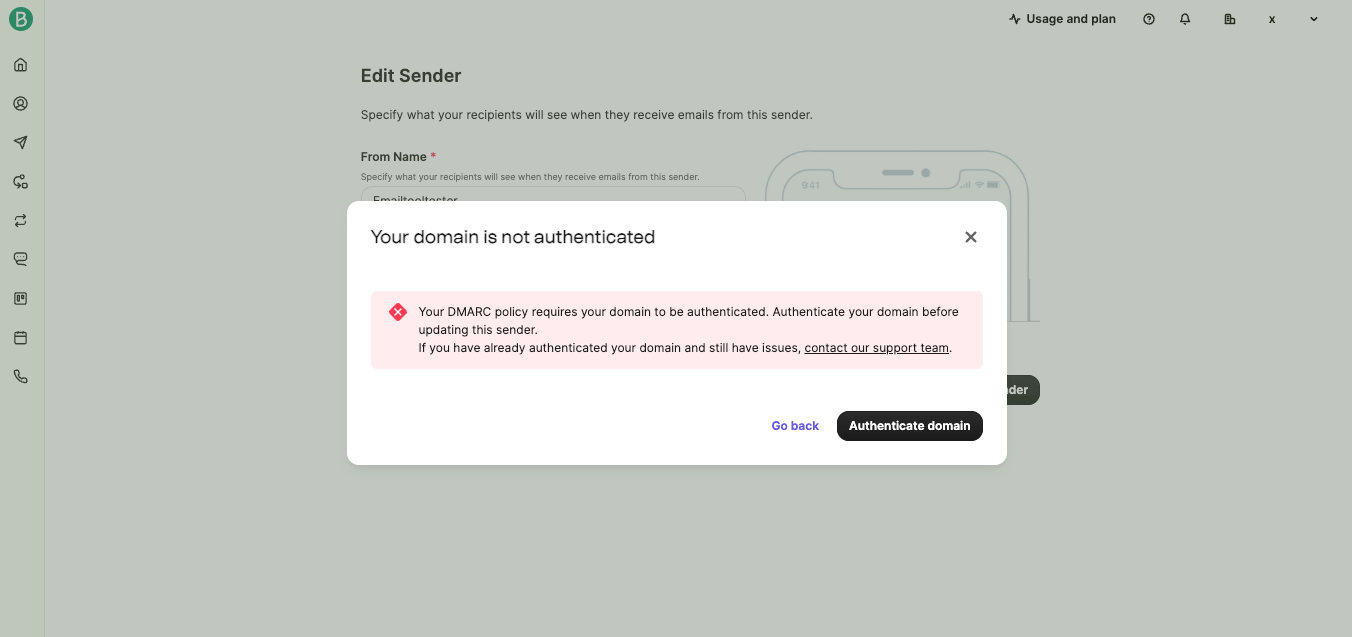
To improve email deliverability and avoid the spam folder, you’ll need to authenticate your domain.
- Go to Settings > Senders, Domains, IPs > Domains
- Then Add a domain or Authenticate on an existing one (choose Automatic Authentication)
Brevo will try to connect with your domain provider (e.g. GoDaddy, Namecheap) and set up the necessary DNS records (SPF, DKIM, DMARC). If automatic setup doesn’t work, you can follow Brevo’s manual instructions. Note that domain authentication is now mandatory because of Gmail, Yahoo, and Microsoft sender requirements.
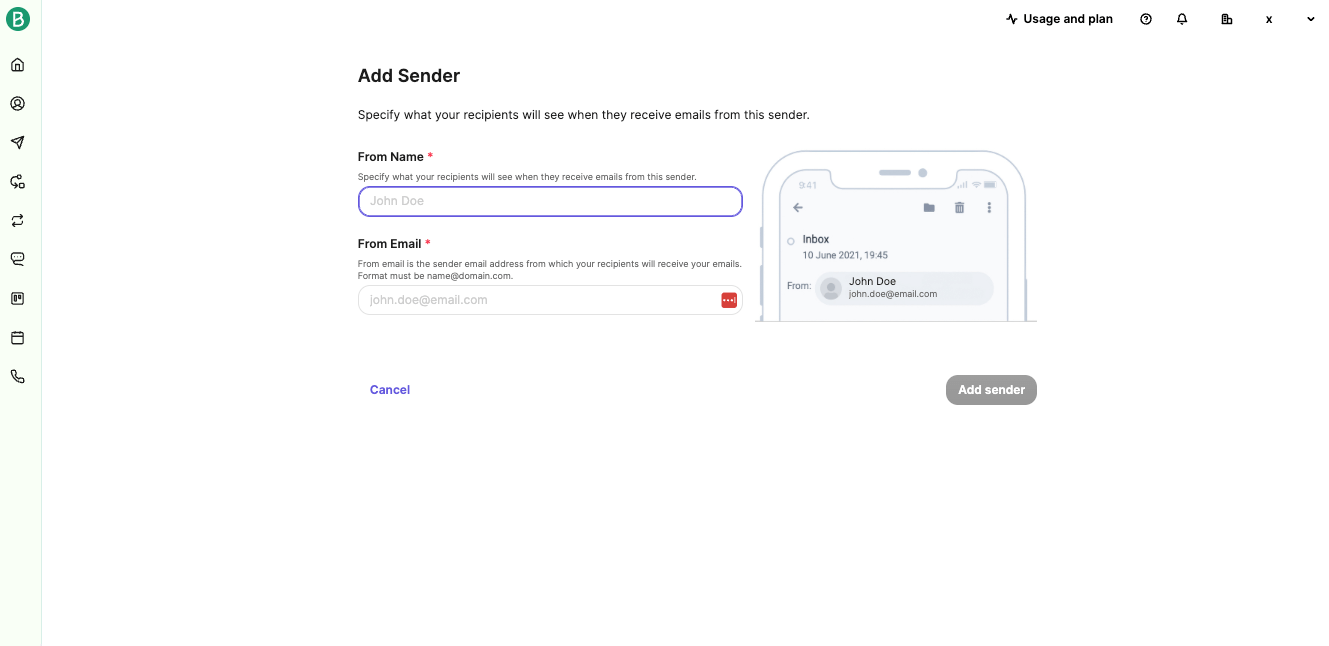
Once verified, go to ‘Senders' and add a sender's address, something like ‘yourname@yourdomain.com' or ‘contact@yourdomain.com'
3. Importing and Managing Contacts
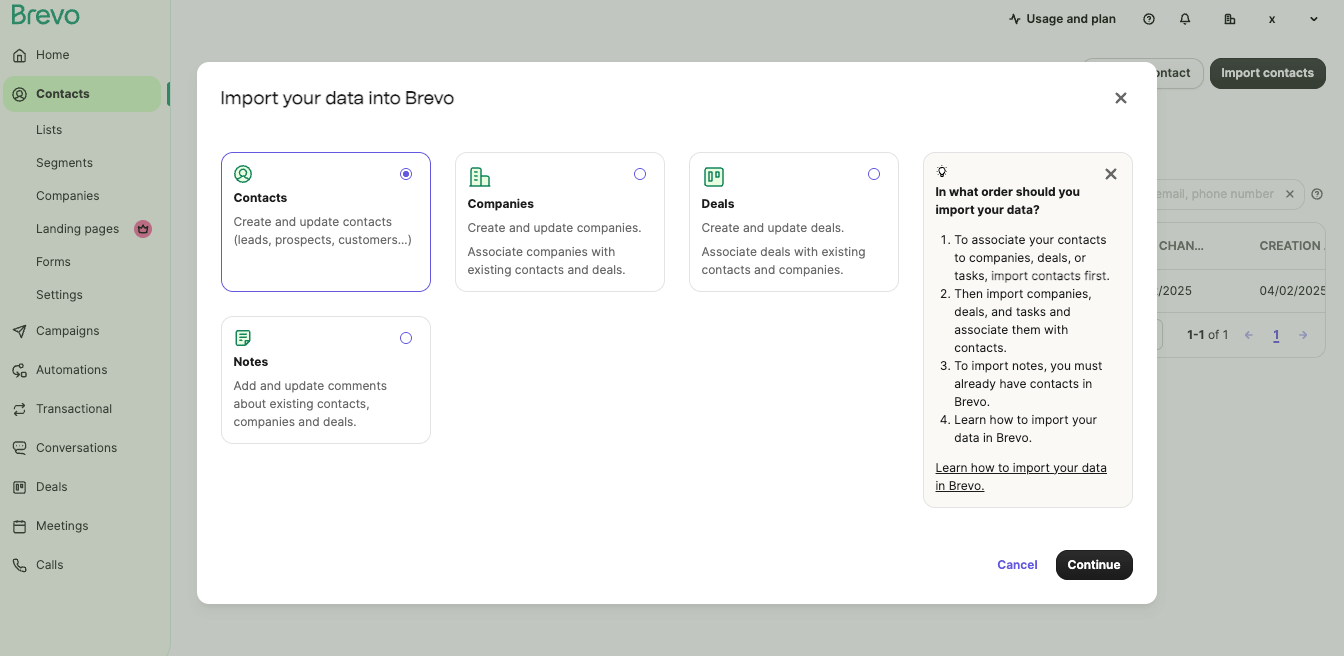
To upload contacts:
- Go to Contacts → Import Contacts.
- Upload a CSV file or copy/paste your contacts.
- Map the fields (e.g. First Name, Email).
- Choose or create a list to assign them to.
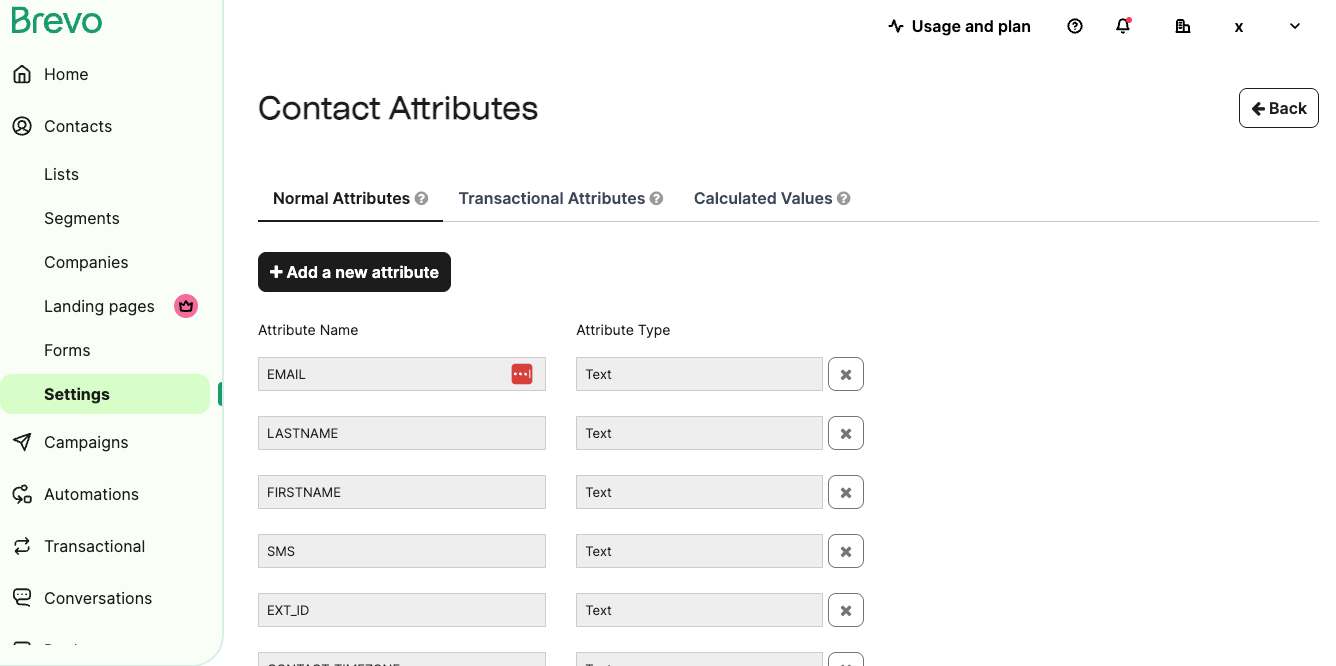
You can also add custom contact attributes such as “Industry” or “Country” under Settings > Contacts > Contact Attributes, which come in handy for personalization or segmentation later on.
4. Create a Signup Form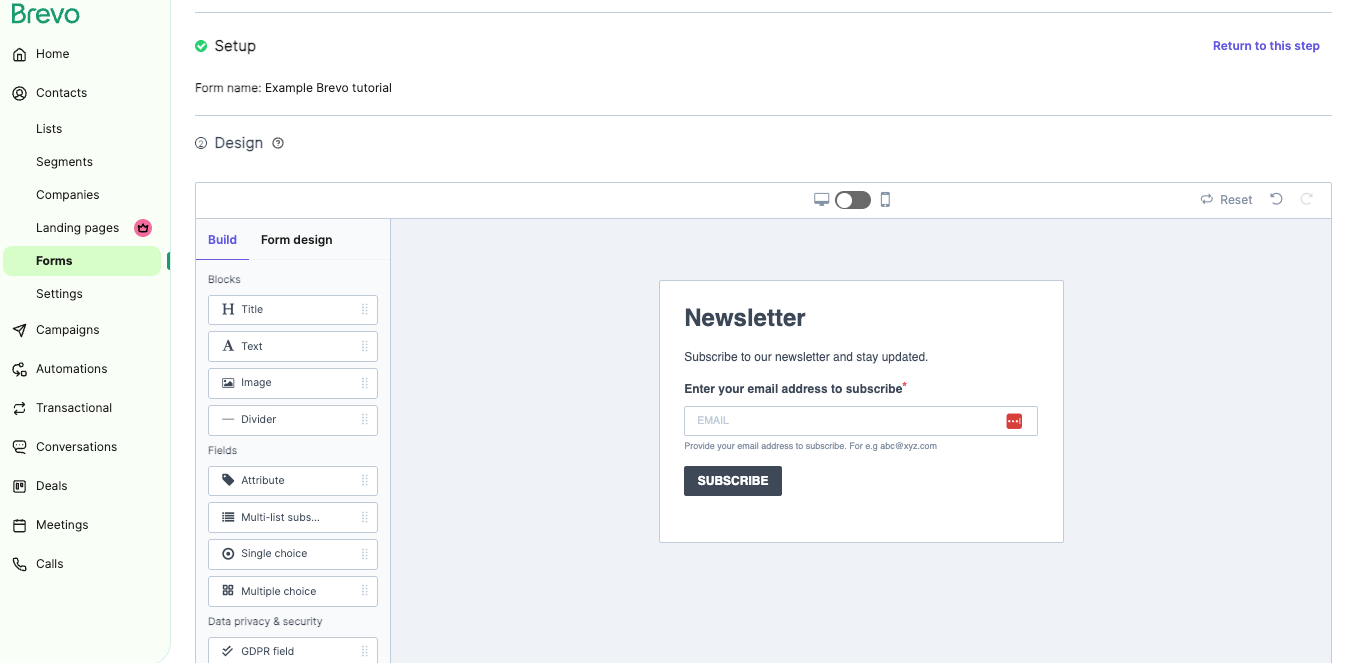
Growing your list is your next priority.
- Go to Marketing > Forms > Create sign-up form.
- Name your form (e.g. “Newsletter Signup”).
- Add fields like First Name and Email.
- Customize text, colors, and font to match your brand.
- Link the form to a contact list.
- Enable double opt-in (recommended for compliance and deliverability).
You can embed the form on your website or use Brevo’s Quick Share URL if you don’t have a site yet.

5. Send Your First Email Campaign
Now you’re ready to send your first email!
- Go to Campaigns > Create Campaign > Standard Email Campaign.
- Name the campaign (this is for internal use only).
- Set the sender name, email, and choose your recipients (you can select a list or segment).
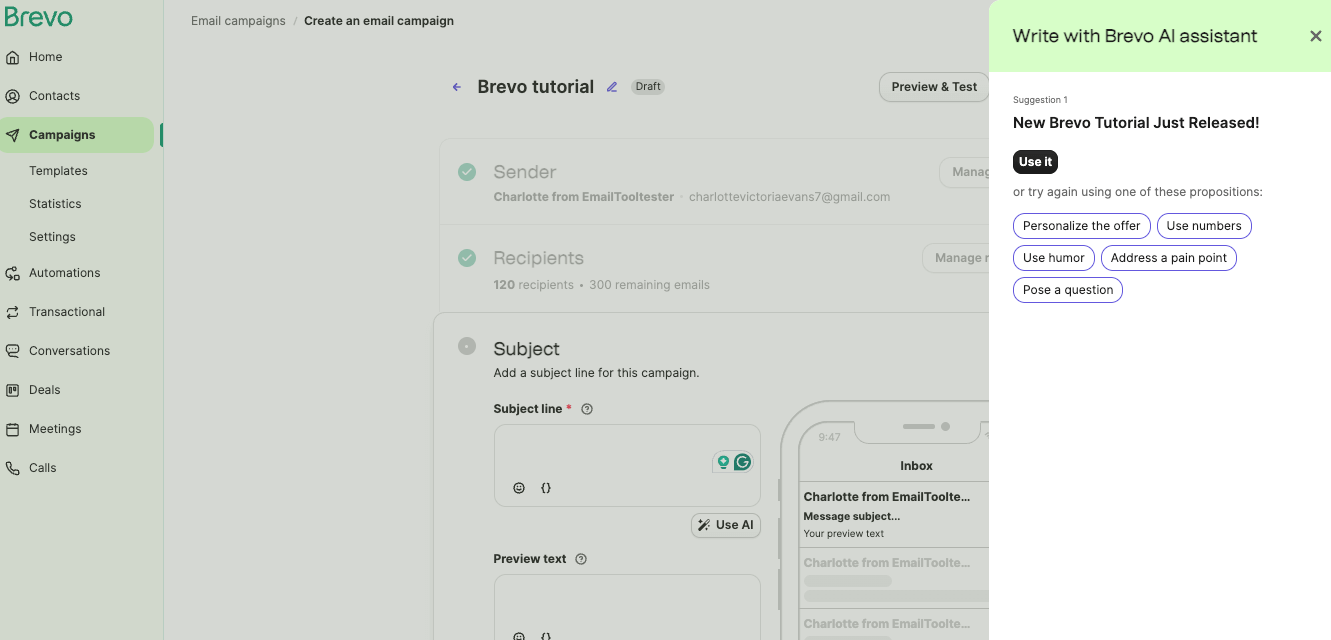
- Write a compelling subject line, and of course, try our subject line tester. Its also worth trying our Brevo's AI assistant if you are stuck for ideas!
Designing the Email
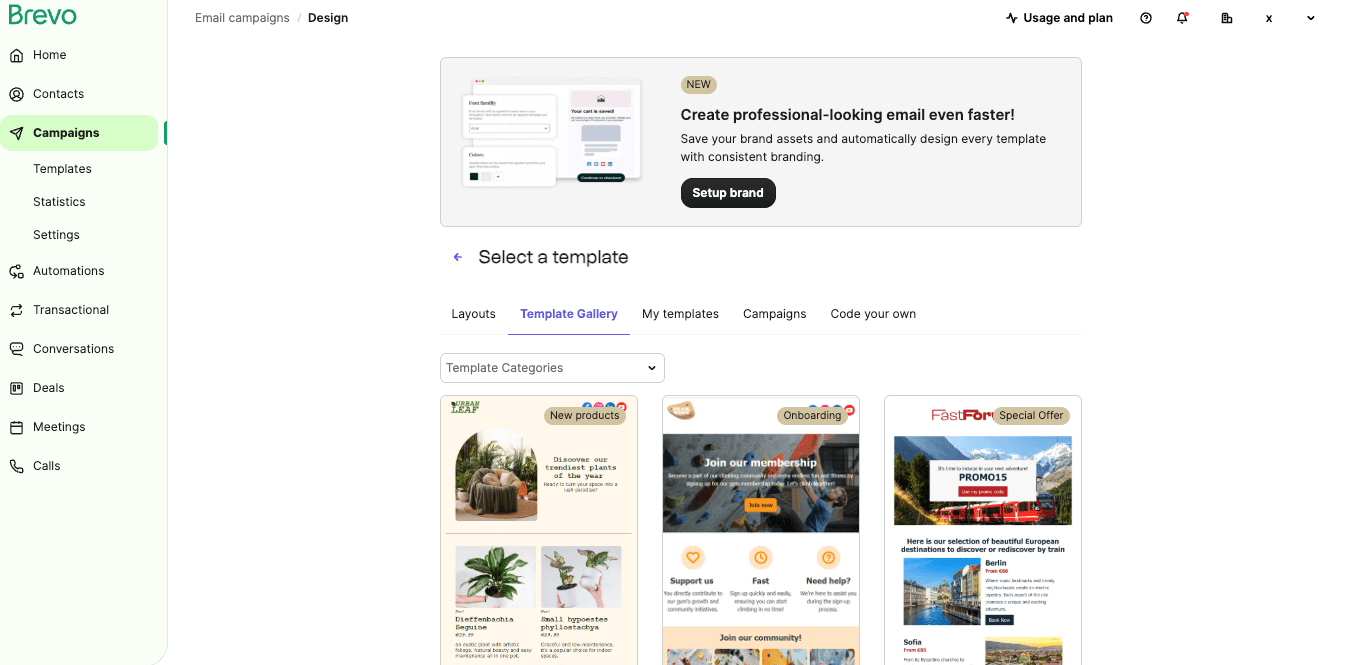
Choose a template, layout, or start from scratch using Brevo’s drag-and-drop editor.
- Add headings, text, and images using blocks on the left.
- Use personalization (e.g. First Name) by inserting contact attributes.
- Add a call-to-action button and customize its text and color.
- Always preview and send a test email before launching.
Once it’s ready, you can choose to either send immediately or schedule it. Standard plan users can also use the Send at Best Time feature to optimize timing based on audience behavior.
6. Segment Your Audience
Segmentation helps you send more targeted, relevant emails. It's a great way to improve your deliverability.
Go to CRM > Segments > Create Segment.
You can define segments based on:
- Contact attributes (e.g. location, birthday)
- Behavior (e.g. email opens, link clicks)
- Purchase history
- Engagement levels
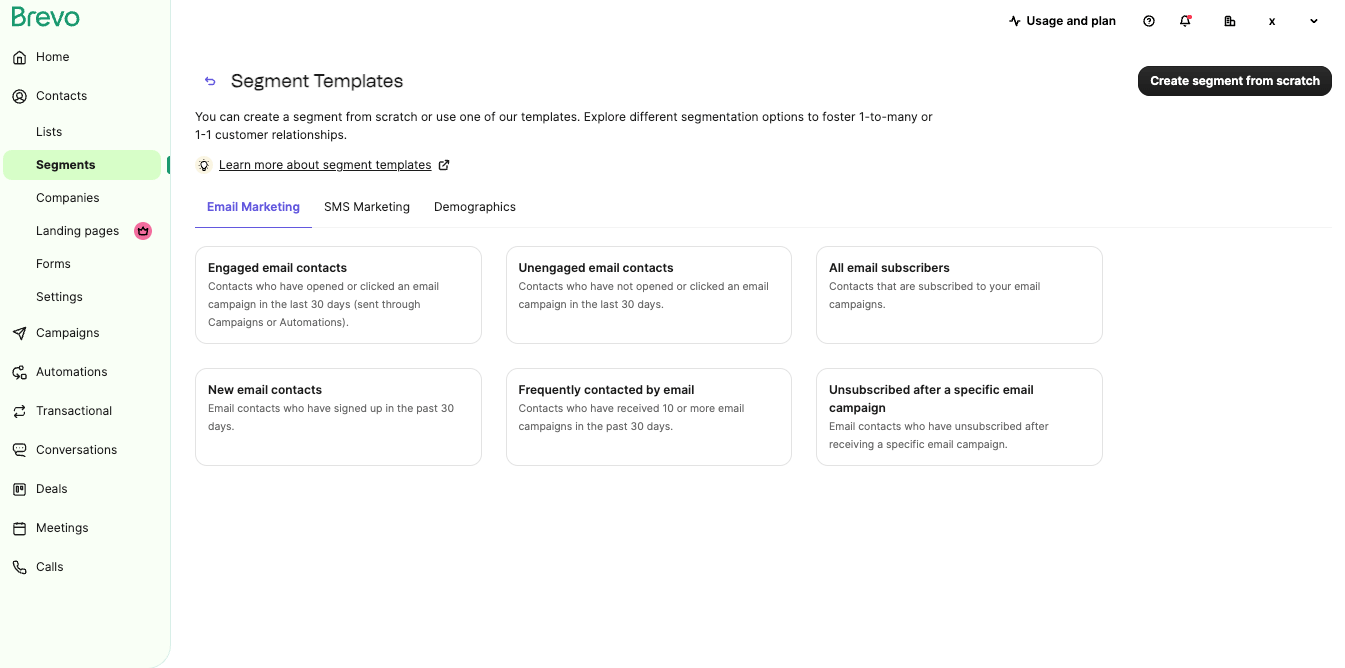
For example, you might create a segment for:
- Subscribers who haven’t opened an email in 30 days
- Customers who’ve purchased more than 5 times
Note that segments update automatically, unlike static lists.
7. Set Up a Welcome Automation
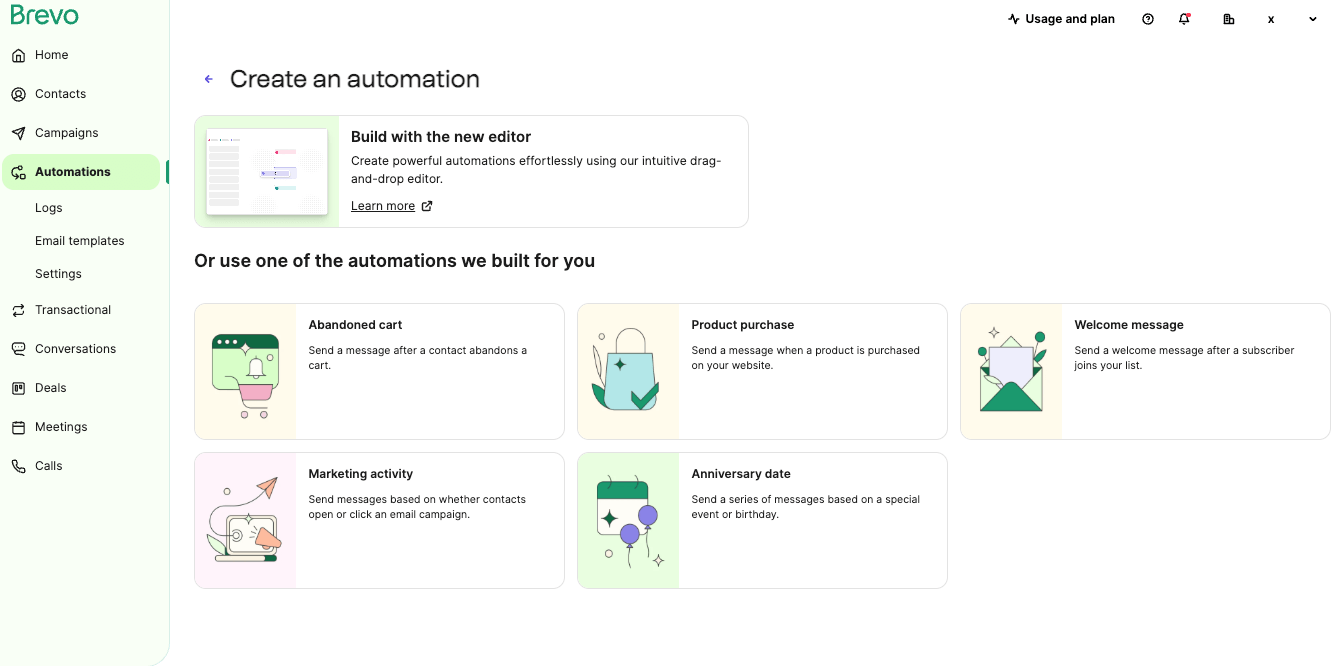
Ready to automate? A welcome email series is a great place to start.
- Go to Automations > Workflows → Create an Automation.
- Choose the Welcome Message template and hit Create Automation.
- Select the list (e.g. newsletter signups).
- In Settings, decide whether contacts can re-enter the workflow.
- Exit the guided setup and delete any default “Wait” step if you want the email to send immediately.
Now, customize the welcome email:
- Use Brevo’s default email or choose a saved template.
- Add a strong welcome email subject line like “Welcome to [Your Brand]!”
- Check the sender name and email address.
To build a series:
- Add a Time Delay (e.g. 2 days).
- Then drag in another Email block.
Use the welcome series to:
- Share your brand story or values
- Highlight top resources
- Offer a discount for first-time purchases
Watch our Brevo automation video tutorial:
8. Add a Conditional Split (Advanced)
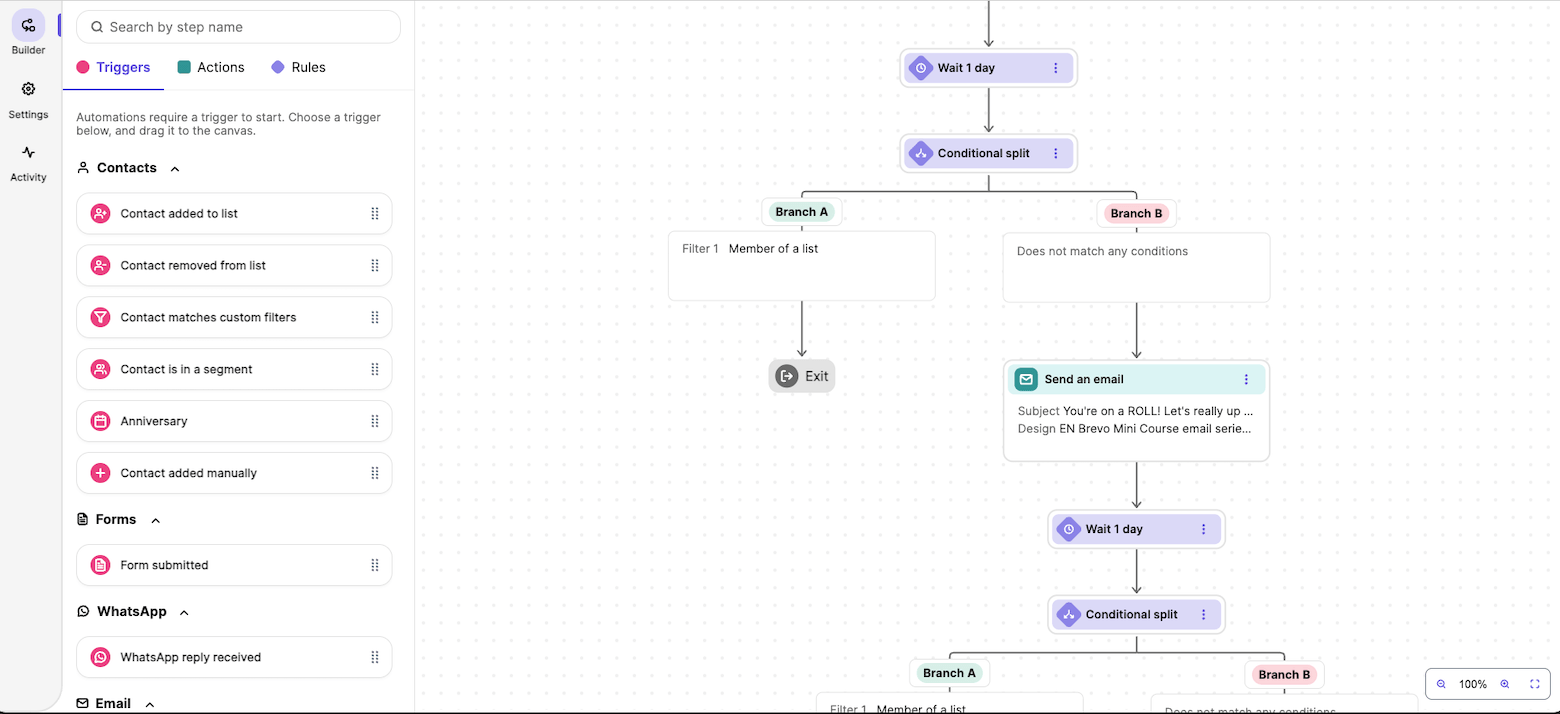
Want to send different messages based on user behavior?
Use a Conditional Split.
For example, to email users who clicked a link in your welcome email:
- Drag a Conditional Split onto the workflow.
- Click Add Filter → Email → Link Clicked in an Email.
- Click on ‘add filters' and type the name of the email.
- Hit Save.
Now you can send a different email to each branch – or only one, depending on your goal.
9. Monitor Your Results
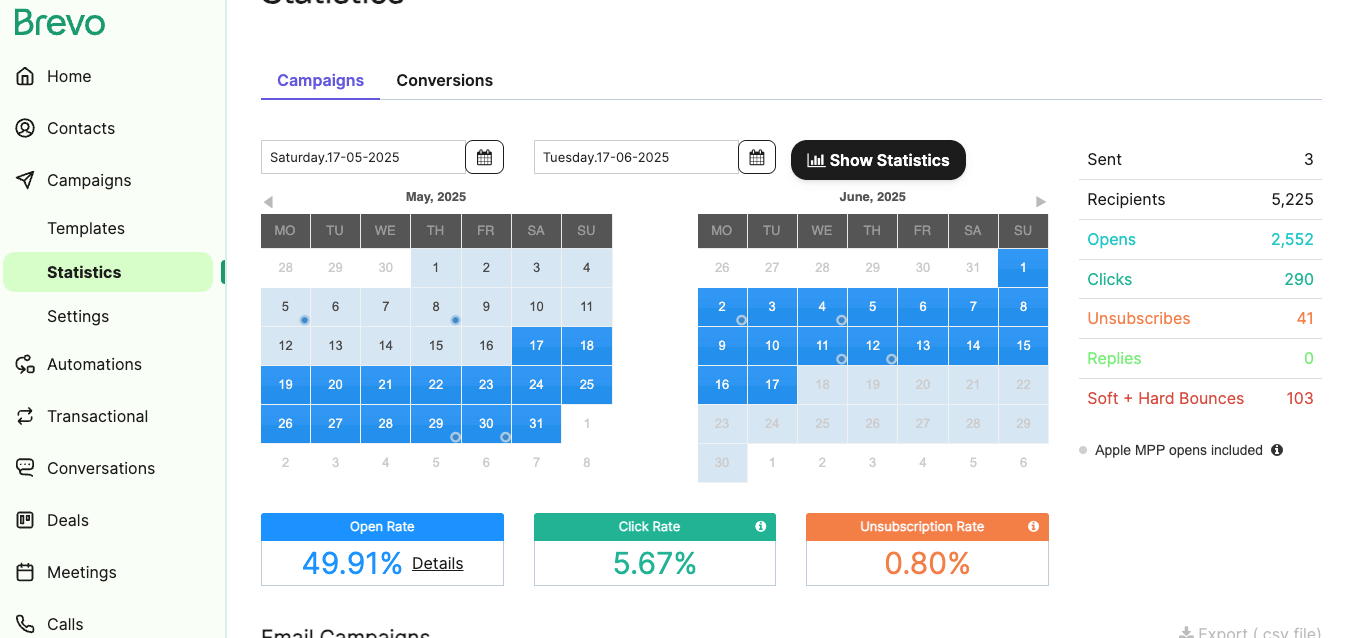
To check how your automation or campaigns are performing:
- Go to Marketing → Statistics and check your campaign results
- Alternatively, to check your Automation stats, go directly into your workflow and click on the ‘Activity' tab on the left.
- View how many contacts started/finished the flow.
- Check open and click-through rates for each email.
If performance is low, try tweaking subject lines, content, or calls to action.
To edit emails used in automation workflows, go to Automations → Email Templates.
10. Final Tips (& Learn More in Our Complete Brevo Course!)
That’s your beginner-friendly Brevo tutorial: from the initial signup to setting up your first automation in Brevo.
If you’re ready to go deeper, including setting up website tracking, advanced segmentation, and powerful automation, we’ve created a full Brevo course, packed with hands-on lessons and expert advice.
Brevo makes email marketing feel a lot less complicated, and now that your first campaign and automation are up and running, you’re off to a great start. We’ve enjoyed using Brevo ourselves, and we hope it works just as well for you.
If this guide helped, you’ll love our full Brevo course – packed with practical lessons, templates, and expert, on-hand support via our exclusive community. Click here for more information:
The author
Learn more about us
We keep our content up to date
12th Mar 2026 - updated content
2nd Mar 2026 - Added Brevo coupon code
Our Methodology
This article has been written and researched following our EmailTooltester methodology.
Our Methodology