EmailTooltester is supported by readers like yourself. We may earn a commission when you purchase through our links. Of course, this won't increase the cost for you.
Email marketing can be a highly effective marketing and sales channel, with a return on investment (ROI) as high as 3,600%! But if you’re new to it, how do you set up your email operations for such success?
Other guides will say you need to follow a 20-to-30-step process. Honestly, that’s way too intimidating for beginners.
So, instead, I’ve decided to list just the 10 essential steps you need to set up correctly at the start so that:
- You don’t accidentally get your emails marked as spam.
- You grow a list of active, engaged subscribers.
- You see results from your emails!
Ready? Then let’s get into this ultimate email marketing checklist.
1. Familiarize Yourself With Permission-Based Marketing
Email marketing is a type of permission-based marketing, where you market to only people who have given you their permission to do so.
This way, if a person hasn’t consented to receiving your marketing emails, you don’t email them. Otherwise, you may be making a huge email marketing mistake. But why?
Why is permission-based marketing important?
Many email marketing providers state in their terms of service that users (this includes you) are not to use their platforms to send unsolicited emails. Users who do so may have their account suspended or even terminated.
Just check out ActiveCampaign’s terms of service, for example:
What’s more, if you send marketing emails to users who haven’t agreed to receive them, they may just mark your emails as spam.
This can hurt your email deliverability, where your future emails are less likely to reach your subscribers’ inboxes — much less get read.
How to get permission to send marketing emails
Get users’ consent to receiving your marketing emails directly in the contact forms you set up.
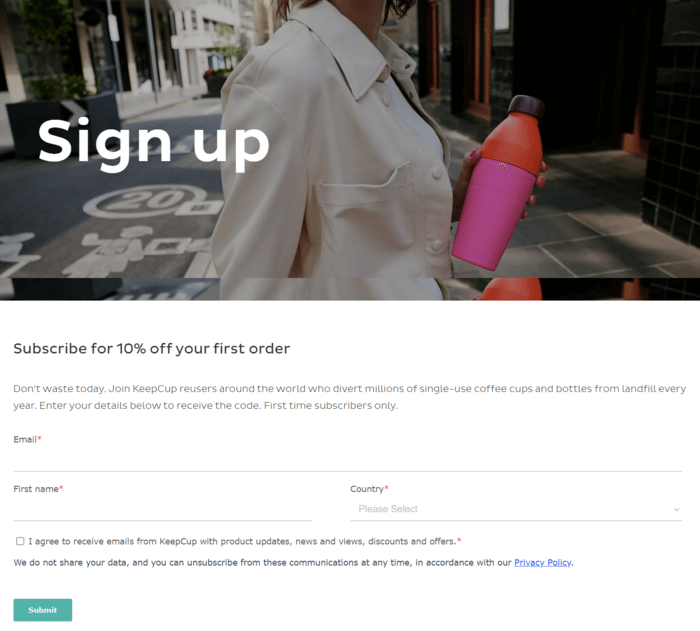
For example, KeepCup’s email form has a checkbox for users to indicate that they agree to receive the business’s emails. Note the red asterisk, which means that this is a mandatory field:
And no, just because a user has given you their email address in exchange for receiving your lead magnet doesn’t mean they’ve agreed to receiving your marketing emails!
If your forms don’t expressly get their consent for this, then they haven’t agreed to it — and you can’t send them marketing emails.
2. Select Your Email Marketing Service
This is the platform you’ll use to send your marketing emails.
From MailerLite to ActiveCampaign, Brevo, Omnisend, and so on, you’ll have no shortage of options to choose from. So, be sure to pick the right platform for your email marketing efforts.
Why is choosing the right email marketing service important?
Once you start storing your subscribers’ email addresses, creating your email templates, and building your email automations in one email marketing service, migrating everything to a different service can be a major hassle.
As far as possible, try to pick the most suitable email marketing service for your email goals right off the bat. This way, you won’t have to switch platforms later on if you realize your current provider lacks a crucial feature you need.
How to choose the right email marketing service
Start by listing the features your email marketing service needs to have. By doing so, you can shortlist platforms that offer them.
For example, think about whether you need:
- Powerful email automations
- Gorgeous email templates
- Extensive subscriber segmentation options
Next, read our reviews. We’ve been testing email marketing services for more than 10 years now, and have put together detailed guides to help small business owners like yours pick the perfect email platform!
Here are some guides to get you started:
- The 16 Best Email Marketing Services: Find Your Top Provider for 2024
- The 16 Best Free Email Marketing Services: How far can $0 get you in 2024?
- 12 Best Email Marketing Platforms for Your Ecommerce Store
Finally, try the platforms for yourself!
Many email marketing services offer free plans and free trials. Take advantage of these to explore whether a platform is right for you before you start paying for it.
3. Set Up Your Sender Address
The sender address is the email address that recipients will see in your marketing emails’ “From” field. It’s also known as the “From” address.
Why is it important to set up your sender address?
For one, your email platform won’t let you send emails that don’t have a sender address.
But apart from that, your sender address tells recipients who is sending them emails. This way, they’ll know what content they can expect to read when they open it.
How to set up your sender address
Choose a professional sender address for your emails. This means not using free email addresses like yourname@gmail.com or yourname@outlook.com.
Instead, use an email address from your business’s domain, like yourname@company.com. Your emails will be taken more seriously this way.
After that, add your sender address to your email platform. The platform will typically ask you for it when you’re setting up your email marketing account.
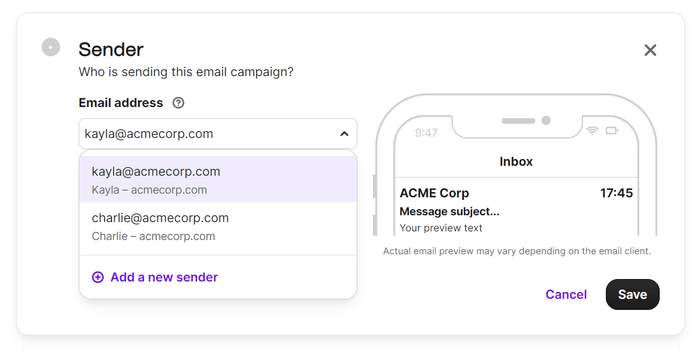
Some email platforms like Brevo will even let you set up multiple sender addresses! This is helpful if you want to send marketing emails under different team members’ names or different business departments.
Learn more best practices for sender email addresses here.
4. Authenticate Your Domain
Email authentication is the process of adding certain lines of text (called “records”) to your domain’s settings. By adding these records, you help email mailbox providers confirm that your emails are sent by you and not someone else pretending to be you.
Email authentication isn’t the same as “verifying” your domain.
Email verification involves confirming that you own the domain and sender address from which you want to send emails. To do so, you’ll typically click a link in an email that your email service provider sends to your sender address.
(That said, some email marketing services may use the term “email verification” to refer to email authentication. Don’t get confused!)
Why is email authentication important?
Authenticating your emails is a requirement if you’re a bulk email sender. Otherwise, the mailbox provider may send your emails to the spam folder.
Gmail sees you as a bulk sender if you send more than 5,000 emails to Gmail addresses in one day. But other mailbox providers, like Yahoo, don’t have a fixed threshold you have to exceed to be considered a bulk sender.
So, even if you don’t think you send (or will send) that many emails every day, I recommend authenticating your emails anyway to give your emails the best shot at being delivered! Here’s how:
How to authenticate your domain
Your email marketing provider will provide you with the Domain Name System (DNS) records for authenticating your domain.
Here’s what they look like in MailerLite, for example:
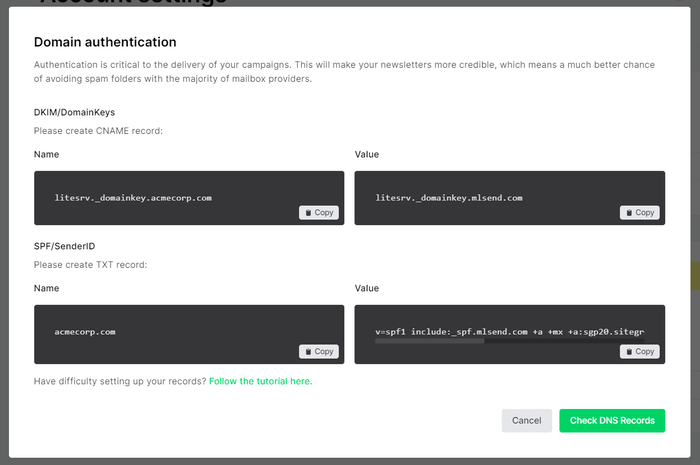
Add these DNS records to your domain provider. This is the platform you’re using to host your domain, like Namecheap or GoDaddy.
Give your email marketing platform some time to confirm that your DNS records have been added. Then, run an email authentication check to test if you’ve done it successfully.
If you get an unexpected result or just aren’t sure what to do, contact your email platform’s support team for help.
P.S. Apart from authenticating your domain, you’ll need to follow other requirements to ensure your emails reach Gmail and Yahoo! users. Learn more about them here.
5. Decide How You’ll Grow Your Email List
If you’re just starting out with email marketing, don’t build your email list by buying email addresses.
Sure, it’s tempting to take your email list from zero to hundreds (or even thousands) of subscribers in one day. But it isn’t worth it.
Why is it important to choose a proper way of growing your email list?
Doing so helps your emails avoid spam filters.
When you buy other people’s email addresses, they probably haven’t agreed to receiving your marketing emails. As a result, they might mark your emails as spam, causing mailbox providers to send your future campaigns to the spam folder as well.
The list of email addresses you buy may also contain spam traps — legit-looking email addresses that mailbox providers use to detect spammers.
When you send an email to a spam trap, the mailbox provider that planted it will know you’ve used dubious methods to grow your email list. It may then label you as a spammer and block your emails from reaching its users’ inboxes.
How to grow your email list (the proper way)
Add email forms to your website to let users not only join your email list of their own accord, but also give you permission to email them.
You can also dangle lead magnets like free guides and discounts to entice users to sign up. We created this Free Guide to Email Marketing for Beginners, for example:
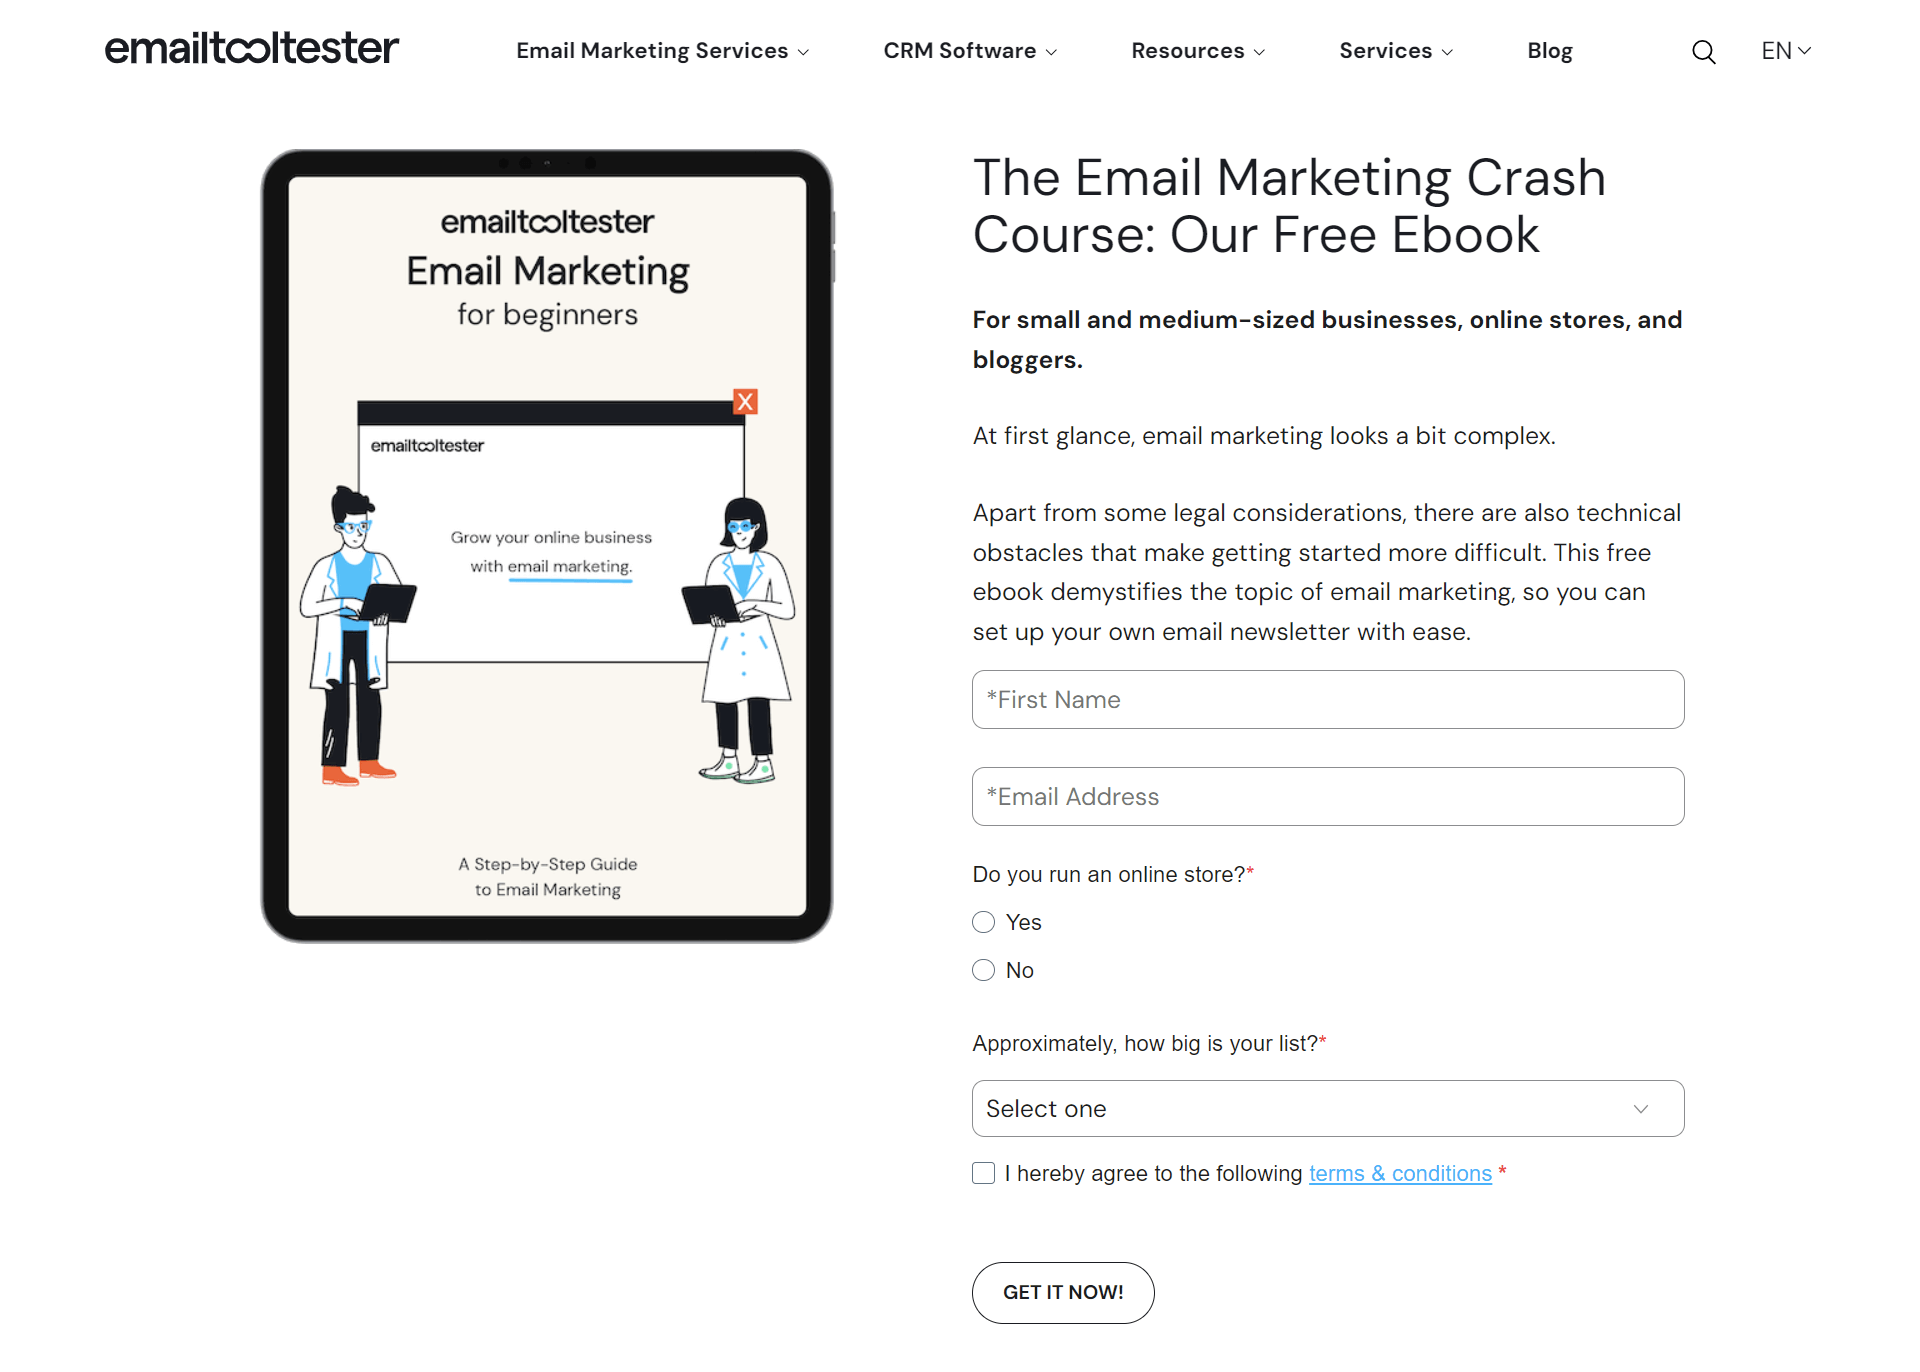
Growing your email list this way will be slower than buying an email list, but you can rest assured you’re building a legitimate email list of subscribers interested in your offerings.
Advanced tip: Keep your email list squeaky-clean by periodically scrubbing it to remove misspelled, inactive, or fake email addresses.
6. Develop Your Email Marketing Strategy
Think of your email marketing strategy as your battle plan for engaging with users via email.
Who will you email, what will your emails cover, and how often will you send your emails? Your email marketing strategy will answer these questions and more.
Why is developing an email marketing strategy important?
With a solid email marketing strategy in place, you’ll know exactly which emails you’ll be creating and sending at any point in time, and for whom.
As a result, you can focus on producing quality emails instead of thinking about what email you’ll write next. (More on quality content in the next section!)
You’ll also be able to send emails consistently, which is vital for nurturing subscribers into loyal customers over time.
How to develop your email marketing strategy
Decide key issues like:
- Your emails’ target audience: Your email list should generally consist of people who are your ideal customers. That said, split your subscribers into more niche target audiences so you can send them personalized content.
- The types of email marketing campaigns you’ll create: Examples of these are newsletters, welcome email sequences, drip campaigns, and abandoned cart emails.
- What content your emails will cover: For instance, if you’re about to launch a new product, you could create a series of promotional emails to publicize your product and encourage subscribers to buy it.
- Your sending frequency: Strike a balance between emailing your subscribers regularly enough to build a relationship with them, but not so often that you cause inbox overload.
Setting up a newsletter calendar can help you keep track of how often you email your subscribers and the content you send them.
7. Send Quality Content
Quality email content is content that’s useful and easy to read. It’s also effective in driving conversions, so that you get the most value out of investing in email marketing!
Why is it important to send quality content?
Getting people to subscribe to your emails is only half the story. If they think your content is garbage, they may send your emails straight to the garbage bin.
They may even unsubscribe. In this case, you won’t be able to engage with them unless they rejoin your email list (and no, you cannot re-add them manually).
How to send quality content
While different people may have different standards for what counts as “quality” content, there are some universally accepted guidelines:
- Send content that appeals to your subscribers. For example, you can discuss the latest news they may be interested in, share tips to address their pain points, or talk about upcoming product promotions. Avoid sending spammy content with no obvious link to your business’s products or services.
- Make your emails look professional. Double-check your emails for typos and broken links before sending them. Also, don’t write your emails in ALL CAPS as subscribers may think you’re screaming at them.
- Choose a mobile-friendly email design. 43.5% of emails are opened on mobile devices nowadays, so your emails should be easy to read even on these smaller screens.
- Add alt text to your emails’ images. Alt text is a short description of an image that will appear if a subscriber’s mailbox provider is having trouble displaying the image itself. This helps the subscriber know what your image is about nevertheless. Adding alt text also helps people with visual impairments understand your image, as they can use screen readers to have your alt text read out to them.
And here’s one last tip: optimize your emails for plain text.
This means trying to make your emails look like the “normal” ones you send for work or non-marketing purposes.
Like this one from Feature Upvote:
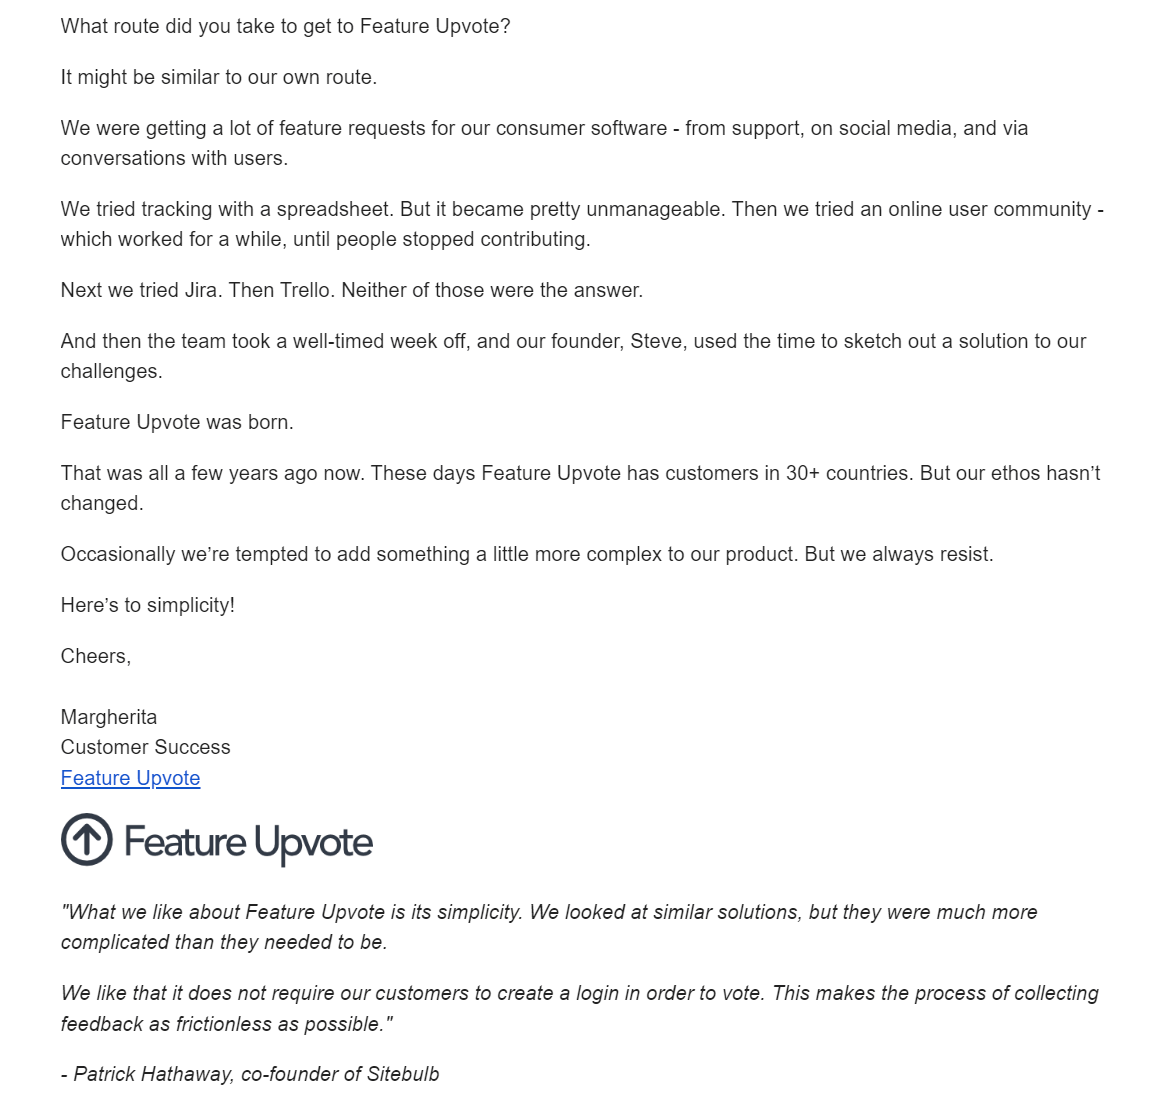
A plain email may look more boring, but its simpler, cleaner design can encourage subscribers to read it in full.
In contrast, a super-flashy email may just seem like a promotional email that’s trying to sell them something — causing subscribers to delete it without reading.
8. Include an Unsubscribe Link in All Your Emails
An unsubscribe link is a link that subscribers can click to automatically remove themselves from your email list. It’s usually located in the email footer.
This is what ours looks like:
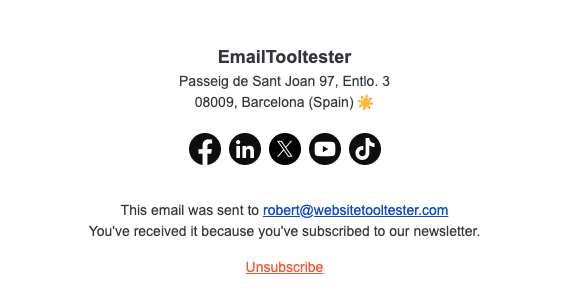
Why is it important for your emails to have an unsubscribe link?
Under email marketing laws like the CAN-SPAM Act, marketing emails need to contain an option for subscribers to opt out of future emails. Having an unsubscribe link helps you comply with this rule.
If your marketing emails don’t have an unsubscribe link, you probably won’t be able to send it. Your email platform will just display an error message and refuse to send the email marketing campaign until you add an unsubscribe link to it.
But if you do manage to send marketing emails without an unsubscribe link, expect to face monetary penalties and other legal consequences if you get caught!
How to add an unsubscribe link to your emails
Email marketing services will typically add the unsubscribe link to your email footer for you. Just like what Mailchimp has done here:
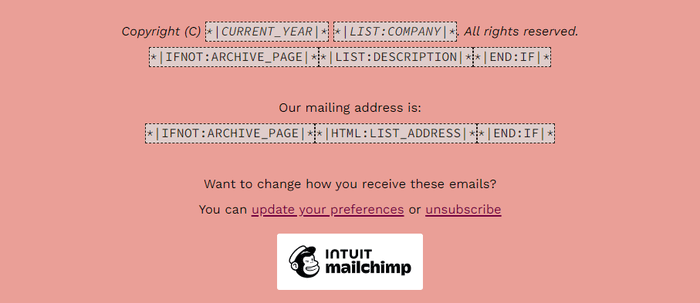
You can change your unsubscribe link’s location — like having it in your email header, for example. Just cut and paste your unsubscribe link to move it to your preferred location.
9. Personalize Your Emails
Tailor your email content to match your subscribers’ characteristics.
For example, if you sell phone cases for both iPhones and Samsung Galaxy phones but know that a certain subscriber owns an iPhone, then send this subscriber only emails that promote your iPhone cases!
Don’t email that subscriber about your Samsung Galaxy phone case offers. They likely won’t be interested.
Why is personalizing your emails important?
Personalizing your emails makes them more useful to your subscribers. That’s because you’re sending them the most relevant content for their needs and interests.
You can also build warmer relationships with your subscribers if you personalize your email marketing campaigns with their names.
As you establish goodwill with — and send targeted content to — your subscribers, they will be more likely to stay subscribed to your emails. They’ll also engage with your emails more by opening them and clicking their links.
The result? You keep email marketing KPIs like your open rates and click-through rates high, and your unsubscribe rate low.
How to personalize your emails
Set up your email form to gather your subscribers’ name and characteristics.
For example, this email form by Uniqlo asks for the subscriber’s first name, last name, and birthdate, and the collections they’re interested in:
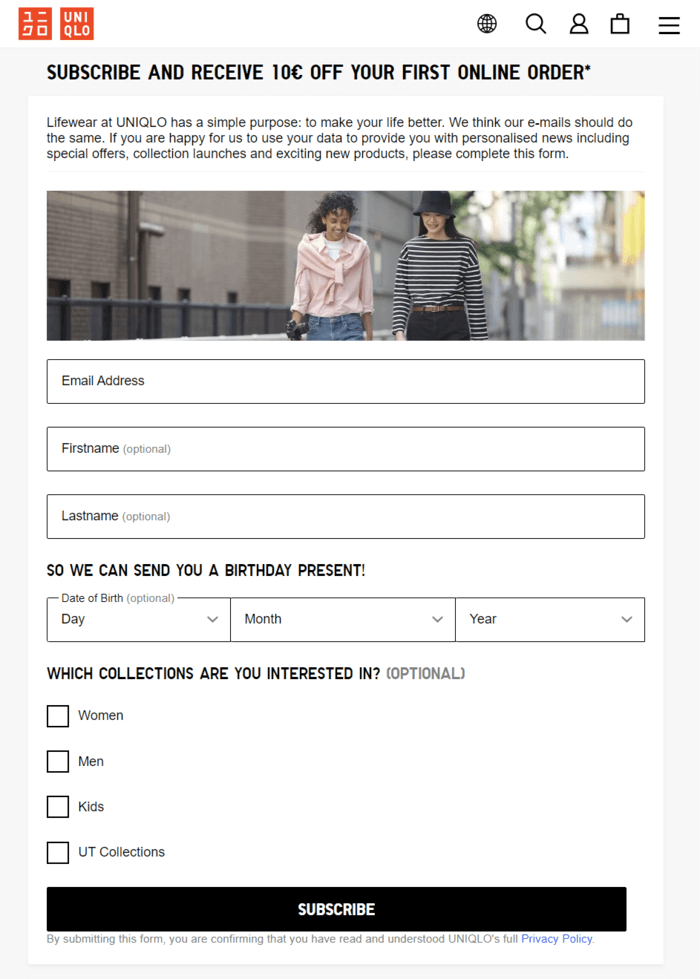
You can then use your subscribers’ information to:
- Address your subscribers by their first name in your emails. An email that starts with “Hi [subscriber’s first name]” feels more personal than one that says “Hi Customer.”
- Split your subscribers into different groups, or “segments,” in your email platform. If you are handling Uniqlo’s email marketing, for example, you can have one segment of subscribers interested in your collections for women and a separate segment for subscribers interested in your collections for men. You can then send different emails to each segment to cater to their respective interests.
10. Test, Test, and Test Your Emails Again
After creating your email campaign, you can run two types of tests on it:
- Tests to confirm that your email will look as intended when your subscribers receive it.
- Tests to experiment with different email content.
Running tests can seem like a chore when you’re this close to hitting the Send button, but don’t neglect doing so!
Why is it important to test your emails?
Testing your email campaigns helps you:
- Pick up on (and fix) mistakes before your email goes out: Think embarrassing typos, broken links, missing images, and so on.
- Check how your email looks on desktop and mobile devices: An email that looks good on a desktop computer may not look good on a mobile device if its design isn’t mobile-optimized.
- Improve your email marketing ROI: Testing your email content helps you discover what appeals to your audience best.
How to test your emails
Before sending your email to your subscribers, send a test version of it to yourself.
Scrutinize the email content for typos and grammar mistakes. Also, click all the links in the email to check that they lead to the correct destinations.
Send another test email to a team member and have them conduct the same checks. They may just spot issues you’ve missed.
Next, review your email’s appearance on different device types. Many email marketing platforms let you preview your emails on desktop and mobile before sending them.
Here is GetResponse’s device testing feature at work, for example:
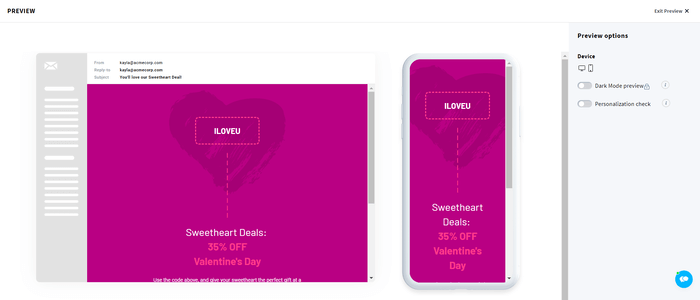
Finally, set up A/B tests for testing various aspects of your email.
This involves creating and sending two versions of your email with different content to a portion of your recipients. Your email platform tracks the results of both versions, and then sends the higher-performing version to the rest of your recipients.
Depending on your email platform, you may be able to A/B-test your email subject line, “From” name, main content, and more.
Put This Email Marketing Checklist Into Action!
That’s the end of our email campaign checklist. Can you remember all the steps? Let’s recap.
The essential 10 steps in an email marketing checklist are:
- Familiarize yourself with permission-based marketing
- Select your email marketing service
- Set up your sender address
- Authenticate your domain
- Decide how you’ll grow your email list
- Develop your email marketing strategy
- Send quality content
- Include an unsubscribe link in your emails
- Personalize your emails
- Test, test, and test your emails again
If you’re eager to get your email marketing off the ground, start with step one! Head over to our guide to permission-based marketing to learn more about this important subject.
We’re also here to help if you have questions on picking an email platform or anything else — just leave us a comment below!
Email Marketing: Beginners Guide
Ideal for small & medium-sized businesses, online stores and bloggers. Avoid common mistakes with this complete guide.
Sign up to receive your free copy!
Our Methodology
This article has been written and researched following our EmailTooltester methodology.
Our Methodology