
EmailTooltester is supported by readers like you. When you purchase through our links, we may earn a commission that helps keep our reviews independent and free.
If you're feeling frustrated with Mailchimp’s clunky setup, limited segmentation, or rising costs, you're not alone. More and more ecommerce businesses are switching to Klaviyo, and it’s easy to see why.
Mailchimp may have been a reliable choice when you were just getting started. But as your store or email list grows, you’ll quickly run into limitations, especially when key ecommerce features are locked behind expensive pricing tiers.
Klaviyo is purpose-built for ecommerce brands. It gives you access to advanced automation, real-time customer insights, and smarter segmentation that helps you send more relevant emails, all without needing to upgrade to unlock essential tools.
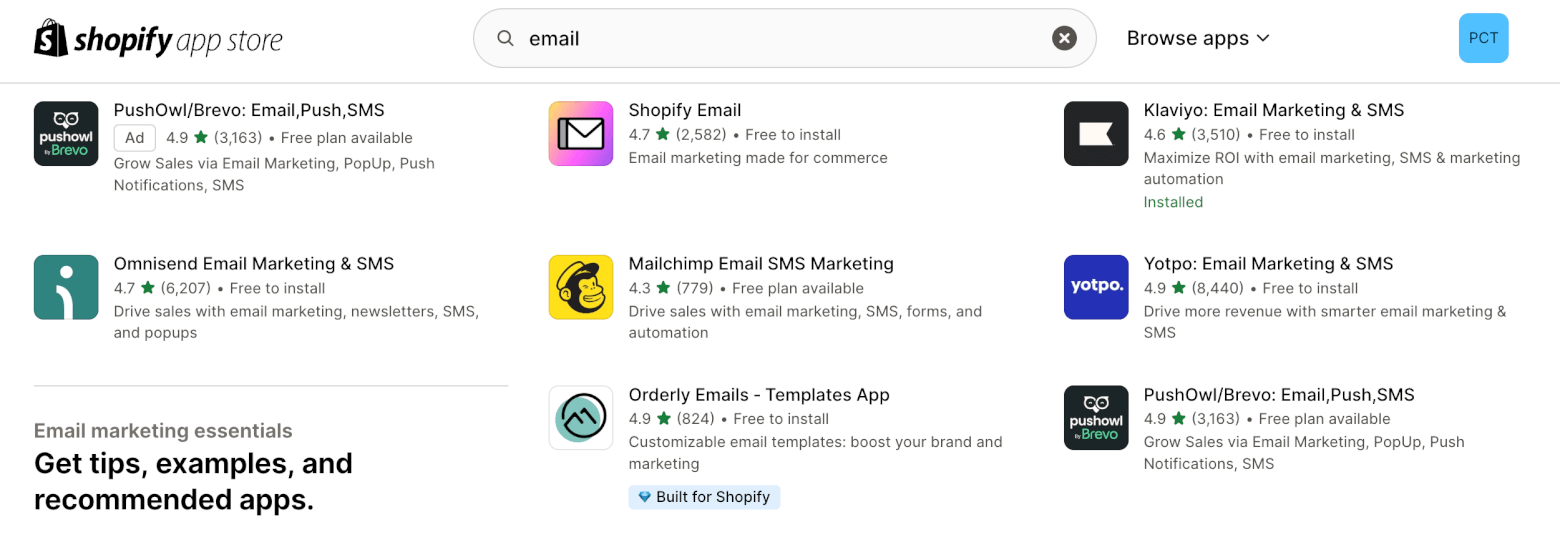
It’s also the clear favorite among Shopify merchants, with more reviews and higher ratings than Mailchimp on the Shopify App Store.
In this Mailchimp to Klaviyo migration guide, we’ll show you:
- Why Klaviyo is a better fit for ecommerce brands
- What to expect when switching
- How to migrate your contacts, tags, and templates
- How to rebuild your forms and flows in Klaviyo
- Finally, the best practices for sunsetting your Mailchimp account
Why switch from Mailchimp to Klaviyo?
Mailchimp’s a solid platform. But over the past couple of years, we’ve seen more and more ecommerce businesses hit limitations as their business grows:
- Features locked behind higher tiers: Want to run a single automation, get access to more analytics, or use dynamic content? Well, you’ll need to upgrade to a paid plan. And key ecommerce data, such as purchase likelihood and customer lifetime value, are only available on high-tier plans.
- Contact billing quirks: If the same person is on multiple lists (“audiences”), Mailchimp charges you multiple times.
- Frustrating ecommerce workflows: Mailchimp’s abandoned cart and product recommendation tools work, but they’re not as flexible or insightful as Klaviyo’s.
Klaviyo is designed to scale with your store, offering a generous free plan, detailed analytics, and real-time segmentation that adapts automatically as your customer behavior changes.
Let’s take a look at the biggest advantages.
What Klaviyo does better than Mailchimp
Here are the most common reasons we see small businesses switching from Mailchimp to Klaviyo:
1. Real-time, dynamic segmentation
Mailchimp allows you to segment based on several conditions, but Klaviyo goes much further. You can build highly specific, real-time segments that update automatically when customer behavior changes. This makes it easier to target the right customer at the right time. For example, you could create a segment of customers who have opened at least one email in the last 30 days, viewed a specific product category, but haven’t made a purchase in the past two weeks, allowing you to trigger personalized outreach that’s both timely and relevant.
2. Predictive Analytics
Klaviyo can estimate when a customer is likely to purchase again, how much they might spend, or if they’re at risk of churning. These insights are invaluable for ecommerce marketers who want to anticipate their customers’ behavior.
3. Better value at lower tiers
Mailchimp’s free plan is limited in both features and volume, and many key tools like email automations are locked behind paid tiers. Klaviyo’s free plan is more ecommerce-friendly, offering access to core tools like basic flows, segmentation, and signup forms for up to 250 contacts. And as your email list grows, you can gradually unlock more advanced features on a paid plan.
4. Built-in ecommerce automations
Klaviyo offers over 70 prebuilt automations (called “flows”) tailored for ecommerce – from abandoned carts to post-purchase follow-ups. These can be easily customized and are tightly integrated with platforms like Shopify.

5. Transparent billing
Finally, contacts in Klaviyo are only counted once, no matter how many lists or segments they’re in. That means fewer billing surprises.
What to consider before migrating from Mailchimp to Klaviyo
Migrating platforms always comes with a few tradeoffs. Here’s what to be aware of before making the move:
- Interface differences: Klaviyo takes a slightly different approach than Mailchimp, especially in how it handles flows and segments. It will look and feel different at first but many users find it easier once they get started, especially if they’re used to ecommerce platforms like Shopify.
- No website or landing page builder: Unlike Mailchimp, Klaviyo doesn’t offer native tools for building websites or landing pages – you’ll need to use an external platform and integrate it.
- Transactional email setup requires more steps: Mailchimp allows transactional emails with minimal setup, while Klaviyo may require additional steps or verification to enable this functionality.
How to Migrate from Mailchimp to Klaviyo
Step 1: Create your free Klaviyo account
Go to Klaviyo’s website and sign up for your free account. You'll get:
- Up to 250 contacts
- 500 email sends per month
- Access to core email features
- A free trial of Klaviyo’s AI tools
- 60 days of support to help you get started
For some extra guidance on getting your Klaviyo account set up, you can watch our tutorial video here:
Step 2: Connect your ecommerce store
Before connecting anything from Mailchimp, make sure your online store (like Shopify, WooCommerce, or BigCommerce) is connected to Klaviyo. This helps pull in your customer and order data correctly.
Pro tip: If Mailchimp is still connected to Shopify, disconnect it first. Otherwise, you could accidentally send duplicate emails to your subscribers.
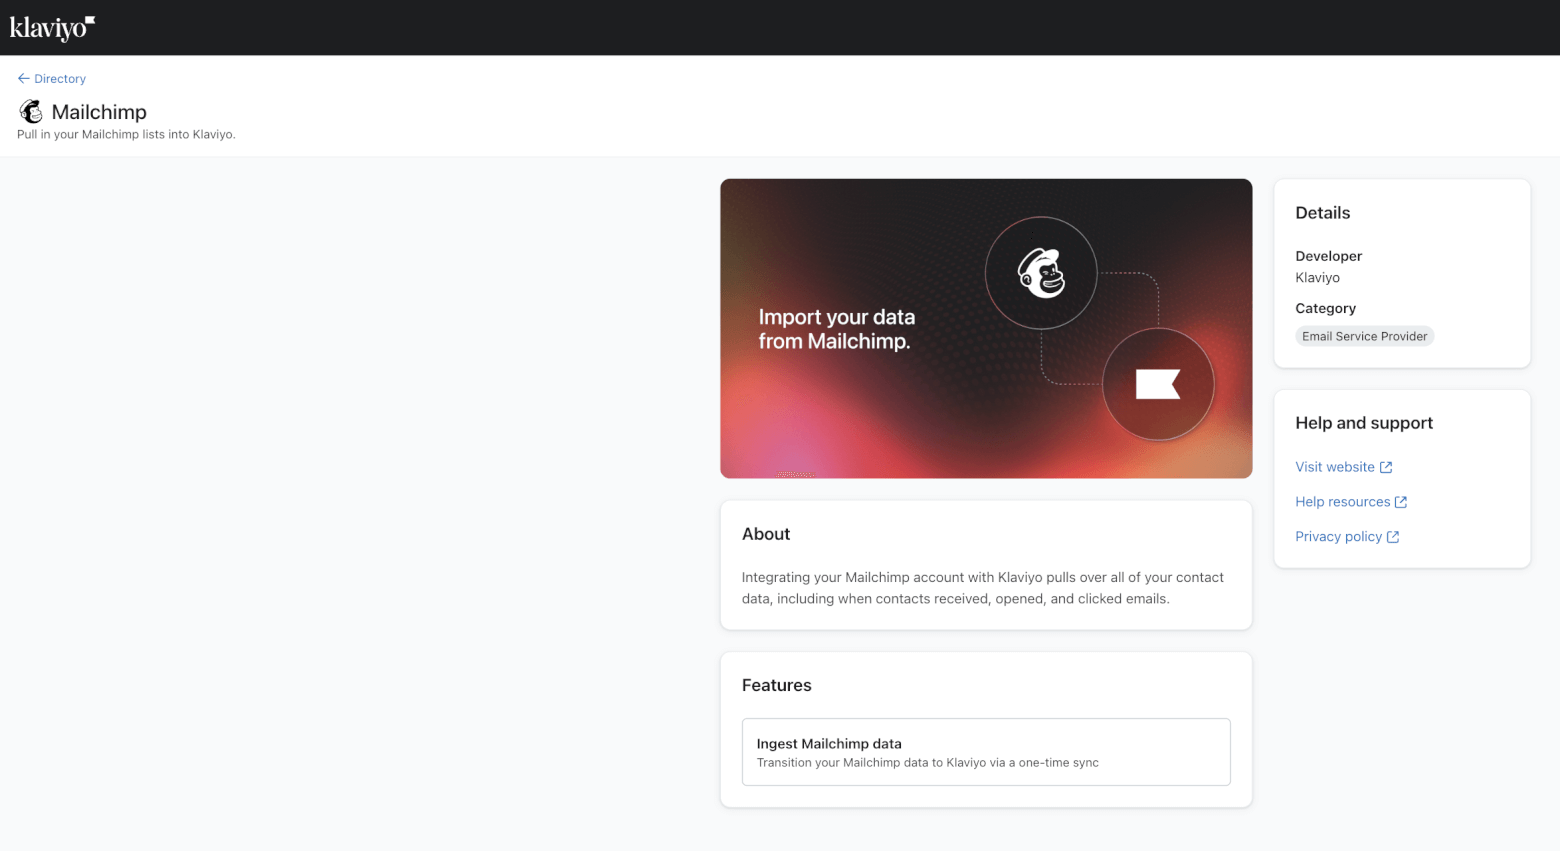
Klaviyo has a built-in integration that pulls in your Mailchimp data automatically.
Here’s how to connect it:
- In Mailchimp, go to Account > Extras > API Keys and create a new API key.
- In Klaviyo, go to Integrations > Add Integration > Mailchimp.
- Paste your API key and choose what to sync:
- Mailchimp audiences to Klaviyo lists
- Email engagement data (opens, clicks, sends)
- Mailchimp ratings
How the sync works: The first sync grabs the last 90 days of campaign data (once only). And then after this initial sync:
- Existing audiences sync every 30 minutes
- New campaigns/audiences sync every 6 hours
- Campaign activity syncs after emails are sent
Step 4: Review and clean up your data
Once your Mailchimp data starts syncing into Klaviyo:
- Double-check subscriber status – unsubscribed or bounced (a.k.a. “cleaned”) contacts are automatically suppressed in Klaviyo.
- If a contact already exists in Klaviyo, the most recent subscription status will apply.
- Deleting a contact in Mailchimp won’t delete it in Klaviyo, you’ll need to suppress it manually if needed.
Step 5: Bring over your tags
Mailchimp tags don’t sync automatically, unfortunately, but you can still bring them over:
- In Mailchimp, go to Manage Contacts > Tags and export the tags you use (as CSVs).
- In Klaviyo, upload these as custom properties and assign them to profiles. This keeps your segments and targeting intact.
Step 6: Move your email templates
You have two options for migrating your templates to Klaviyo:
Option 1 (The easiest way):
Rebuild your emails using Klaviyo’s drag-and-drop builder – it's responsive, easy to use, and has a library of clean, modern templates to get you started quickly. While the templates may not end up looking exactly the same, Klaviyo’s editor is flexible enough to let you recreate your Mailchimp emails pretty closely.
Option 2 (For those of you who prefer working with HTML):
- Export the HTML from Mailchimp.
- Swap out Mailchimp’s personalization tags (like *|FNAME|*) with Klaviyo’s format ({{ first_name }}).
- Upload the updated template in Klaviyo under Content > Templates > Import Template.
Note: Klaviyo requires the {% unsubscribe %} tag in all templates.
Step 7: Recreate your email automations (aka flows)
As we mentioned, in Klaviyo, automated emails are called flows. These won’t carry over from Mailchimp, so you’ll need to rebuild them.
- Use Klaviyo’s flow library to quickly set up common ecommerce automations like welcome emails, abandoned cart recovery, and post-purchase sequences.
- Be sure to test each automation before going live.
Watch our video tutorial on how to use Klaviyo flows with your Shopify store
Step 8: Rebuild your signup forms
Mailchimp signup forms don’t transfer, so you’ll need to recreate them. You can use:
- Klaviyo’s built-in signup form builder
- Third-party tools that integrate with Klaviyo
- Custom forms synced through your ecommerce platform
By default, Klaviyo uses double opt-in for new subscribers. You can change this in your list settings.
Make sure you replace all your existing Mailchimp forms with your new Klaviyo form, and be sure to test it (as well as keeping a close eye on registrations to make sure they’re being captured).
Step 9: Turn off Mailchimp automations
Once your Klaviyo flows are up and running:
- Pause all Mailchimp automations to avoid sending emails twice
- Double-check that all your forms now point to Klaviyo
Step 10: Disconnect Mailchimp from Klaviyo
Once everything’s working smoothly, it’s time to cut ties with Mailchimp.
- Run final tests – make sure your welcome emails, abandoned cart flows, and newsletters are firing correctly.
- In Klaviyo, go to Integrations.
- Click the action menu next to Mailchimp and select Remove integration.
This ensures Mailchimp no longer sends or syncs data, and you can move forward fully on Klaviyo.
You can also follow our guide to canceling your Mailchimp subscription if you'd like to close your Mailchimp account.
Ready to migrate from Mailchimp to Klaviyo?
While both platforms have their strengths, Klaviyo stands out for ecommerce brands looking to scale more efficiently. Its real-time segmentation, ecommerce-focused flows, and flexible integrations make it a strong choice for stores that want more control over their email strategy.
Of course, it’s not just the number of features that are important. It’s also about how well your tools support the customer journey. We’re confident in saying Klaviyo gives you the visibility and flexibility to send targeted, meaningful emails that evolve with your business.
Already made the switch? Let us know how it went – we’d love to hear your experience in the comments.
The author
Learn more about us
Our Methodology
This article has been written and researched following our EmailTooltester methodology.
Our Methodology