
EmailTooltester is supported by readers like yourself. We may earn a commission when you purchase through our links. Of course, this won't increase the cost for you.
While HubSpot is best known for its CRM, it also offers a surprisingly beginner-friendly email marketing platform, particularly suited to small businesses and B2B companies. You don’t need to be a designer or marketing expert – with HubSpot’s drag-and-drop editor, built-in CRM, and smart automation options, you can get professional-looking campaigns live in hours, not weeks.
And because everything’s in one place, you’ll spend less time juggling tools and more time connecting with your audience.
Whether you’re just getting started or looking to switch email marketing tools, this Hubspot tutorial guide will walk you through the process of setting up your first email campaign, all the way through to adding and segmenting your contacts and more.
You’ll learn how to:
- Set up your Marketing Hub account
- Authenticate your domain for better deliverability
- Create and organize contact lists
- Design branded emails
- Build signup forms
- Automate follow-ups
- Track and optimize performance
Now, let’s get started.
HubSpot Tutorial: Video
If you prefer to learn by watching, follow along with our video tutorial
HubSpot Tutorial: Getting started
First things first, let's head over to HubSpot and sign up for a free trial. The free plan includes pretty much everything you need to get started; however, it does come with some limits. We’ll cover those later.
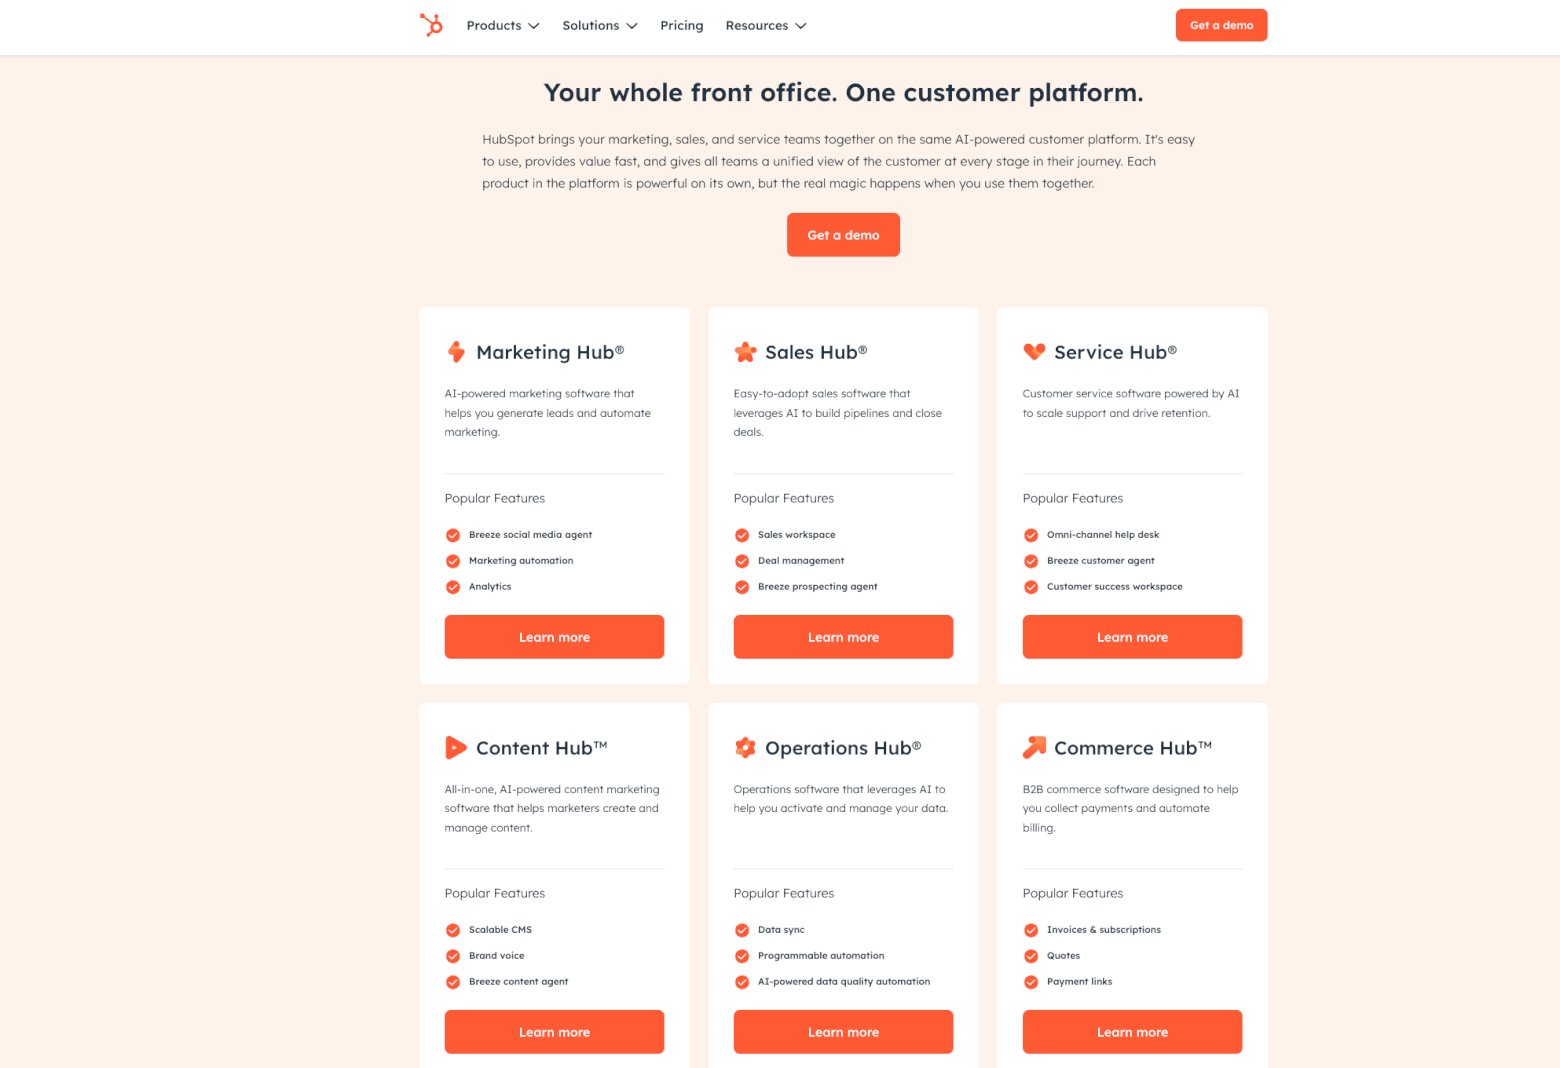
HubSpot categorizes its features into distinct “Hubs,” including Marketing, Sales, Service Content, Operations, and Commerce.
To access email marketing tools, you’ll need to activate the Marketing Hub.
Customize your portal
Once you’ve signed up, you’ll be dropped into the main dashboard. From here, you’ll primarily use three sections of the platform:
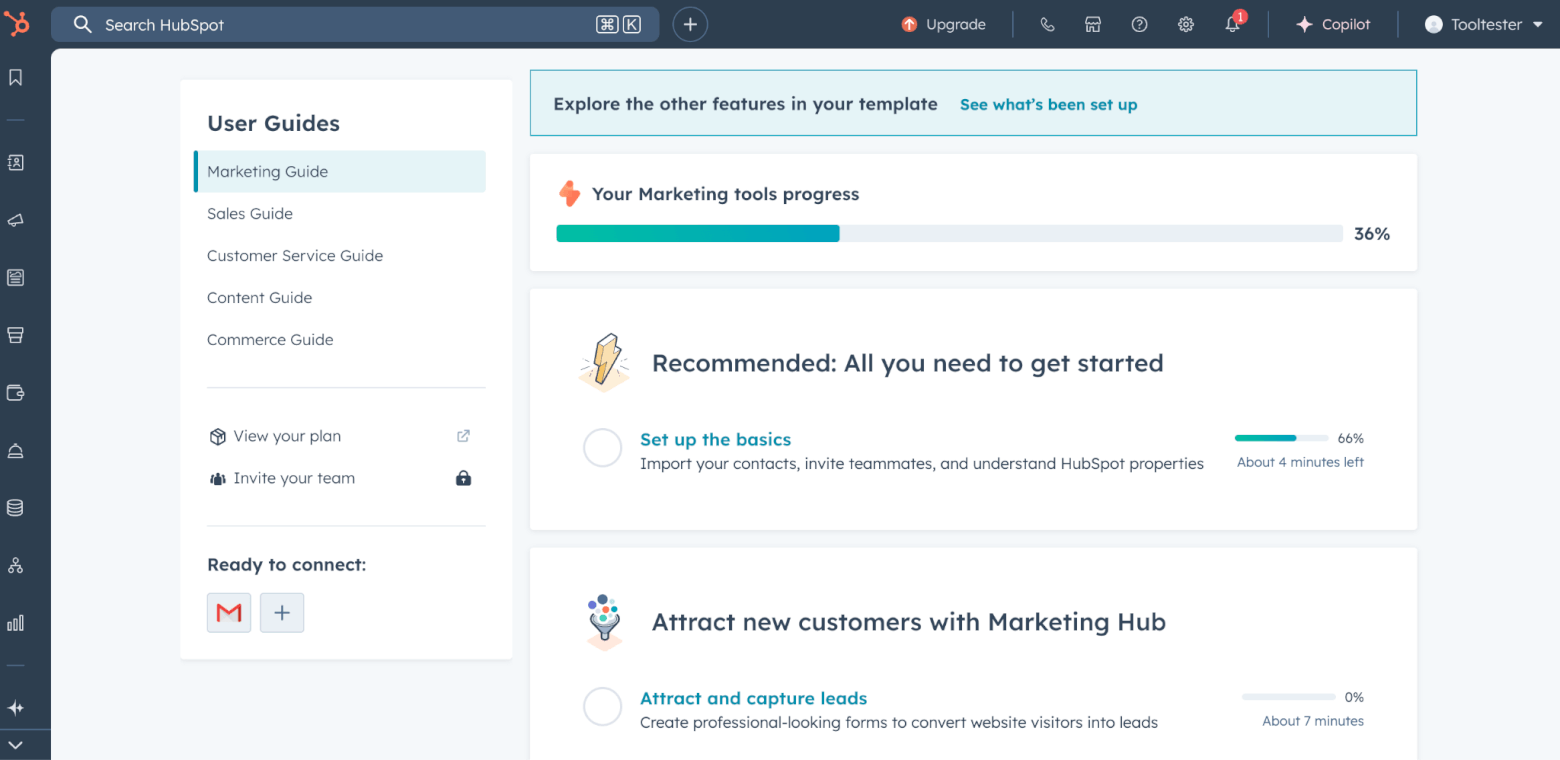
- Marketing – where you can create emails, forms, landing pages, and automations
- Contacts – view and segment subscribers in the CRM
- Settings – where you configure domain authentication, compliance, and branding
We’ll go through each step one by one.
Set up your brand identity
Before sending a single email, lock in your brand elements so they automatically apply to every campaign. This not only saves time but also ensures your emails, forms, and landing pages all feel consistent.
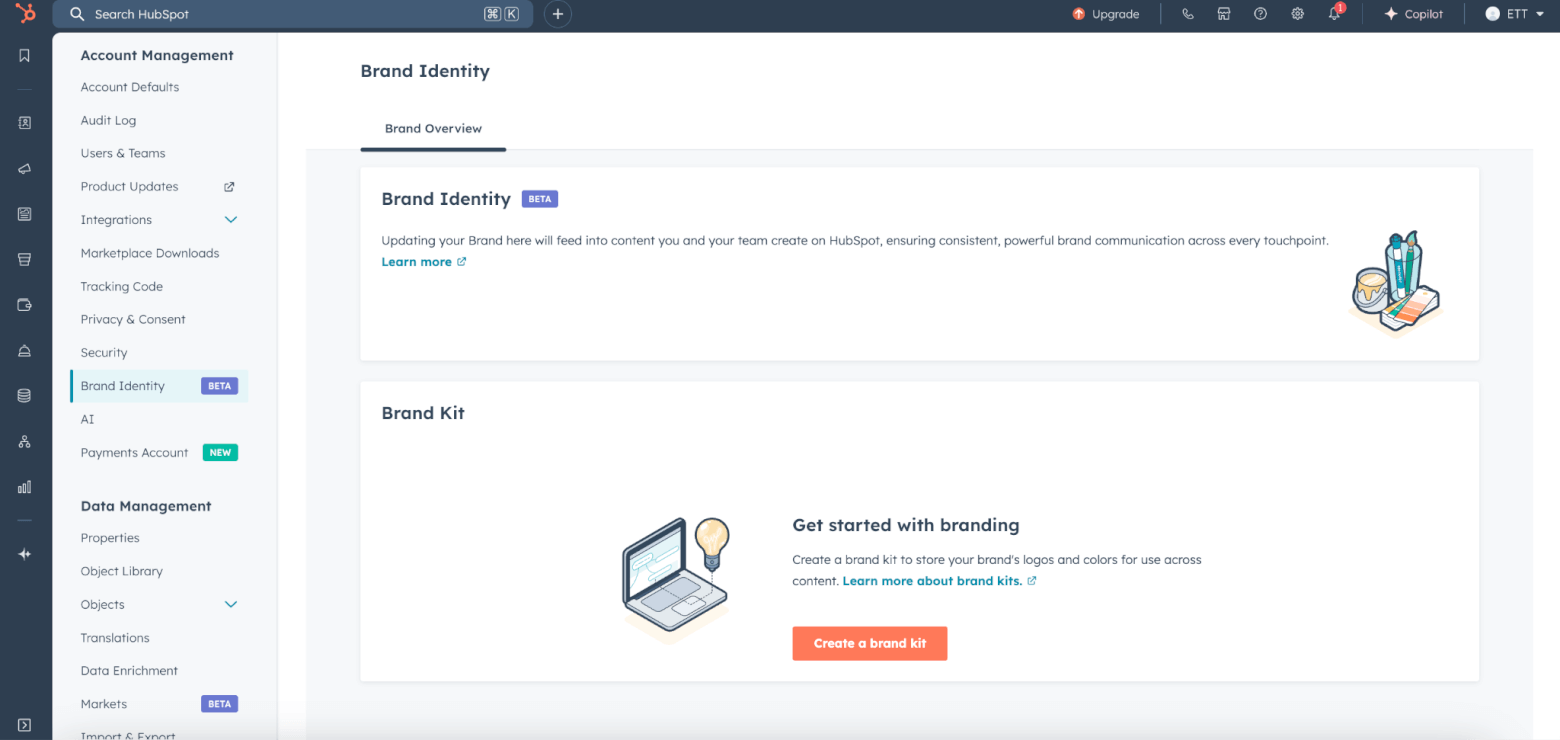
To set your brand defaults:
- Go to Marketing → Email → Settings
- Scroll to Brand Kit (or Brand Identity, depending on your account view)
- Add your logo
- Choose your brand colors and fonts
- Set your default email footer with your business details and unsubscribe link
Pro tip: Save common elements like headers, banners, or legal disclaimers as reusable sections so you can drop them into any new email without rebuilding them from scratch.
Beginner gotcha: If you skip the branding step, you may end up manually adding branding to every single email later, a tedious time-sink.
Set up email authentication
Before sending your first campaign, it’s critical to authenticate your domain. This step boosts your email deliverability and helps prevent your emails from ending up in the spam folder.
Important: Email domain authentication is only available on paid HubSpot plans. Free users can send from a HubSpot email domain (e.g. youremail@hubspotfree.hs-send.com), but this may affect trust and inbox placement. Find out more about the email deliverability best practices.
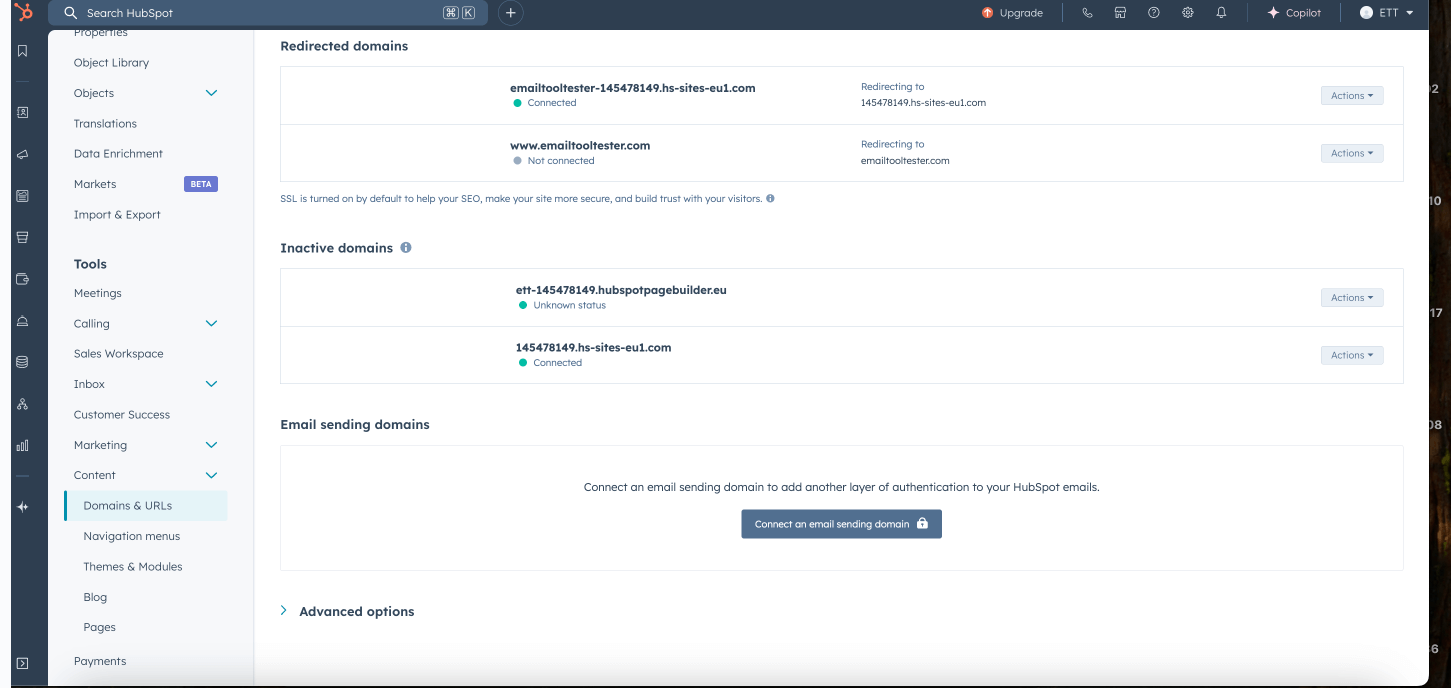
To authenticate your domain:
- Go to Settings → Content → Domains & URLs
- Click Connect a domain, and choose Email Sending
- Follow the step-by-step guide to add DNS records (SPF, DKIM, DMARC) to your domain provider
- Once verified, HubSpot will show a green “Connected” status
Need extra help? Read our Email Authentication Guide or book a consultation call.
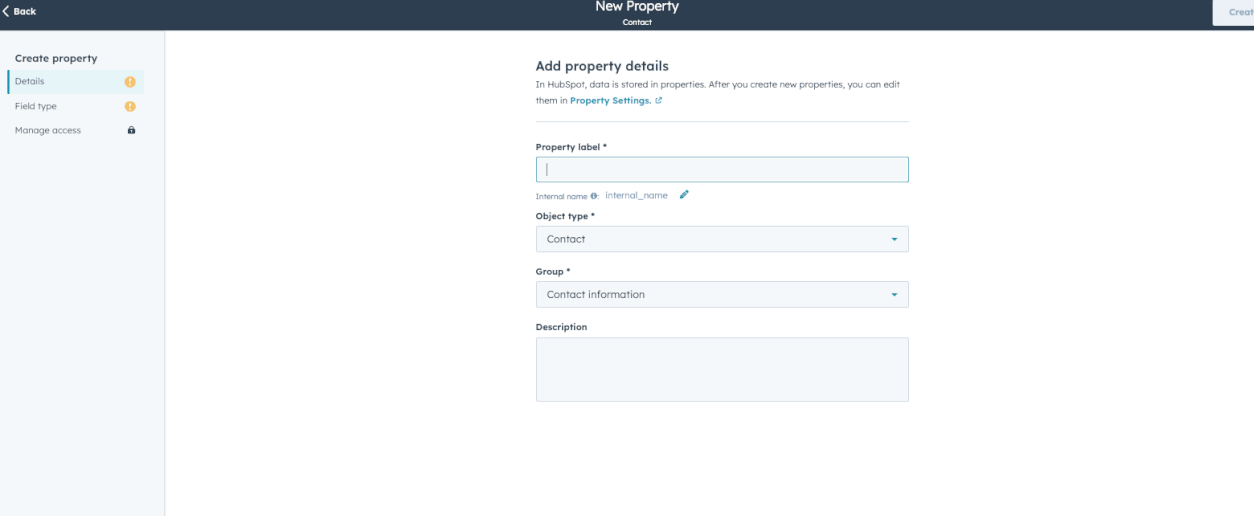
Create custom contact properties
HubSpot lets you personalize emails using both standard data (e.g. first name) and custom contact fields (e.g. areas of interest). This is especially useful if you’re targeting different industries or specific roles.
To create custom fields:
- Go to Contacts → Actions → Edit Properties → Create
- Choose a label and field type (e.g., text, dropdown, checkbox)
- Save the new property
Common examples include:
- Industry
- Company size
- Lead score
- Assigned sales rep
You can later use these fields to personalize your emails or trigger automations.
Importing and organizing contacts
There are several ways to add contacts to HubSpot, but the most common method is importing a CSV file. This is especially helpful if you're switching from another email platform.
Before you upload:
- Clean your list: remove invalid or duplicate addresses
- Only upload contacts who’ve given explicit permission to receive emails
- Use a free email verification tool if unsure
To import contacts:
- Go to Contacts → Contacts
- Click Import → File from computer
- Upload your CSV file and map columns (e.g. “First Name” → HubSpot’s First Name property)
- Click Finish Import
Once imported, you can filter, search, and view individual contact profiles, including activity history and form submissions.
Segmenting contacts with Smart lists
HubSpot makes list segmentation easy with two list types:
- Static lists: Stay fixed unless updated manually. Great for specific one-off campaigns.
- Active lists: Automatically update based on conditions (e.g. opened an email, submitted a form).
To create a list:
- Go to Contacts → Lists
- Click Create List → Active or Static
- Set your filters (e.g. “has filled out any form” or “lifecycle stage = Lead”)
- Save and name your list
You can even segment based on custom properties like industry or use lead scoring to target your most engaged users.
Designing and sending your first email campaign
With your account ready and contacts uploaded, it’s time to create your first email.
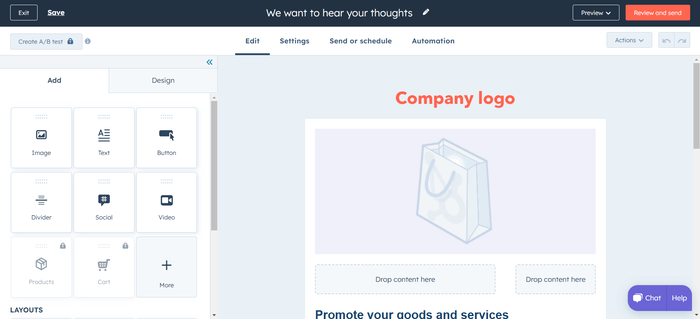
To get started:
- Go to Marketing → Email
- Click Create Email → Regular
- Choose a template or start from scratch
Use the drag-and-drop editor to:
- Add content blocks (text, images, CTAs)
- Insert personalization tokens (e.g. First Name)
- Set your subject line and preview text
Try our Subject line tester to preview your email across devices and boost your open rate.
When ready:
- Select your recipient list(s)
- Exclude certain contacts if needed
- Preview and test on desktop + mobile
- Send immediately or schedule for later
HubSpot doesn’t currently support send-time optimization, so you’ll need to choose your timing manually. Don’t rely on guesswork; check out our advice on the best time to send an email newsletter.
Building email signup forms
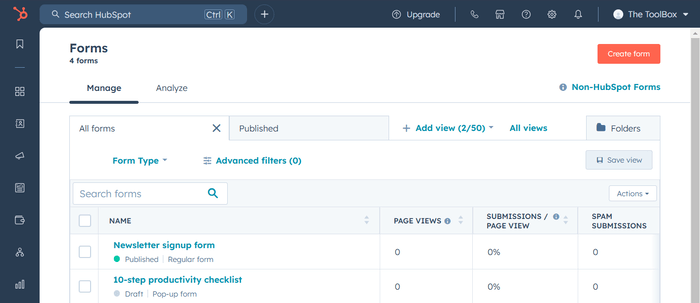
To grow your list, you’ll want to create forms that capture visitor info, and luckily for you, HubSpot features one of the best form builders on the market.
To create a form:
- Go to Marketing → Forms → Create Form
- Choose a form type:
- Embedded form
- Pop-up
- Blog comment form
- Drag in fields like First Name, Email, and Company Name
- Customize the thank-you message
For GDPR compliance, enable consent checkboxes and consider setting up double opt-in (under Settings → Marketing → Email).
Once your form is ready, you can:
- Embed it on your website
- Or create a dedicated landing page
Automating follow-up emails
Even on the free plan, HubSpot lets you send a follow-up email after someone submits a form.
To set this up:
- Edit your form
- Click the Automation icon (flowchart symbol)
- Choose a prebuilt option (e.g. “Send email after submission”)
- Or create a custom workflow by selecting a trigger and action
- Turn the automation on
This is a handy way to deliver lead magnets, confirmation messages, or welcome emails, all without upgrading to a paid plan.
However, if you want to build richer customer automations, such as multi-step onboarding sequences, post-purchase follow-ups, or behavior-based nurture flows, HubSpot’s more advanced tools are only available on paid plans.
For teams serious about automating customer journeys, the investment can quickly pay for itself in time saved and results gained.
HubSpot Tutorial – Tracking your results
After sending your email, HubSpot makes it easy to monitor performance.
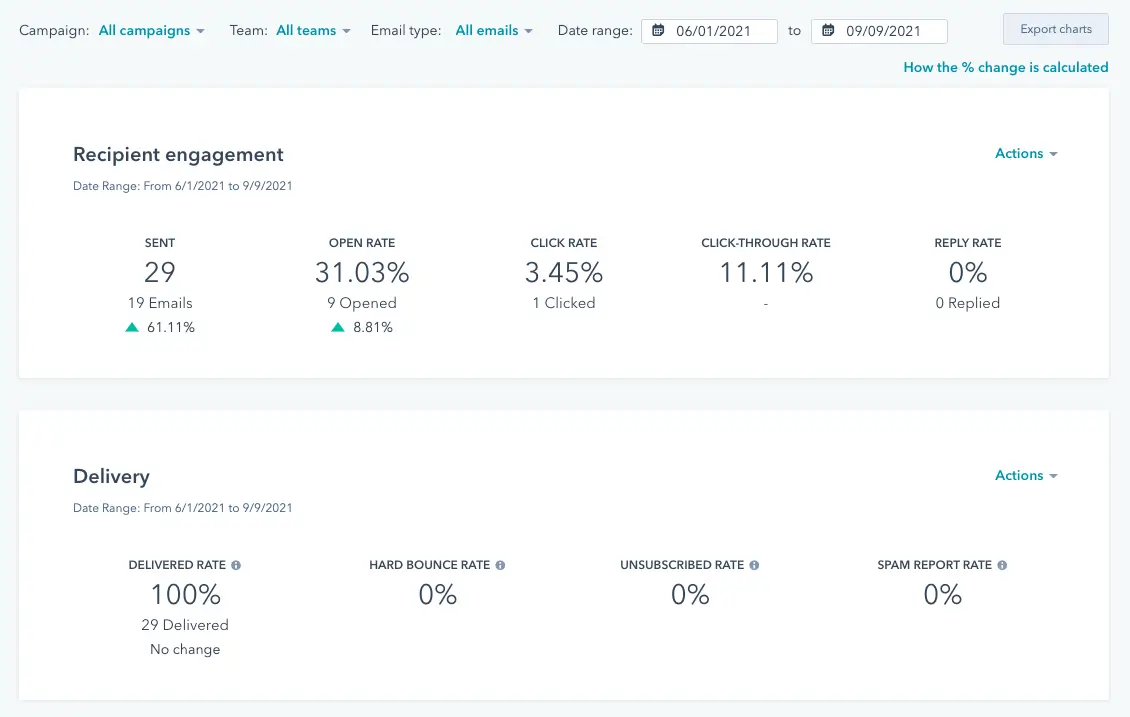
You'll be able to see:
- Open rates
- Click-through rates
- Bounce and unsubscribe stats
- Top clicked links
- Click maps
Use these insights to test new subject lines, improve content, and increase engagement over time.
If you’re on a paid plan, you’ll also get access to A/B testing tools, allowing you to test different versions of your subject lines, content blocks, and send times.
Final thoughts: HubSpot Tutorial
That’s it! You’ve just walked through the core features of HubSpot’s Marketing Hub for email marketing. Getting started with email marketing can feel overwhelming, but as you’ve seen, HubSpot makes it surprisingly easy.
Whether you're running a solo business or managing a growing team, HubSpot gives you the tools to create polished campaigns, segment your audience, automate follow-ups, and track what’s working, all from one central platform.
We hope that this HubSpot tutorial has helped you feel more confident about using the platform for your email marketing. By following the steps we’ve covered, you should now have a clear starting point for running your own email campaigns and automations.
HubSpot offers plenty of features to explore, so as you get more comfortable, you can start experimenting with automation, testing different approaches and refining your strategy based on what works best for your audience.
If you’d like a clearer picture of what’s included on the free plan versus the paid options, take a look at our HubSpot pricing guide.
The author
Learn more about us
Our Methodology
This article has been written and researched following our EmailTooltester methodology.
Our Methodology