Creating a webinar email should be simple, right?
You draft a quick invite, hit send, and watch the sign-ups roll in.
Except, it rarely ever goes that way. What usually happens is…
…your webinar invitation email gets lost in crowded inboxes. Some people open it but don't sign up, and those who do often forget to show up.
And when the big day arrives, your virtual seats are two-thirds empty. Even with a topic that tackles real problems and features a big-name guest ready to deliver serious value, the turnout is disappointing.
Here’s the reality:
A basic “please register for my webinar” email isn’t enough to get email subscribers to attend your webinar. You need an attention-grabbing, curiosity-sparking, action-driving webinar email sequence. One that makes them want to show up.
Whether you're planning your first-ever webinar or your millionth, this guide will show you how to create a webinar email sequence that doesn't just ask people to register but gets them to actually attend.
Ready to fill those virtual seats? Let’s dive in.
Before You Write, Understand Your Webinar Audience
The golden rule of writing webinar emails (or any online content, really) is to know your audience first.
Sure, it’s your webinar, but it’s not about you. It’s about your audience – their dreams, their problems, and their pain points.
They don’t care that you're hosting a webinar, even if it’s free. What they care about is what’s in it for them. How will your webinar help them solve their problems, achieve their dreams, or make their life easier?
Take our recent EmailTooltester webinar. Our audience wasn’t thinking, “I’d really like to learn about email marketing tools.” No. They were thinking, “Which email marketing tool is best for my business?”
And that’s why our webinar topic was: “How To Choose the Best Email Marketing Tool for Your Business.” By the way, you can watch a replay of the webinar here if you’re interested.
Before you write a single word of your webinar emails, ask yourself:
- “Who am I inviting to this webinar?”
- “What would they want to learn?”
- “Why would they attend?”
Think about what keeps them up at night. Outline their needs, challenges, and pain points, and highlight how your webinar will provide a practical solution.
For example, Float, a resource management software company, zeroed in on one of their audience's core problems: difficulty making accurate project estimates. So, they hosted a webinar, “We Need to Talk About Estimation,” to address the challenges and show how their tool could help solve them.
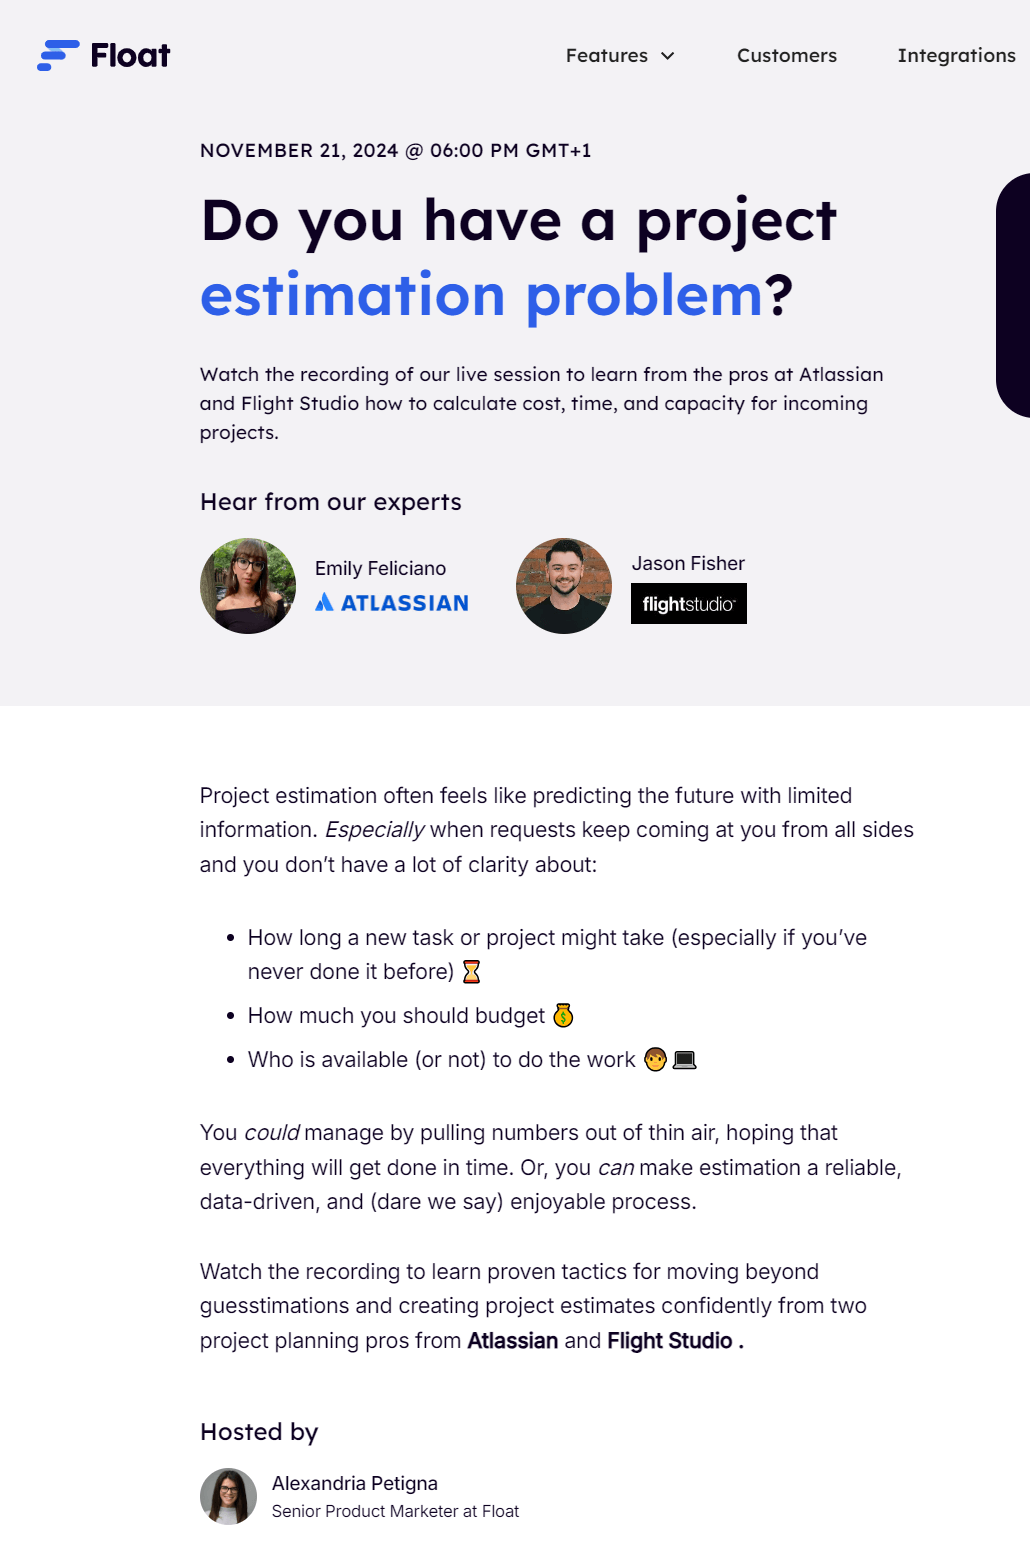
Source: Float
Bottom line? Follow the golden rule. Take the time to know your audience.
By understanding your audience, you can write webinar emails that address their needs directly, spark anticipation and excitement, and encourage them to click “Register Now” and attend your webinar.
5 Key Elements of a Webinar Invitation Email That Gets Sign-ups
Every successful webinar email has five must-have elements. Nail all of them, and you’ll grab your subscribers’ attention and compel them to sign up and attend your webinar. Here's how to craft each element to work for you.
The subject line: Write it to stop the scan
Your webinar email subject line is your first impression. Subscribers scan their inboxes and look for something interesting to open. Make yours stand out.
Craft a subject line that sparks their curiosity. Tease the value of your event, address their problems, or add urgency. For example, “Struggling to find clients? Let’s fix that in 60 minutes.”
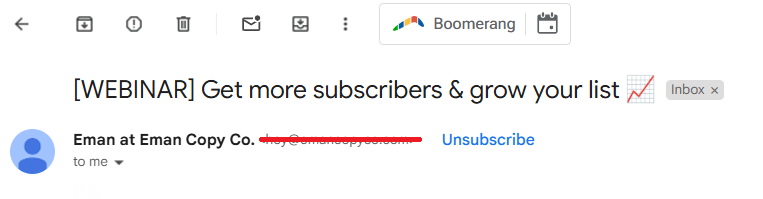
Webinar subject line from Eman Copy
You don’t have to include the word “webinar” (like in the example above) or mention your topic. The goal is for your subject line to pique curiosity enough to get your webinar email opened.
The opening line: Hook them immediately
The opening line is the first thing subscribers see when they open your webinar email. So, it’s your chance to hook them and get them to continue reading.
Avoid cliche or fluffy opening lines like, “Hi, I'm excited to invite you to my webinar on…”, especially as these tend to be focused more on you rather than the reader. Instead, put them front and center, and lead with something that immediately grabs attention, like, “What if you could double your email list by next month? Spoiler: You can, and I’ll show you how.”
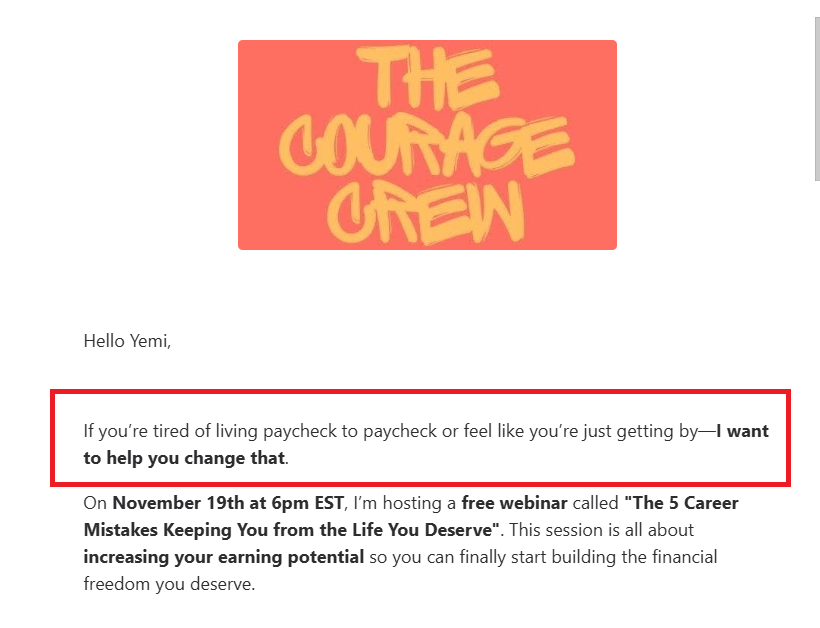
Webinar email from The Courage Crew
The webinar details: Make it crystal clear
You must include the basic information about your webinar: the topic, date, and time. Your subscribers shouldn't have to click elsewhere to find out these details.
For example, you can write: “Join us live on Thursday, Nov. 30, at 2 PM EST to learn how to double your email open rates.”
And don’t forget to add the registration link or button! If you have a guest speaker, highlight their details, too. A banner can be handy for showcasing all the information in one place.
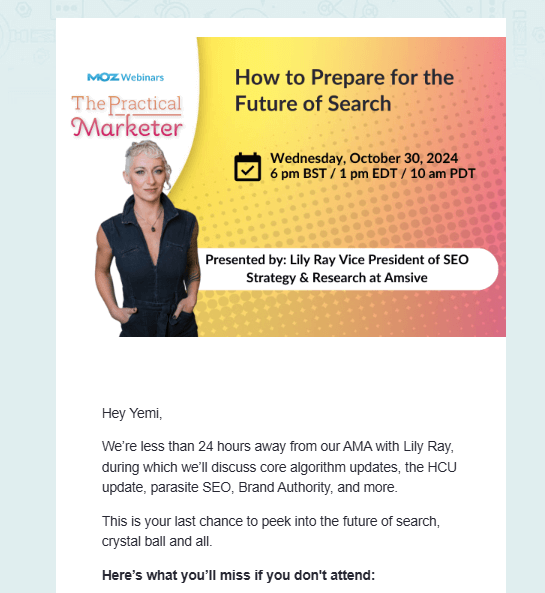
Moz’s webinar email for The Practical Marketer Webinar
The value proposition: Highlight the benefits
The value proposition is why your audience should care. What's the benefit of attending your webinar? Why should they invest an hour of their time listening to you?
To drive engagement, address your audience's pain points and share how your webinar will solve them. Also, frame the value around the benefits to your audience, not just what the webinar covers.
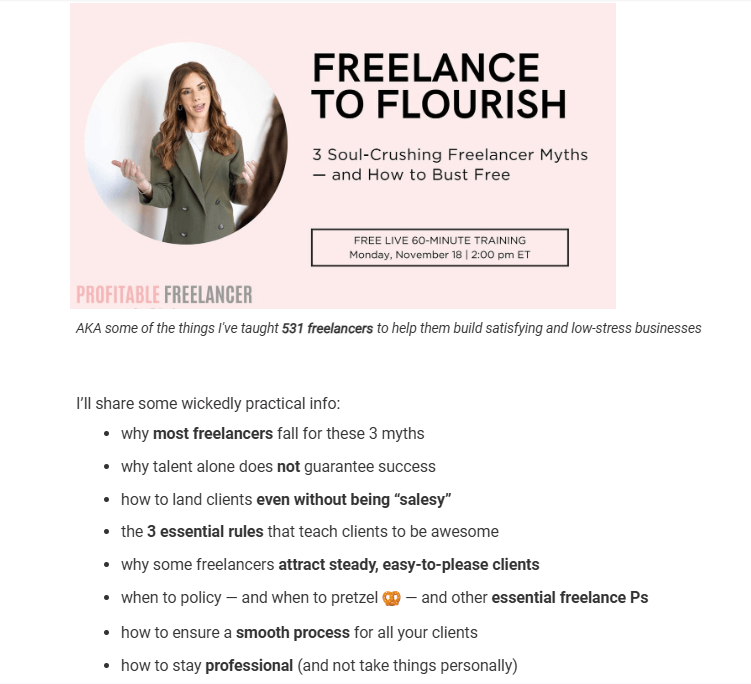
The Profitable Freelancer webinar email from Michal Eisik
The CTA: Tell them what to do next
The call-to-action (CTA) gets subscribers to your webinar signup form. So, avoid weak or soft CTAs that don’t inspire action. Instead, write CTAs that are clear, direct, and action-oriented.
Example:
- Weak CTA: “Click here to learn more.”
- Strong CTA: “Register now to save your spot!”
Strategies for Writing Webinar Emails That Convert Subscribers To Webinar Attendees
Writing effective webinar emails isn’t just about getting the essentials right. It’s about using the best email marketing strategies to make your webinar a must-attend event. Here are some tips to ensure your audience can’t resist signing up:
Personalize like a pro
Yes, we’re bringing up email personalization again—and for good reason. Sending generic, unimaginative emails is like asking your subscribers to skip your webinar.
We recommend using your subscriber’s name in the subject line or opening sentence. But don’t stop there. Go further by tailoring your webinar emails to match your subscribers' behaviors and interests. This extra touch can significantly boost your email engagement and help drive those all-important registrations.
Use social proof to build credibility
People trust people, which is why social proof is such a powerful way to build trust and credibility. In fact, 72% of customers trust a business more after reading positive reviews and testimonials.
Include testimonials, success stories, or stats from past events to reassure your audience that your webinar is worth attending.
If you have a guest speaker, don’t just name-drop: highlight their credentials to establish authority. Explain why they’re the ideal expert to address the problem your webinar tackles and the solutions they’ll provide.

Estimation webinar email from Float
Don't overload with text
Attention spans are short. (And they’re only getting shorter!) Your webinar email isn’t meant to be an educational email course or a novel. Too much text will only put your subscribers off the webinar altogether. Keep it concise and skimmable with short paragraphs and bullet points.
Add a visual pop
Plain text emails are fine for some types of email campaigns. But your webinar email should be visually appealing. Use a branded banner or header with the webinar topic, date, and maybe a picture of your guest speaker.
If you want to be more creative, include a GIF of your speaker waving, or a video teaser of what attendees will learn. Keep it professional, though – don’t overdo it with too many visuals.
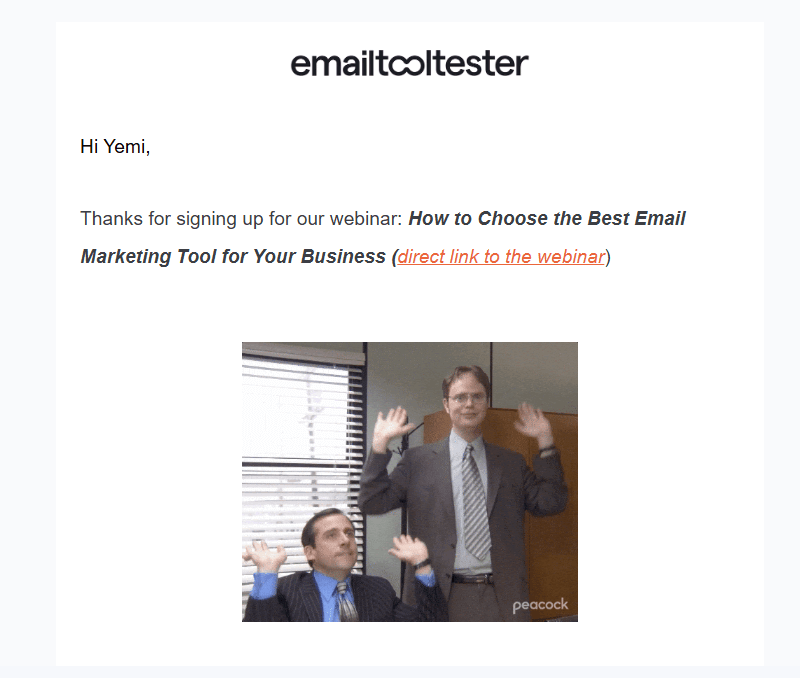
Webinar email from EmailTooltester
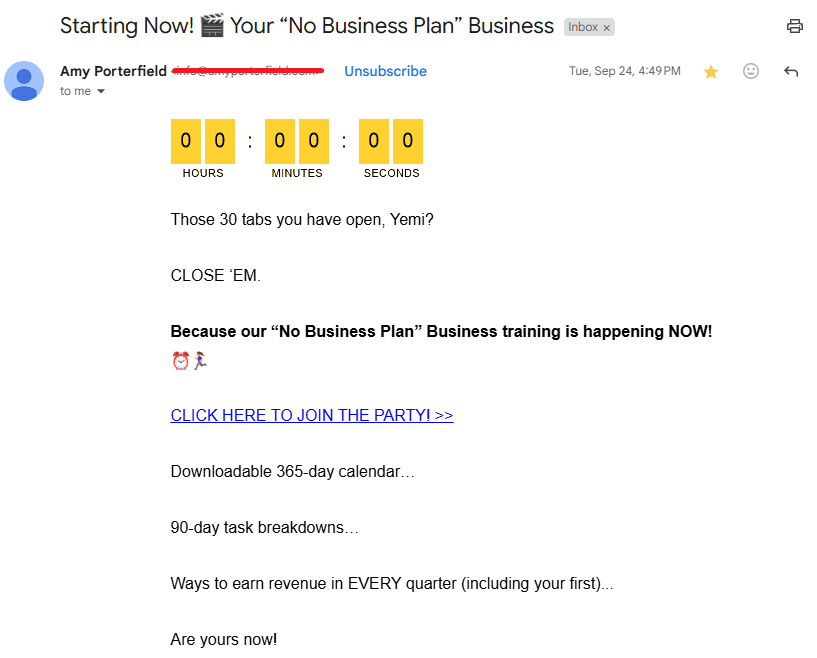
Tap into the fear of missing out (FOMO)
People are terrified of missing out on opportunities that could solve their problems. So, use their FOMO to your advantage by creating a sense of urgency.
With limited spots or time-sensitive registration, subscribers will be compelled to register quickly. They would want to avoid missing the chance to attend a free event that promises to solve their problems.
For instance, FOMO was one of the strategies Chima Mmeje, Senior Content Marketing Manager at Moz, used to get more attendees for the Practical Marketer Webinar. By combining FOMO with a sharp focus on the problems the webinar would solve, she increased registrations to over 1,000 signups per episode.
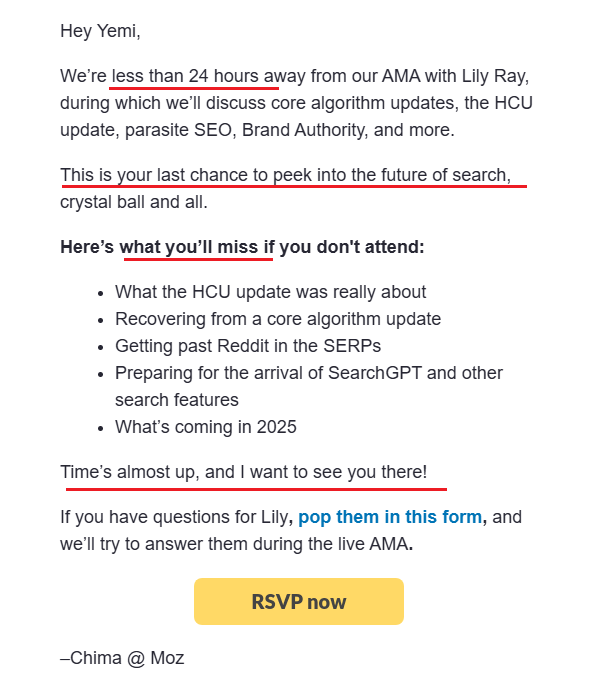
Webinar FOMO email from Moz
Source: Chima Mmeje’s LinkedIn post
Include a link to “add to calendar”
Everyone is busy living their lives. Even if your email subscribers register and are excited to attend your webinar, they can easily forget to join on the day of the event.
Adding a calendar invite to your webinar email ensures your event makes it onto their schedule. They’ll receive a calendar reminder a few minutes before the event starts and are more likely to show up.
How to create and attach a calendar invite to your webinar email
Adding a calendar invite isn’t complicated, but it requires a few steps. Here’s how you can do it for the most common calendars:
Option A. Google Calendar Invite
1. Create a new event
- Open your Google Calendar, click “+Create,” and select “Event” from the drop-down menu.
Click “More Options” at the bottom of the pop-up dialog box.
2. Add webinar details
- Enter the webinar (event) name, date, time, notification, and description.
- Add the webinar join link (e.g., Zoom or Google Meet) in the location tab.
- Adjust guest permissions as needed, and click save
3. Generate the calendar invite link
- Go back to the calendar and open the created event. Select “Invite via link,” then click “Copy Link.”
- Alternatively, click “More Options,” select “Publish Event,” and copy the “link to event.”
4. Attach invite link to webinar email
- Use the link to create a hyperlink to a text in your webinar email, such as “Add this webinar to your Google Calendar.”
Option B. Outlook Calendar Invite
1. Create a new appointment
- Open your Outlook Calendar and click “New Appointment.” Or, click “New Items” and select “Appointment” from the drop-down menu.
2. Add webinar details
- Enter the webinar (event) name, date, time, notification, and description.
- Add the webinar join link (e.g., Zoom or Google Meet), and save the appointment.
3. Generate a .ics file
- Open the saved appointment, click “Forward,” and select “Forward as iCalendar.”
- Save the .ics file by right-clicking it (on Windows) or dragging it to your desktop (on Mac)
4. Attach the .ics file to your webinar email
- Attach the file directly to your webinar email.
- Or, upload it to your ESP and add the link as a hyperlink with text like “Download calendar invite here.”
Option C. Apple Calendar Invite
1. Create an event
- Open your Apple Calendar, click the “+” button, and enter your webinar name.
- Click “Enter” to create a placeholder event for the current day.
2. Add webinar details
- Click the event to edit and add webinar details.
- Enter the webinar (event) name, date, time, notification, and description.
- Add the webinar join link (e.g., Zoom or Google Meet), and click “Done” to save the event.
3. Generate a .ics file
- Click and hold the event, then drag and drop it to your desktop to create the .ics file.
4. Attach the .ics file to your webinar email
- Attach the file directly to your webinar email.
- Or, upload it to your ESP and add the link as a hyperlink with text like “Add to Apple Calendar.”
Test, measure, and tweak
No matter how great your webinar email is, there’s always room for improvement. So, test your subject lines, layouts, and CTA to see what works best for your subscribers.
For example, Stella Inabo, Content Marketer at Float, shared that they recently A/B tested two subject lines: “You’re invited” versus “You’re invited to our live session on project estimation.”
Unexpectedly, the shorter version outperformed the longer one, proving the importance of testing the elements of your webinar (and the power of sparking curiosity).
How To Build A Webinar Email Sequence That Converts
Repetition is key to getting results. Sending just one webinar isn’t enough to get people to register and show up. You need a solid email sequence that gives subscribers multiple chances to engage, builds anticipation, and ensures attendance.
Here’s how to map out your three essential webinar email sequences:
A. The pre-registration sequence (3 emails)
Before anyone can show up, they must know about and sign up for the webinar. Here’s how to build a webinar sequence that grabs attention and drives webinar registrations.
Email 1: The announcement email
Send this webinar email 5 to 7 days before the event. Typically, this will be the first time subscribers hear about your webinar, so focus on building excitement about it. Share all the deets: who it’s for, what they’ll gain, and how to sign up.
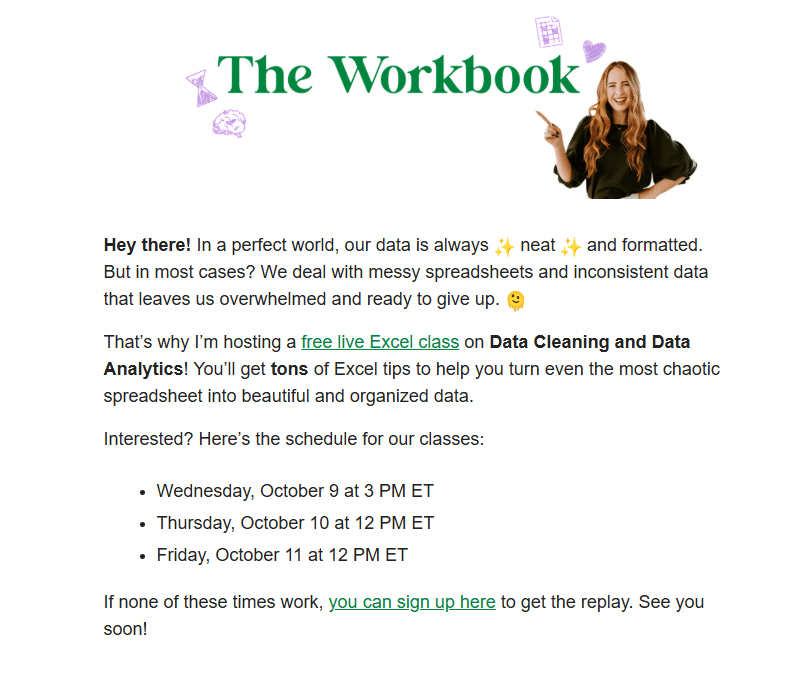
Announcement webinar email from The Workbook
Email 2: The reminder email
Not everyone who sees (and opens) the announcement email will sign up. Send a reminder 24 to 48 hours before the event to nudge those who haven't signed up yet (and be sure to exclude those who have).
You could get into the benefits of attending the webinar or address common objections. Sharing more about the speaker or giving a sneak peek of your slides is also great. The goal is to reinforce why the webinar is worth their time.
Webinar reminder email from Amy Porterfield
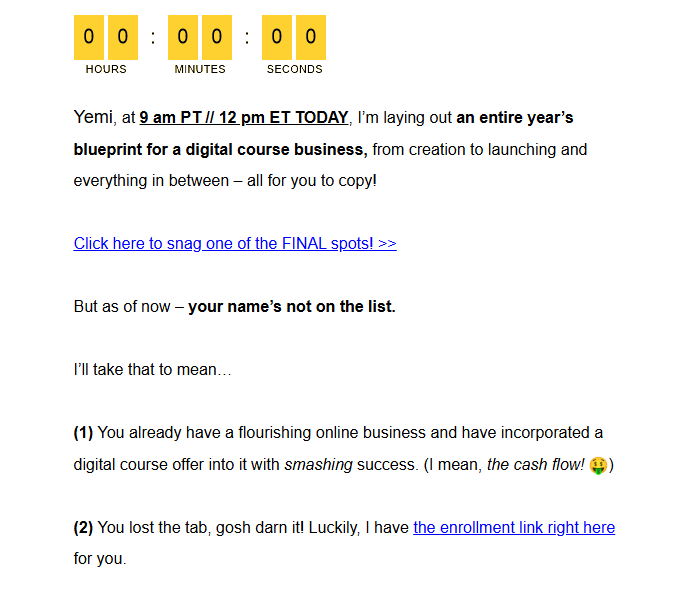
Email 3: The last-chance email
You should have a sizable number of signups by now. But some people like to wait until the last minute to register, so send a last-chance email some hours before the event.
FOMO is your friend for this webinar email. Highlight exclusivity or limited spots, offer a bonus for attending, or even suggest that there will be no replay (or charge a price for it).
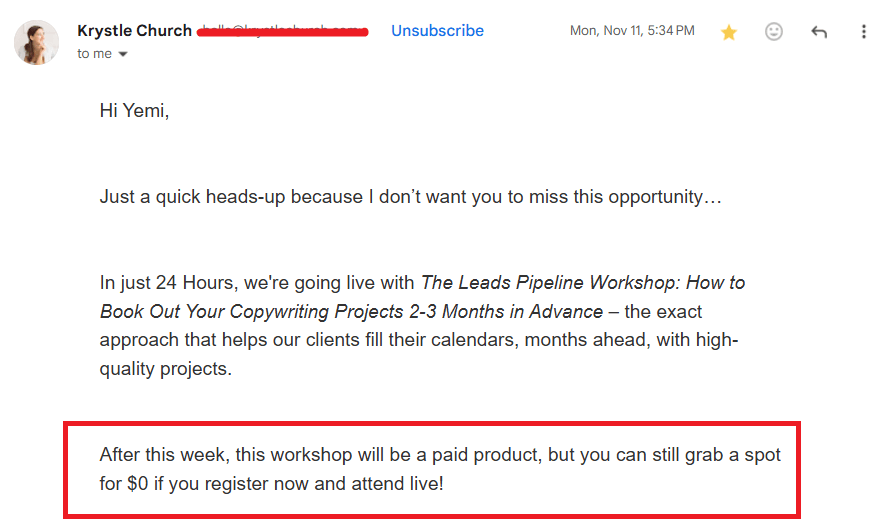
Webinar FOMO email from Krystle Church
B. The post-registration sequence (2 emails)
Of course, you need to send a confirmation email when someone registers for your webinar. But confirming registration doesn't mean attendance. Here’s how to build a sequence to get them excited about the webinar and make them actually show up.
Email 1: The confirmation email
Send this immediately after subscribers sign up to thank them for registering. The email should also include the webinar details and a calendar invite to add the event to their schedule. Bonus points if you include a recap of what they’ll gain.
Webinar confirmation email from Danielle Weil
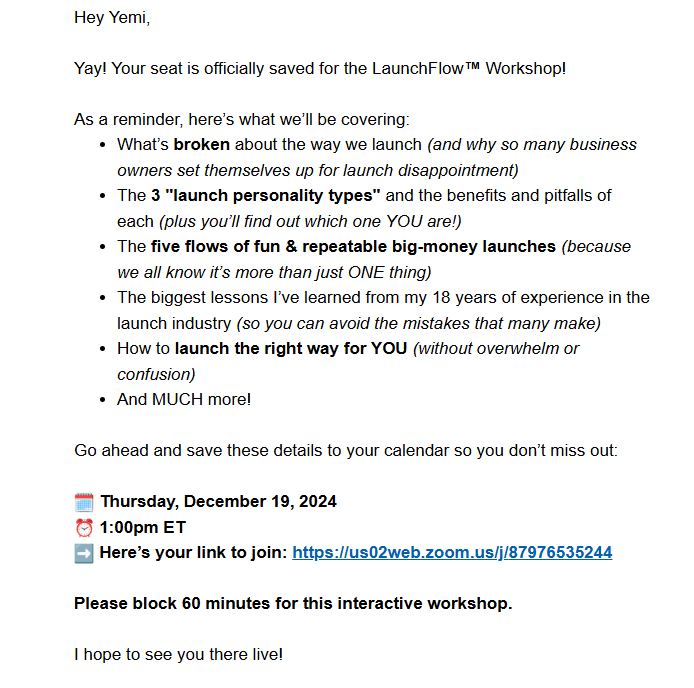
Email 2: The reminder email
Remind those who registered to attend the event and build excitement. Keep it short and action-focused, and highlight the value they’ll get from attending the webinar.
Send this email an hour or minutes before the webinar. You may send two reminder emails, in which case, you send one 24 hours before the event. This may be a “how to get the most out of the webinar” or “send in your questions” email.
Webinar reminder email from Amy Porterfield
C. The post-webinar sequence (1 email)
Not everyone will attend your webinar live, and that’s okay. Just make sure you send a follow-up email with a replay link or additional resources (if you promised to do so).
Although there’s typically only one email in this sequence, you may send different emails to those who attended live and those who didn’t.
Email 1: The webinar replay email
Send this follow-up email 24 hours after the webinar. Thank them for attending or registering, and share a link to the webinar replay. The goal is to make it available to those who want to rewatch the webinar or couldn’t attend.
The webinar replay email also allows you to share additional resources and drive more action. Your CTA could be sales-related. You could also ask for feedback on the webinar to gain valuable insights for future webinars.
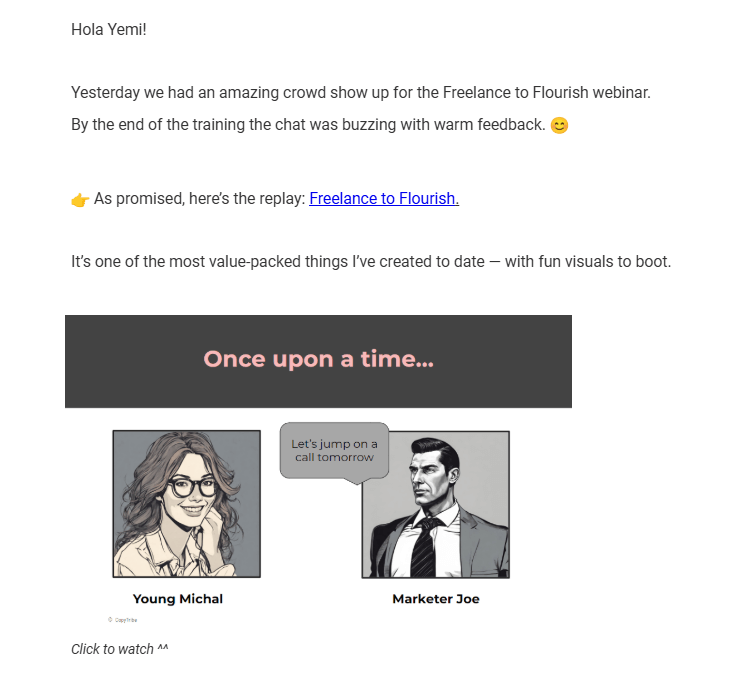
Webinar replay email from Michal Eisik
How To Automate Your Webinar Email Sequence With Your ESP
Writing effective webinar emails is only half the battle. The other half is ensuring your automation sequence runs smoothly. Here’s a step-by-step guide to help you set up your webinar email sequence:
Step #1: Choose Your ESP
If you don't already have one, pick an email service provider (ESP). One that supports automation workflows and email segmentation, and has a webinar feature (or integrates with a webinar platform). Popular options we recommend at Email Tooltester include:
- MailerLite: For ease of use
- Brevo: For all-in-one solutions
- Mailchimp: For endless integrations
- Kit (formerly ConvertKit): For creators
- ActiveCampaign: For advanced features
- GetResponse: For built-in webinar features
Step #2: Map your webinar email sequence
Before diving into our ESP, outline your webinar email sequence. Plan the timing, triggers (more on this below), and flow for each email to make sure you send the right email to the right subscriber at the right time.
Step #3: Setup the automated sequence
Go to the automation workflow section of your ESP and add your already-written webinar emails in the order they’ll be sent. Use tags or segments to group your audience. And set up the correct trigger for each email and sequence.
What is a trigger?
A trigger is an action or condition that prompts your ESP to send an email or start a sequence. The trigger could be based on subscribers’ actions or timing-based. Within an automated workflow, it works alongside segmentation to deliver the right email to the right subscriber.
Let’s take your post-registration sequence, for example.
- Action trigger: After a subscriber signs up for your webinar (trigger), the confirmation email is sent to them immediately (action).
- Time trigger: Everyone who confirmed registration is put in a segment or group, and a reminder email is triggered to be sent to them 24 hours or an hour before the webinar.
Step #4: Test your sequence
Before going live, be sure to test your sequence to make sure everything works perfectly. Double-check all of your links (registration link, webinar link, and calendar invite link), verify that the triggers work, and as always, ensure your emails look great on desktop and mobile.
Step #5: Monitor performance and optimize
Once your webinar email sequence is live, track each email’s performance and optimize as necessary. Some stats to track include:
- Your open rate, which indicates if your subject lines are compelling
- Your click-through-rate, which reveals if your CTA is driving actions
- Your conversion rate, which shows if people are signing up
Final Thoughts: Your Success Starts With Your Webinar Emails
Creating a webinar email isn't just about getting people to sign up. It’s about building excitement and getting people to show up. After all, your webinar will only be a success when your audience is present and engaged.
If you're thinking, “But do I really have the time to create all these webinar emails?” Well, here's the thing: you can’t afford to risk your webinar event looking like a ghost town.
So, don't overthink it. Start small. Get to know your audience, their pain points, and what will motivate them to attend your webinar – that's your first step. From there, it only gets easier with the strategies we’ve shared in this post.
Once you write your first email for your event, you’ll see how easy and powerful it can be. And the result is totally worth it. Just imagine logging into your webinar to find a full house buzzing with engaged attendees.
So, go ahead and get started creating your webinar emails. If you need some extra guidance, feel free to reach out to us for a quick consultation. Let's make your webinar a smashing success.
The authors
Learn more about us

Our Methodology
This article has been written and researched following our EmailTooltester methodology.
Our Methodology